It was decided to make the next new shop as non-metallic as possible. The maximum goal was that the only metal parts of the finished product were nails and screws.

By the way, the budget only included costs for those same consumables, and all the materials were found in the yard and sheds. Now let's talk about everything in order.
Preparation of materials and tools
Not many tools were needed for the work: a hammer, a tape measure, a level, tongs, pliers, a saw, an angle grinder (you can get by with a metal blade), a screwdriver and an axe.
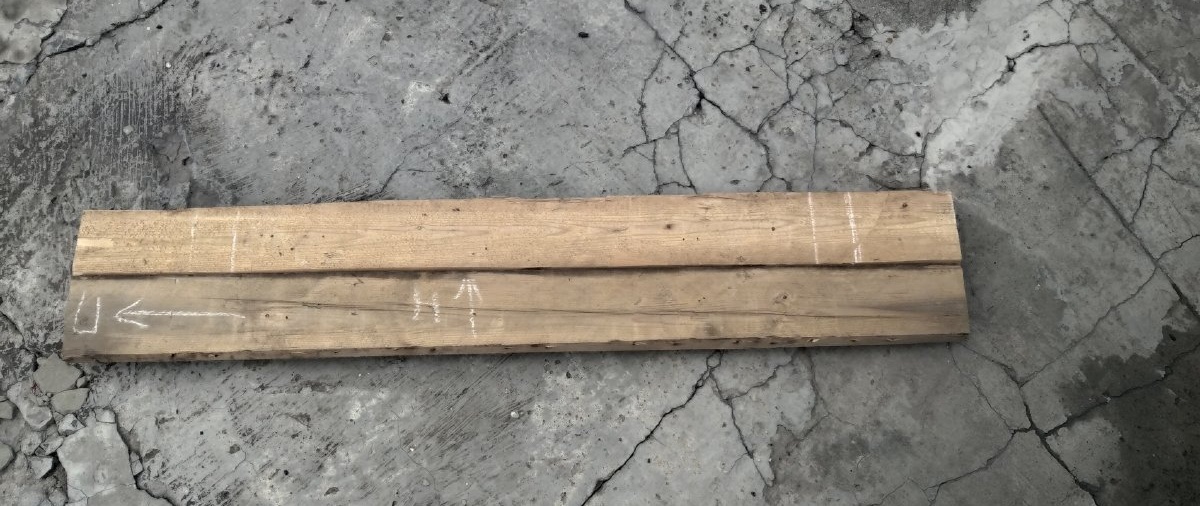
The materials somehow appeared by themselves. Old window frames were suitable for the legs (the impressive thickness and density of the wood came in handy).

The seat was made of boards about 20 mm thick (made in USSR, like the loots, so there are no questions about the quality at all).

It would have been possible to leave the surface wooden and paint it, but the remains of plastic lying around idle literally radiated a desire to be useful.

The expected height of the legs was 45 cm, so the remaining 55 cm of wood was sent to be treated with waste machine oil.
Seat assembly
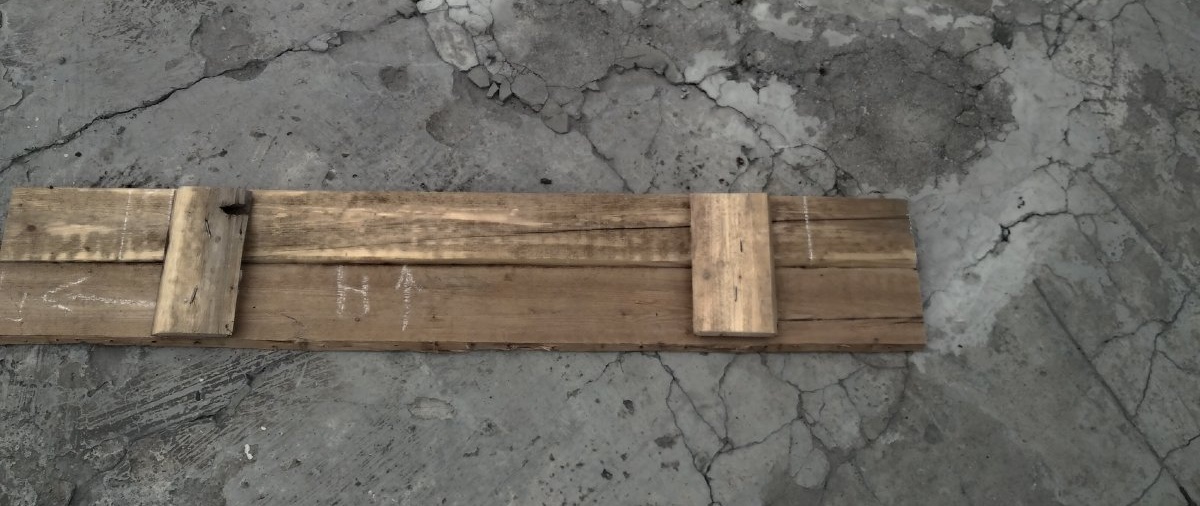
Two boards in total gave a width of 26 cm, which was enough. All that remains is to trim the wood a little and successfully connect the two parts together. Considering that the boards were not the first freshness and were originally intended for rough work, I had to tinker with the connection to avoid height differences.
A little nerve, four nails, and you're done.
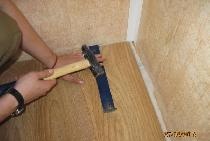
A plastic profile, which creates a kind of rails for a piece of plastic, was secured with self-tapping “bugs” screws along the perimeter of the seat. One of the smaller sides will need to be secured after installing the bench.

It turned out very well. Thanks to careful measurements and even cutting, the plastic fit perfectly into place.

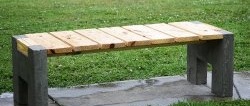
The finished seat looks like this.

Installation
Again, due to a modest budget and reluctance to go to the store for cement, it was decided to install a bench without extra expenses.
A couple of holes were surprisingly easy to dig, but the hardest part was aligning the legs so that the bench wouldn't end up lopsided. Compacted earth and broken bricks gave exactly the effect that was needed. Even when only half of the hole was filled in, the bench was already standing very, very confidently. When the pits were completely filled in, it turned out something like this. All that remained was to nail the seat to the legs.
The three of us checked it: in total it withstood about 200 kg.The legs will be painted a little later, but for now I just want to write on the white plastic that there is no metal in this bench, and there is no need to try to get it out of the ground.