Do it yourself
Life hacks, master classes, useful tips, recipes.
home » Different » Crafts » Crafts made from plastic pipes » Newspaper box made of PP pipes
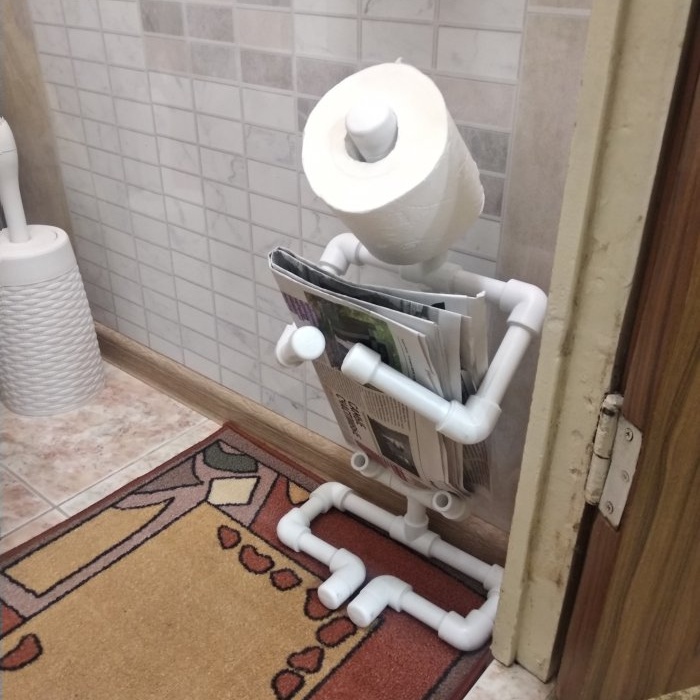
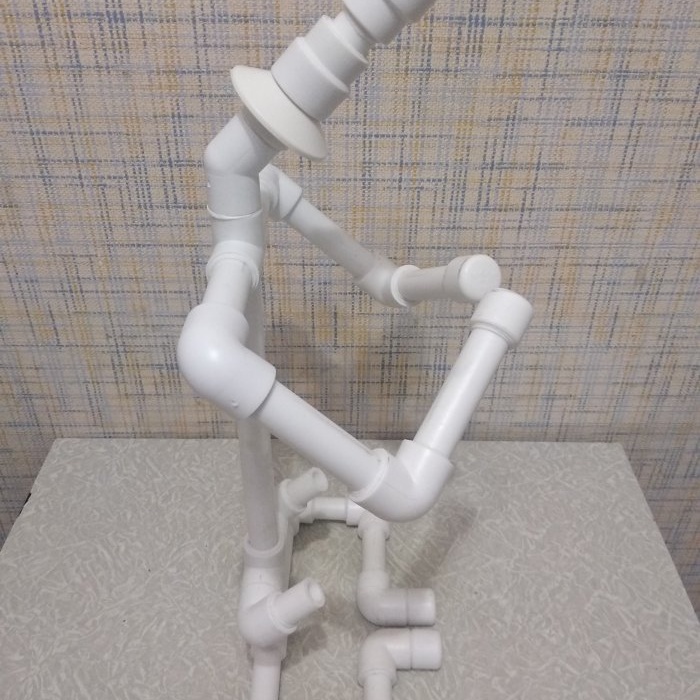
Good day to all! I have long dreamed of making a craft from PP pipes, namely making a newspaper rack. I previewed a lot of sites and was attracted by the idea of ​​a lamp, which I took as the “basis” of my work.
Newspaper box made of PP pipes

Will need


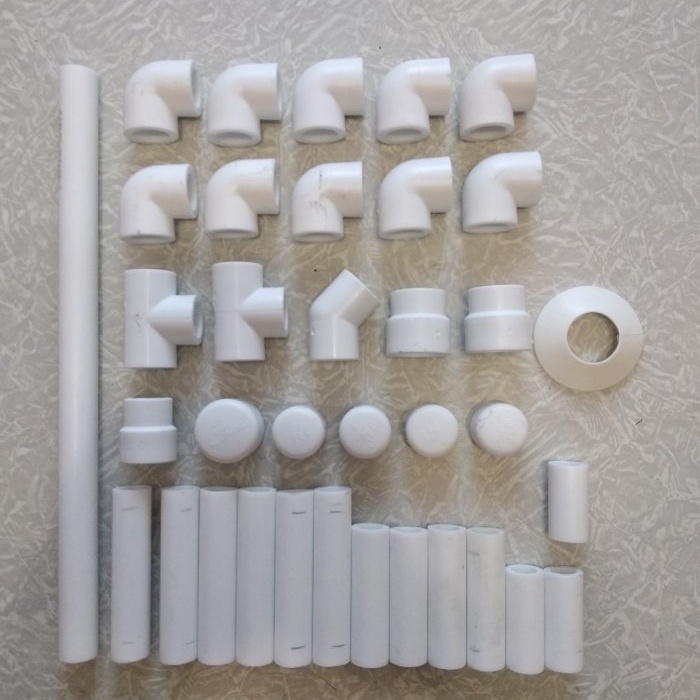
The following were purchased in the store:
  • Pipe PP20 - 2m.
  • Corner d20x90 – 10 pcs.
  • Corner d20x45 - 1 pc.
  • Tee d20 - 2 pcs. (as there was no cross)
  • Adapter d20v x d25n — 1 pc.
  • Adapter d20v x d25v - 2 pcs.
  • Plug d25 - 1 pc.
  • Plug d20 - 4 pcs.
  • Plastic reflector for 3/4 pipe - 1 pc.

Complete assembly kit:
Newspaper box made of PP pipes

We make blanks from the pipe in mm. (millimeters): 320 – 1 piece. 90 - 6 pcs. 70 - 4 pcs. 50 - 2 pcs. 40 — 1 piece.
The first thing that had to be done when making a newspaper rack was to not go beyond the 160mm size. in depth. Secondly, the product should not interfere with the knees and be multifunctional.
Since the depth of the base is small and the height is decent, it was necessary to make sure that it was stable. To do this, I moved away from the original idea (rotating the “foot” at 45 degrees to the floor) in favor of a different design: all the parts of the base are in the same plane.
Also, the entire structure and details in particular were made using the selection method according to “proportions”: in the finished product (visually).

Making a newspaper box from polypropylene pipes


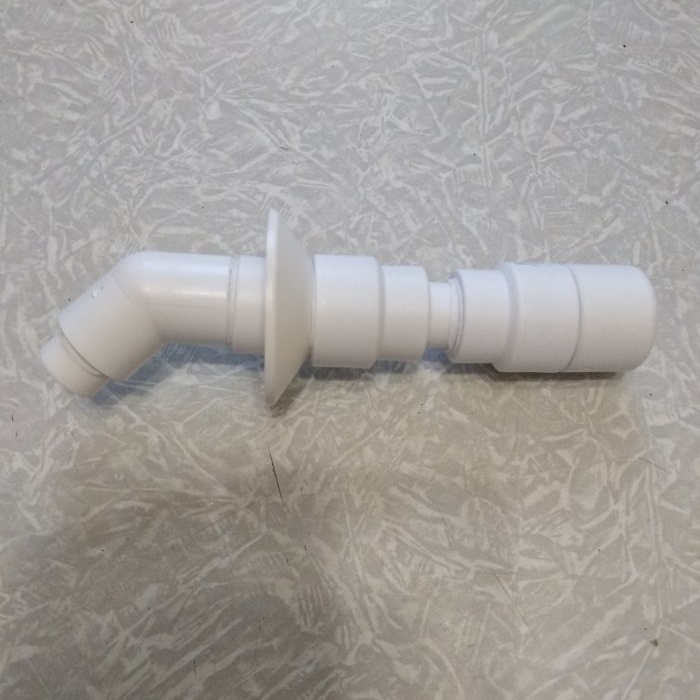
Let's start welding. The first thing we start assembling is the toilet paper holder.
Newspaper box made of PP pipes

Since it is assembled from an Adapter d20v x d25n, 2 Adapters d20v x d25v with a pre-installed Reflector for a 3/4 pipe and a d25 plug, we need d25 equipment.
Newspaper box made of PP pipes

For all other connections use d20. We put a plug on the 2nd adapter and connect the adapters to each other with a piece of pipe d20x40mm. On the reverse side, we weld a corner d20x45 onto the adapter d20v x d25n.
Only after this the rest of the structure is assembled.

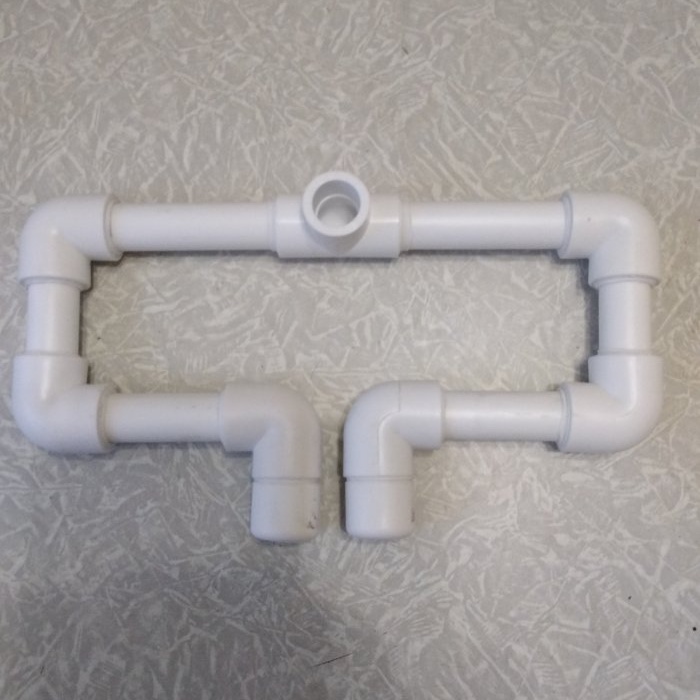
Assembling the base:


On both sides of the 50mm segment. We weld the corners 90 degrees “facing” in one direction and at the same time press them to the plane while the plastic is hot, in order to maintain pressure at the points of contact of the base.
Newspaper box made of PP pipes

Next, we weld the plug to the new corner; on the back side of the corner, we weld a 70mm pipe section. Checking alignment.
Then, to one free outlet of the front corner of the 1st workpiece, we weld the 2nd workpiece, checking the alignment and at the same time pressing the product to the plane while the plastic is hot, in order to maintain pressure at the points of contact of the base.
We weld a 90mm piece to the rear free corner, checking the alignment.
Lastly, we weld a tee to the free end of the 90mm segment, orienting its central outlet vertically upward, and at the same time press the product to the plane while the plastic is hot, in order to maintain pressure at the points of contact of the base.
We weld the second part in the same way, which is assembled similarly to the first only in a MIRROR image.
The base is ready:
Newspaper box made of PP pipes

Now it's time to assemble the stand:
When purchasing the blanks, there were no d20 crosspieces available and I had to buy another tee, which had to be modified: drilled with a d18 step drill with an “additional drilling” of half d20 on the opposite side of the central exit.
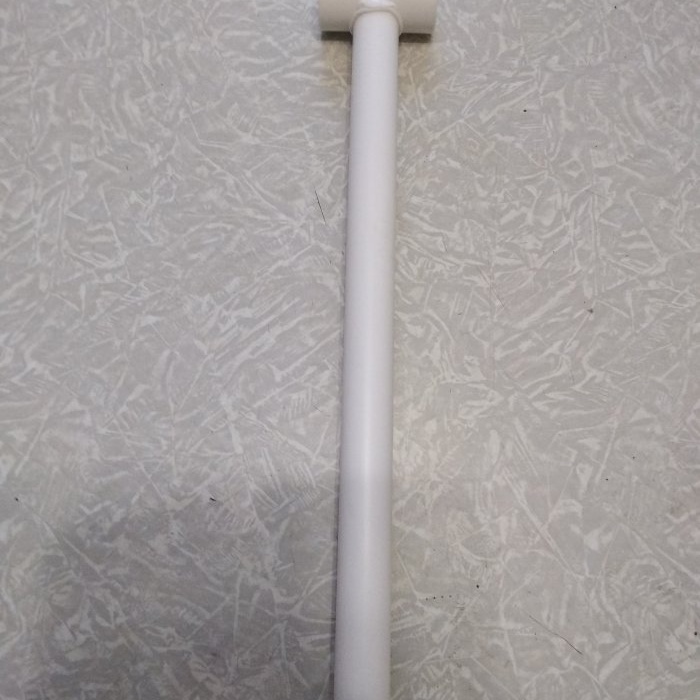
We weld a 320mm pipe section to the bottom of the tee.
Newspaper box made of PP pipes

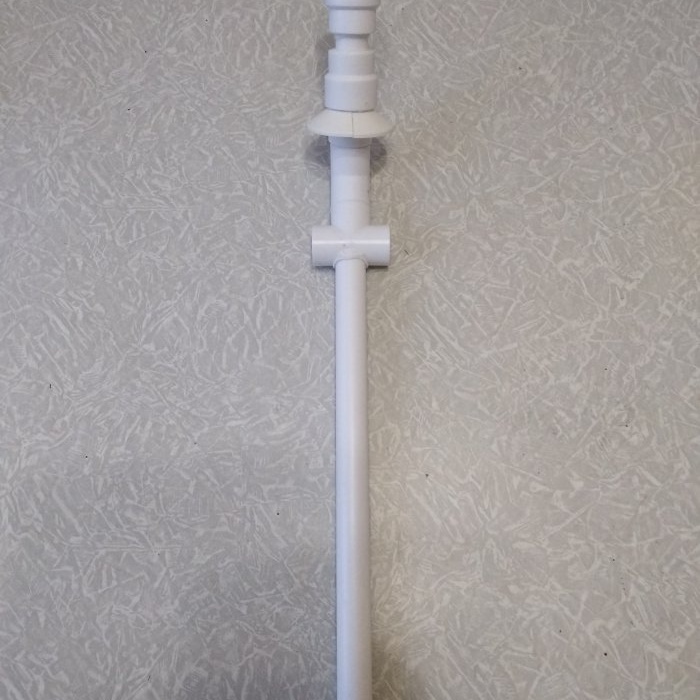
To the top paper holder, maintaining alignment.
Newspaper box made of PP pipes

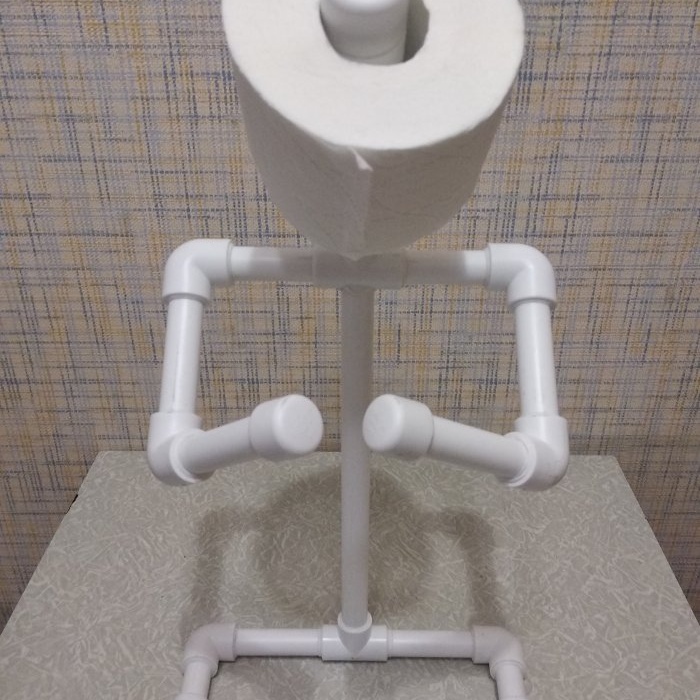
Assembling the arms and shoulder joint.
Newspaper box made of PP pipes

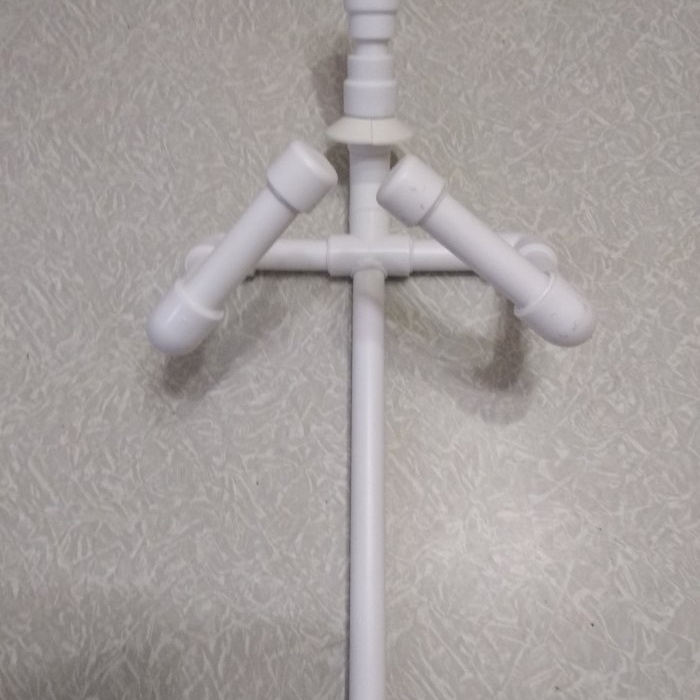
Two pieces of 90mm. We weld it to the corner d20x90, maintaining alignment. On one side we place a d20 plug, on the other we weld a d20x90 corner with a 45-degree rotation according to the corner marks. Next, we weld a 70mm pipe section to the free outlet of the d20x90 corner. maintaining alignment and weld the entire structure to the tee with a 45-degree rotation along the angle marks with a forward inclination. We weld the second part in the same way, which is assembled similarly to the first only in a MIRROR image.
Newspaper box made of PP pipes

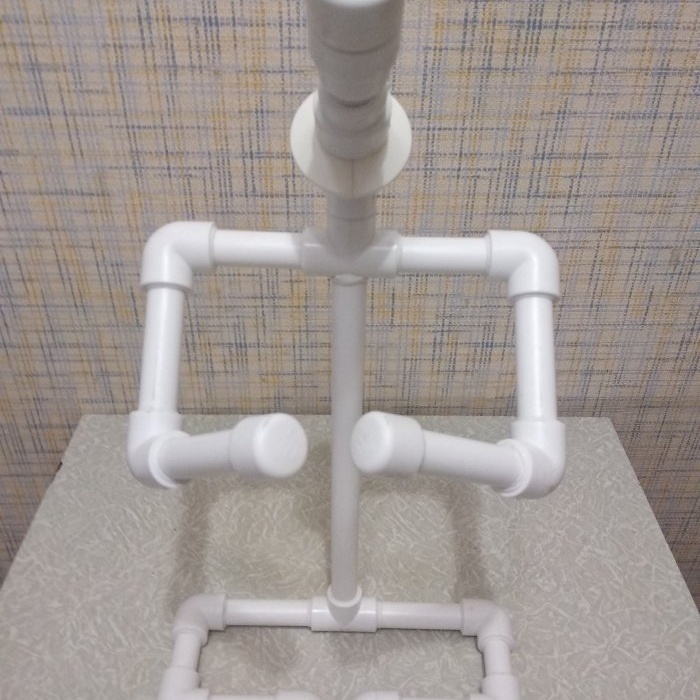
We weld the stand and base together, maintaining alignment.
Newspaper box made of PP pipes

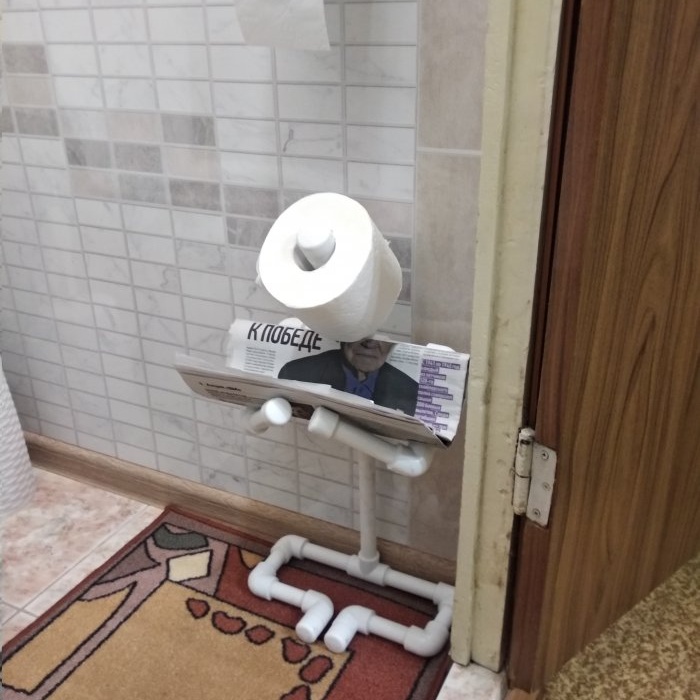
After assembly and installation in a “place of honor”.
Newspaper box made of PP pipes

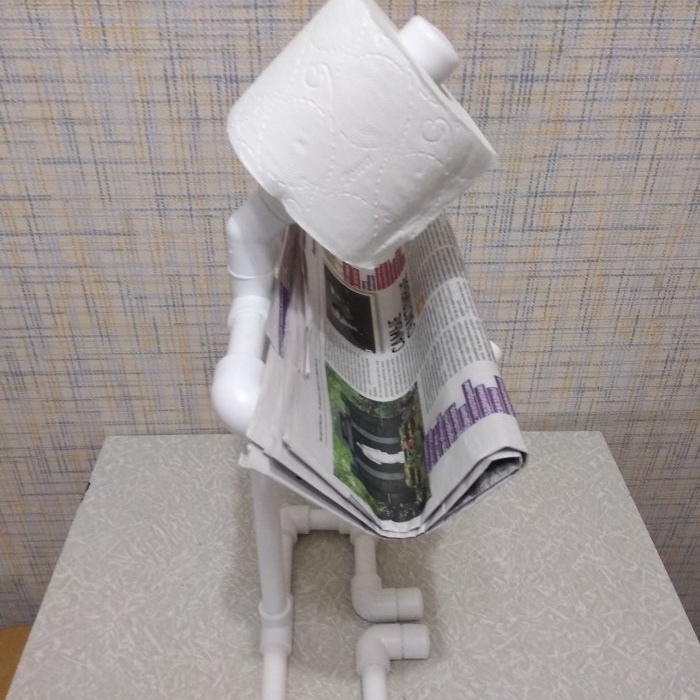
One small drawback was identified, which after a little modification was eliminated, and the product became more functional.
Newspaper box made of PP pipes

Newspaper box made of PP pipes

Welding an additional support for the “lumbar region”.
Newspaper box made of PP pipes

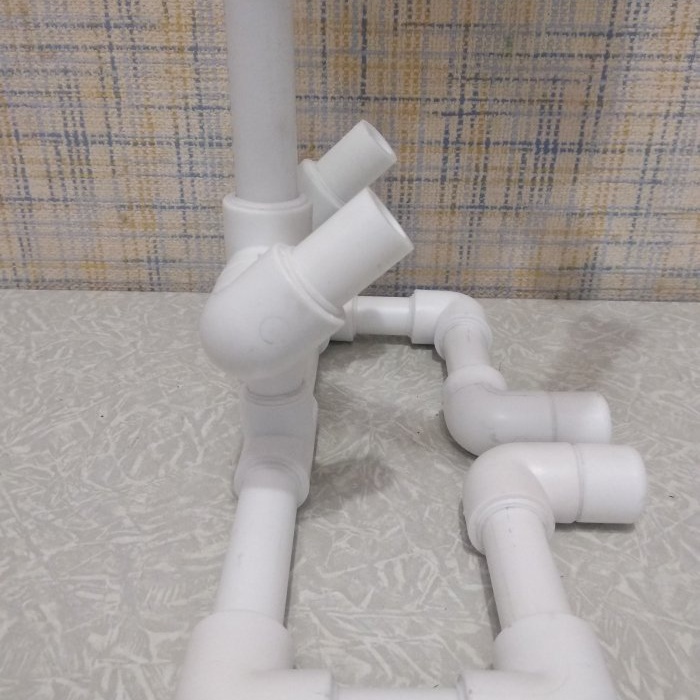
From a tee (which is modified according to the principle for a stand), 2 corners d20x90, 2 pieces of pipe d20x40mm. a part was made to support the newspaper when it is in a vertical position. The corners are attached to the tee in the same way as the “arms”: with a 45-degree rotation along the marks of the corner with an inclination forward. It would be nice to install plugs, but I didn’t have any.
After assembling the stop on the stand, make a mark from the base at a height of 110mm.and cut taking into account the size of the tee or (cross) with an overlap of 10mm. on each side for soldering.
Newspaper box made of PP pipes

Newspaper box made of PP pipes

The final list of parts including the “lumbar” plugs that are not included in the product:
  • Pipe PP20 - 2m.
  • Corner d20x90 - 12 pcs.
  • Corner d20x45 - 1 pc.
  • Tee d20 - 1 pc.
  • Crosspiece d20 - 2 pcs.
  • Adapter d20v x d25n — 1 pc.
  • Adapter d20v x d25v - 2 pcs.
  • Plug d25 - 1 pc.
  • Plug d20 - 6 pcs.
  • Plastic reflector for 3/4 pipe - 1 pc.

I made this product with my 9-year-old daughter Nastya, who helped me to the best of her ability.
Newspaper box made of PP pipes

Good luck to all!

Comment
  • bowtiesmilelaughingblushsmileyrelaxed relaxedsmirk
    heart_eyeskissing_heartkissing_closed_eyesflushedrelievedsatisfiedgrin
    winkstuck_out_tongue_winking_eyestuck_out_tongue_closed_eyesgrinningkissingstuck_out_tonguesleeping
    worriedfrowninganguishedopen_mouthgrimacingconfusedhushed
    expressionlessunamusedsweat_smilesweatdisappointed_relievedwearypassive
    disappointedconfoundedfearfulcold_sweatperseverecrysob
    joyastonishedscreamtired_faceangryragetriumph
    sleepyyummasksunglassesdizzy_faceimpsmiling_imp
    neutral_faceno_mouthinnocent
4 minus one =
Comments (9)
  1. PAN22
    #1 PAN22 Guests 10 April 2020 18:16
    4
    And how high the price is for this device, not everyone can buy the components for free.
  2. nik11666
    #2 nik11666 Guests 11 April 2020 11:37
    3
    If you take into account the crosspieces, then less than 250 rubles. If with tees there are about 200
    Pipe - 50
    Cross - 22
    Tee - 4.7
    Angle 90 - 2.9
    Corner 45 - 3.6
    Plug 20 - 3.8
    Plug 25 - 8.3
    Adapter 25n x 20v - 5.5
    Adapter 25v x 25n - 7.3
    Reflector 3/4 - 20
  3. nik11666
    #3 nik11666 Guests 11 April 2020 15:13
    3
    I'm sorry, I didn't pay attention to the question itself. I honestly can't say.There was no intention to sell. Wrote the cost price for components
  4. Misha
    #4 Misha Guests 11 April 2020 17:34
    1
    Well, what for is she?
  5. nik11666
    #5 nik11666 Guests 11 April 2020 18:07
    1
    To avoid drilling holes: thin walls (flat slate). The suction cups on PVC panels do not hold (they fall off and break the baseboard), the only one that has survived is the holder for the TV. So I decided...
  6. Guest nik11666
    #6 Guest nik11666 Guests April 12, 2020 00:35
    1
    A small addition for everyone:
    At the last moment, when welding the paper holder and connecting the adapters to each other, I used a piece of pipe not 40 mm, as originally intended, but 30 mm to reduce the “overhang of the head”
  7. Guest Vitaly
    #7 Guest Vitaly Guests 24 May 2020 01:09
    3
    Nik11666, to be honest, your product looks pretty ugly, and besides, it’s standing on the floor (it interferes with cleaning, you can trip). When it is not possible to drill into the walls, you need to... glue them. There is a special double-sided tape, but you need to take a good one, for example 3M, which says Very High Bond. Holds tightly. I haven’t screwed on any small things for a long time, I glue everything onto this tape and nothing falls off. You should not take a very thin one, because... If you have to tear it off, you can ruin either the wall or the product. I took 2mm thick, and if something happens I cut it with a knife.
    1. nik11666
      #8 nik11666 Guests 24 May 2020 12:30
      3
      Thanks for the advice, but I tried to glue it to 2-sided tape - specifically foam tape. Unsuccessfully, the “fasteners” lasted a couple of days, only after that I decided to solder them from PP. The design (product) itself does not interfere with cleaning or those in the room.
      The design of the product was calculated as 2in1: a holder for newspapers, magazines and t/paper
    2. nik11666
      #9 nik11666 Guests 24 May 2020 12:41
      2
      And regarding “stumbling” - this is not possible.If you read the entire article on operations, then there was a mention that the calculations took into account a size of 140-160 mm in depth, which is the size from the wall to the door frame

Do you want a reliable Wi-Fi signal throughout your entire apartment? Then here are 5 simple tips for you

Cooking | Page 8 | Do it yourself

Do-it-yourself parametric stabilizer based on a transistor and a zener diode

Garden and vegetable garden | Page 6 | Do it yourself

«Do it yourself - with your own hands» - a site of interesting homemade products made from scrap materials and items at home. Step-by-step master classes with photos and descriptions, technologies, life hacks - everything a real master or just a craftsman needs for needlework. Crafts of any complexity, a large selection of directions and ideas for creativity.

We recommend reading

Washing machine error codes