Do it yourself
Life hacks, master classes, useful tips, recipes.
home » Garden » Simplified diy potato digger for walk-behind tractor
Do-it-yourself simplified potato digger for a walk-behind tractor

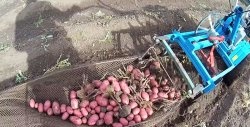
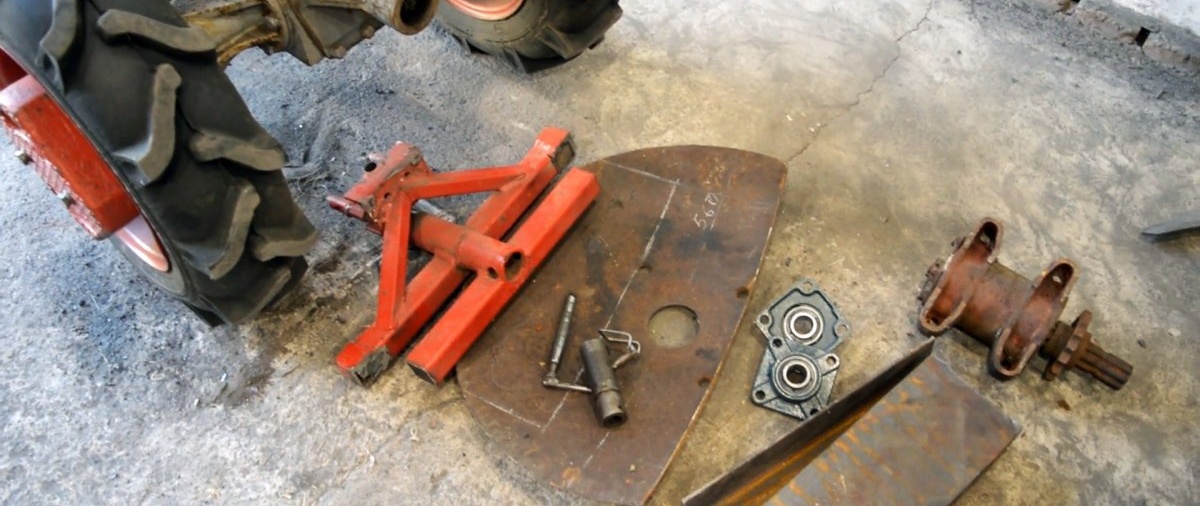
When pulling out potatoes with a walk-behind tractor, it is optimal to use a potato digger with a rumble. She puts all the tubers on top, so when collecting them you don’t need to dig into the soil with your hands. You can make a very simple digger with a rumble yourself.

Materials:


  • pipes of different diameters;
  • channel;
  • splined bushing for power take-off shaft;
  • disk or sheet steel 4 mm;
  • spherical self-aligning bearings for a 30 mm shaft;
  • tension roller or pulley;
  • housing with bearings and shaft;
  • rod 12 mm;
  • shaft 30 mm;
  • wheels – 2 pcs.

Do-it-yourself simplified potato digger for a walk-behind tractor

The process of making a potato digger


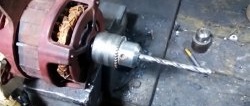
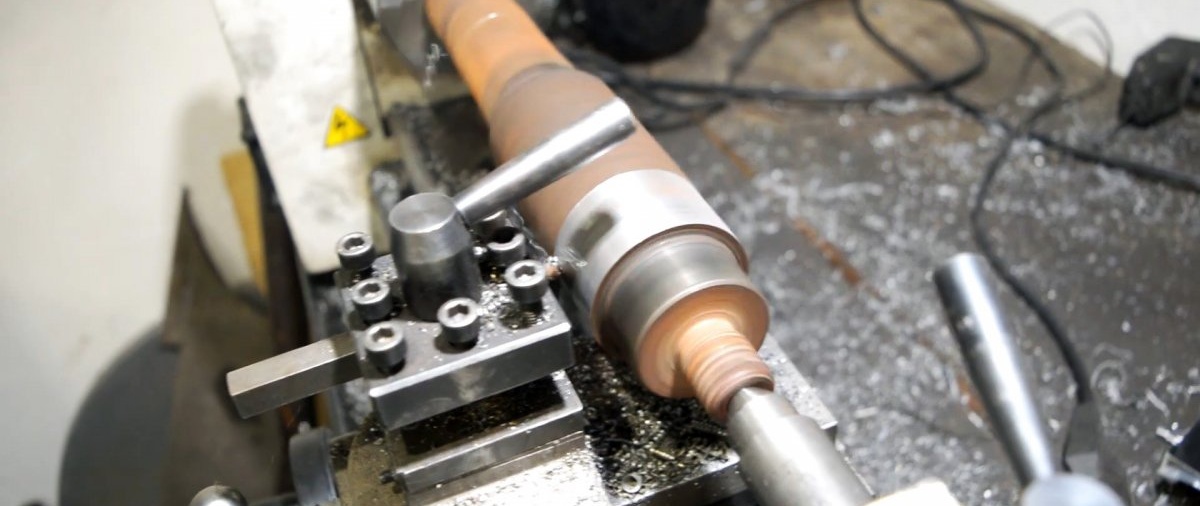
To ensure the operation of the mechanism, it is necessary to make an eccentric. To do this, the end of the shaft from the housing with bearings must be bored to the diameter of the existing pulley with a center offset. A hole is also drilled in the end and a thread is cut. A groove is made on the back side of the shaft to connect to the adapter sleeve, which will allow connection to the splines of the power take-off shaft of the walk-behind tractor.
Do-it-yourself simplified potato digger for a walk-behind tractor

Do-it-yourself simplified potato digger for a walk-behind tractor

Do-it-yourself simplified potato digger for a walk-behind tractor

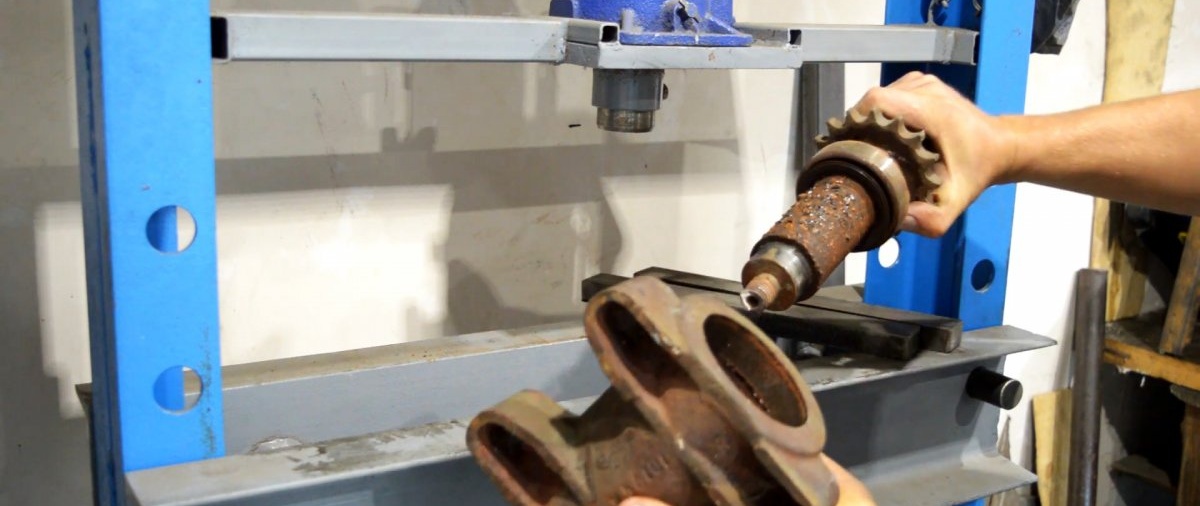
Then the modified shaft is installed back into the housing with bearings.
Do-it-yourself simplified potato digger for a walk-behind tractor

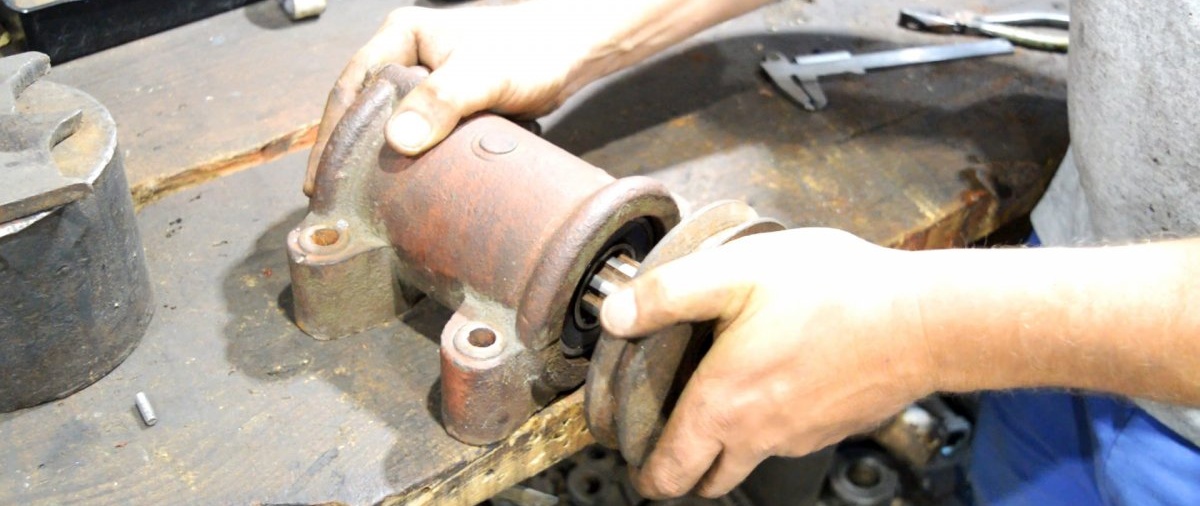
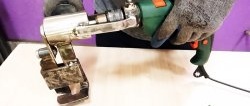
An adapter is pressed onto the flat end of the shaft and mates with the splined bushing. To prevent rotation, the connections are equipped with pins.
Do-it-yourself simplified potato digger for a walk-behind tractor

Do-it-yourself simplified potato digger for a walk-behind tractor

The coupling is welded from the pipes to connect to the take-off shaft. You can simply cut off this part from the unnecessary hanging. The coupling is installed on the walk-behind tractor, and a splined sleeve with an eccentric is connected to it.
Do-it-yourself simplified potato digger for a walk-behind tractor

Based on the measurements obtained, the remaining part of the body is assembled. To do this, it is convenient to use 2 pieces of channel. The housing of the eccentric mechanism is screwed to them. The channels are then welded to the coupling crossbars and gussets. Bearings are screwed to the sides of the channels at the bottom and top for the vertical shaft.
Do-it-yourself simplified potato digger for a walk-behind tractor

Do-it-yourself simplified potato digger for a walk-behind tractor

Do-it-yourself simplified potato digger for a walk-behind tractor

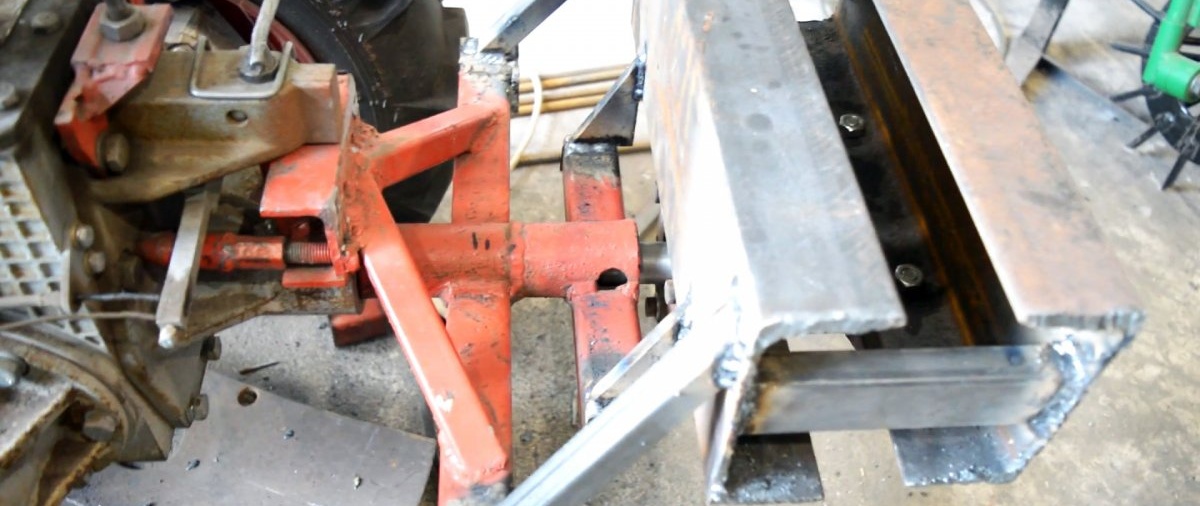
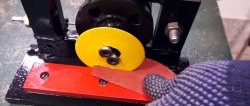
Next, you need to install a pulley on the eccentric and connect it with a rod to the base of the vertical shaft. A knife is welded to the sole for pulling out tubers.
Do-it-yourself simplified potato digger for a walk-behind tractor

Do-it-yourself simplified potato digger for a walk-behind tractor

Do-it-yourself simplified potato digger for a walk-behind tractor

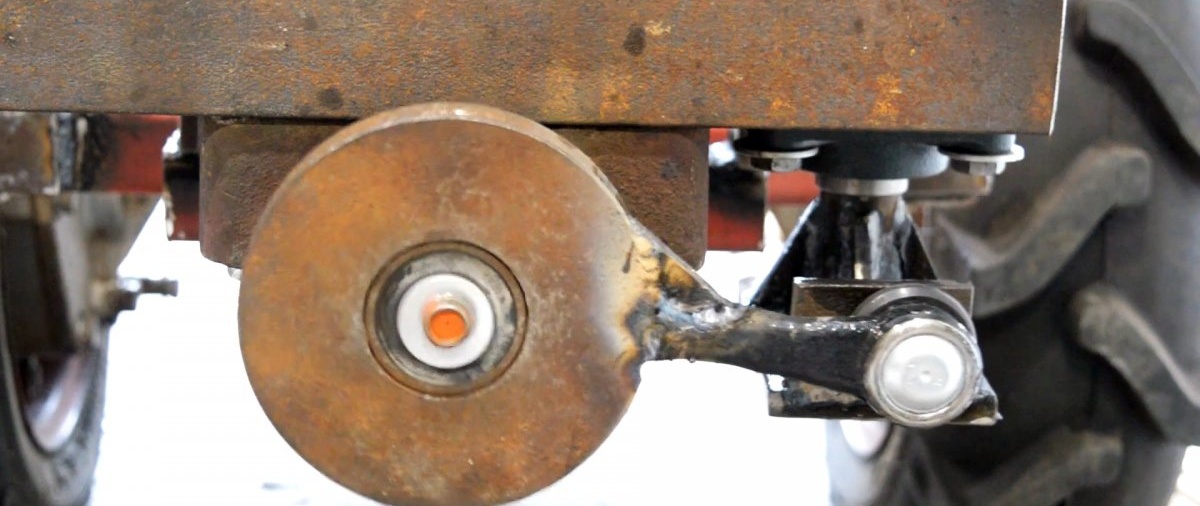
Next, a fan made of 12 mm rod is welded onto the paw. On the sides of the channels there are adjustable stands to which the wheels are attached.
Do-it-yourself simplified potato digger for a walk-behind tractor

Do-it-yourself simplified potato digger for a walk-behind tractor

Do-it-yourself simplified potato digger for a walk-behind tractor

A potato digger of a simplified design is ready for use. It works in the same way as a more bulky and complex screen, but it is done faster and requires less material. When making it, it is advisable to move the wheels as far back as possible to make it easier to control the walk-behind tractor, since due to the short wheelbase it tries to move to the side out of the row.
Do-it-yourself simplified potato digger for a walk-behind tractor

Watch the video


come back
Comment
  • bowtiesmilelaughingblushsmileyrelaxed relaxedsmirk
    heart_eyeskissing_heartkissing_closed_eyesflushedrelievedsatisfiedgrin
    winkstuck_out_tongue_winking_eyestuck_out_tongue_closed_eyesgrinningkissingstuck_out_tonguesleeping
    worriedfrowninganguishedopen_mouthgrimacingconfusedhushed
    expressionlessunamusedsweat_smilesweatdisappointed_relievedwearypassive
    disappointedconfoundedfearfulcold_sweatperseverecrysob
    joyastonishedscreamtired_faceangryragetriumph
    sleepyyummasksunglassesdizzy_faceimpsmiling_imp
    neutral_faceno_mouthinnocent
3+three=
Comments (0)

What you need to know about gel polishes? Application at home. | Do it yourself

Simple DIY low pass filter

How to make a solar oven from aluminum cans and a satellite dish

Decorative shelf made from plywood box | Do it yourself

«Do it yourself - with your own hands» - a site of interesting homemade products made from scrap materials and items at home. Step-by-step master classes with photos and descriptions, technologies, life hacks - everything a real master or just a craftsman needs for needlework. Crafts of any complexity, a large selection of directions and ideas for creativity.

We recommend reading

Washing machine error codes