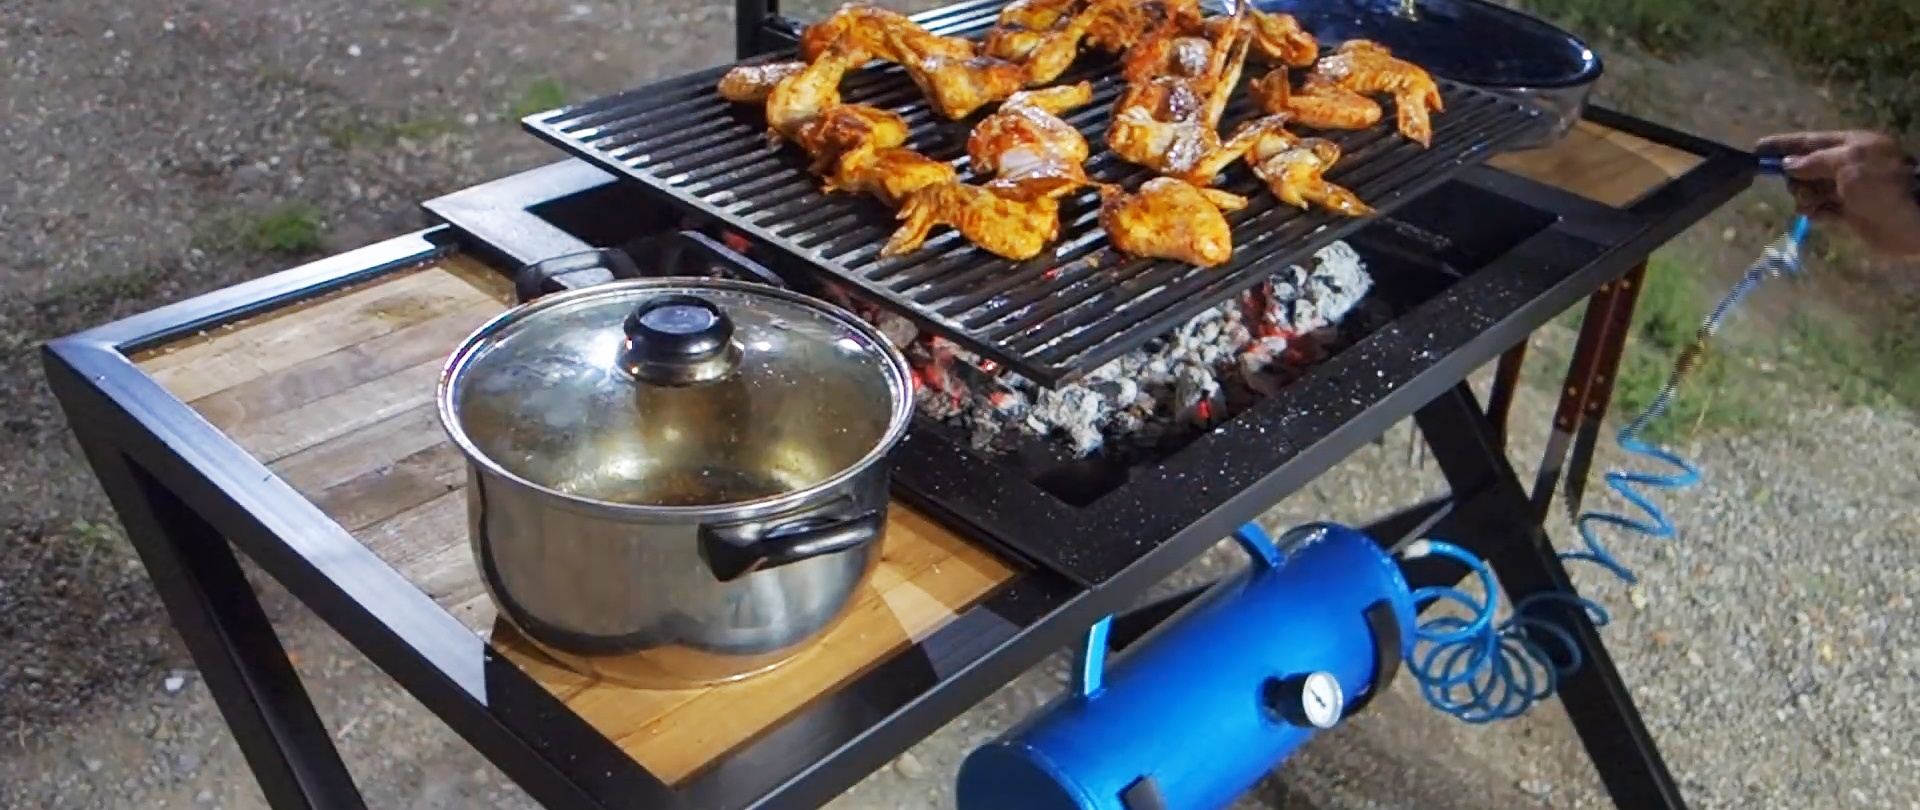
Almost everyone loves grilled meat, but they are too lazy to light the coals and constantly control the heat. Having made such a grill, you will cook with pleasure. It lights up simply and quickly, is easy to clean from ash, has cutting surfaces, hooks for tools and even mechanical adjustment of the height of the grate.
Materials:
- Profile pipes 40x20 mm, 30x30 mm;
- corner 40x40 mm;
- square 10x10 mm;
- sheet steel 2-3 mm;
- post-screw jack;
- strip 20 mm;
- board 10 mm;
- pipe 120-200 mm;
- pressure gauge;
- blow gun;
- air hose.
Grill making process
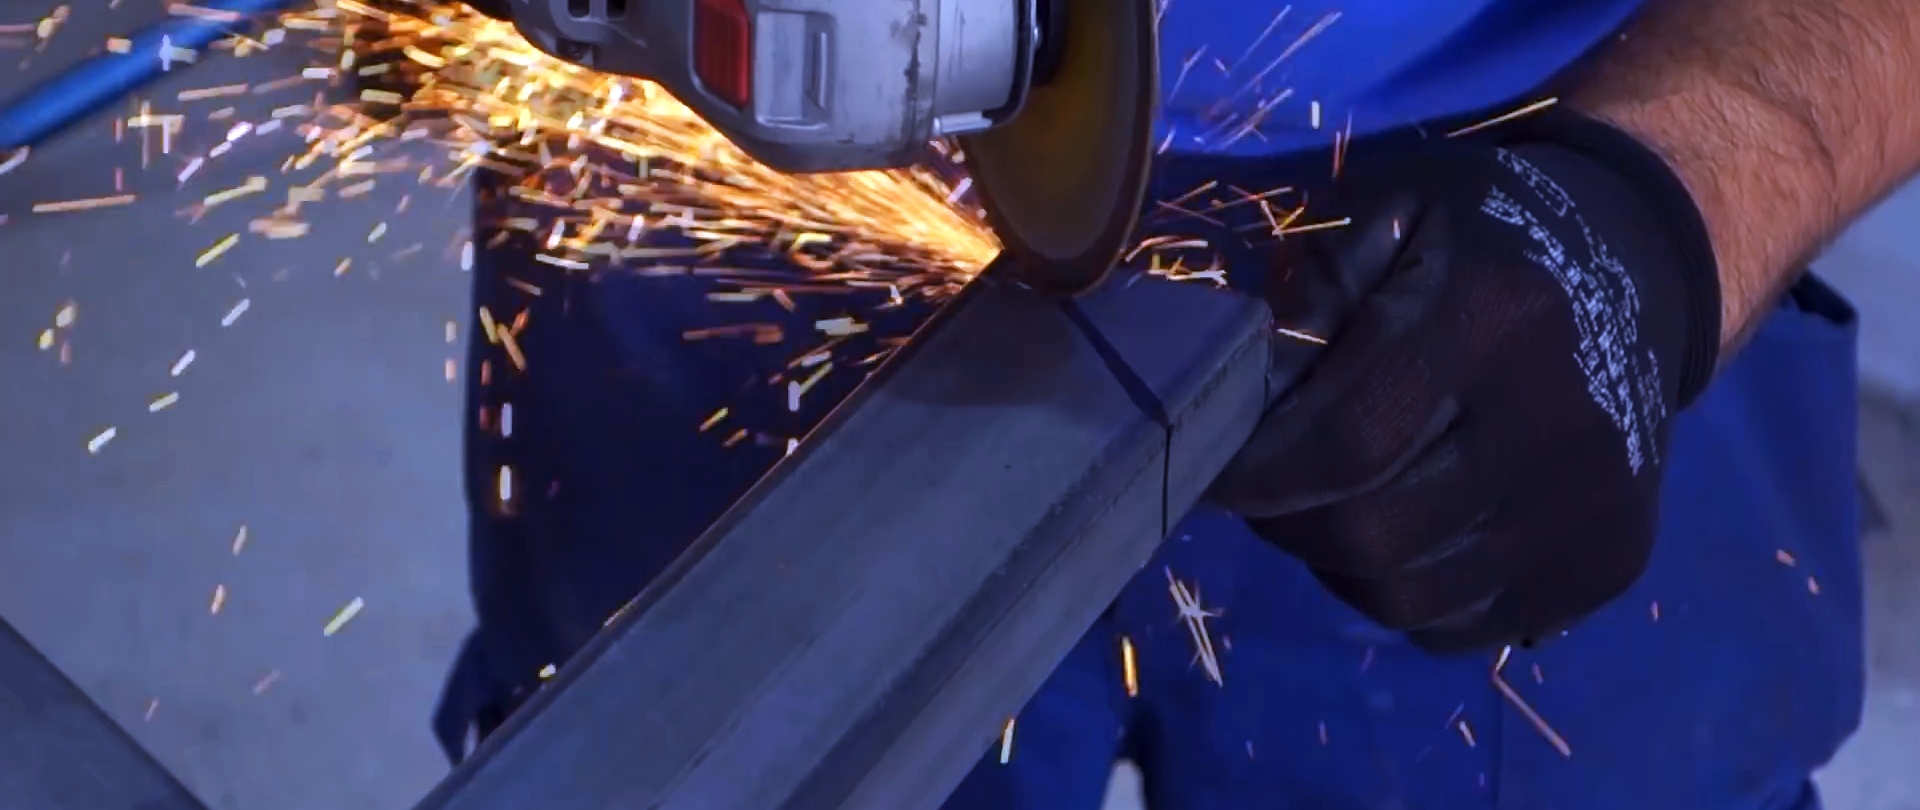
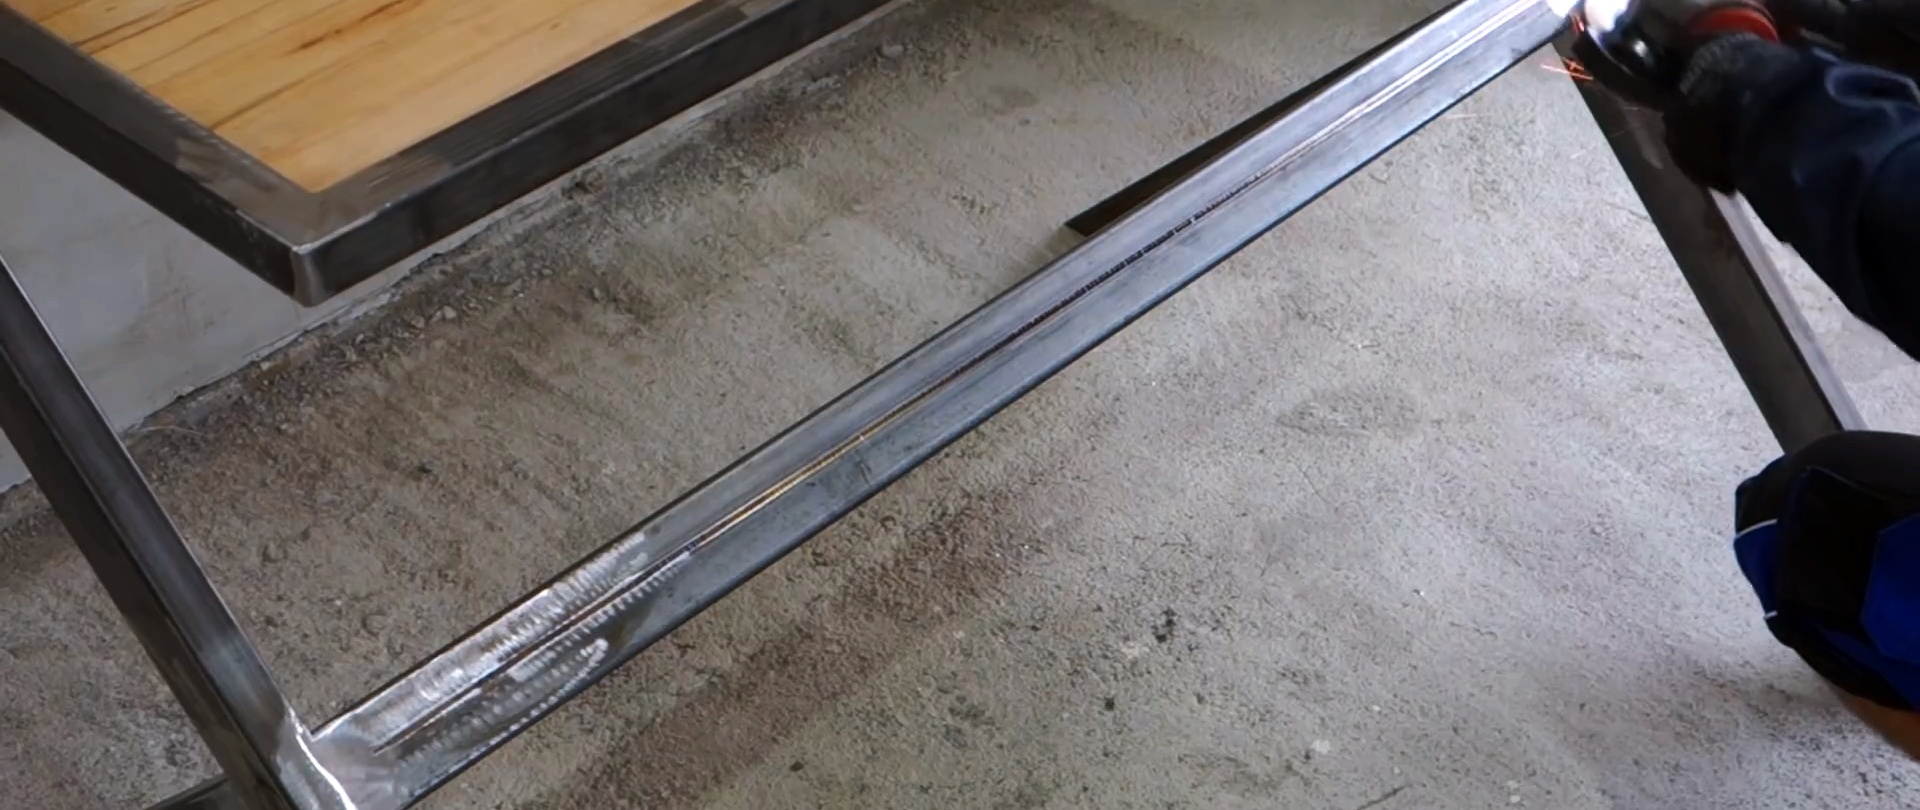
From a 40x20 mm profile pipe you need to weld a pair of Y-shaped legs. To do this, 2 pipes are welded together at right angles, then their ends are cut off at an angle. To achieve stability, there should be a distance of 60 cm from the joint to the edge of the two leg supports.

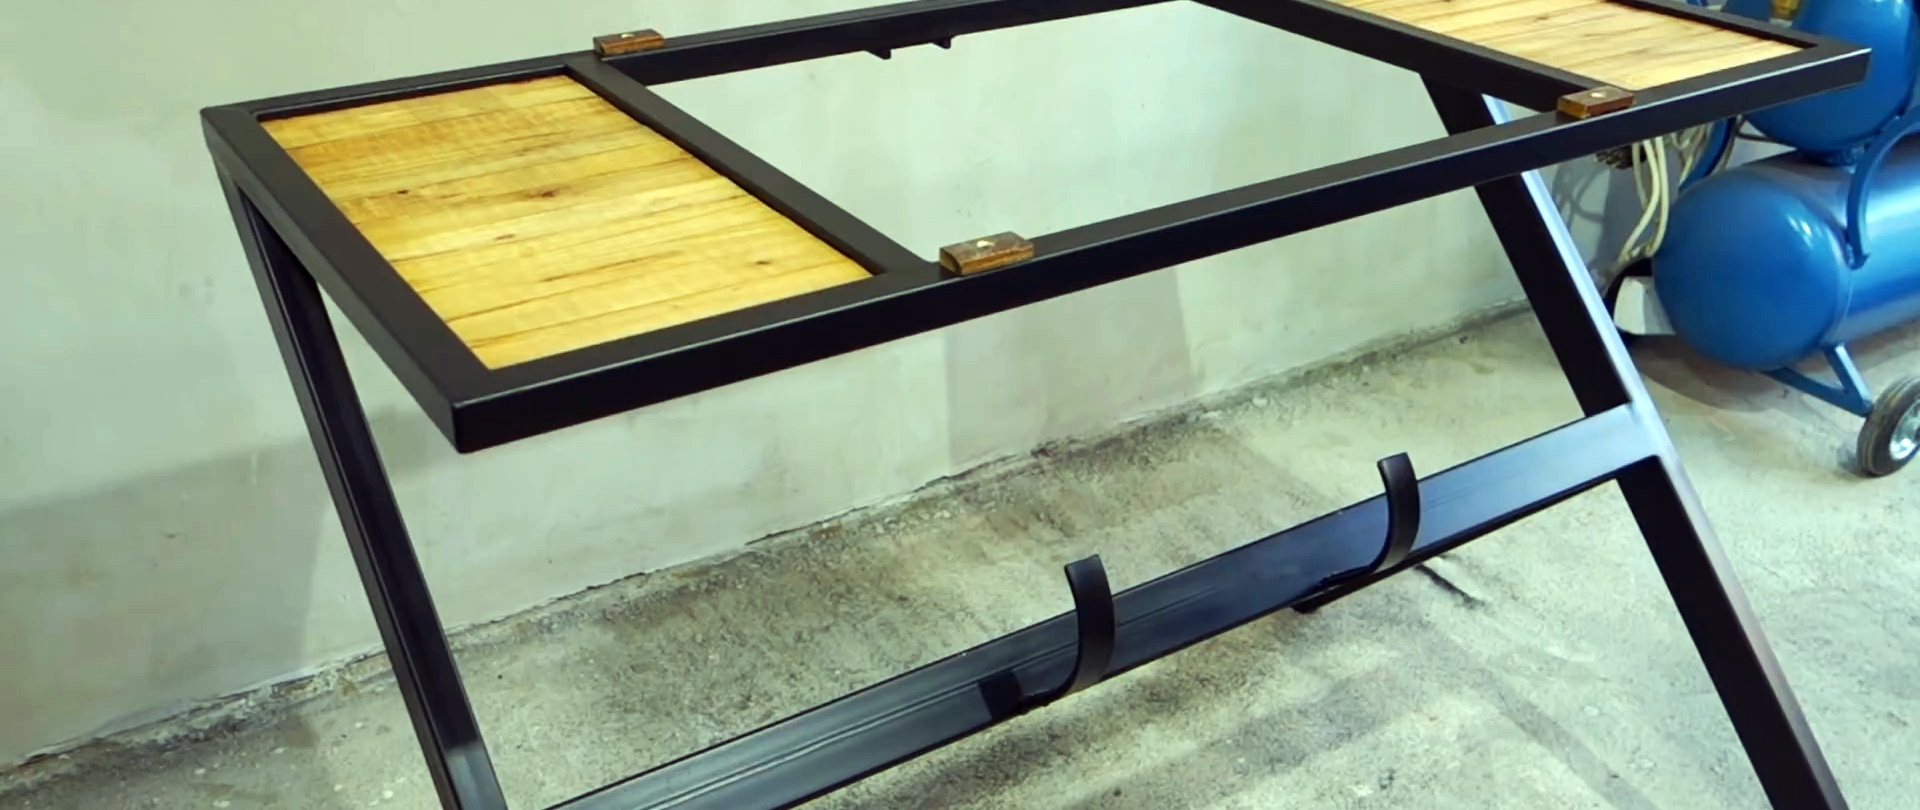
The work table frame is welded from a 30x30 cm pipe. 2 transverse pipes are welded into it.A removable roasting pan will be located between them, and cutting surfaces can be made on the sides.
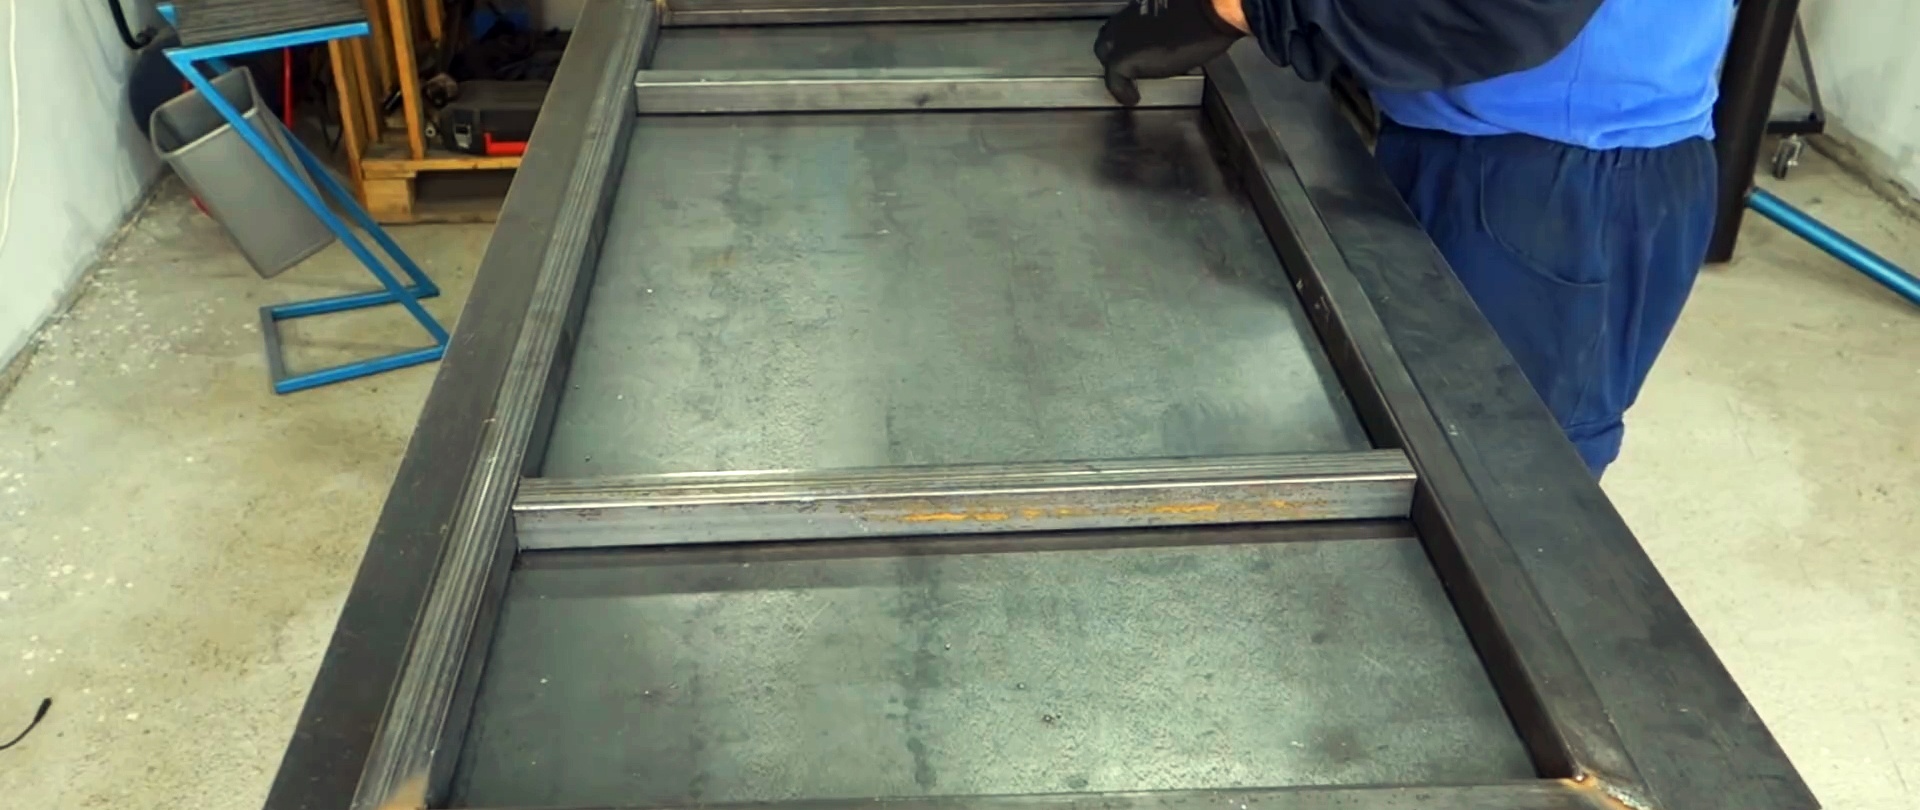
The legs are welded to the frame. The optimal height of the table is 85 cm, which is convenient for a person of average height.

A brazier frame is welded from the corner, which will be inserted into the central cell of the table base. Handles bent from a square and a bottom made of sheet steel are welded to it.
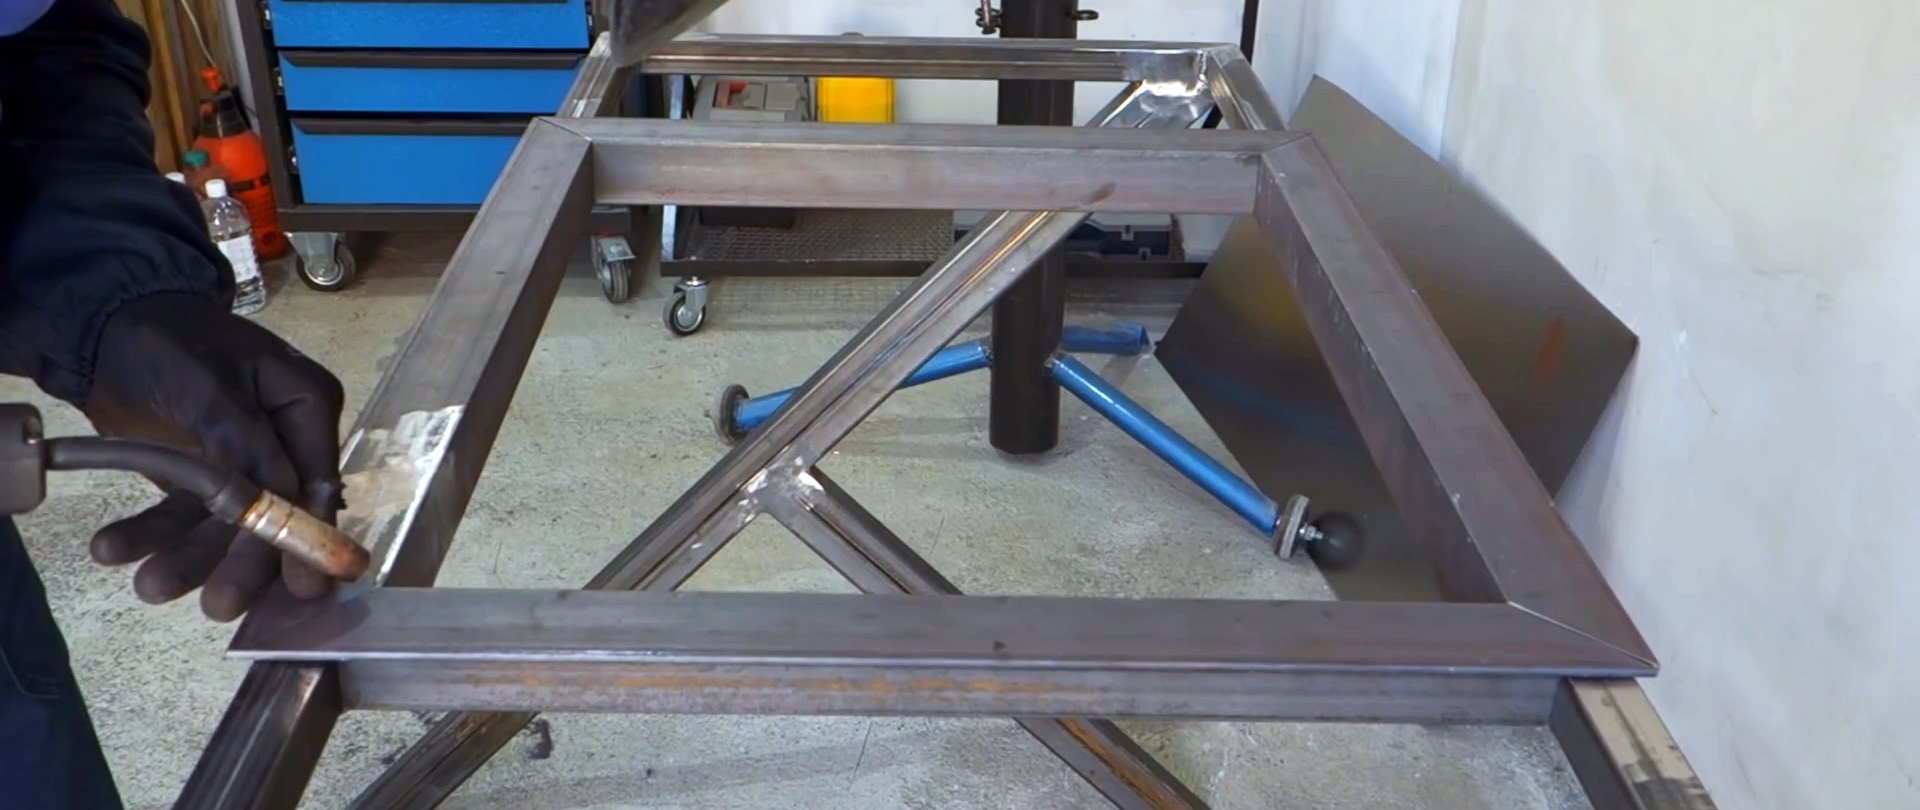

The grille lifting mechanism will require a post-screw jack. His leg needs to be welded so that it is in a folded state. A platform is welded to the table frame opposite the center of the fryer, to which the base of the jack is screwed.


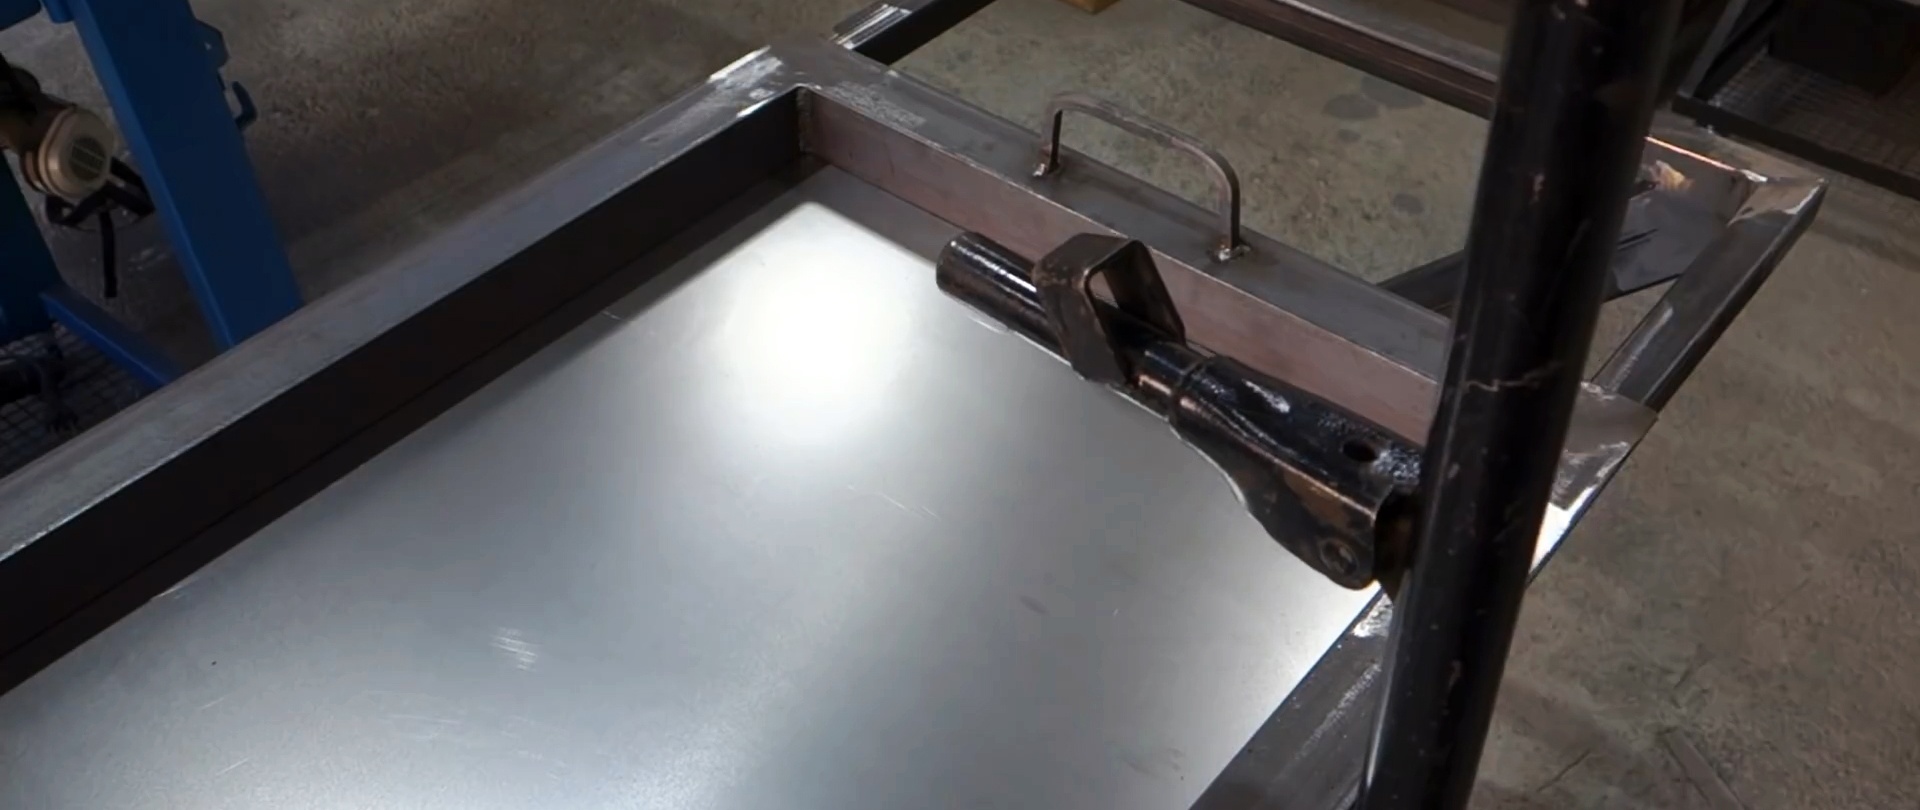
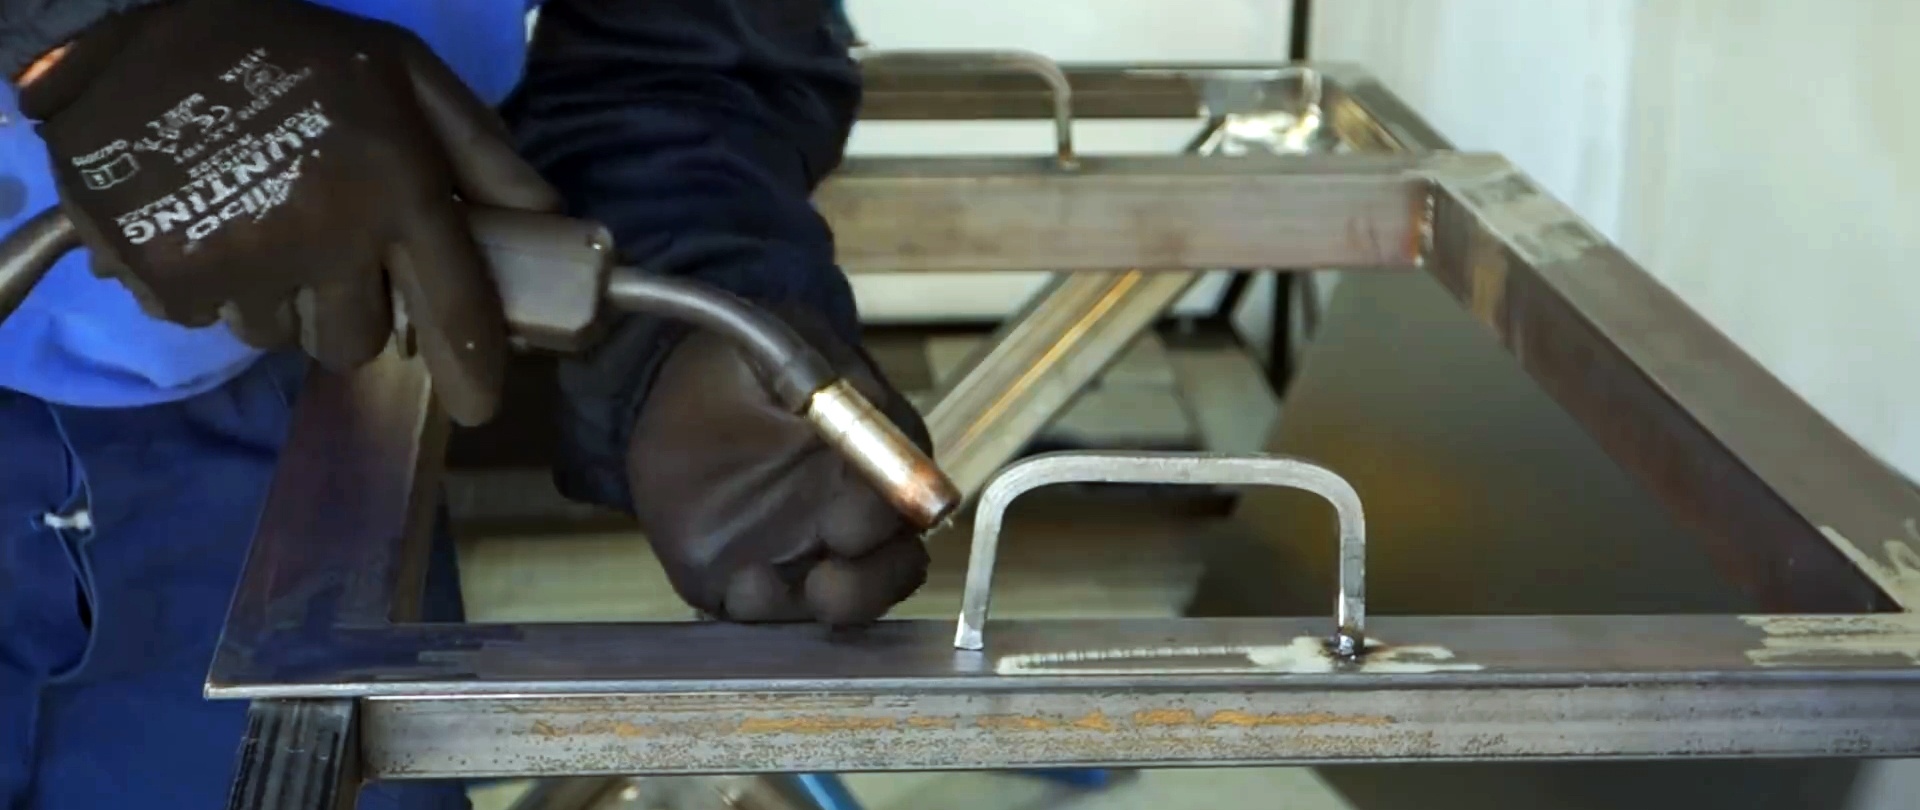
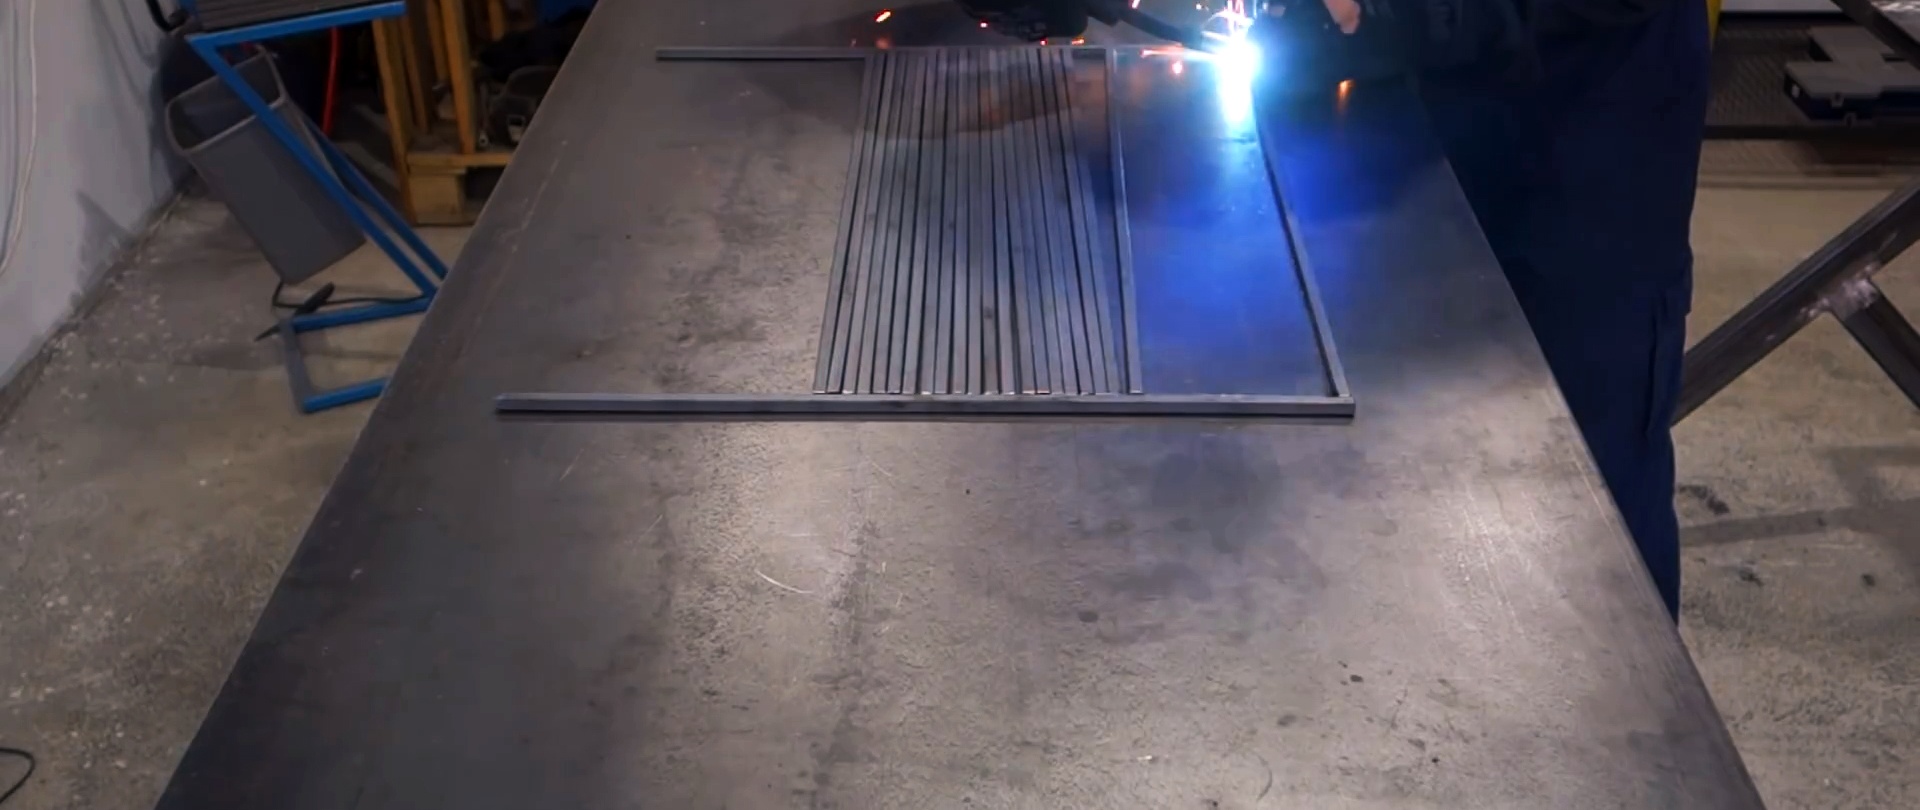
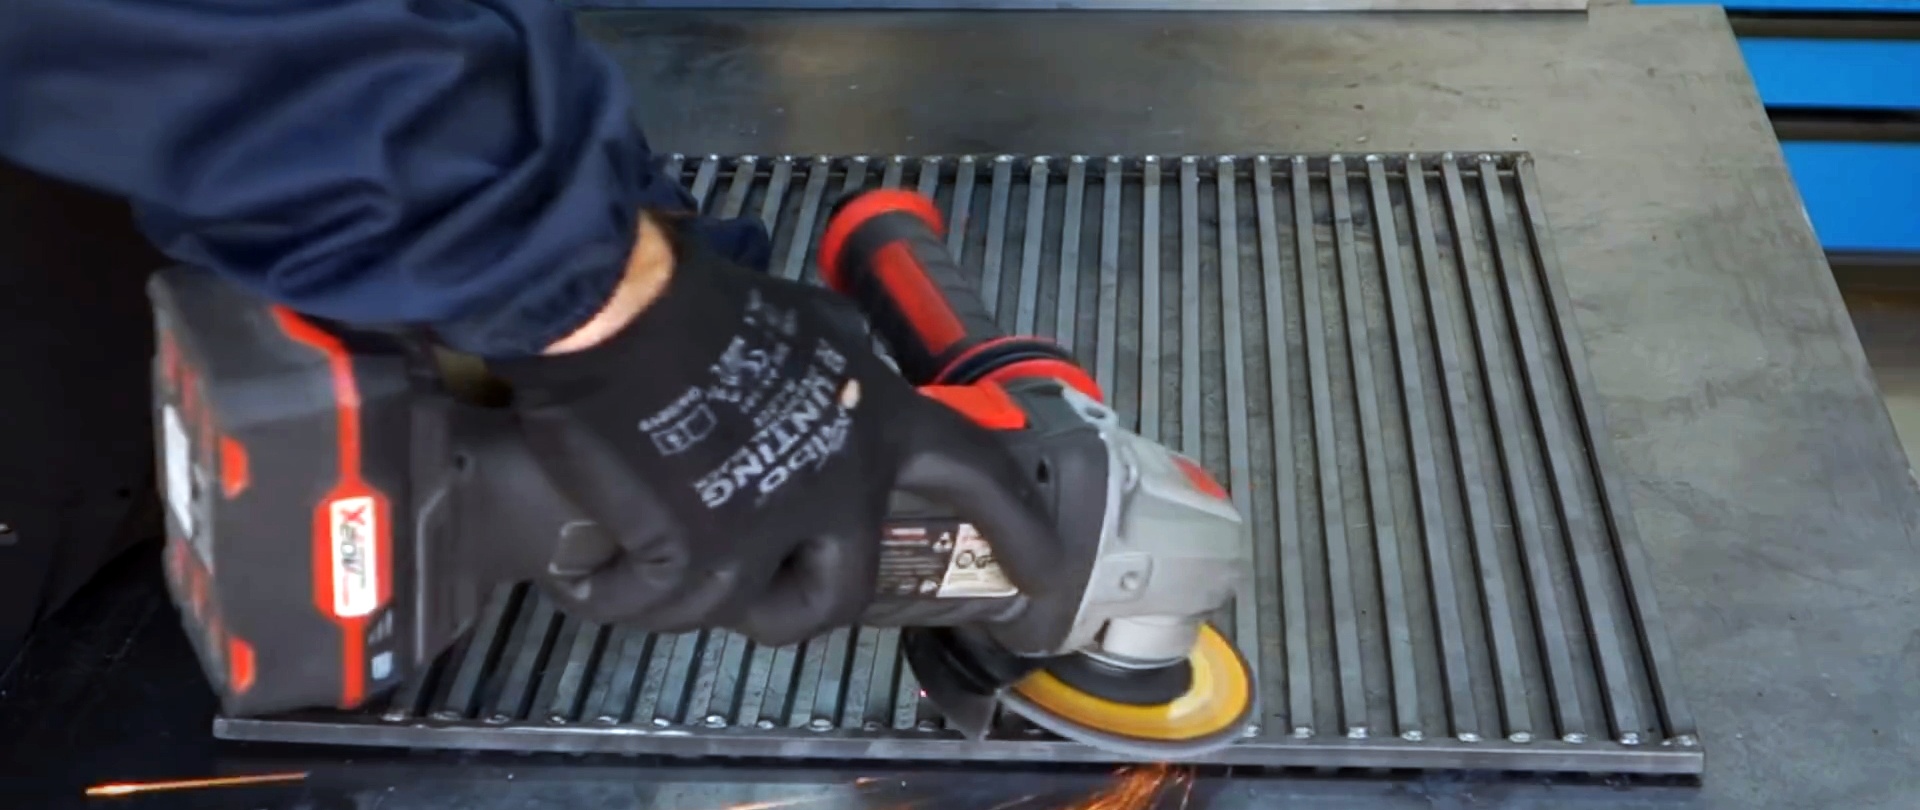
A barbecue grate is welded from a square rod to the size of the roasting pan. You need to weld a tube to it in order to put it on the jack foot. Thus, you can rotate the handle to adjust the height of the grate above the roasting pan. The tab itself and the tube are drilled and secured with a bolt, which will prevent rotation.


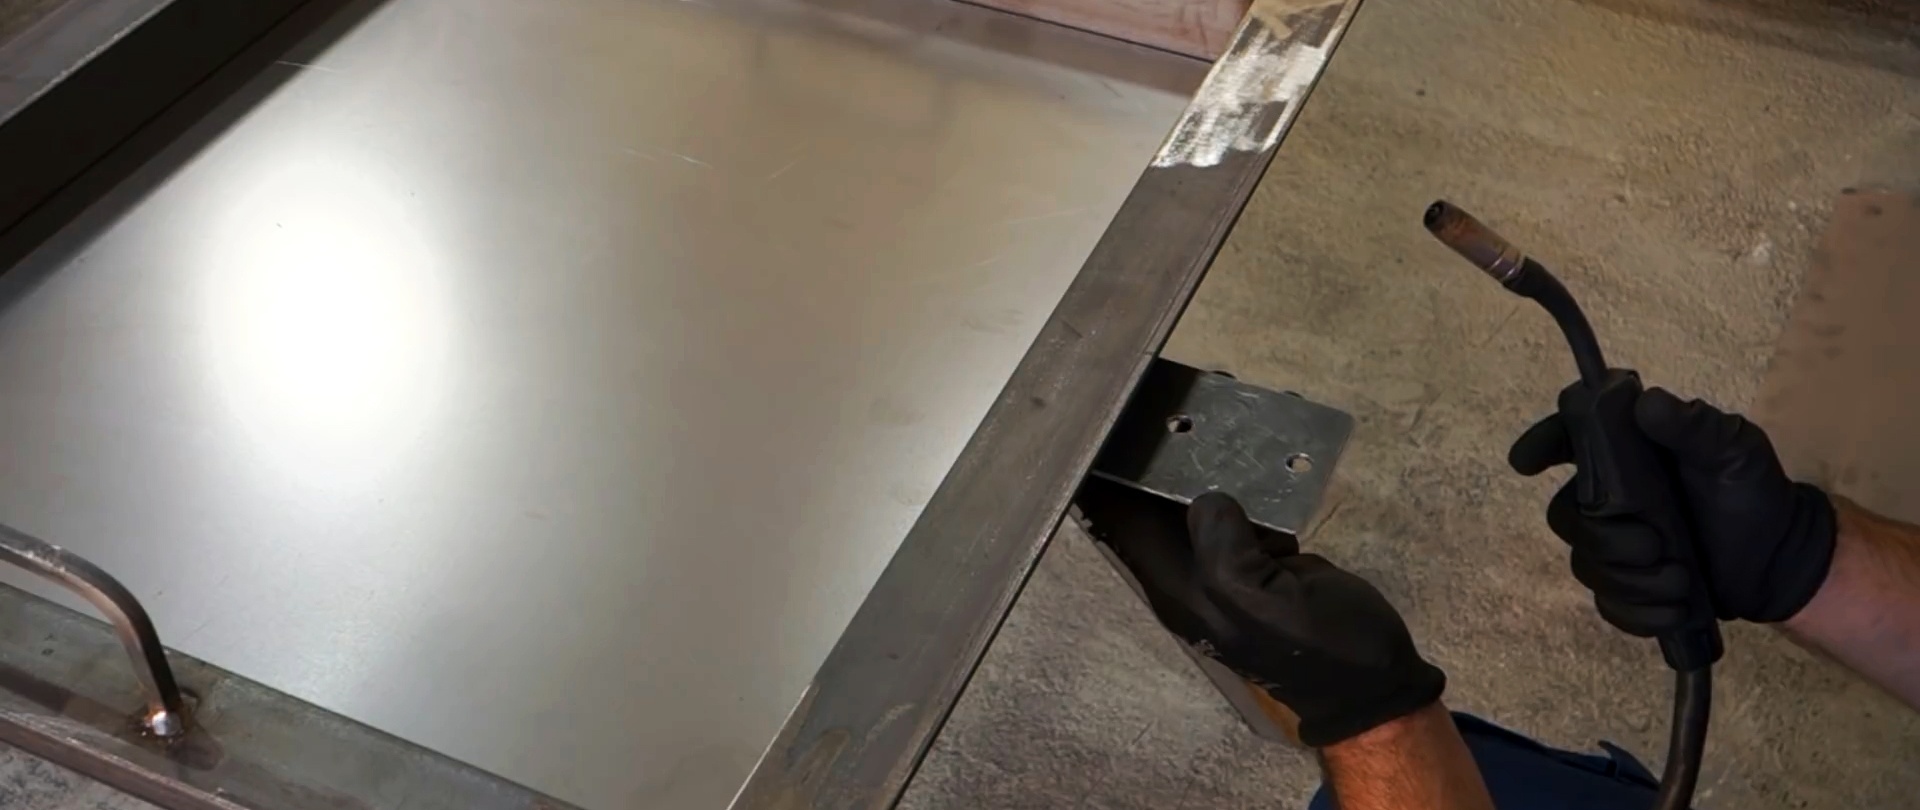
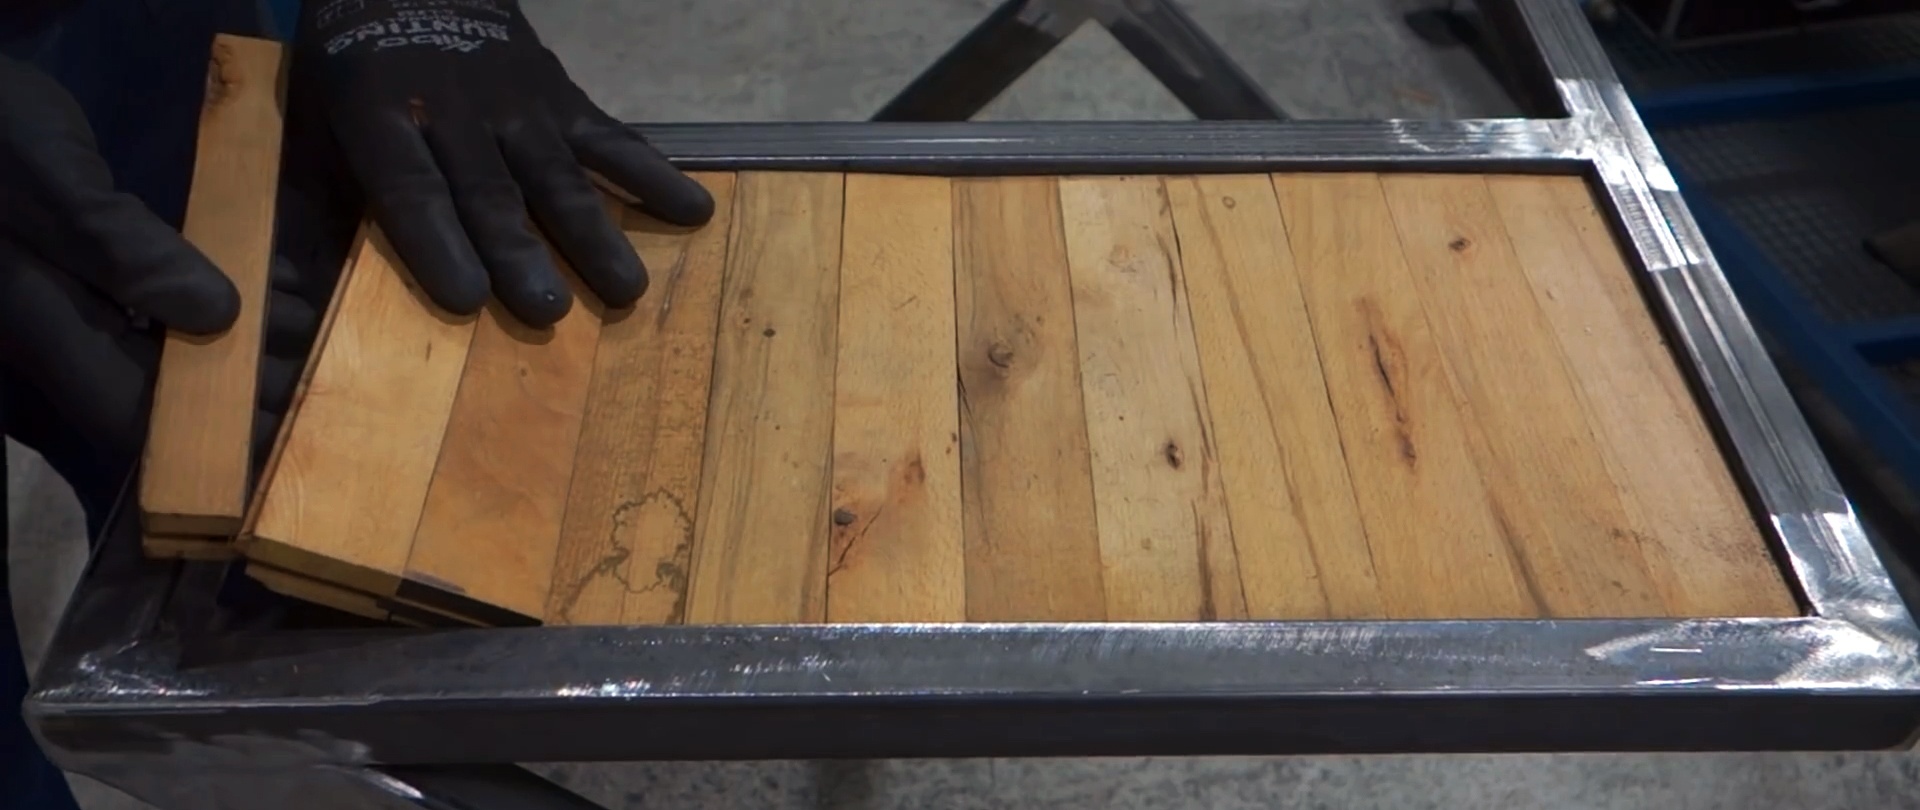
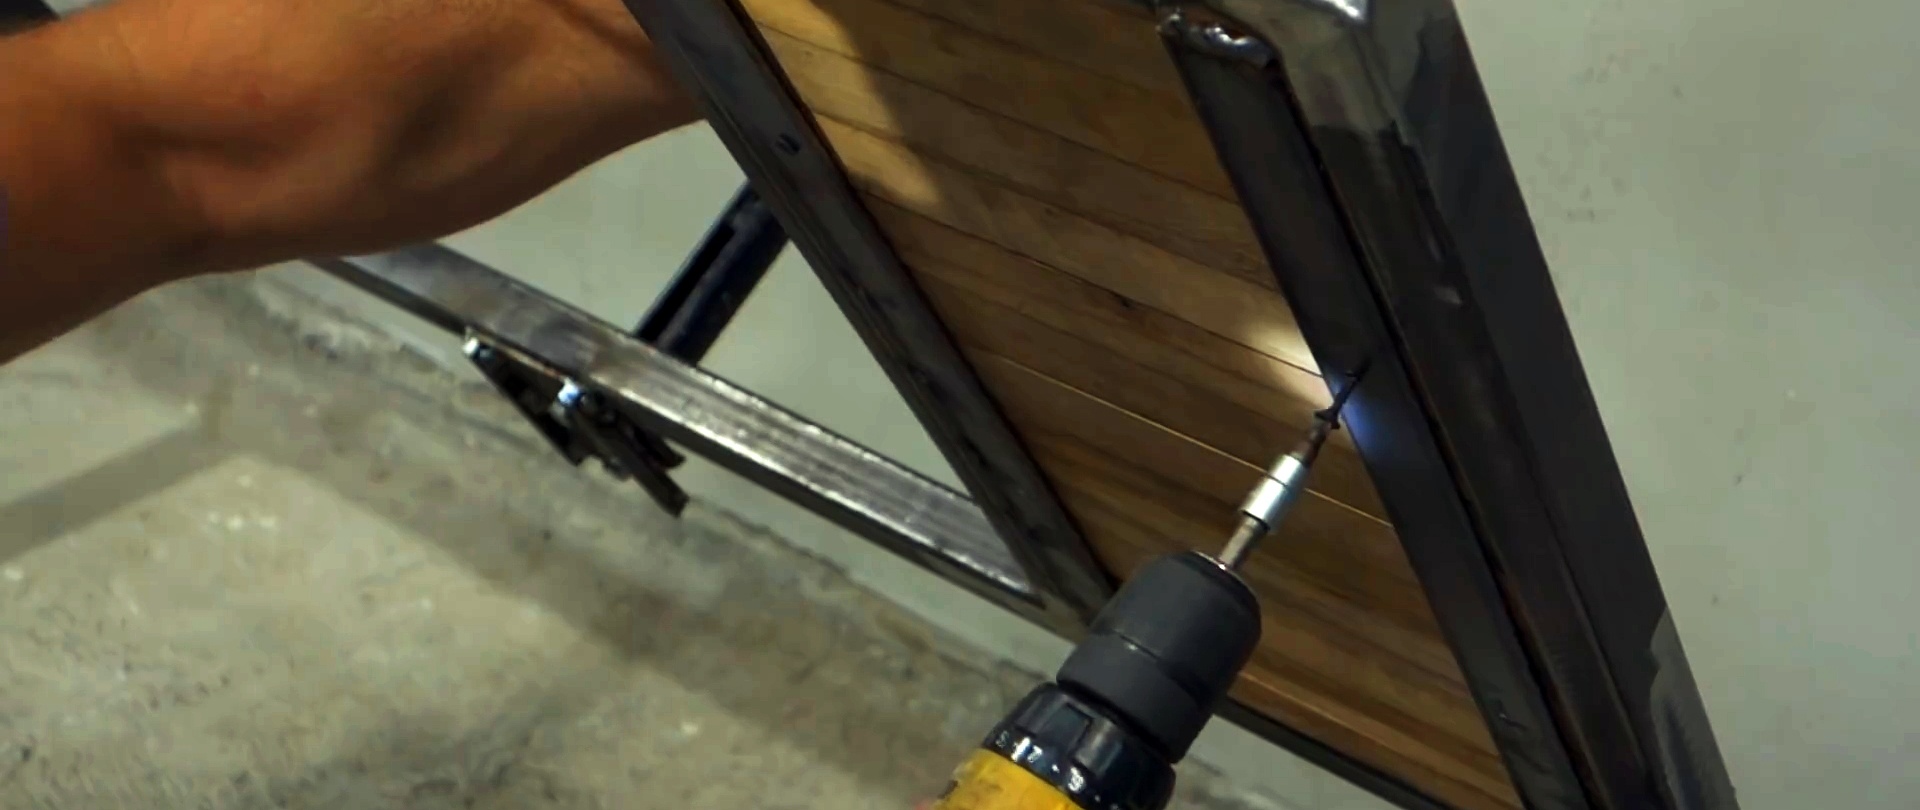
Next you need to make working cutting surfaces on the sides of the fryer. To do this, strips are welded under the frame on which the board will be laid.

For stability, the legs are connected by a crossbar.
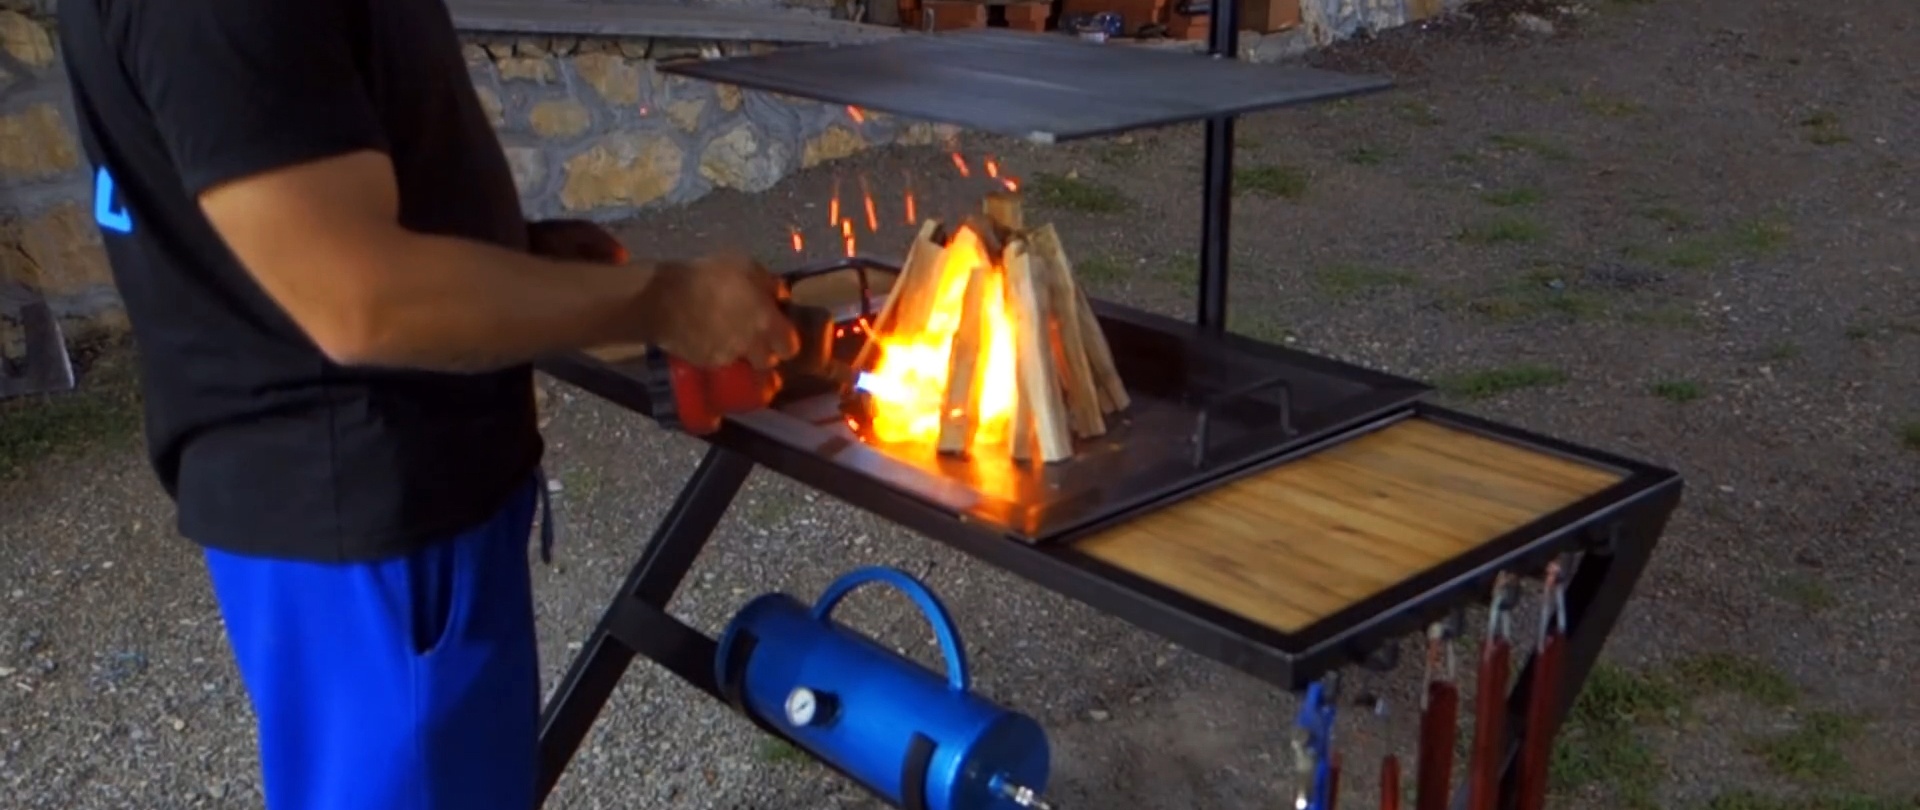
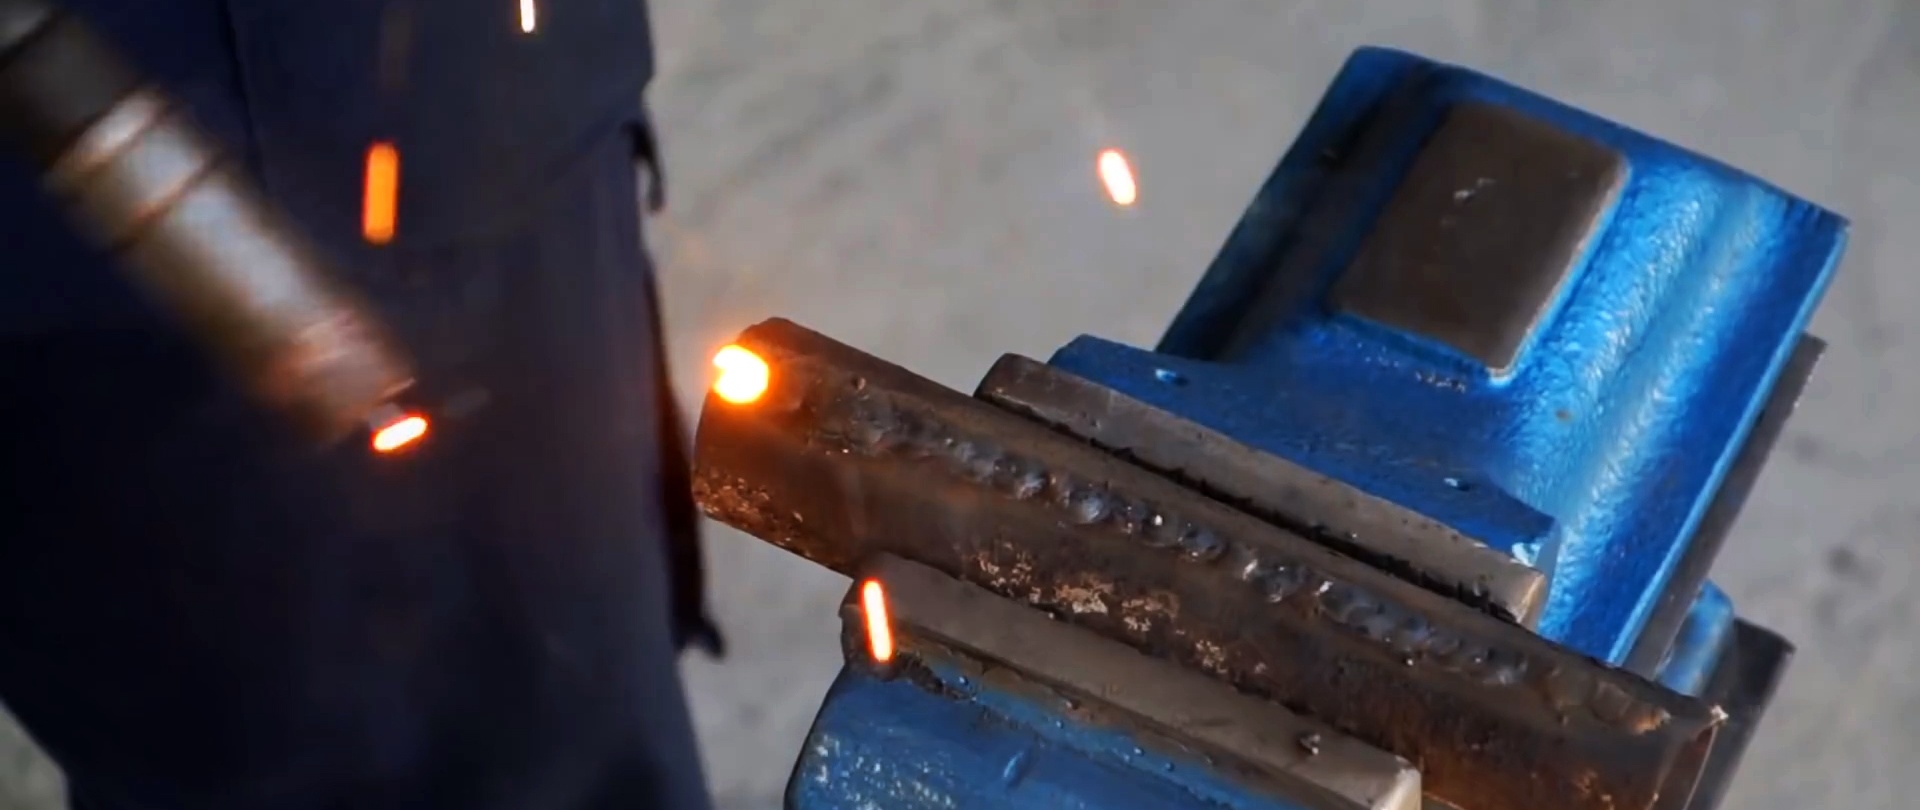
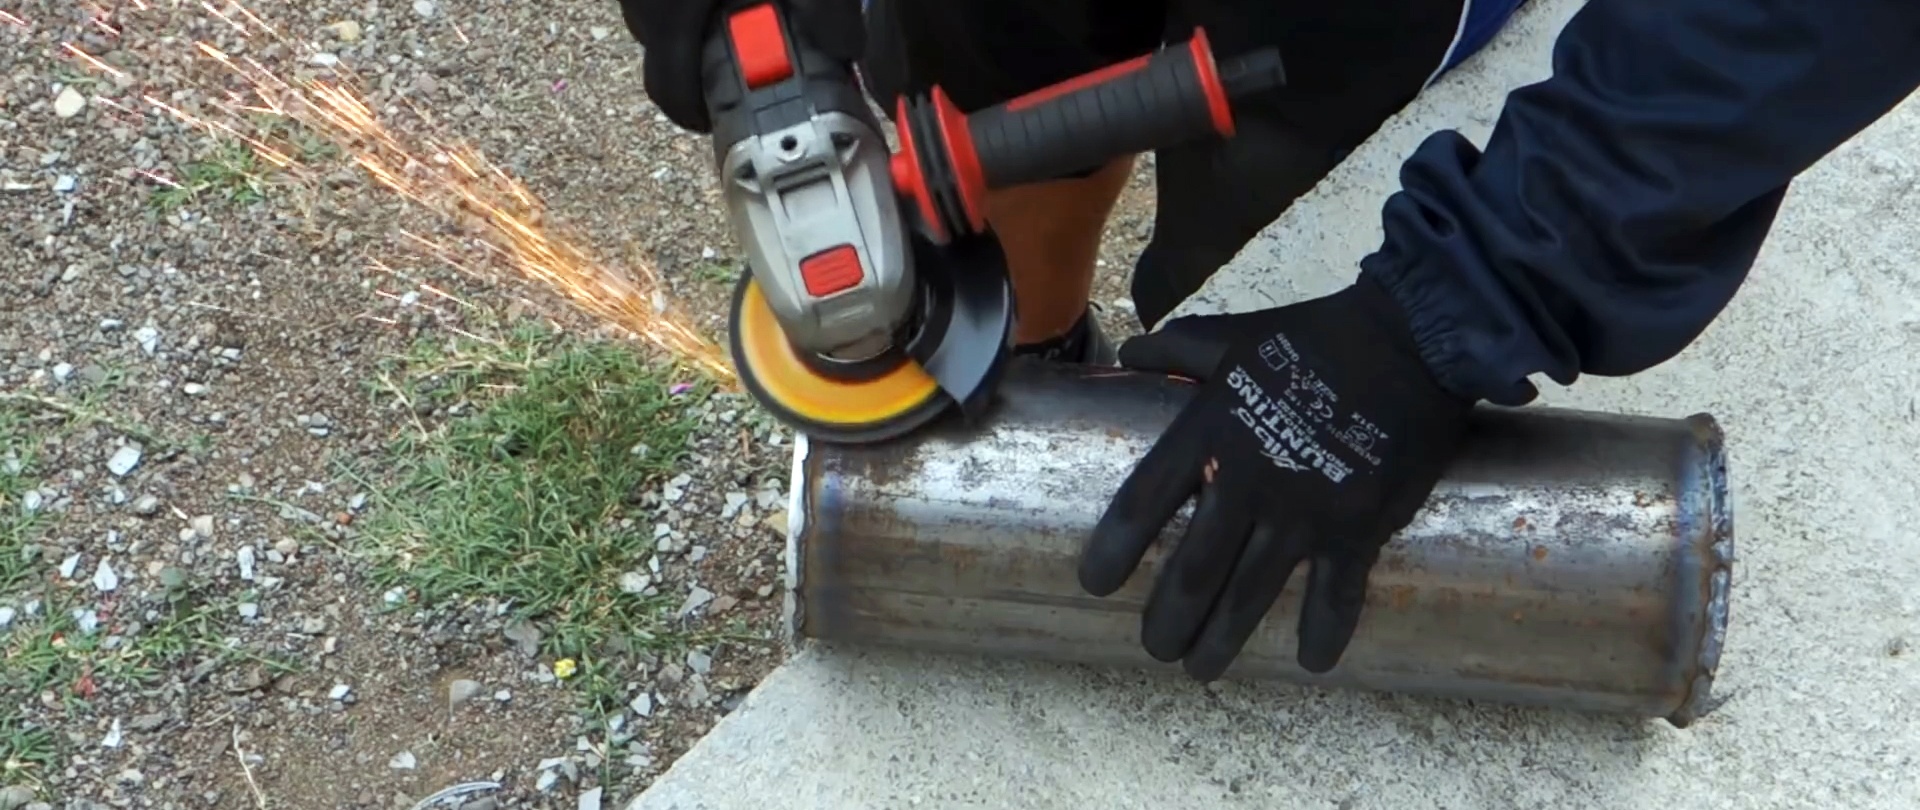
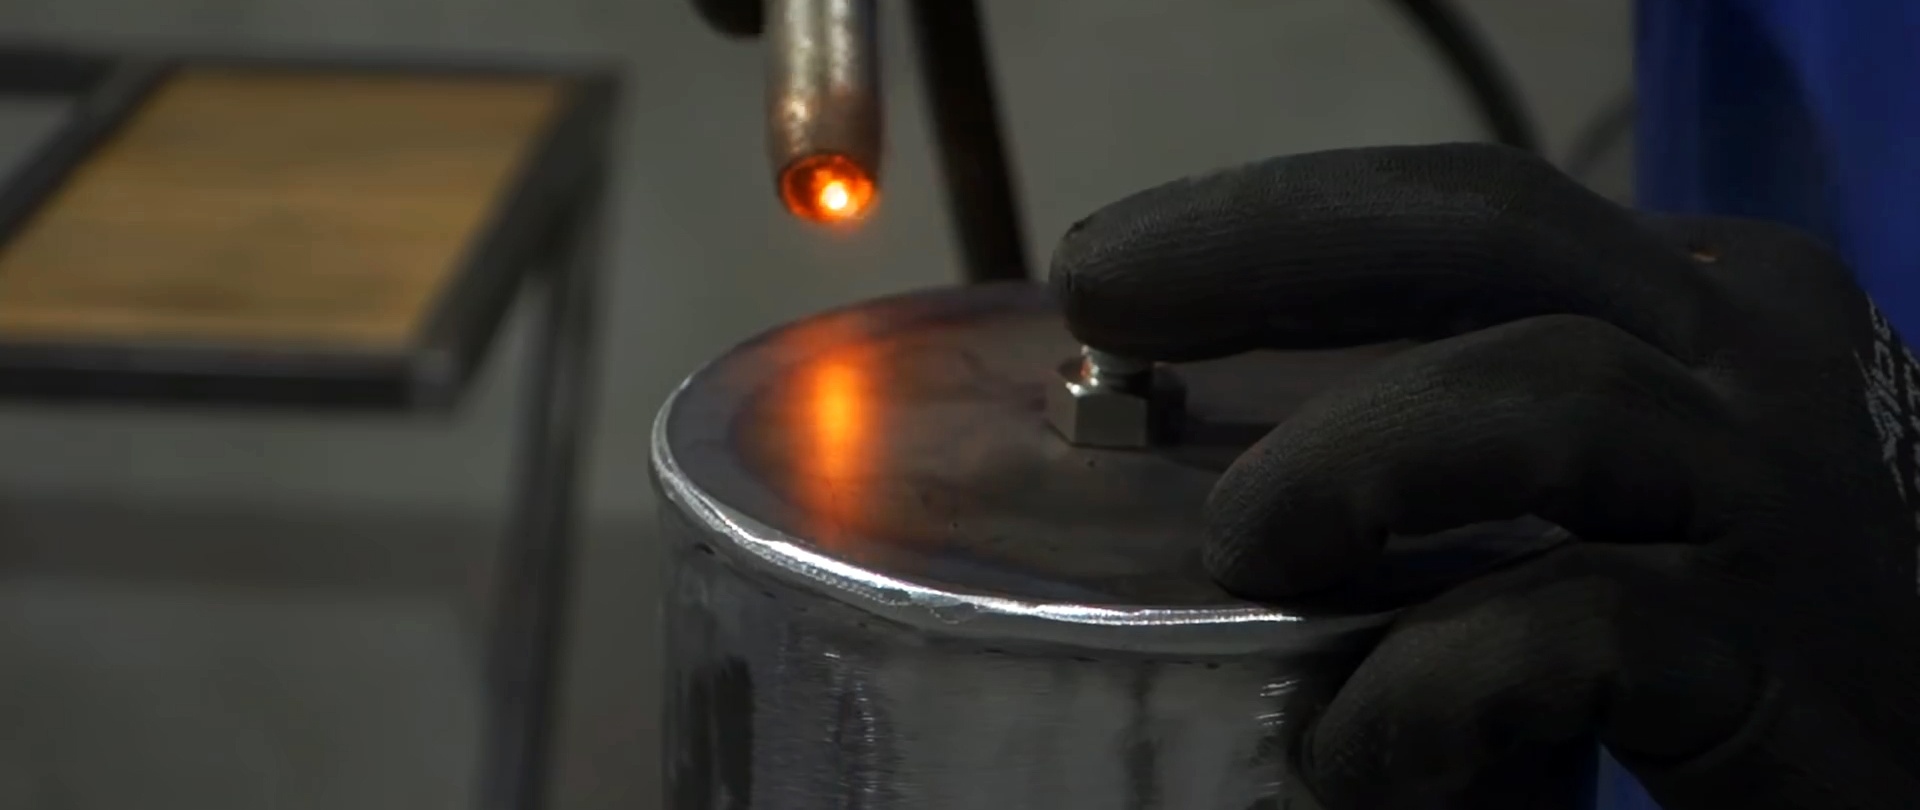
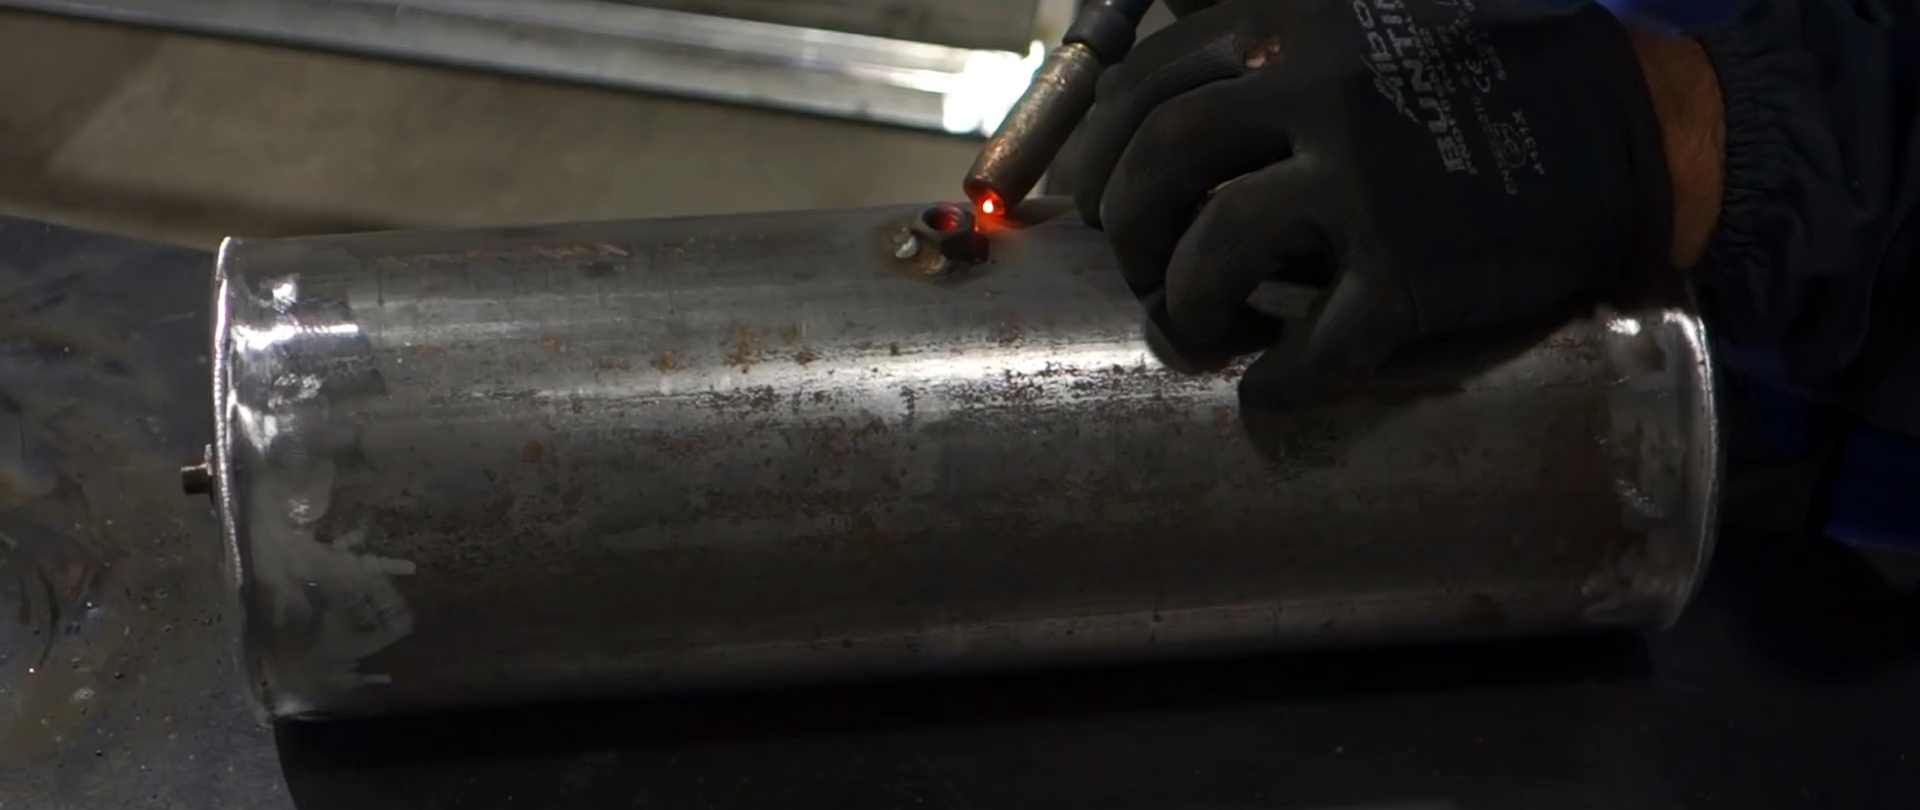
To fan the coals, you can make a balloon and pump it with compressed air. It is welded from a thick-walled pipe 120-200 mm and sheet steel. It needs to be drilled from the side and end. A nut is welded into the side hole and a pressure gauge is screwed in. A fitting is welded into the second for pumping air and connecting a hose with a blow gun. For convenience, a handle from a rod is welded to the cylinder.


Arcs are bent from the strip and welded to the crossbar on the table legs; the cylinder will be stored on them.Hooks from a rod are welded to the side of the table for hanging spatulas, tongs, scrapers and other barbecue tools.


The frame is painted. Boards are screwed onto it. Spacers with slats are installed under the roasting pan so that it heats the frame less.

Wood or coals are lit in a brazier. You can inflate them with air from a balloon. To reduce its consumption, it is advisable to install an adjustment valve on the hose, since without it everything will come out in less than a minute. We get a comfortable workplace. The height of the grill is adjusted using the jack handle; on the left and right there is a surface for cutting meat, placing pans and plates. On the side hooks are all the necessary tools for distributing the heat and turning the meat.