Carpentry is always a creative process. Absolutely any problem can be solved in different ways. Let's look at 5 useful homemade tools and attachments with which you can do many tasks faster and better, saving a lot of time.
1. A jig for filing tenons and grooves with a circular saw
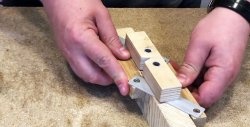
To assemble this device, 3 square blanks of 18x18 cm are cut out of plywood.

They stick together. A narrow plywood overlay is attached to the resulting block in the center.
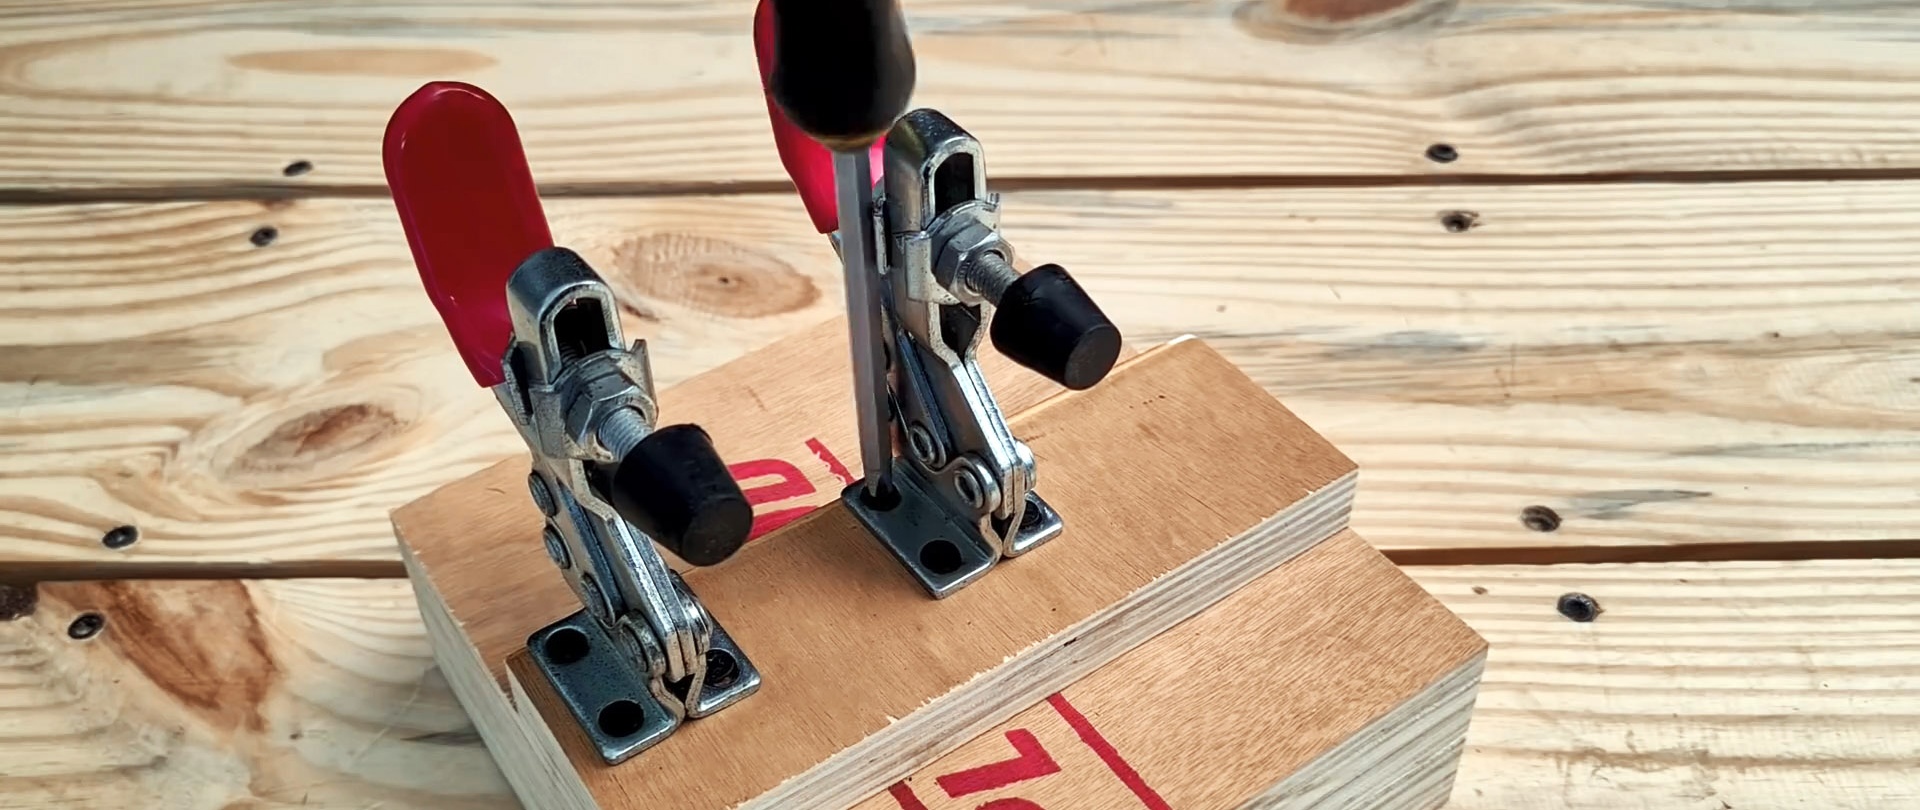
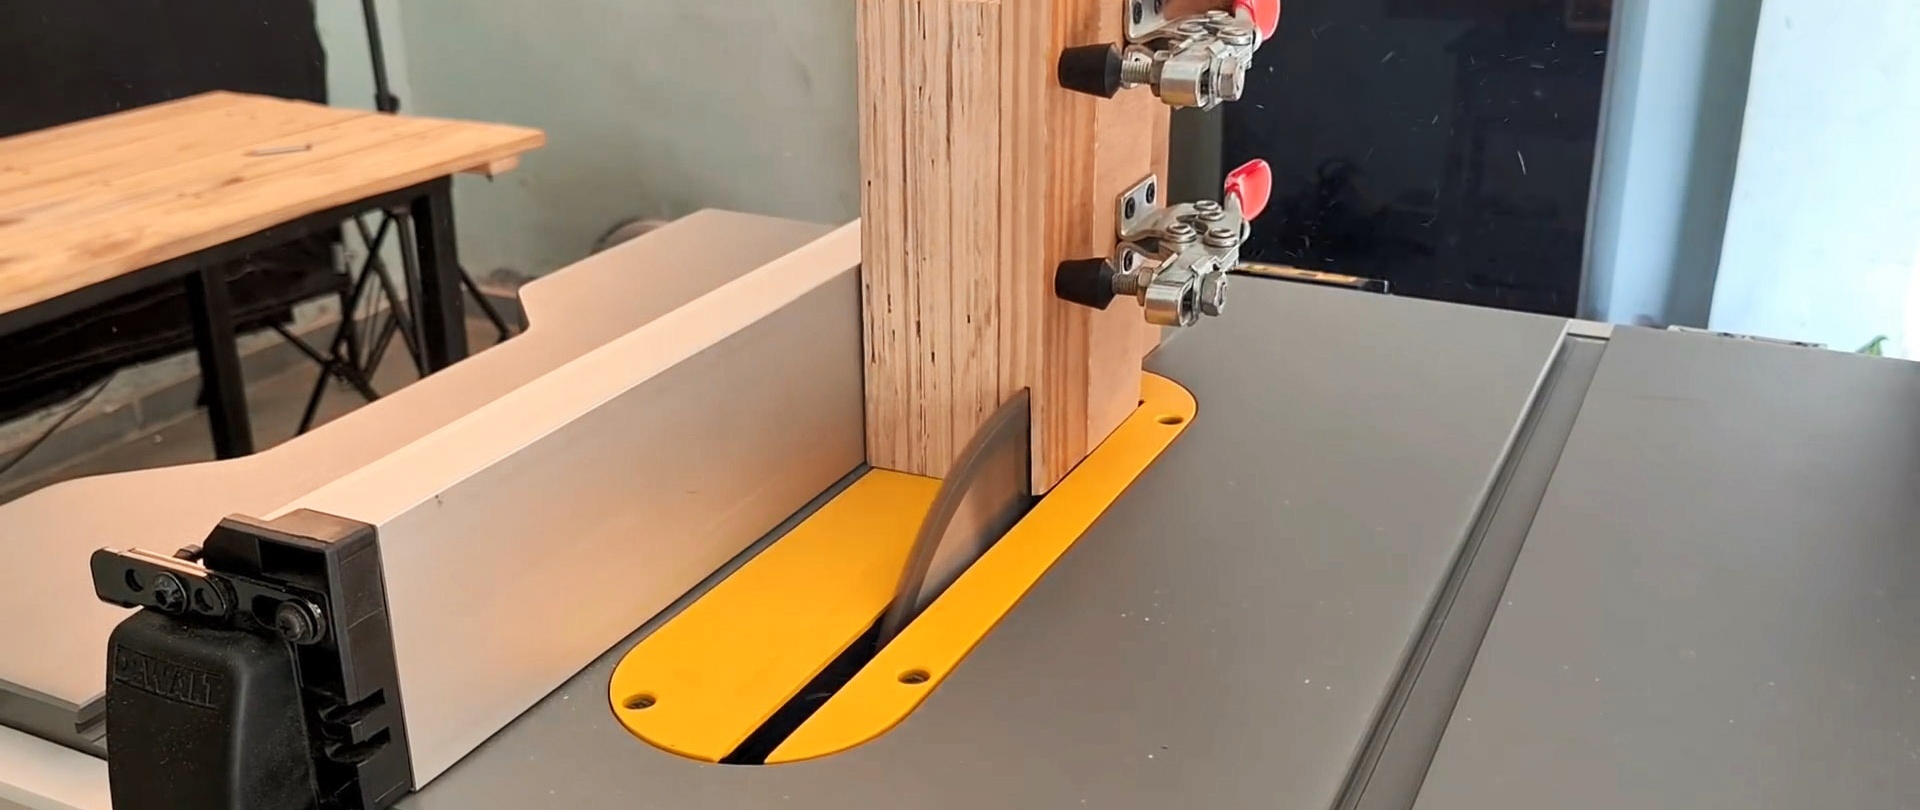
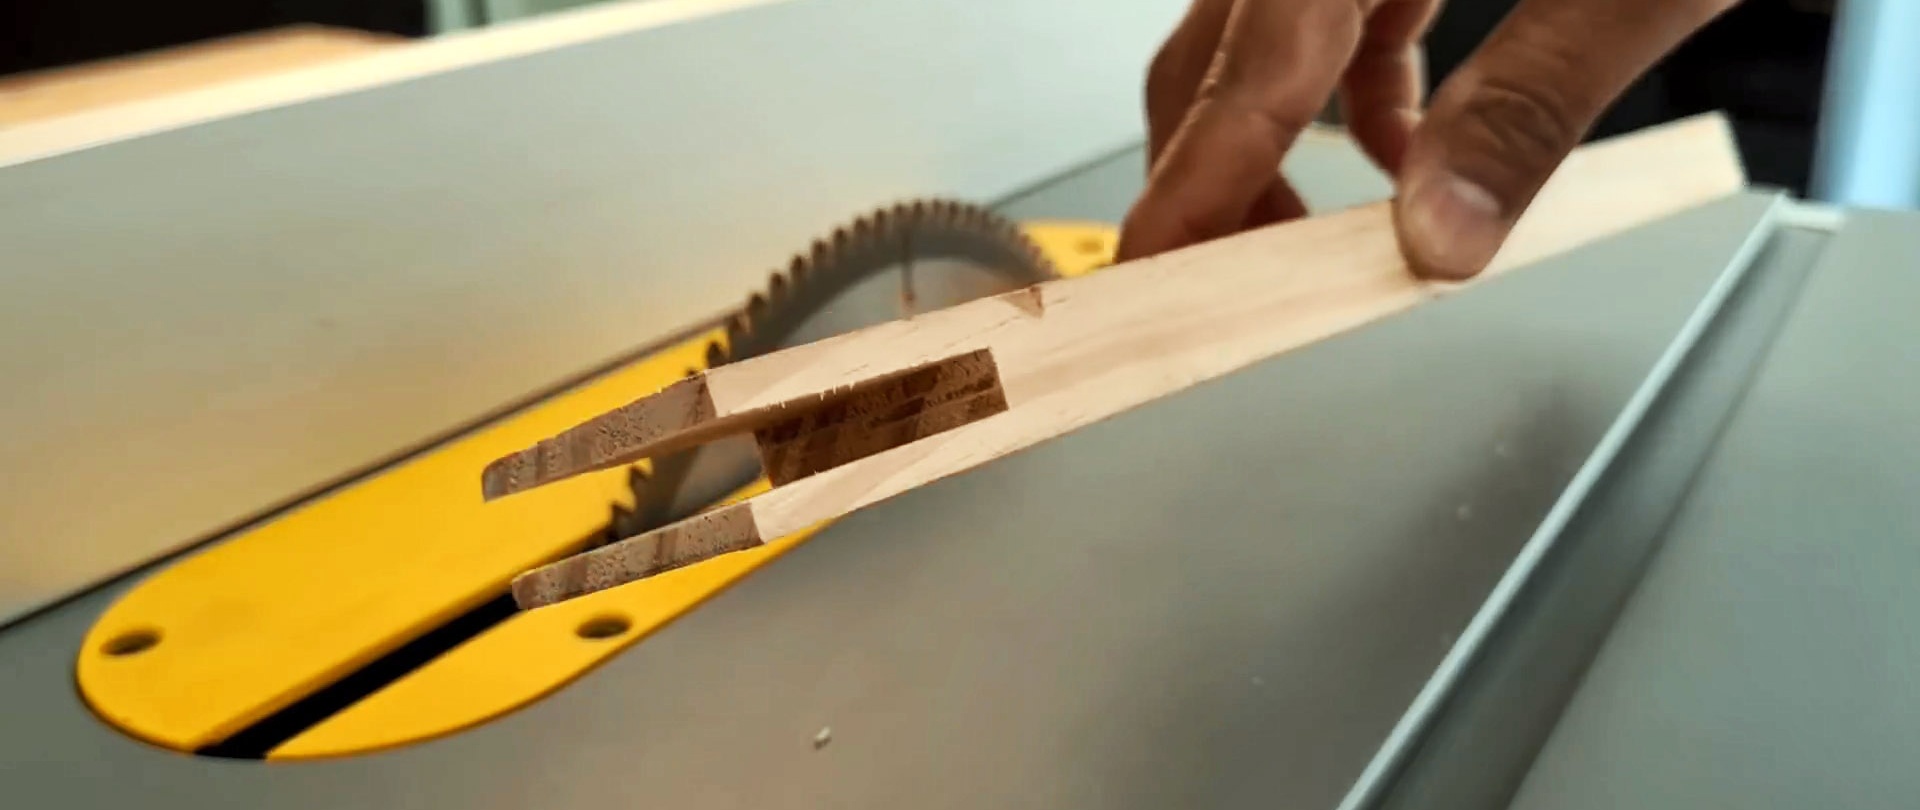
2 carpentry hinge-lever clamps are screwed onto the overlay. With their help, you can later press the workpiece to the jig. This allows you to maintain a right angle so that you can cut them from the end on a circular table while sliding along the rip fence. With this jig you can make perfectly even tenons and grooves.
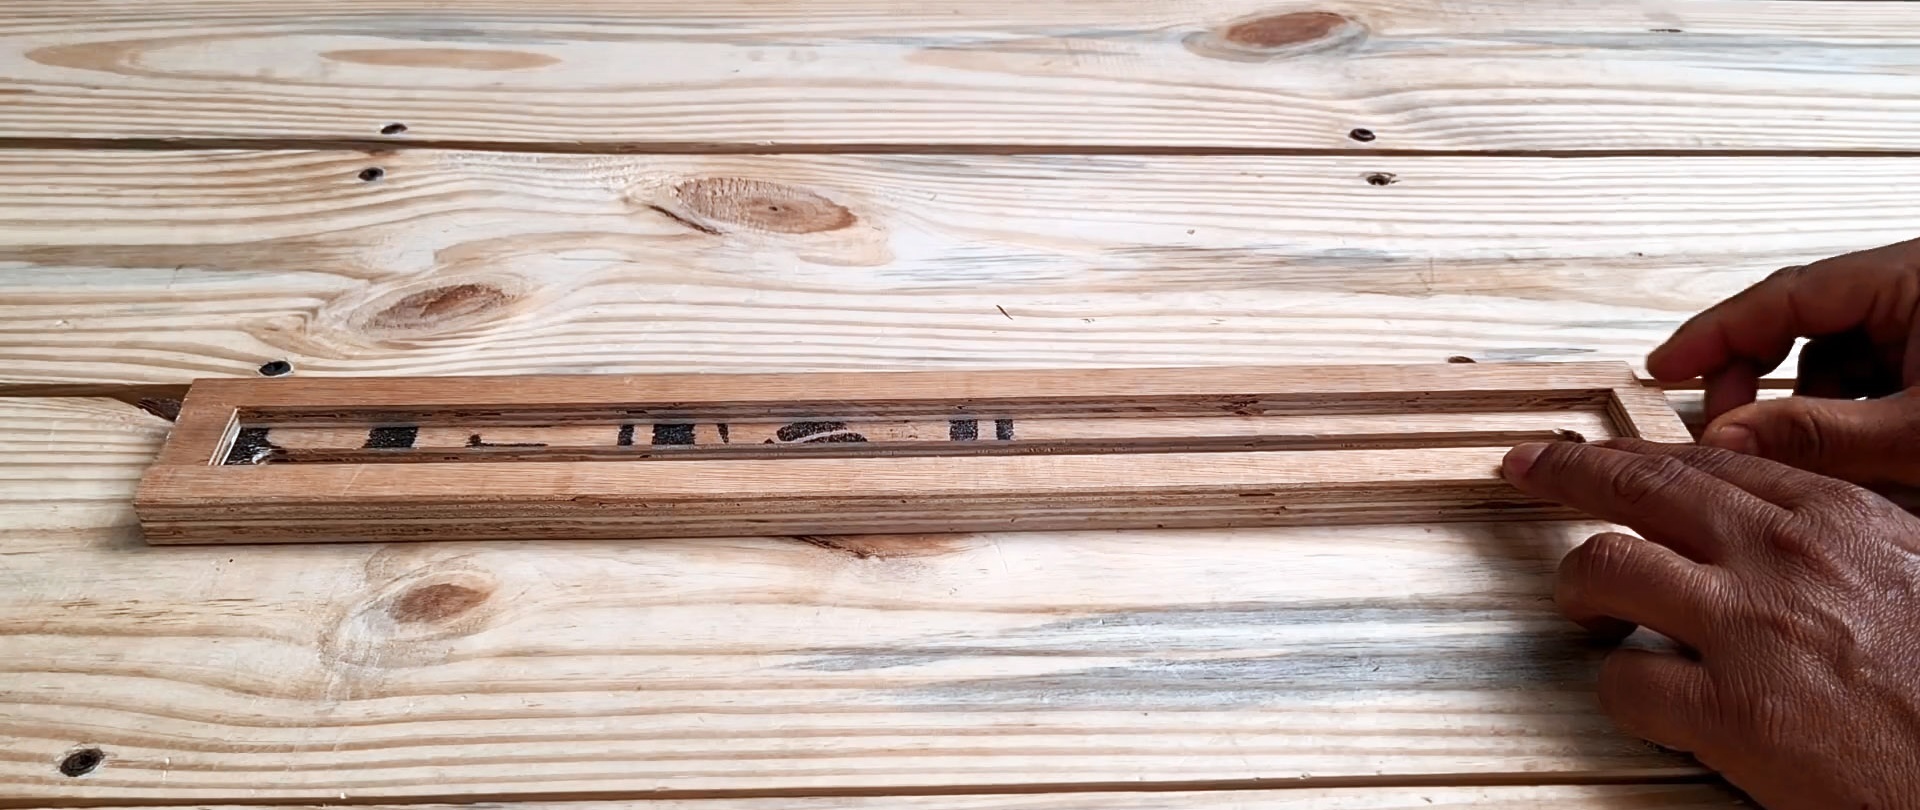
2. Compass for router
To make a compass, a long strip 8-10 cm wide is cut out of plywood. A through longitudinal groove is milled into it.
Centimeter-wide slats are screwed onto it around the circumference.
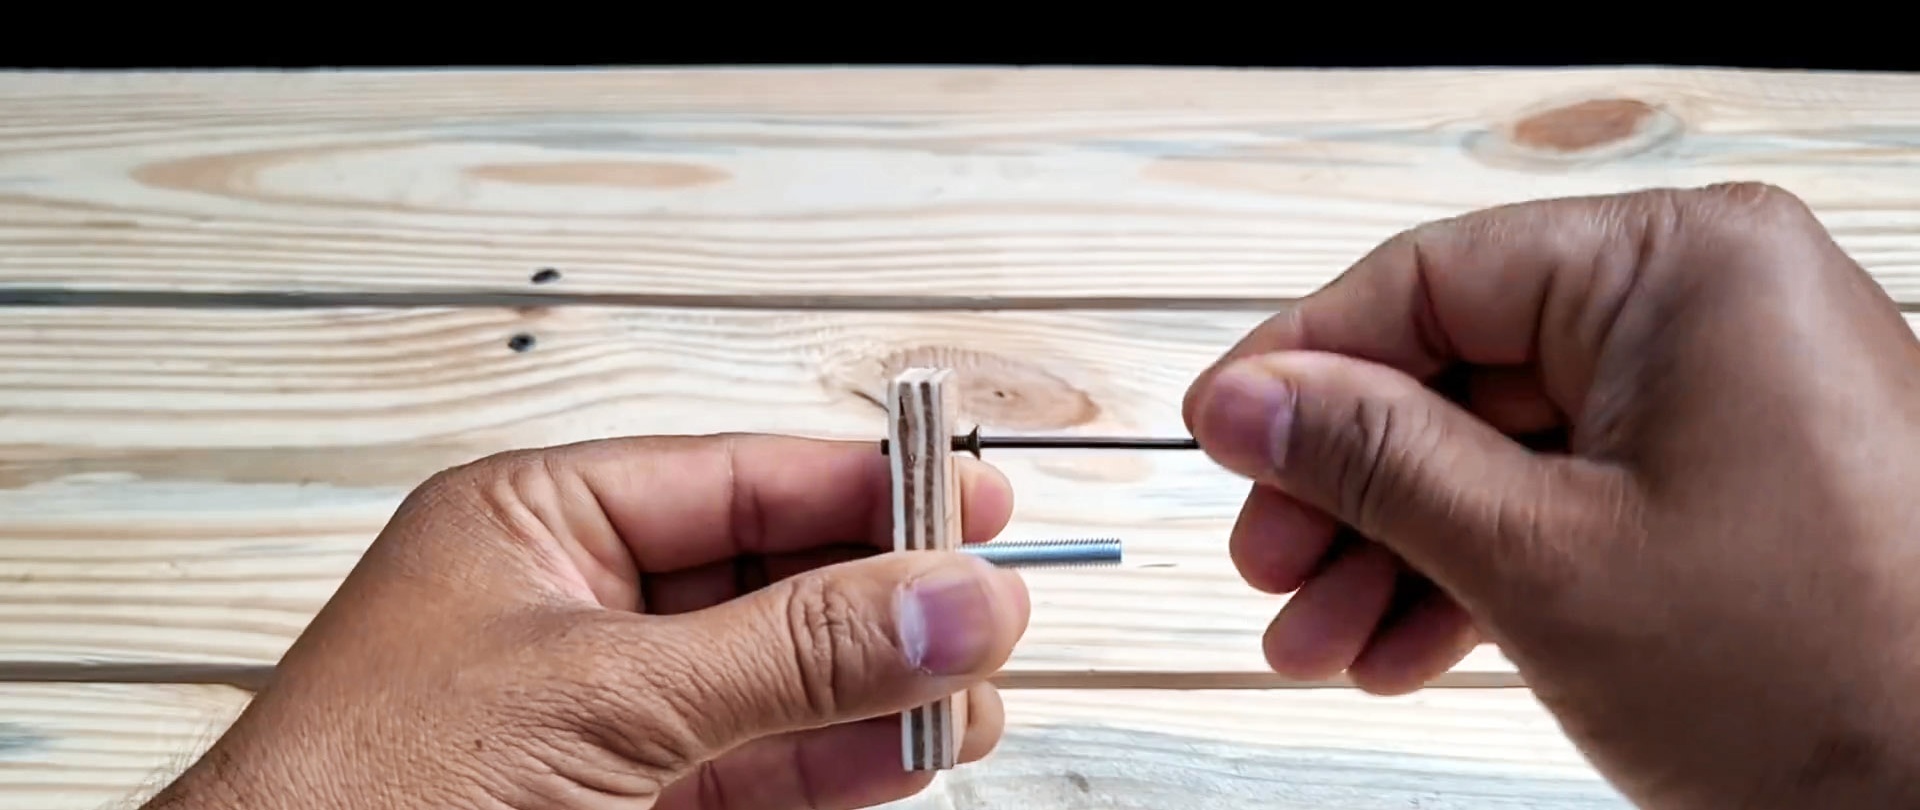
An insert is cut along the width of the gap between the sides under the bar. It is drilled in the center and a bolt is inserted into this hole. The self-tapping screw is screwed in a little on the side.
Core drills on AliExpress at a discount - http://alii.pub/5zwmxz

You need to make a groove at the end of the workpiece.

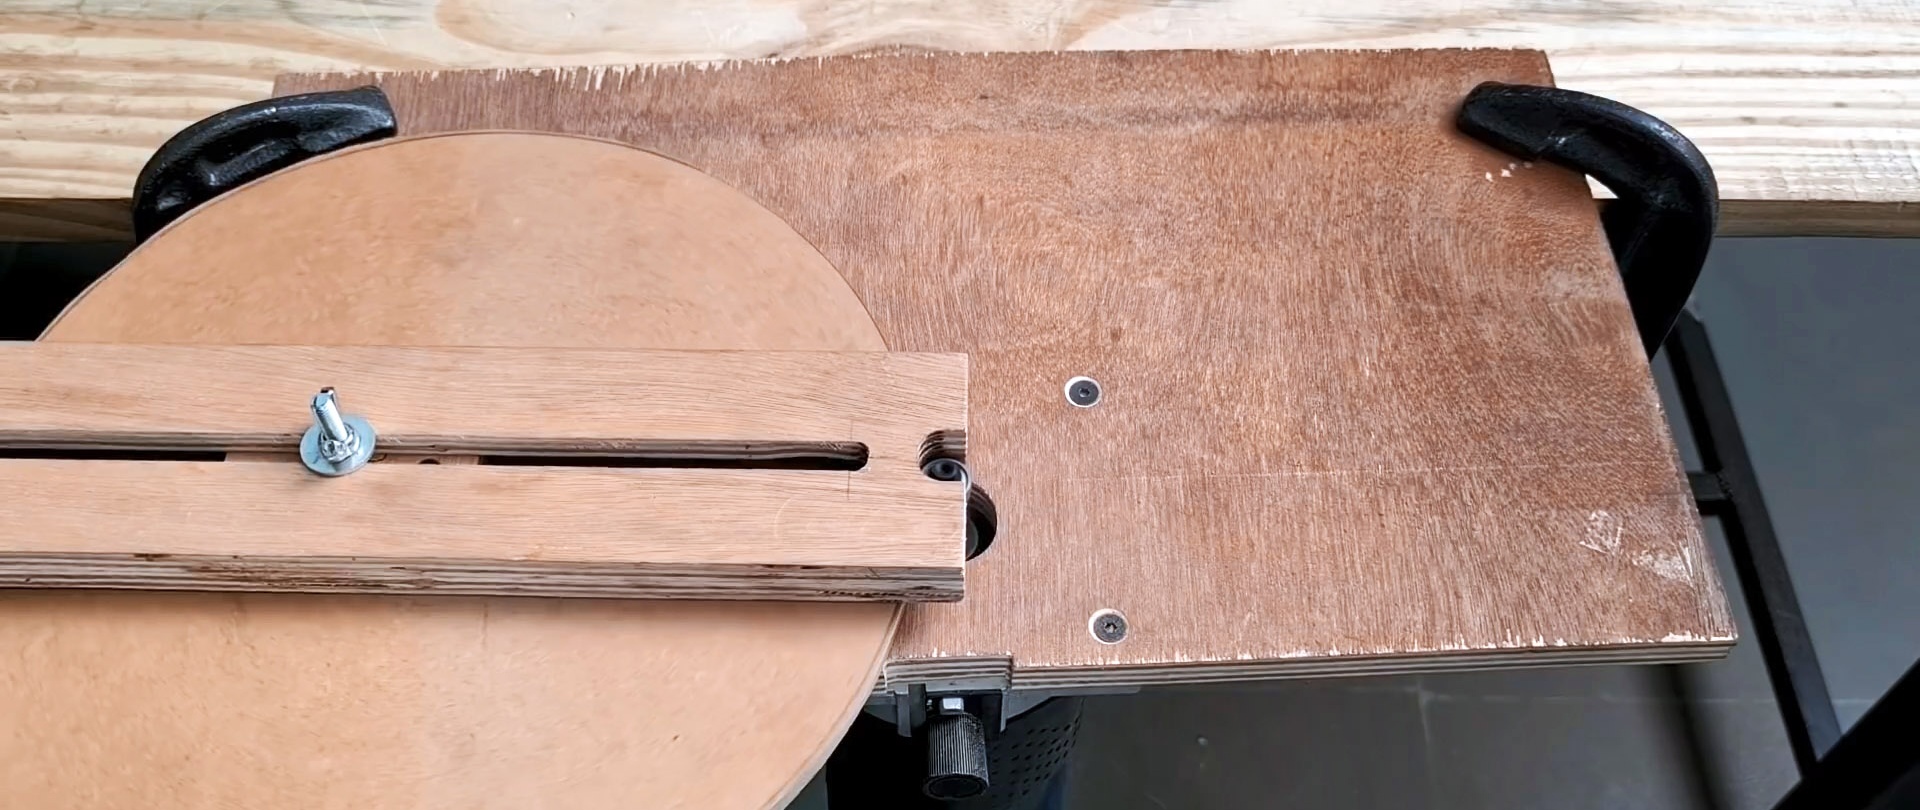
Then the insert is installed in the guide bar and tightened with a wing nut. This tool in this form can be used to mark circles. To do this, you need to make a hole in the workpiece to insert a needle from a self-tapping screw. After this, applying a pencil, you can draw circles with the device like a compass.
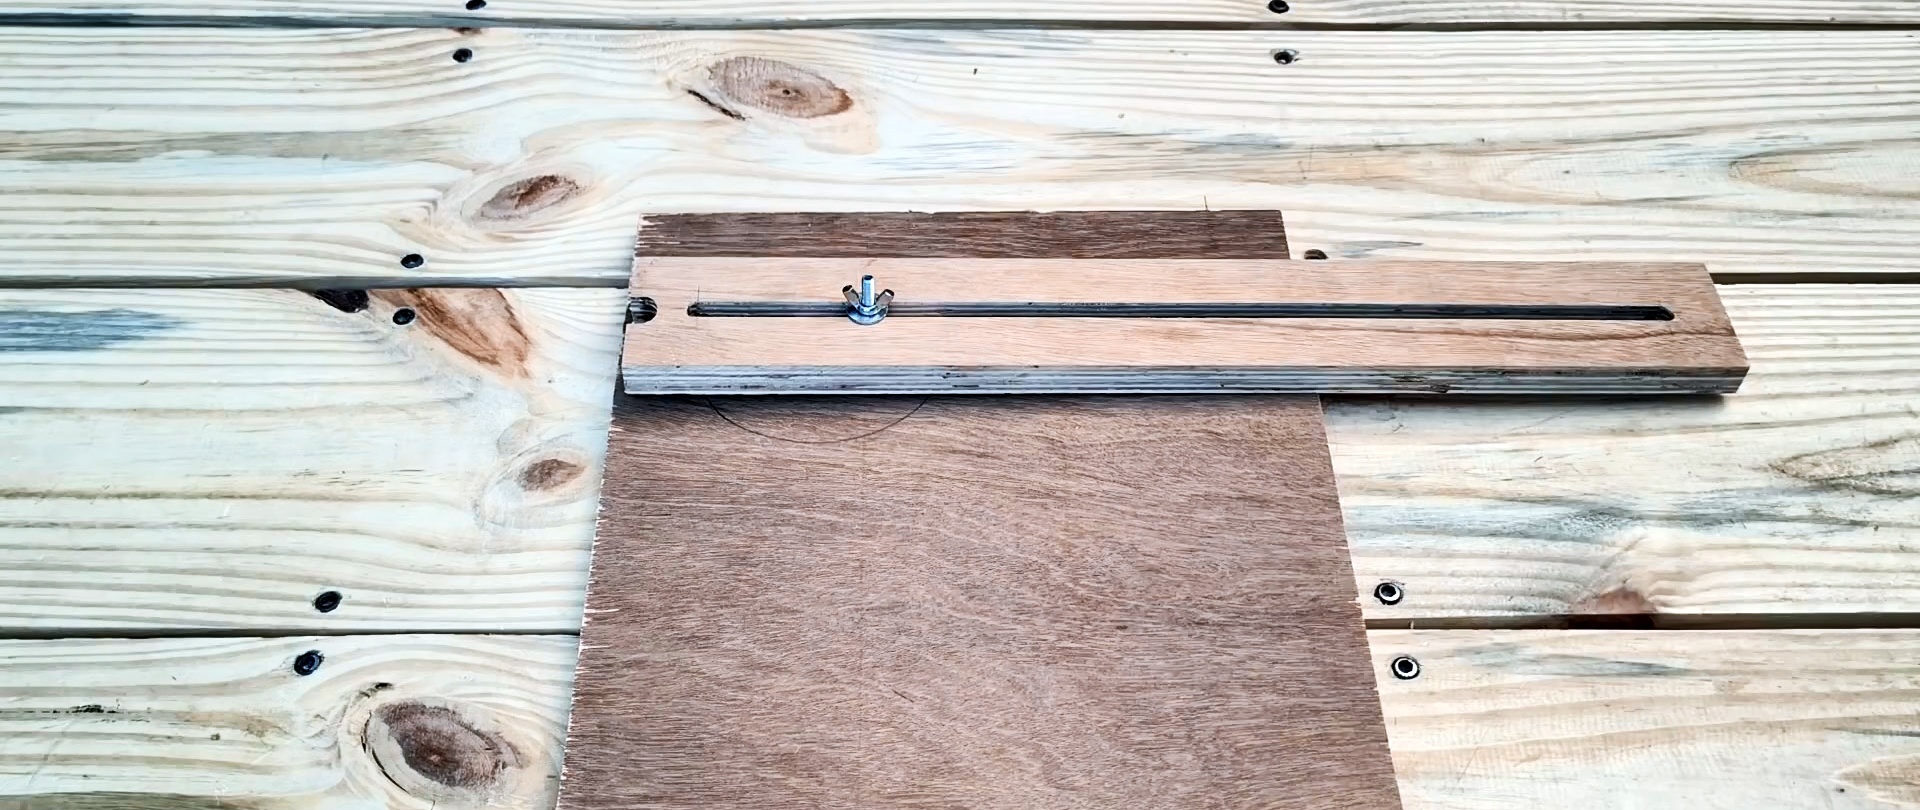

The main task of the device is to mill disks. To do this, they are roughly cut out of plywood or boards, and fixed to the attachment using a hole. The edge of the device with a groove rests against the cutter on the milling table. In this way, you can always keep the disc blank at the same distance from the cutter, so that its edge is removed evenly.
3. Attachment for longitudinal parallel grooves using a manual router
To make this attachment, you need to unscrew the pad from the sole of the router and trace it on the plywood. The workpiece is cut according to the markings. It needs to be drilled so that it fits onto the router base.
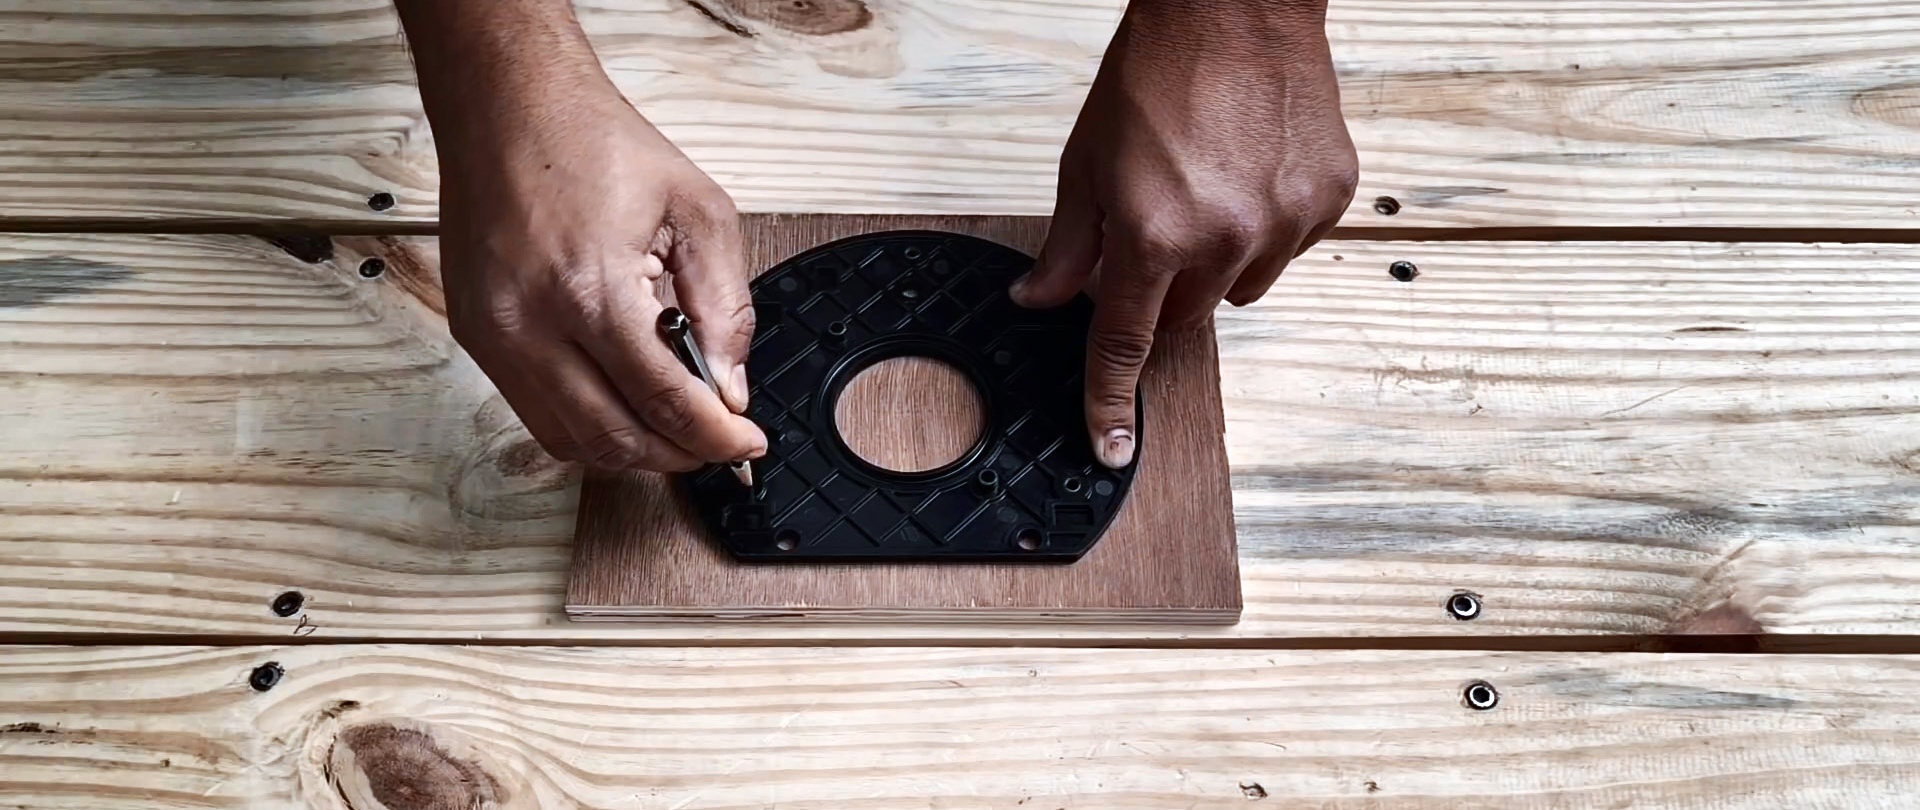

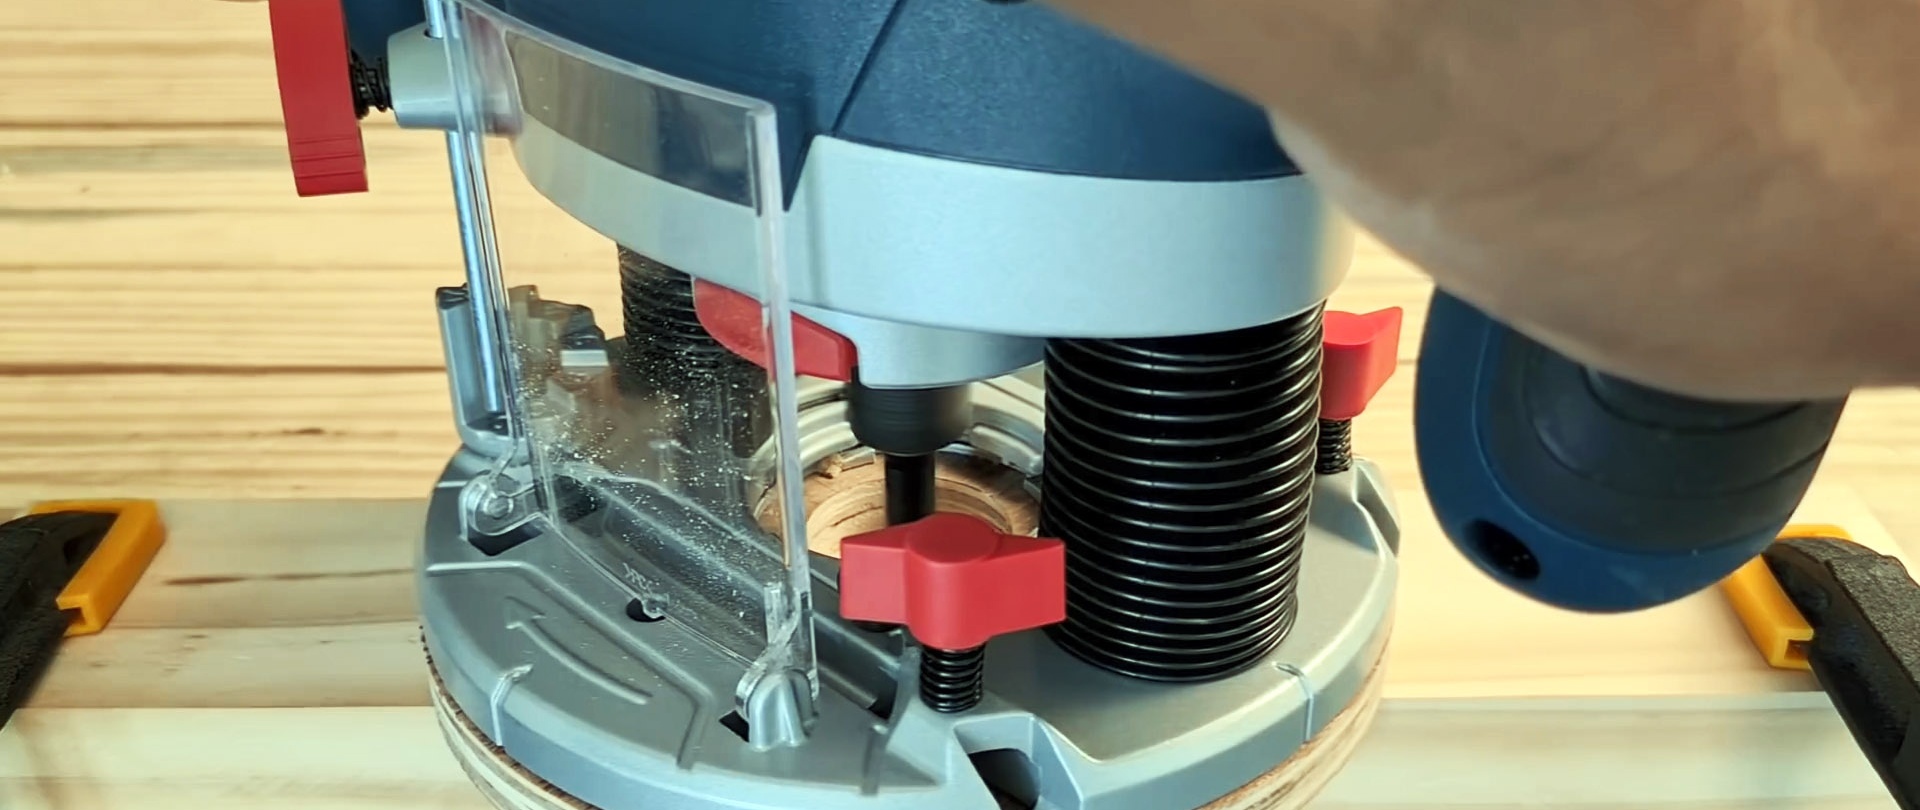
Then you need to drill a central hole for the cutter. 2 more are also done on the side at the same distance. Dowels drilled from the end for a screw are glued into them.

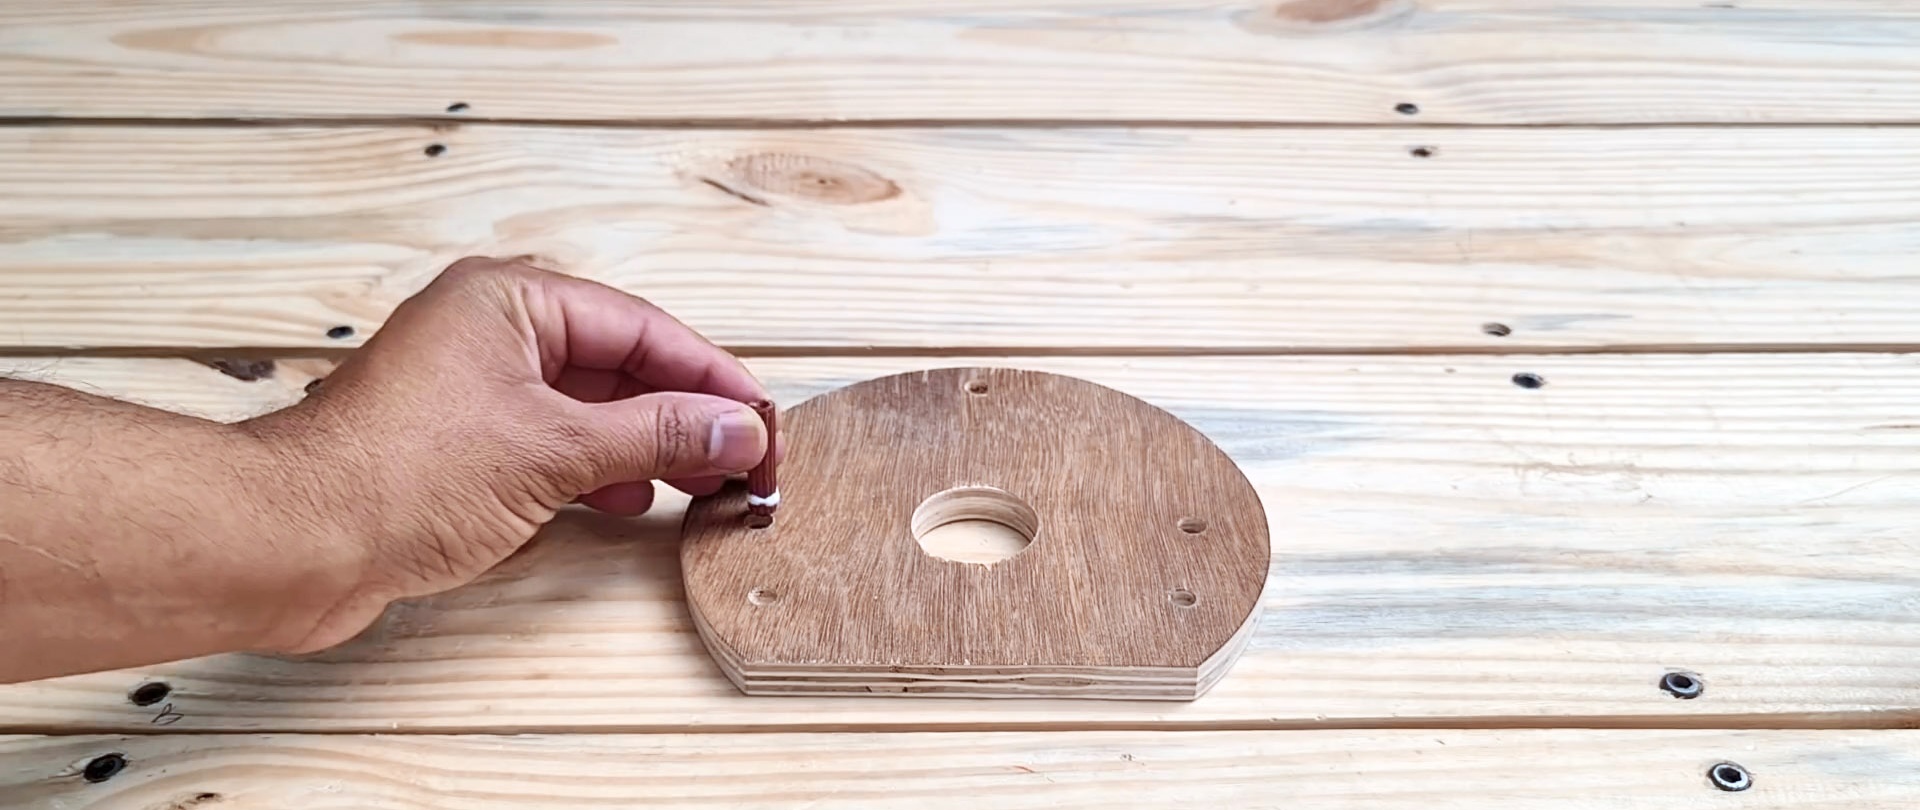
Small bearings are put on the dowels, which are then pressed with a washer and screw.

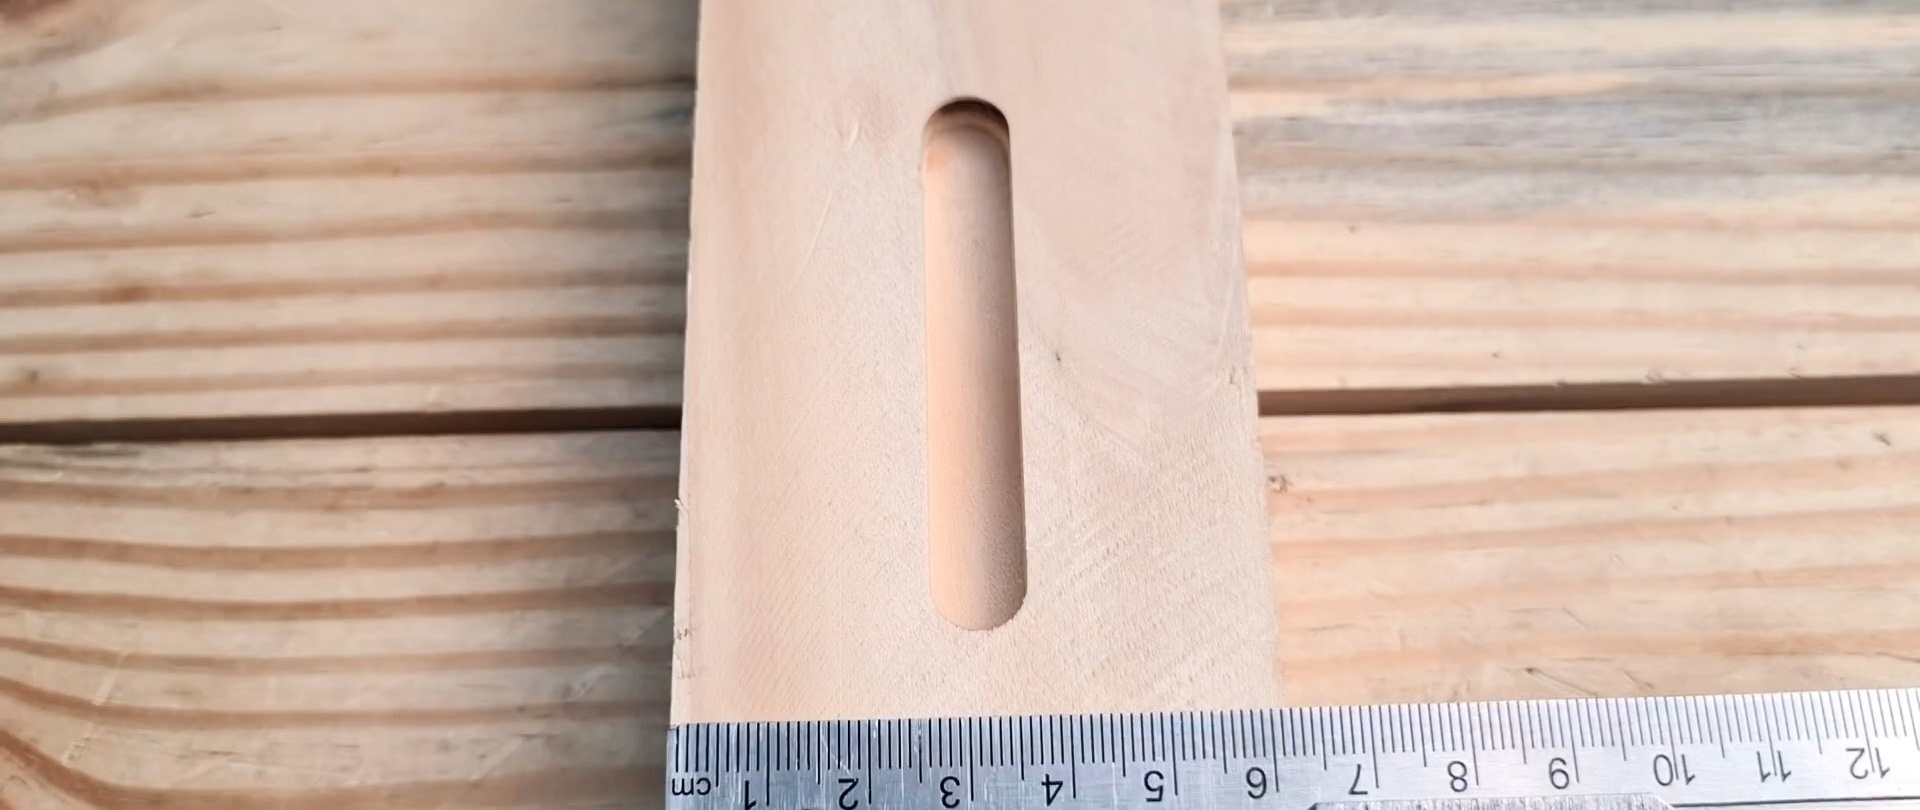
This attachment allows you to position the cutter strictly in the center when turning until the bearings stop against the walls of wooden workpieces. This is necessary to mill an even groove.This device is very convenient for cutting locks into door panels, etc.
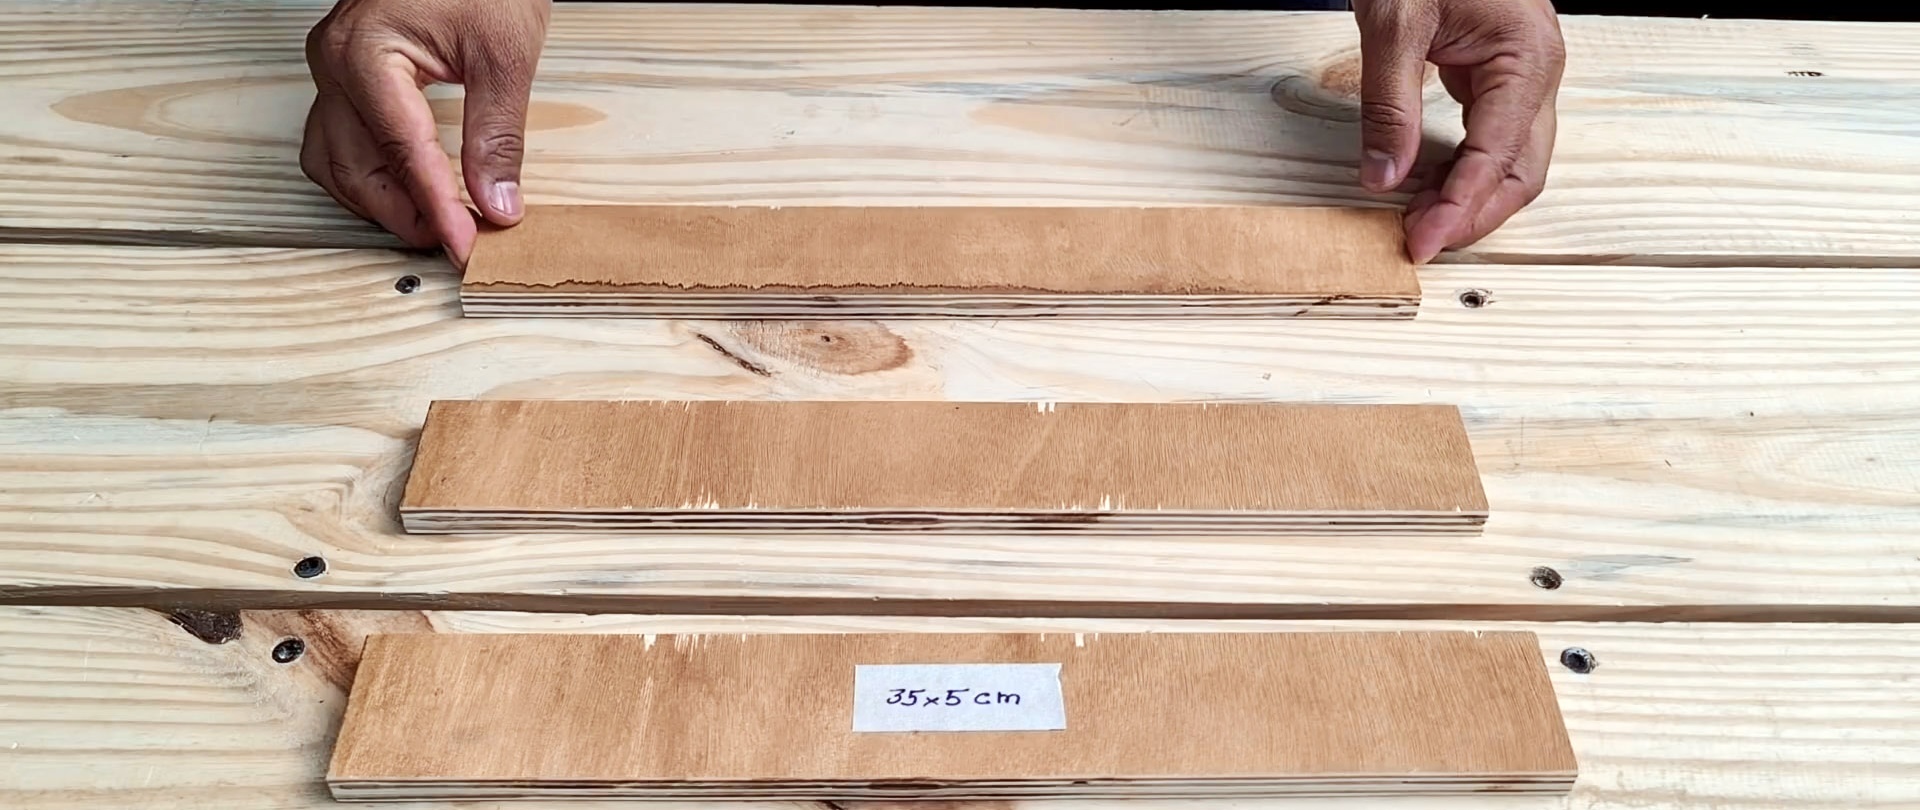
4. Parallel fence with clamp for trimming boards with a jigsaw
To assemble this device, 3 slats of 35x5 cm are cut from plywood.
In one of them, a through groove is milled at a distance of 5 cm from the edge.
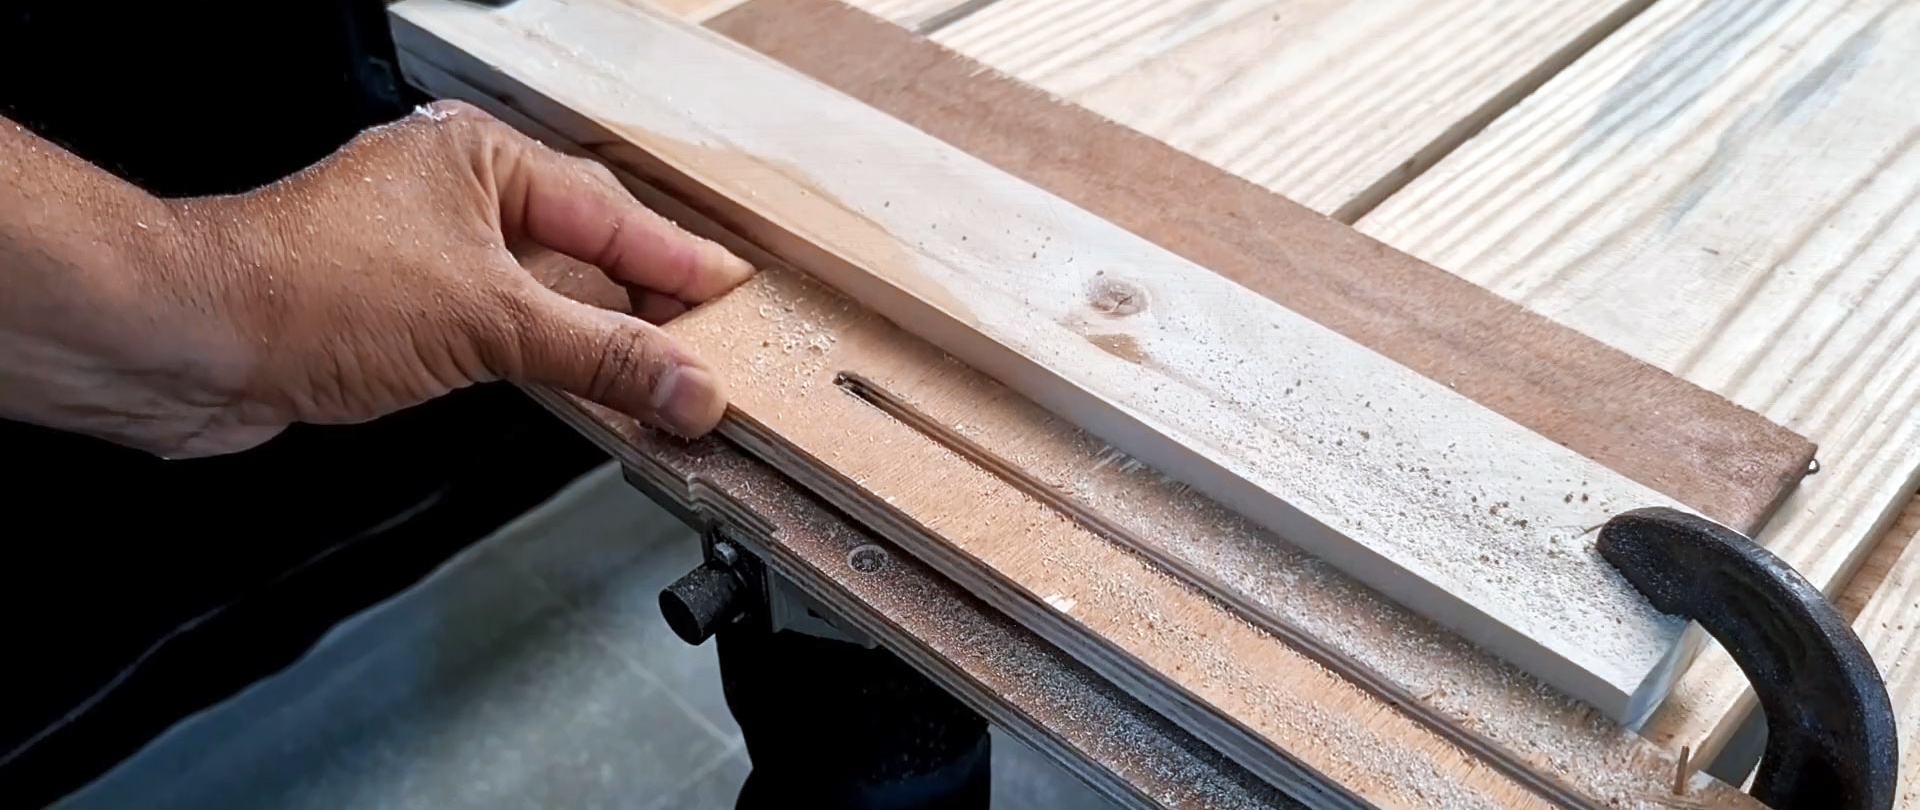
The milled blank is screwed at right angles to the second plank. You need to press a bolt into the remaining rail. Thus, with its help, the latter is connected through a groove with already fastened parts.


Boards can be clamped between the slats of the device. The parallel milled strip will serve as a guide for a jigsaw or a hand-held circular saw. Thus, the device allows you to trim lumber evenly.

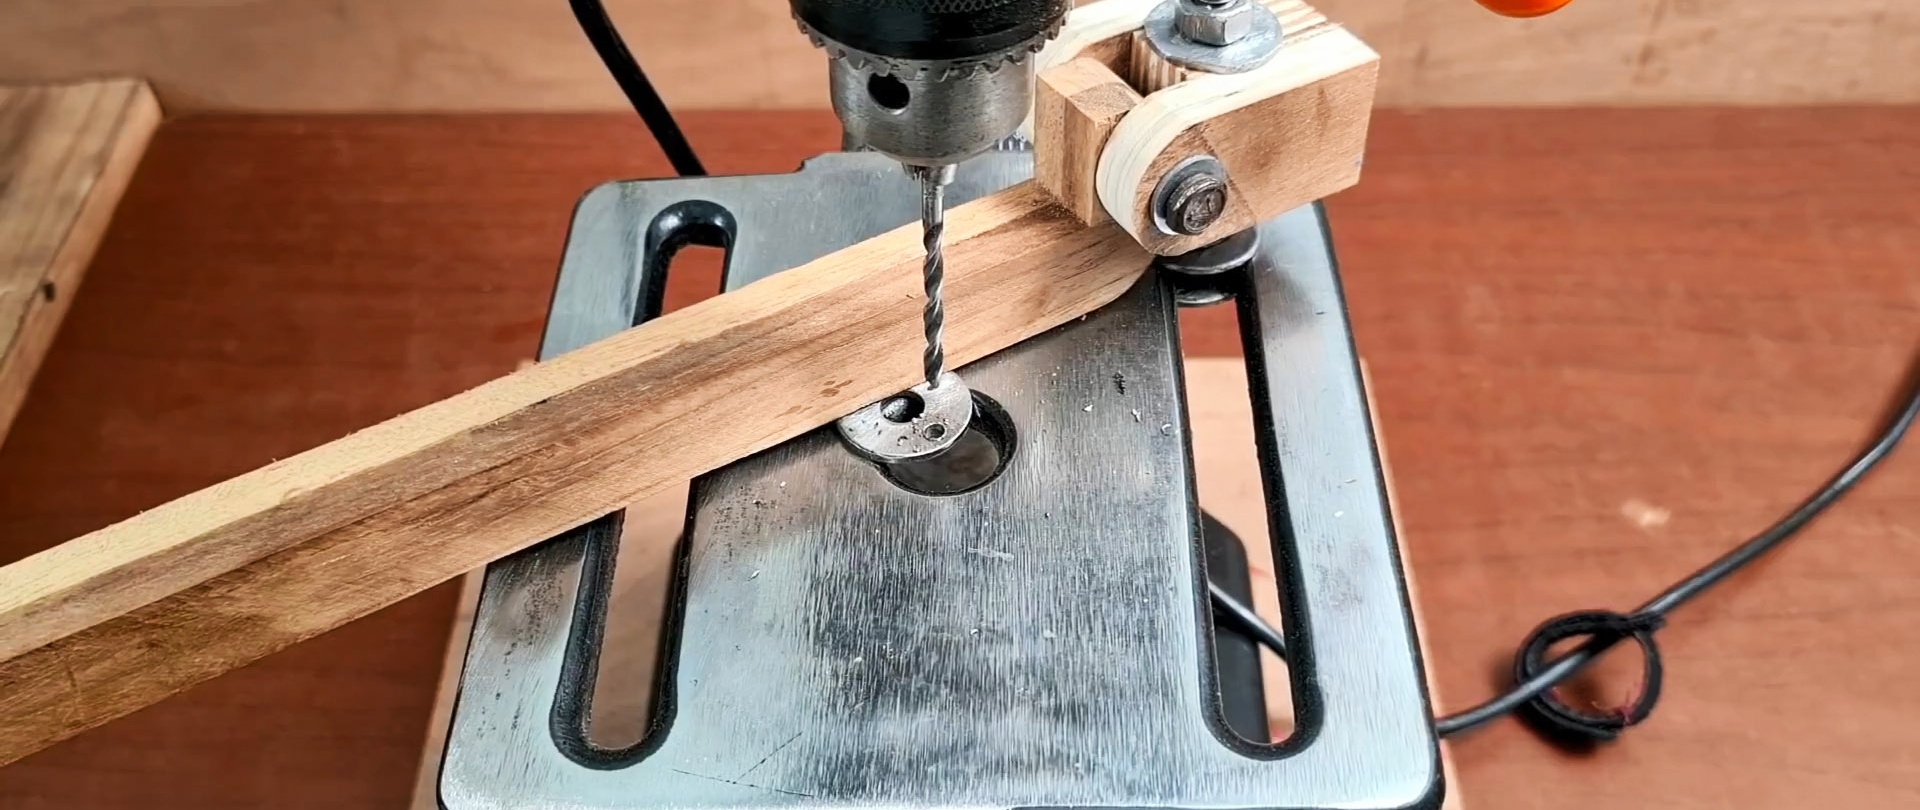
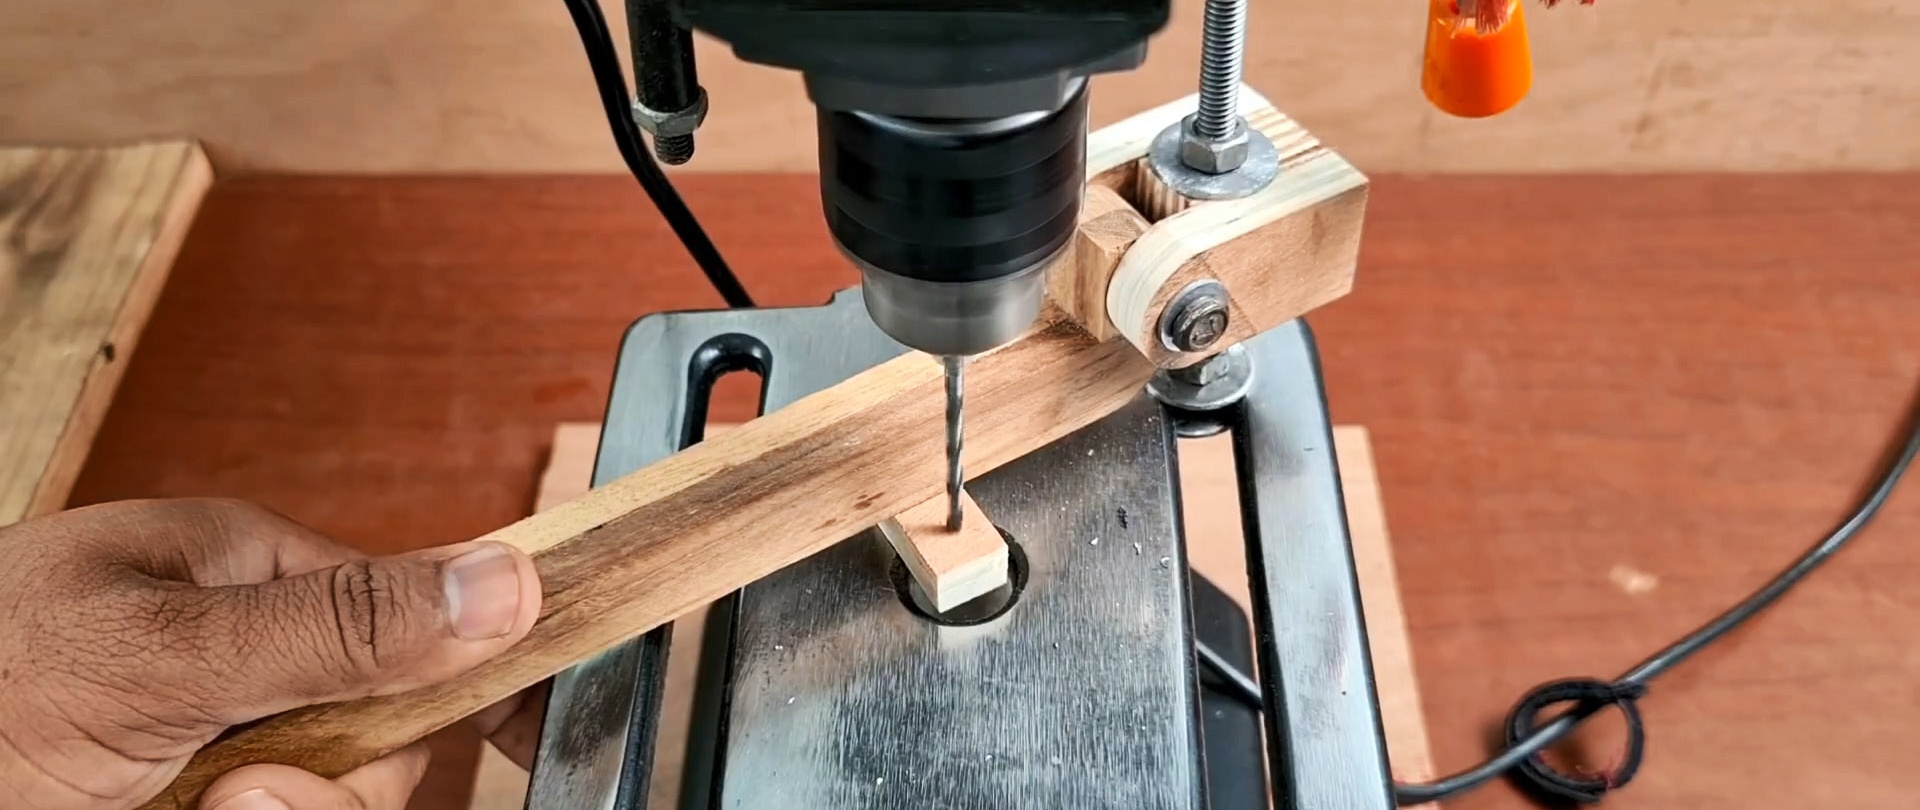
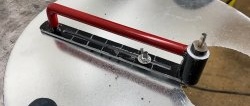
5. Pressing lever for drilling machine
It is necessary to make a bracket from plywood to mount the lever. It consists of 2 rounded eyes with a spacer between them. A hole is made in the bracket spacer. Then you need to drill the eyes coaxially.

A long bolt is screwed onto the drilling table of the machine. A bracket is installed on it and tightened using nuts. Its height is adjusted with nuts.


An L-shaped lever with a rounded outer corner is screwed to the bracket through the eyes.


It allows you to very quickly and reliably press small parts to the table when drilling. In many cases this is more convenient than using a vice.