Many people know that a photoresistor is a simple electrical element for creating a light sensor. Together with the Winston Bridge, it is often used as a machine to turn off artificial lighting. You can also use it to create a basic solar battery.
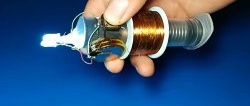
The operating principle of such a device is based on the use of a pyro-sensitive element. But there are alternative options for creating a photovoltaic structure on a conventional screw. You can see how this works by doing a short test. To do this you will need a short screw with a nut, a piece of solid copper wire, superglue, a syringe, an alcohol lamp and a small backing.
You can start making a prototype by filling a syringe with alcohol-containing liquid for convenience.
A fascinating experiment: a photoresistor made of a screw and wire
Next, you need to thoroughly oxidize the copper wire, making it a kind of diode, since copper oxide conducts electric current only in one direction and blocks it in the opposite direction.
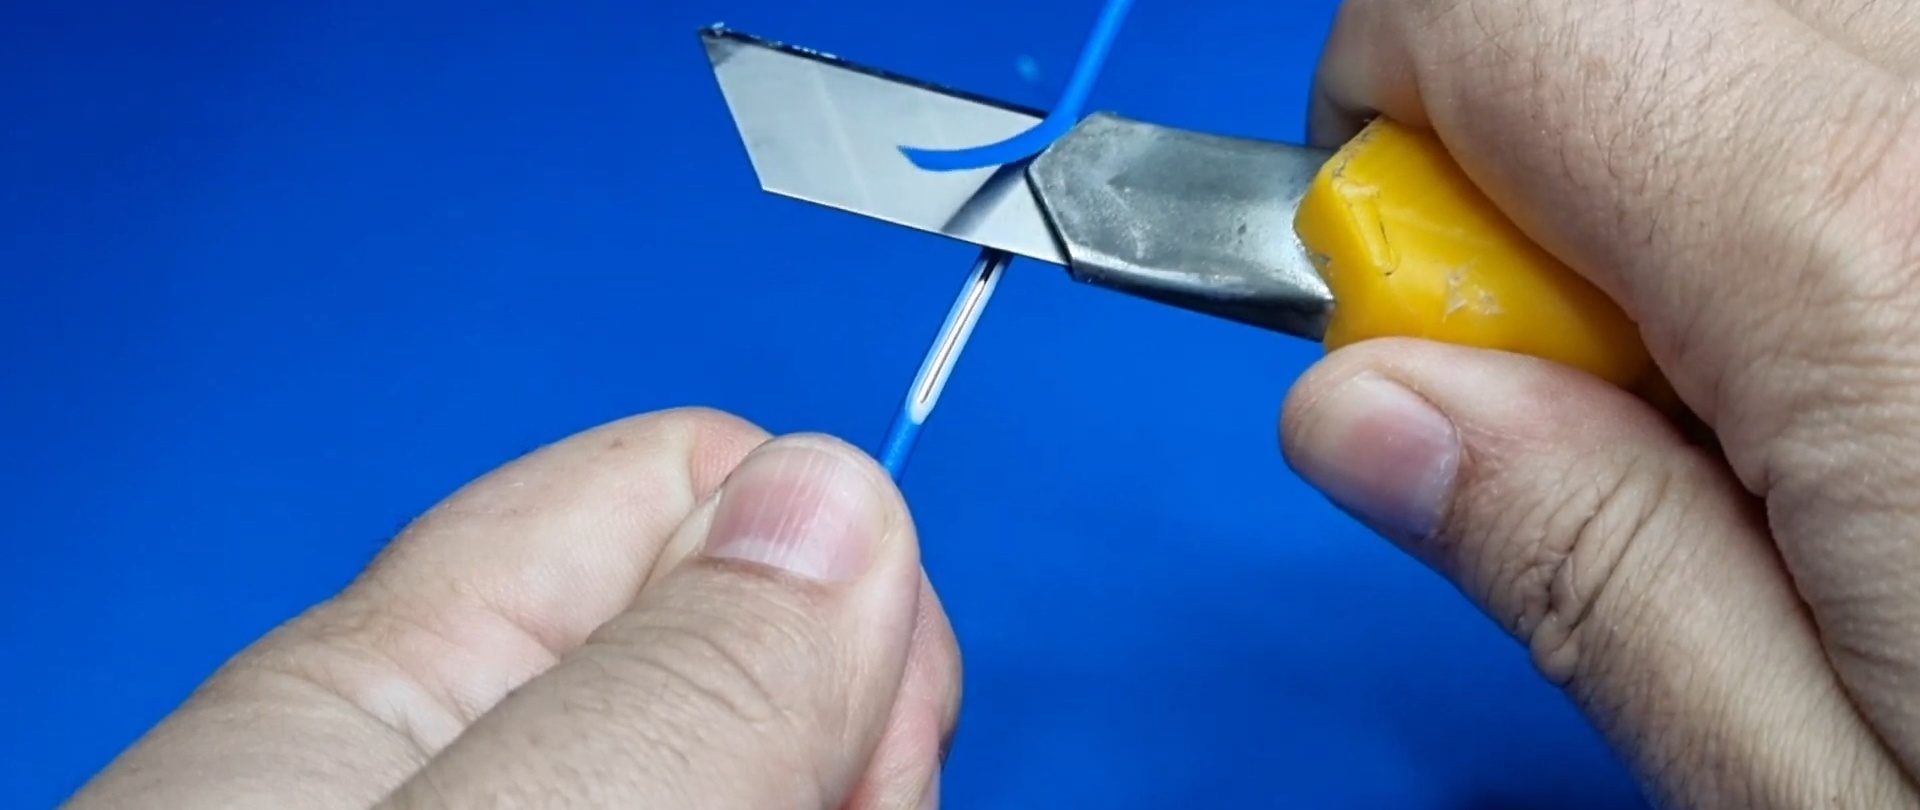
Oxidation is carried out with a flame, but burnt insulation will spoil the result, so it must be cleaned first.

The bare copper core must be burned well in the flame of an alcohol lamp until it is evenly blackened.

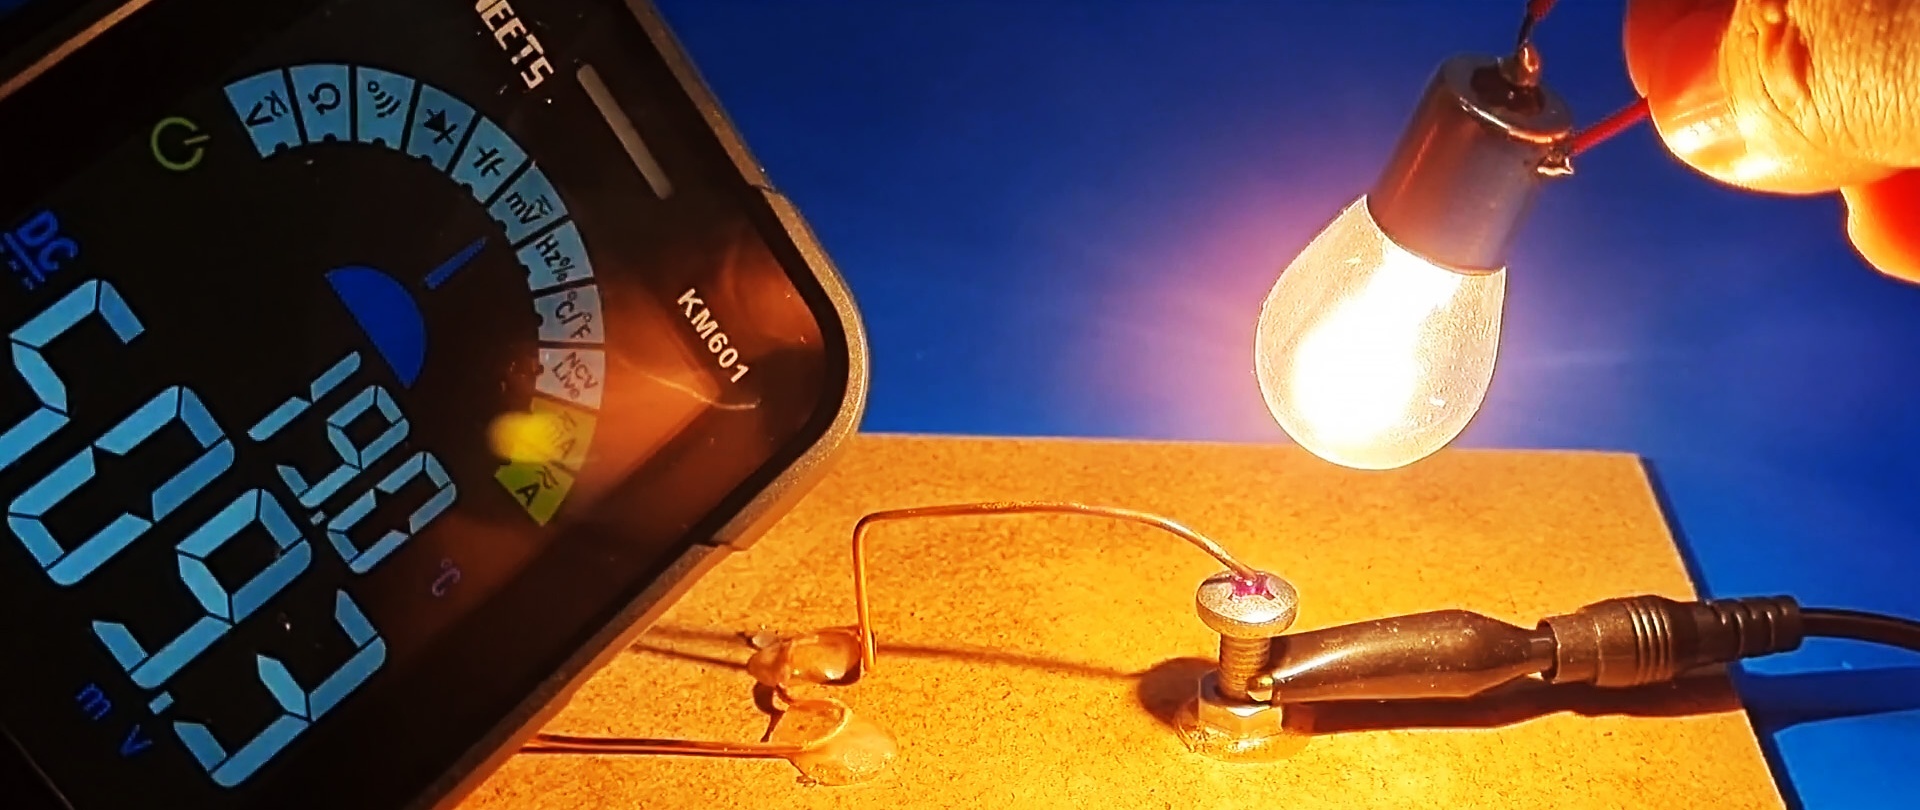
Now a screw is glued to the substrate (with the nut to the base) with superglue. The prepared copper conductor is bent so that it can also be fixed with glue to the selected base, connected to it with a measuring device, and at the same time its tip is 2-3 mm above the groove of the screw head, but does not touch the metal.

The groove is carefully filled with alcohol. The liquid is poured from a syringe, since it is necessary that its level coincides with the upper plane of the head.

Now all that remains is to connect a millivoltmeter to the free end of the wire and the screw in order to measure the readings with the device under various conditions.


By shading the screw with your hand from the light, you can observe that the voltage drop in the circuit, depending on the illumination, is 300-400 mV.

If you use an artificial light source (in this case an ordinary light bulb), you can achieve a difference of 1/5, that is, about 1000-1300 mV.

As a result, we can say that we have obtained the required structure. In it, alcohol located between the screw and the copper wire creates voltage under the influence of light. The value of this voltage may vary depending on the lighting. Significant distortions in the measurements are caused by alcohol fumes, therefore, to obtain a more effective result, it is necessary to isolate the screw head and the tip of the copper wire associated with it in a sealed environment.