The best solution for controlling lamps is a photo relay. It regulates the operation of lighting devices and saves energy. And in this master class I will show you how to assemble a photo relay no worse than the factory one.
A photo relay, in short, is a device that responds to changes in lighting. If you connect it to lighting, you can control whether the lamps turn on and off. Most often, a photoresistor is used in a photo relay. In daylight, its resistance drops, the relay is open, and the lamp does not light. When twilight sets in, the photoresistor increases the resistance and (depending on the setting made by the trimmer resistor) the relay closes, thereby turning on the lamp.
Creating a photo relay:
The photo relay was made according to this scheme: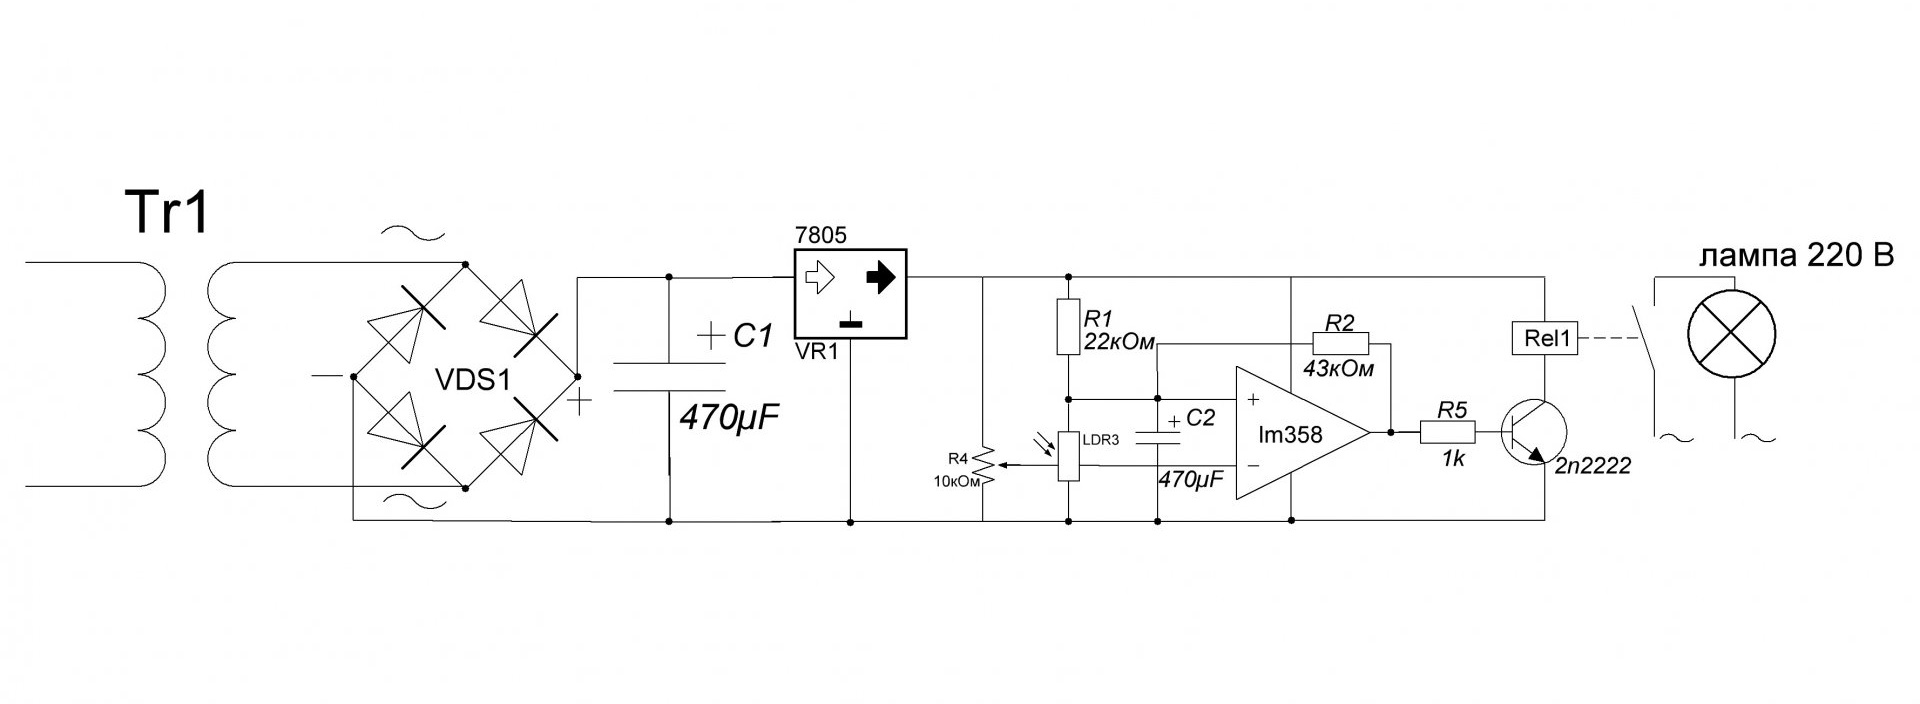
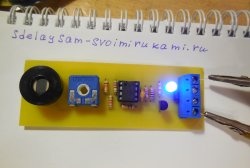
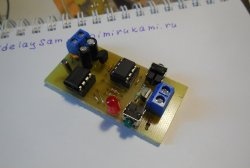
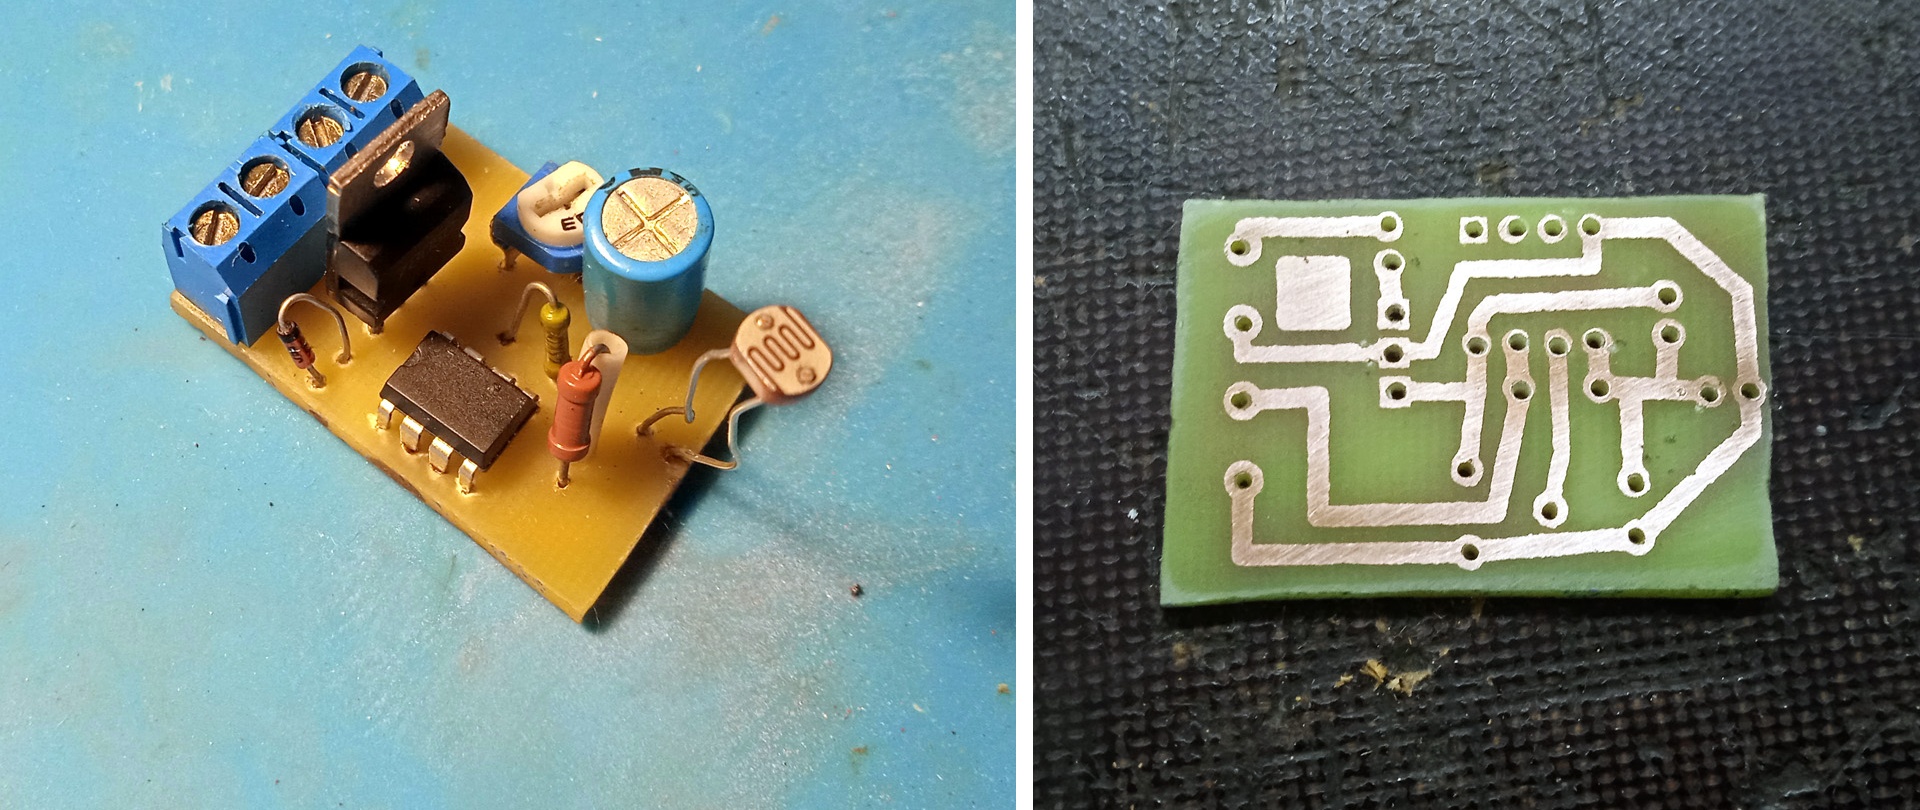
On the board I decided to place only a 7805 voltage stabilizer (its use is not necessary, and can be replaced with other 78xx) and the sensor itself, which includes an lm358 microcircuit (an operational amplifier in comparator mode), a photoresistor, a trimmer resistor and wiring for them. I soldered the power supply and relay with transistor separately using surface mounting. At the end of the article there will be an archive with the board and circuit.

The board was manufactured using LUT methods.And it was etched in a solution of peroxide with citric acid and salt.

After which the elements were sealed.

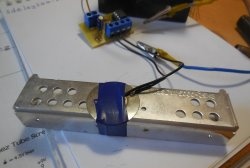
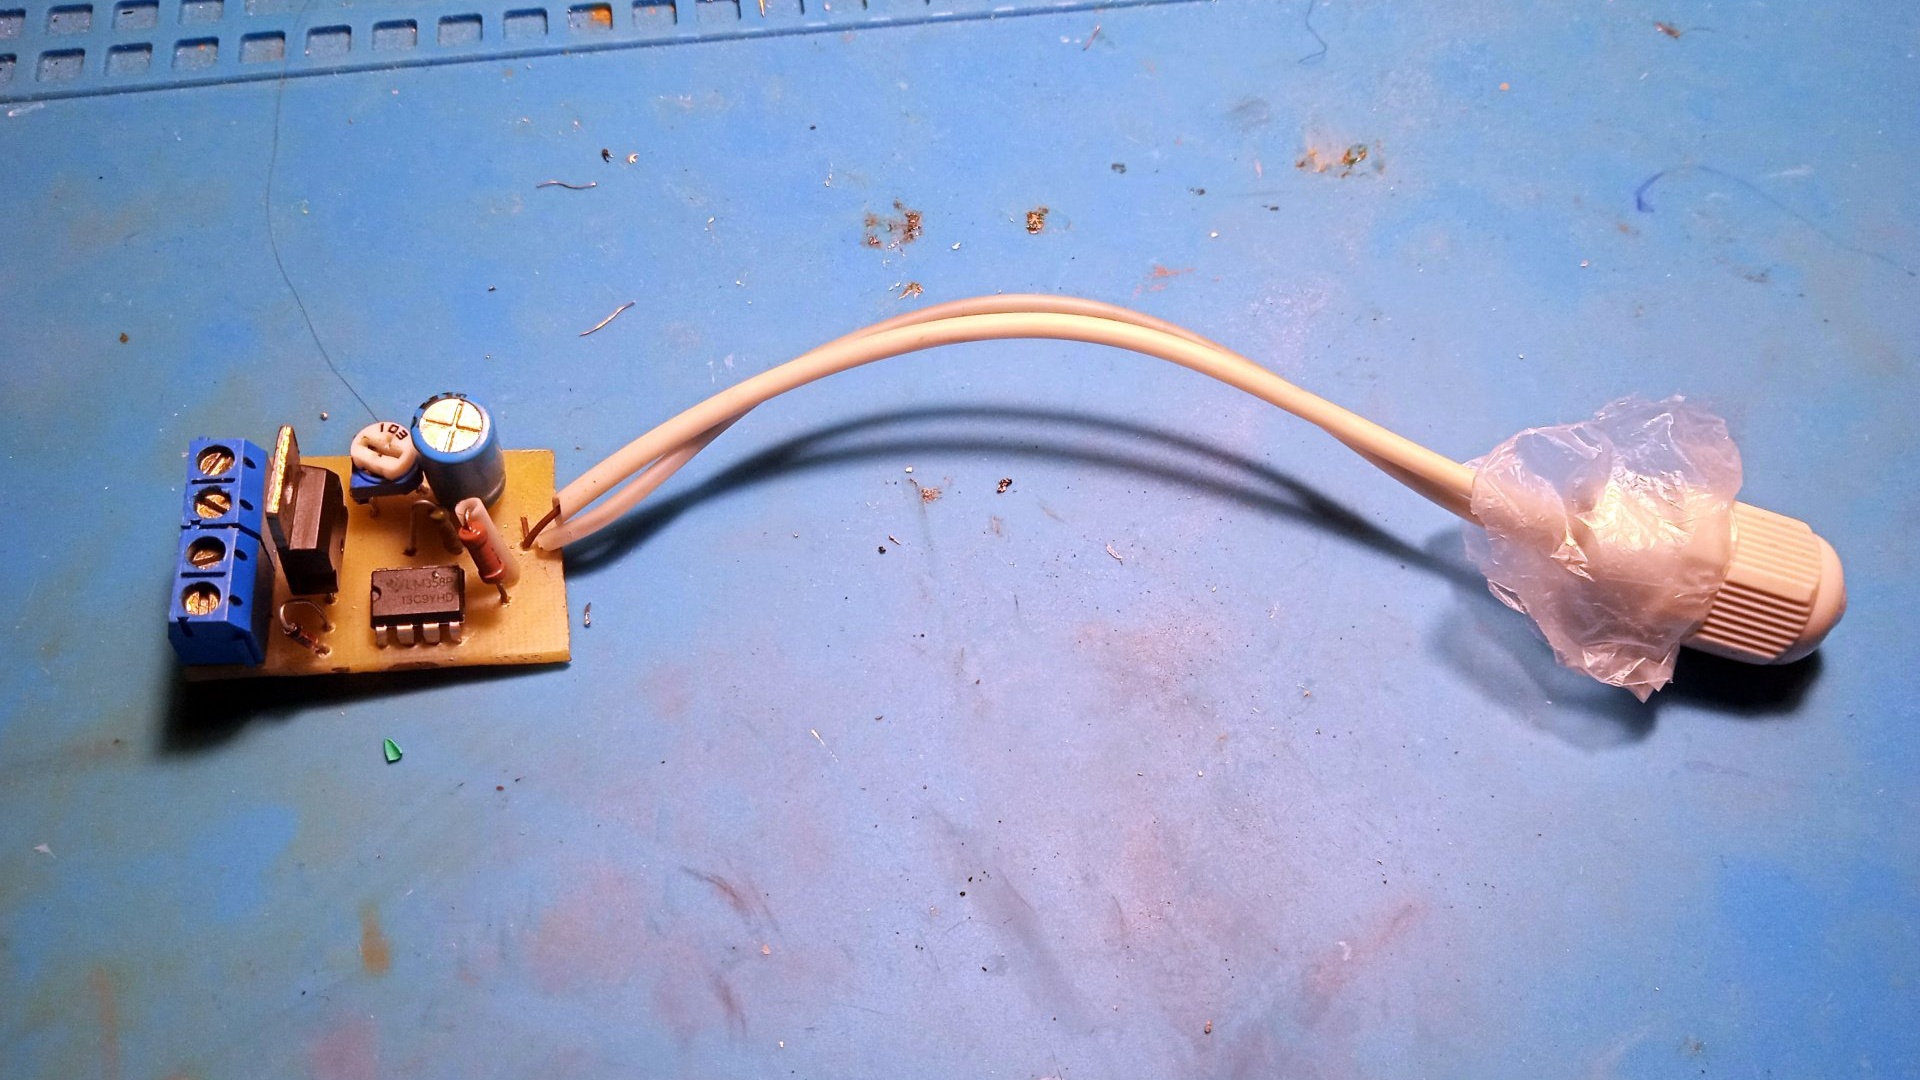
The photoresistor was carried out on wires in cambrics, and the sensor itself was placed in this kind of fastening for wires (see photo), I don’t know the name of the fastening.
The power supply is made on a case transformer with an output voltage of 11 Volts, a diode bridge in the case and a capacitor.

I bought a junction box in Leroy. There were racks at the bottom that interfered with the fastening of the elements. So I took a piece of getinax and secured it to the bottom of the box.

The board with the sensor was secured with one screw, and the power supply with the relay was secured with zip ties. For convenient power connection and controlled load, I bought Wago connectors.


About the device:
This photo relay uses hysteresis, which allows you to get rid of flickering of the lamp during sunrise and sunset. The capacitor on the board serves as protection against false alarms, that is, it sets the delay time for turning the lamp on or off. Its capacity can be any.
The board can be supplied with voltage from 7 to 20 Volts.
The relay in this circuit can be replaced with a triac, which will be more durable and practical.
Photo relay installation:
- The sensor (photoresistor) must be installed so that it is exposed to daylight.
- Any other artificial light sources should be located as far as possible from the sensor in order to avoid false alarms.

Watch the video
The video shows the operation of the device, where I showed how the on and off delay works.
Archive with signet and diagram: