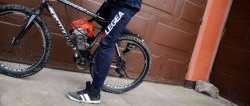
Cyclists, going downhill, use the property of an overrunning clutch installed on the axle of the rear wheel - it allows the wheel to spin while the pedals are stopped. Using such a clutch, you can make a small electric drive that will move the bicycle forward when the cyclist himself is resting.

Materials and tools
During the work process you will need the following consumables and tools:
- An electric motor with a standard hub is best suited starter motor from a small car or motorbike.
- Driven (“small”) sprocket.
- Pedal assembly with drive sprocket.
- Chain.
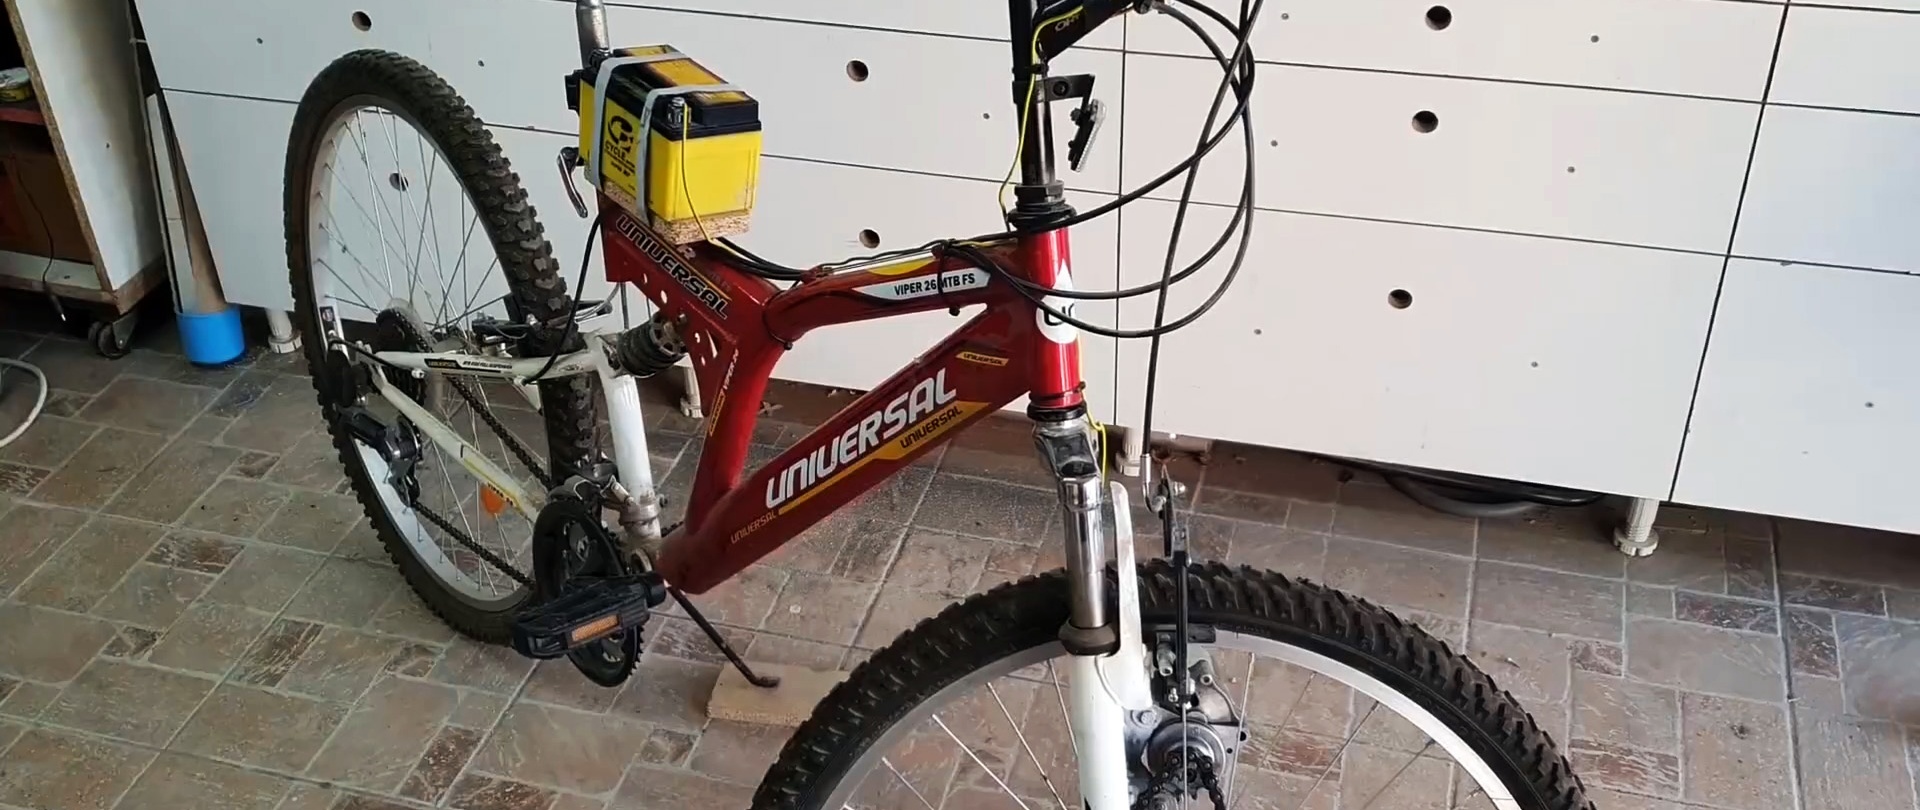
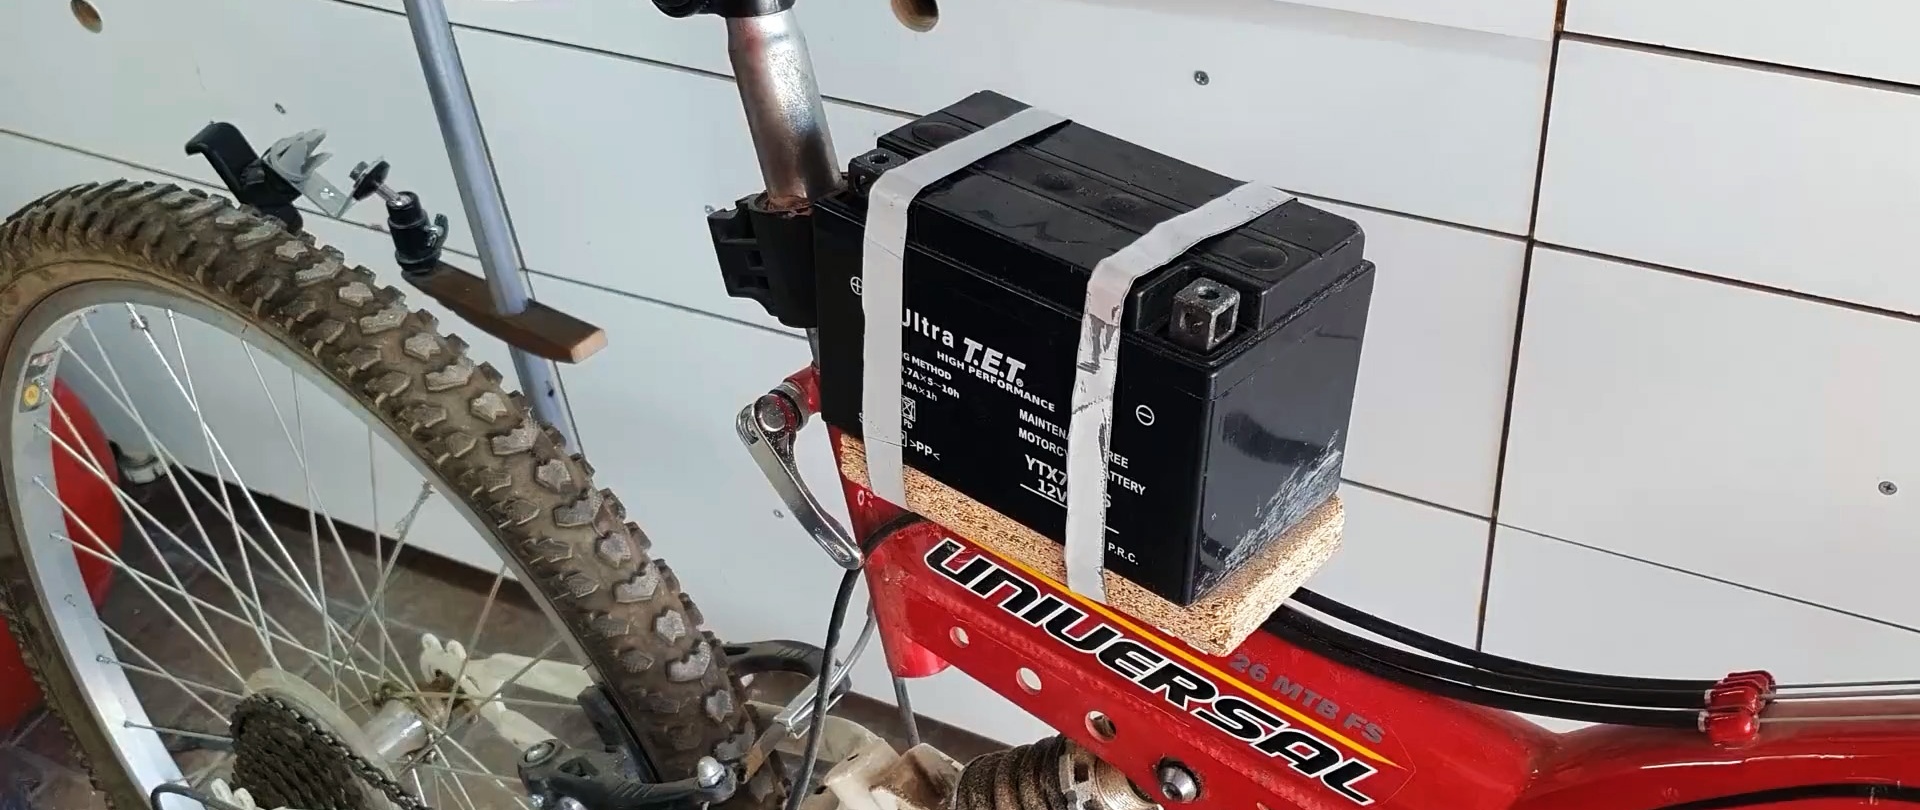
- 12 V battery with a capacity of 35-40 A/h.
- Sections of electrical wires, cross-section from 5 sq. mm.
- Bolts for mounting the electric motor.
- Steel plate to create a motor mounting flange.
- Two large nuts for making spacer bushings for the front axle.
- A piece of board or chipboard for the base for the battery.
- Pieces of steel tape for clamps securing the battery.
- Small switch.
Spacer bushings installed on the front axle can be made from large nuts by drilling out their threads, or you can select ready-made ones.
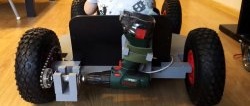
The process of making a simple electric drive for a bicycle
Choose a suitable electric motor - it can be taken from a car or a large motorcycle. The motor power must be at least 350 W, at a voltage of 12 V.

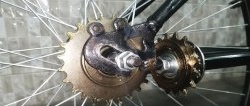
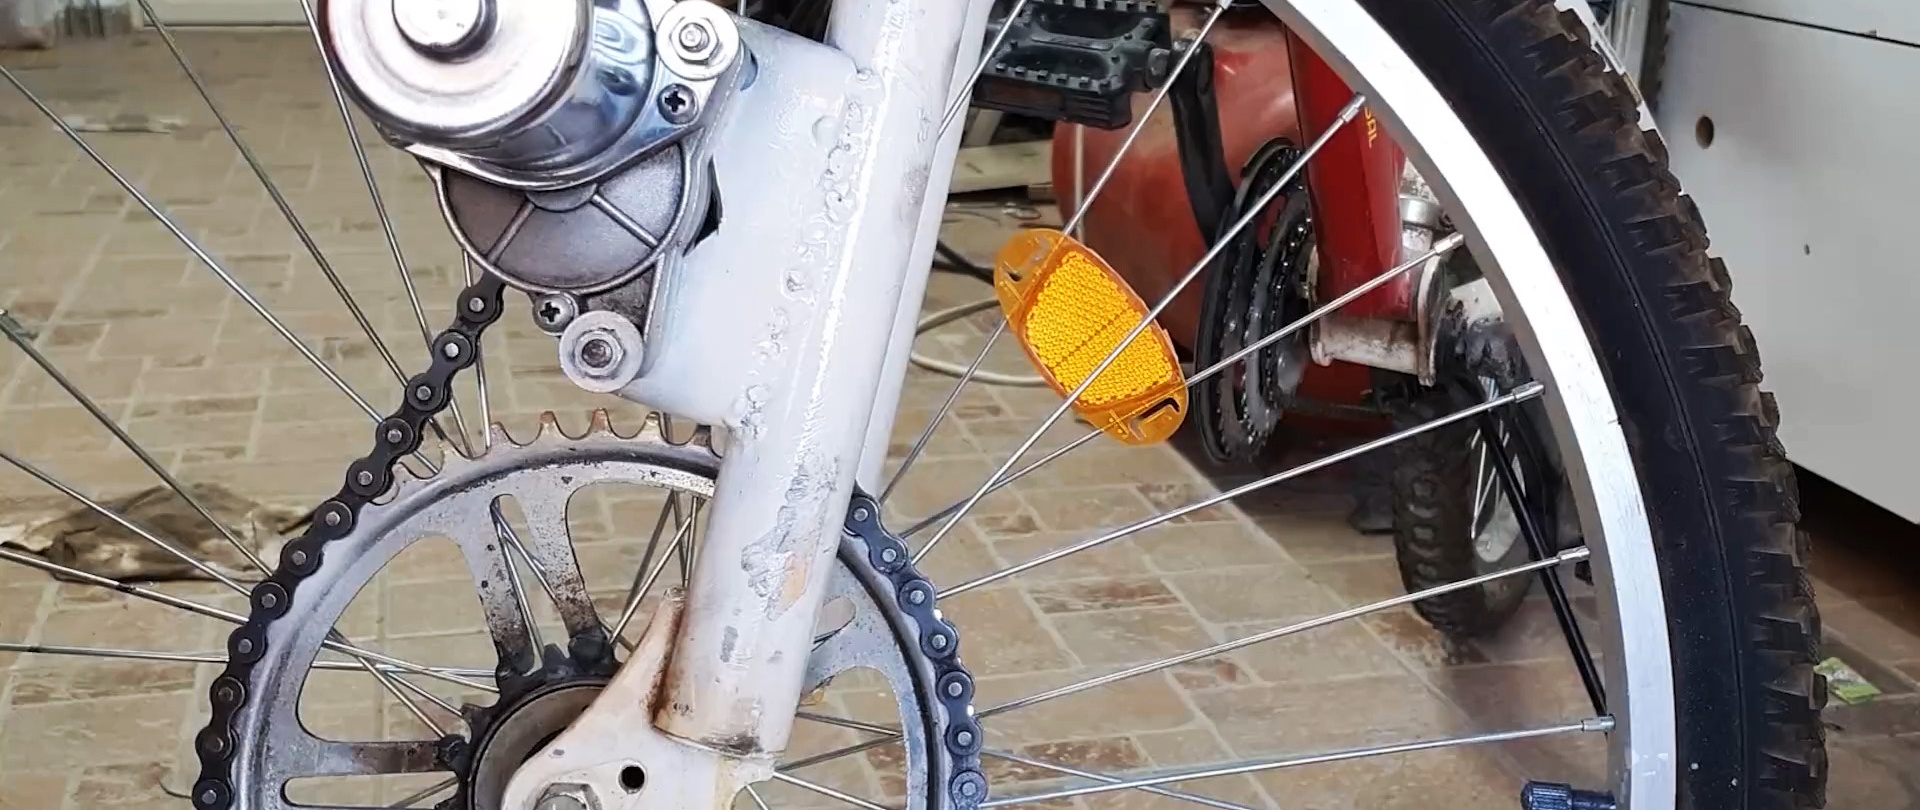
To assemble the drive, the driven sprocket is welded to the standard hub of the electric motor.

By attaching the motor to the front fork of the bicycle, determine the size of the piece of metal required to mount the motor. Cut the plate to the required size and attach it to the motor.

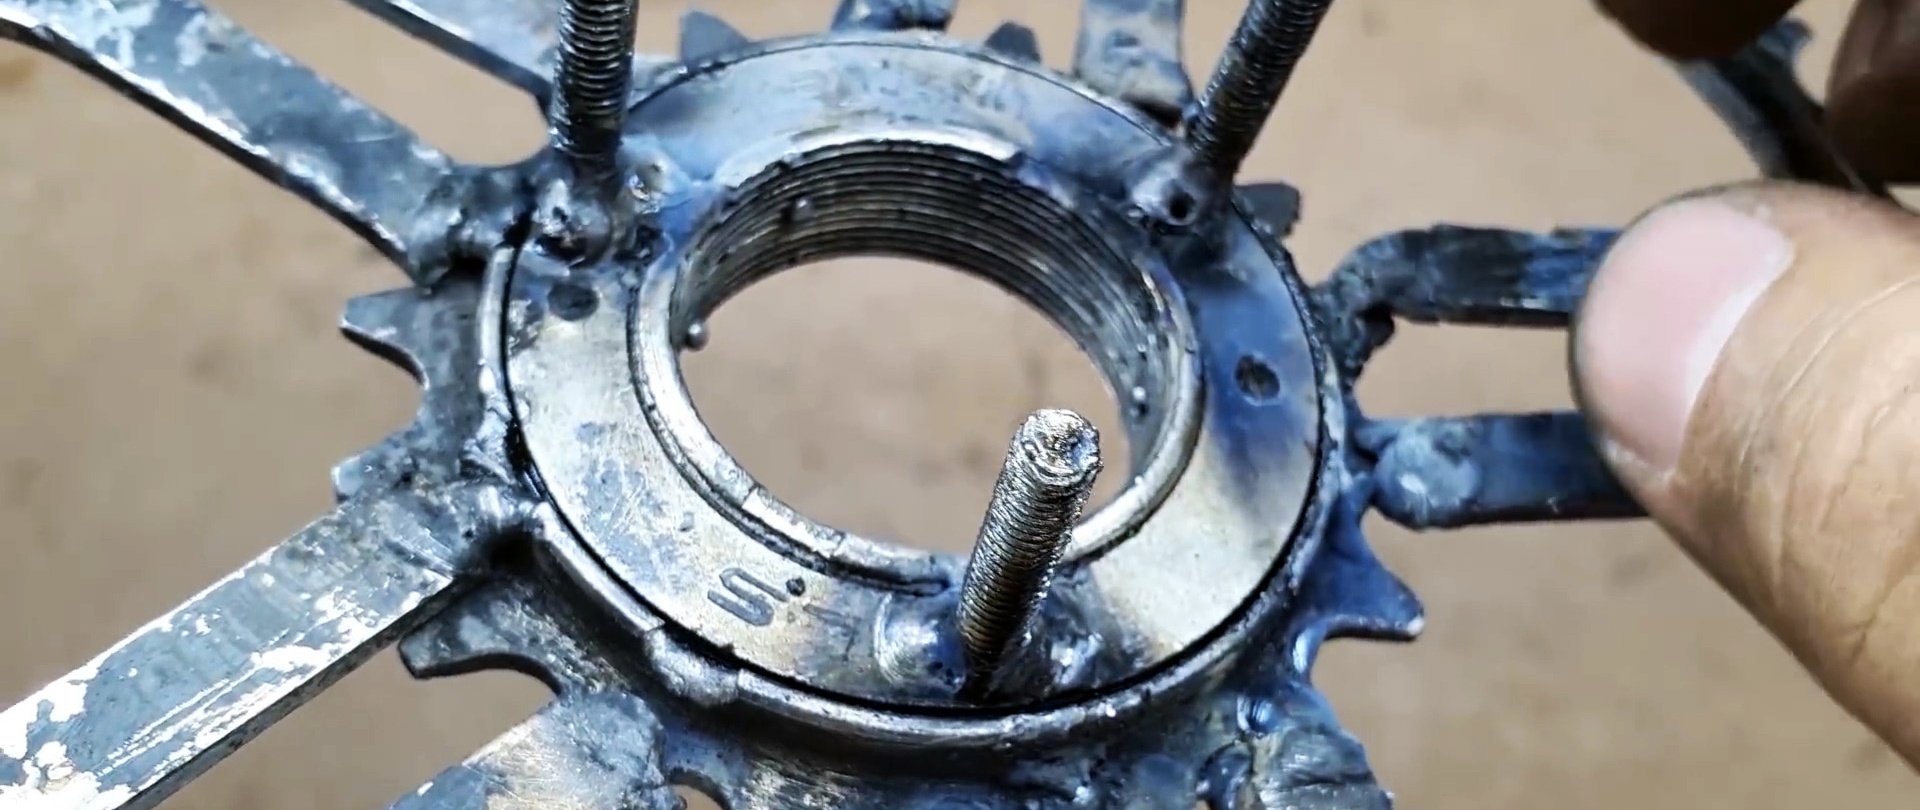
The drive wheel is made:
- an asterisk is cut off from the pedal assembly;
- an overrunning clutch is welded to this sprocket;
- remove the front wheel from the bicycle;
- attach an asterisk with a coupling to it and mark the holes in the asterisk.


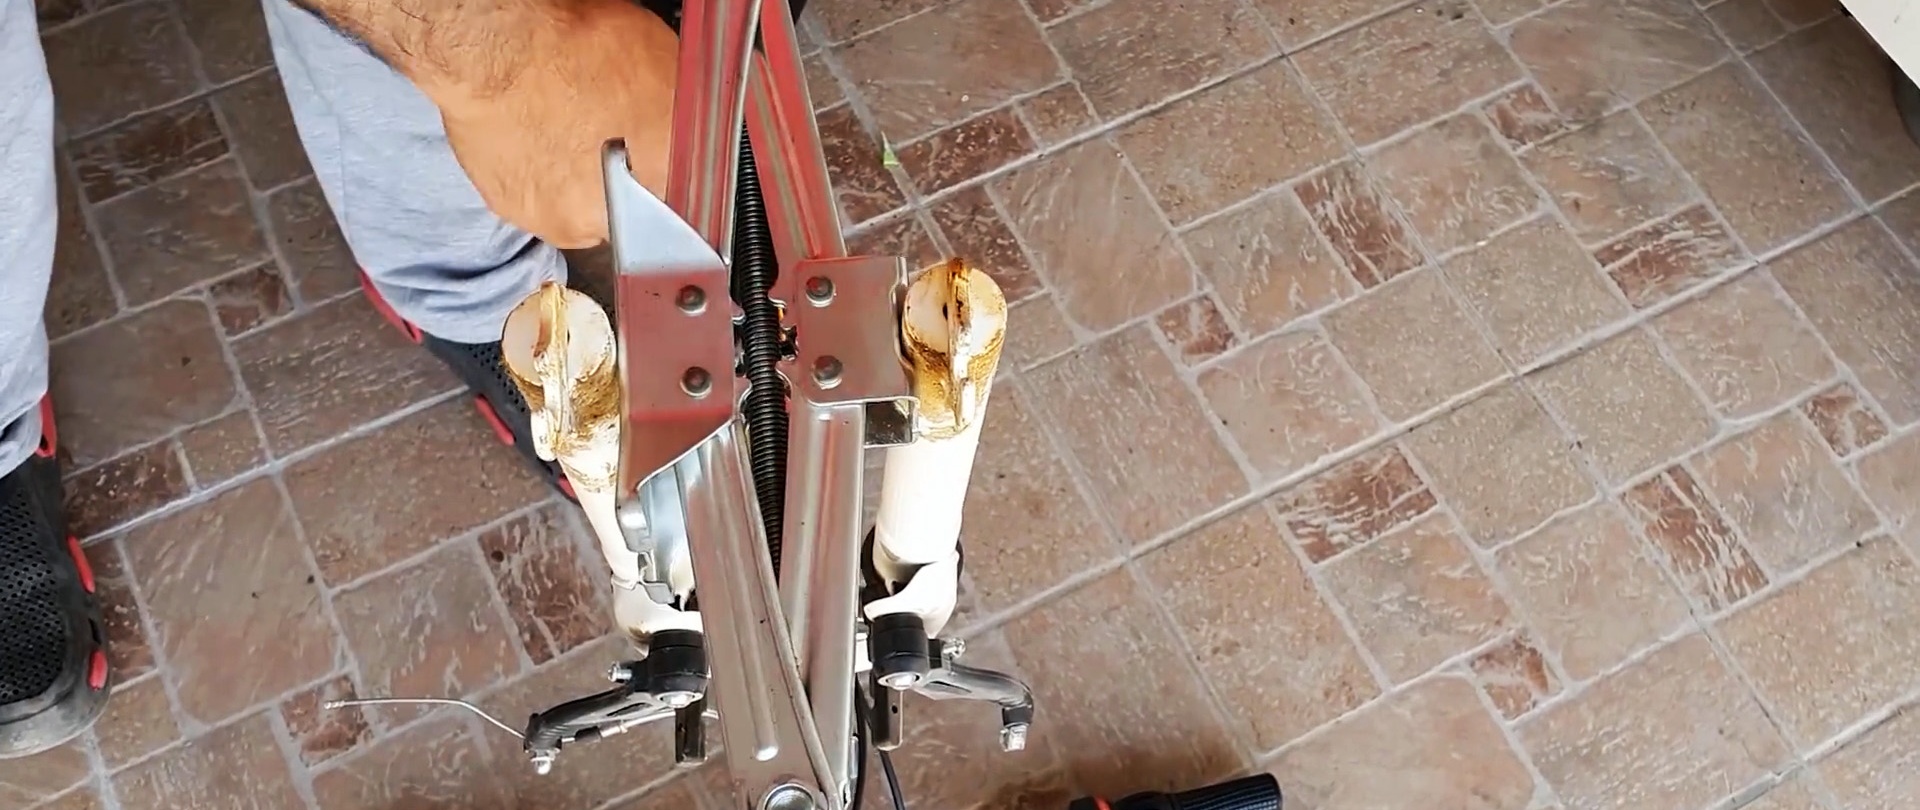
The locations for drilling holes are chosen so that the mounting bolt passes through the triangle formed between two adjacent spokes.
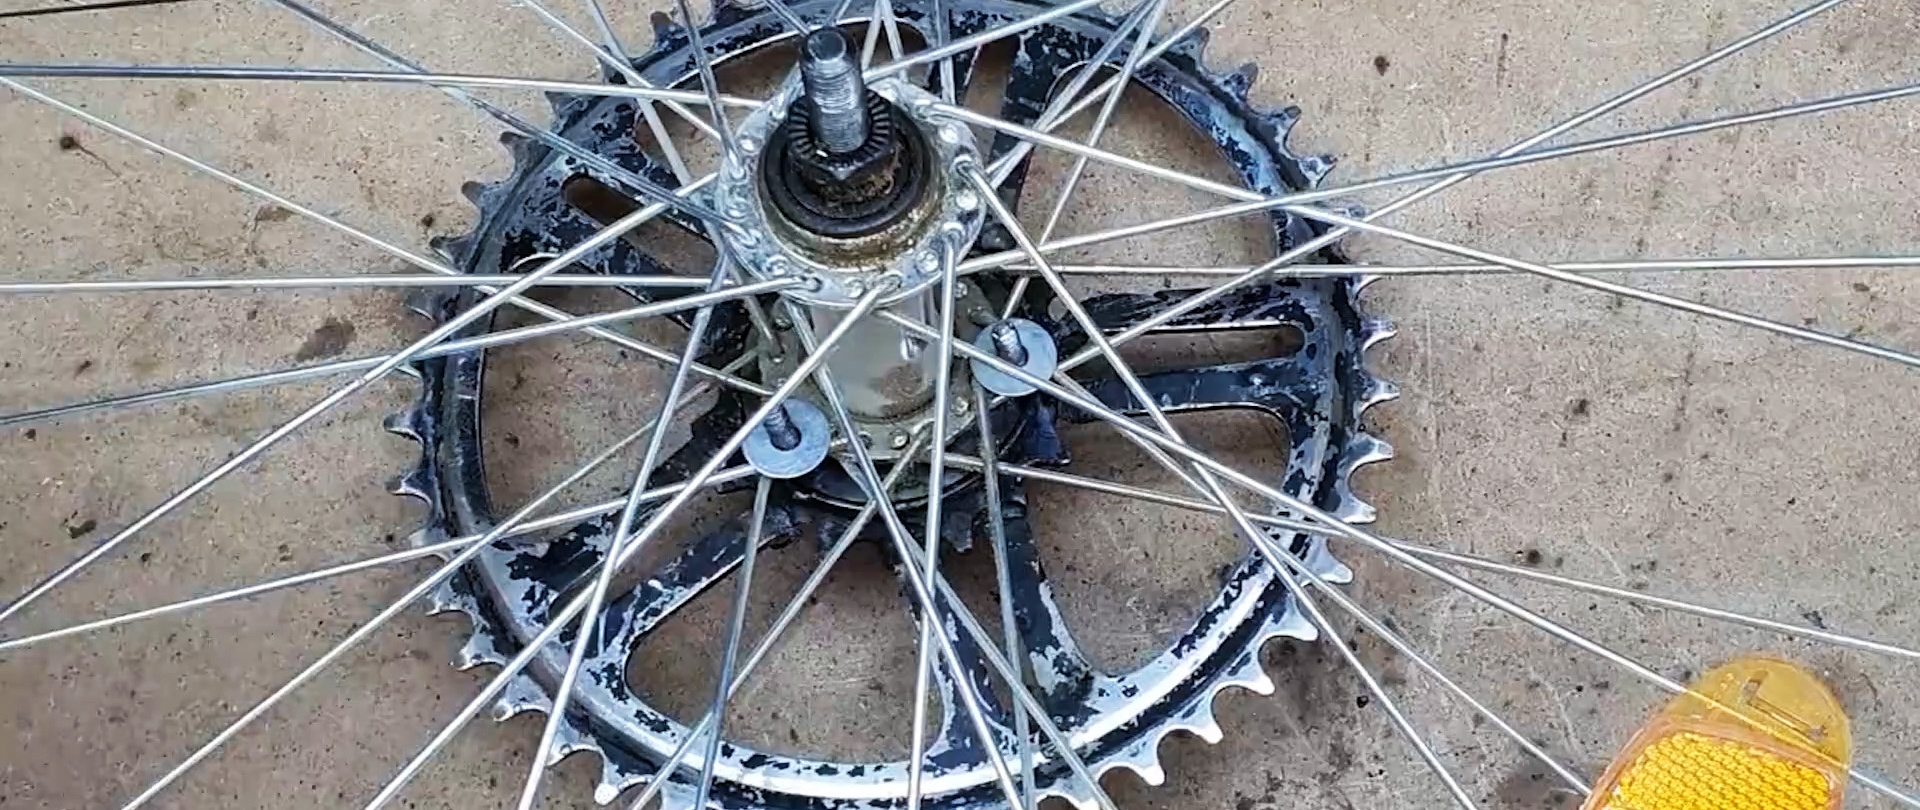
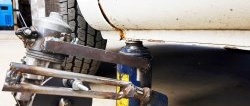
By attaching the wheel to the fork, measure the size by which you need to extend the front fork. Unbend the fork with a jack and install the wheel with bushings and secure it.

By attaching the motor with the plate to the future installation site, measure the length of the chain. If necessary, shorten the chain. They put it on the wheel sprocket, then on the motor sprocket and weld the mount to the wheel fork. Covering the motor with a sheet of paper, clean and paint the welding area.

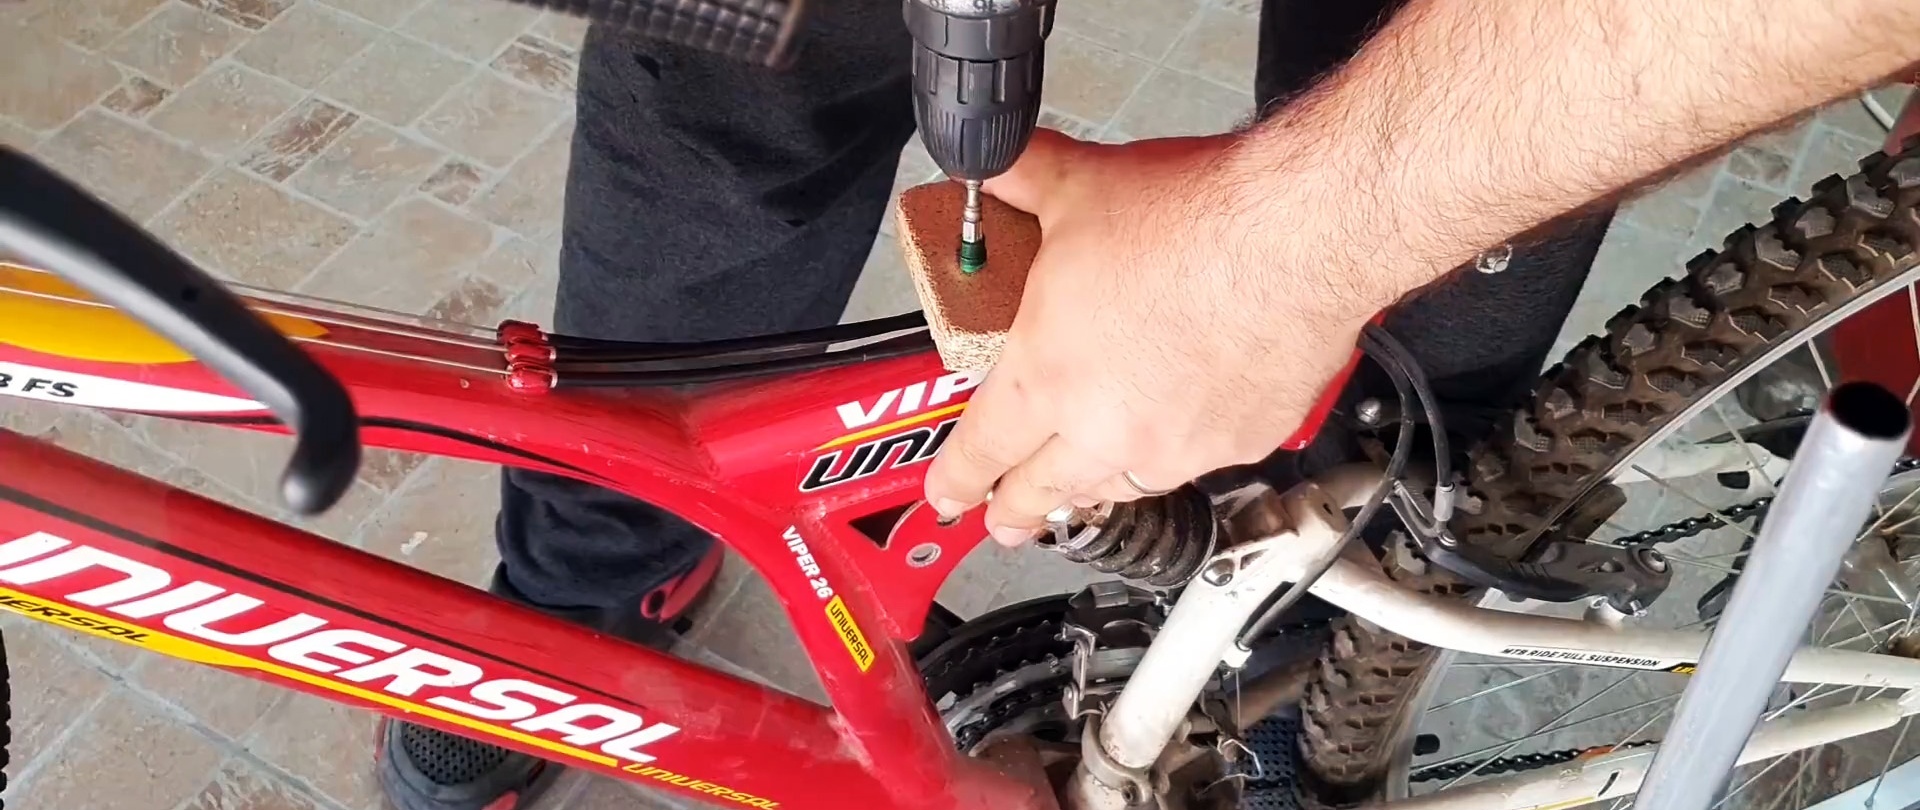
On the bicycle frame, under the seat, they make a platform for installing the battery, and secure it to it with clamps. A short piece of wire from the battery negative is attached to the bicycle frame, clearing the mounting area of paint, thereby creating a “ground” (“minus” of the electrical circuit).

A switch is attached to the handlebars of the bicycle and all elements of the electrical circuit are connected - the “plus” of the motor, the switch, the “plus” of the battery.