While flipping through a well-known online store not long ago, I came across the most curious thing: organizer stand for computer monitor. The thing seemed simple - a few planks and a handful of screws, but it turned out to be very useful and roomy.
Is it true, order this organizer in the store I was in no hurry. The material from which the organizer was made did not inspire confidence. In addition, reviews from buyers who had the imprudence to purchase a stand were very unambiguous regarding the seller and his activities. And the price for such a simple product turned out to be somewhat overpriced.
However, the idea itself seemed good to me. And you can use any material in manufacturing that is more reliable and affordable. Well, in my opinion, anyone can fasten several boards with self-tapping screws and spray the resulting product with spray paint.
Will need
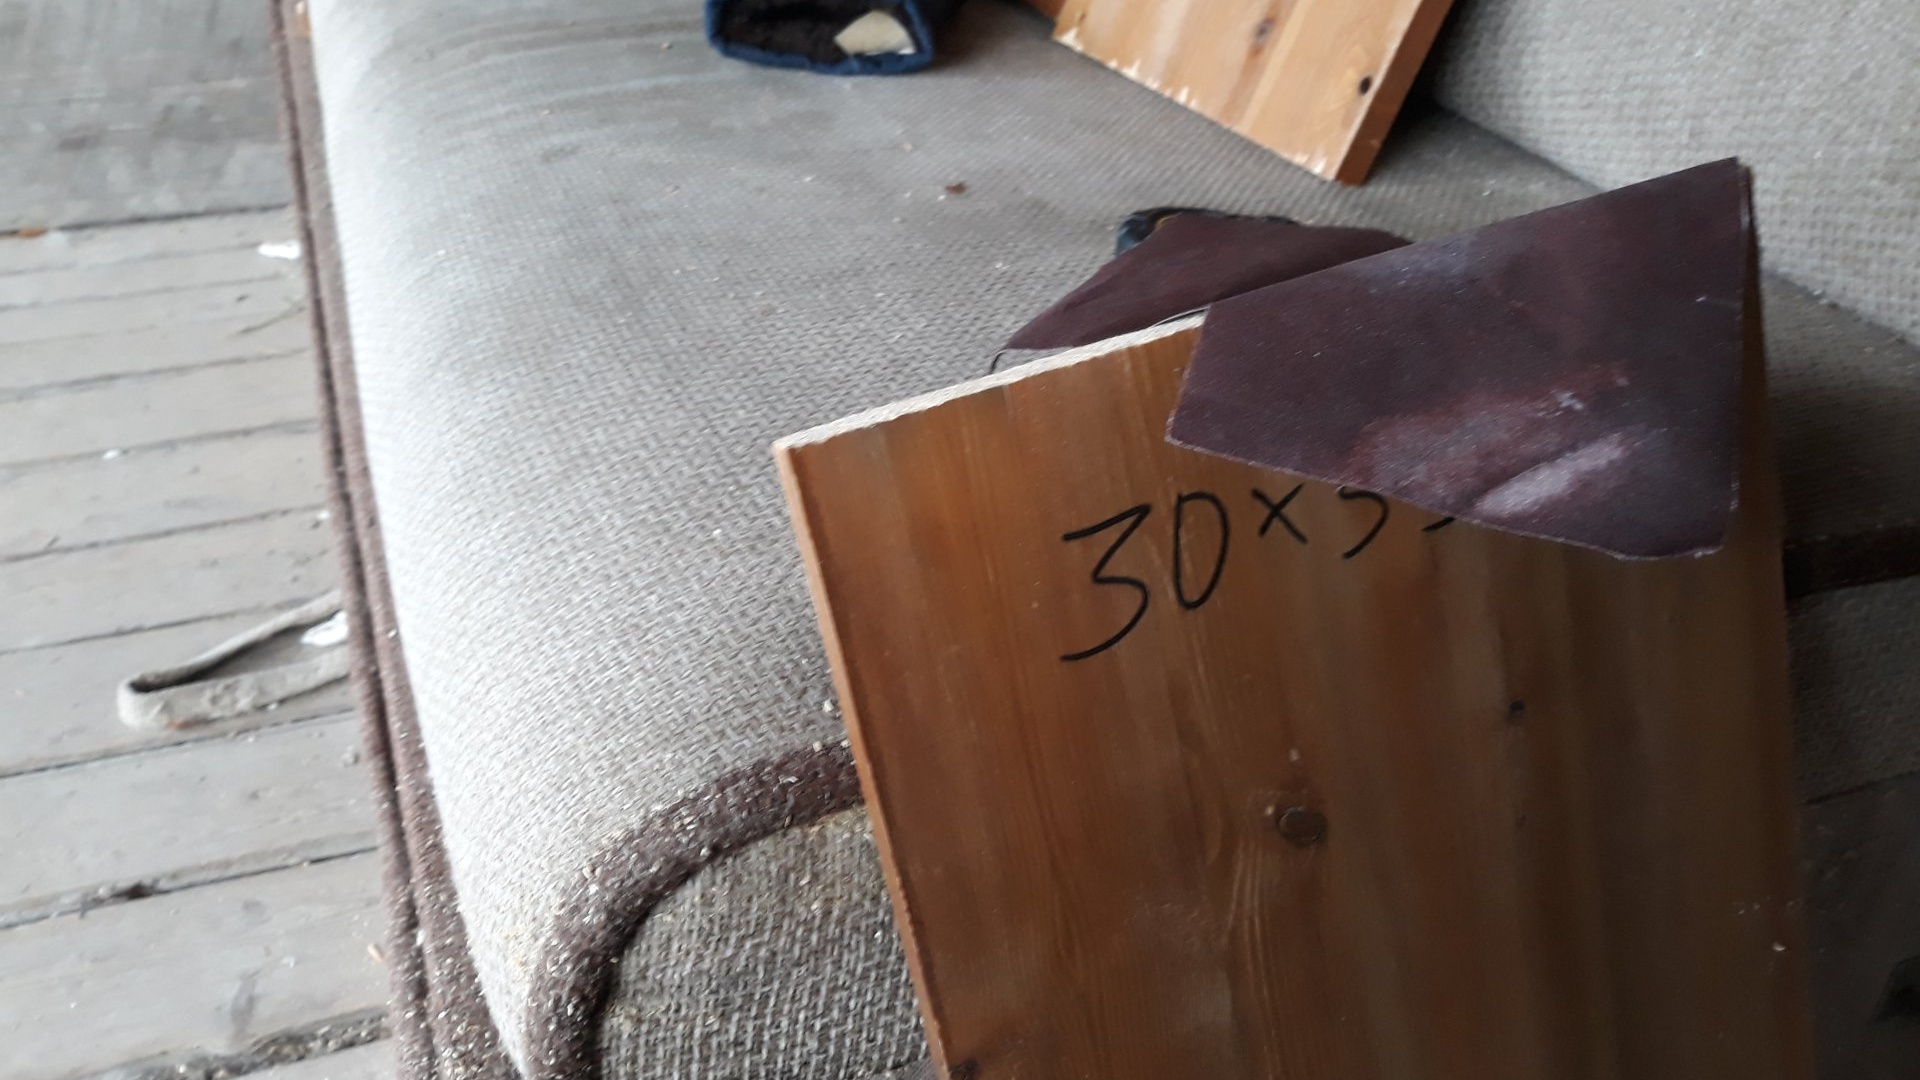
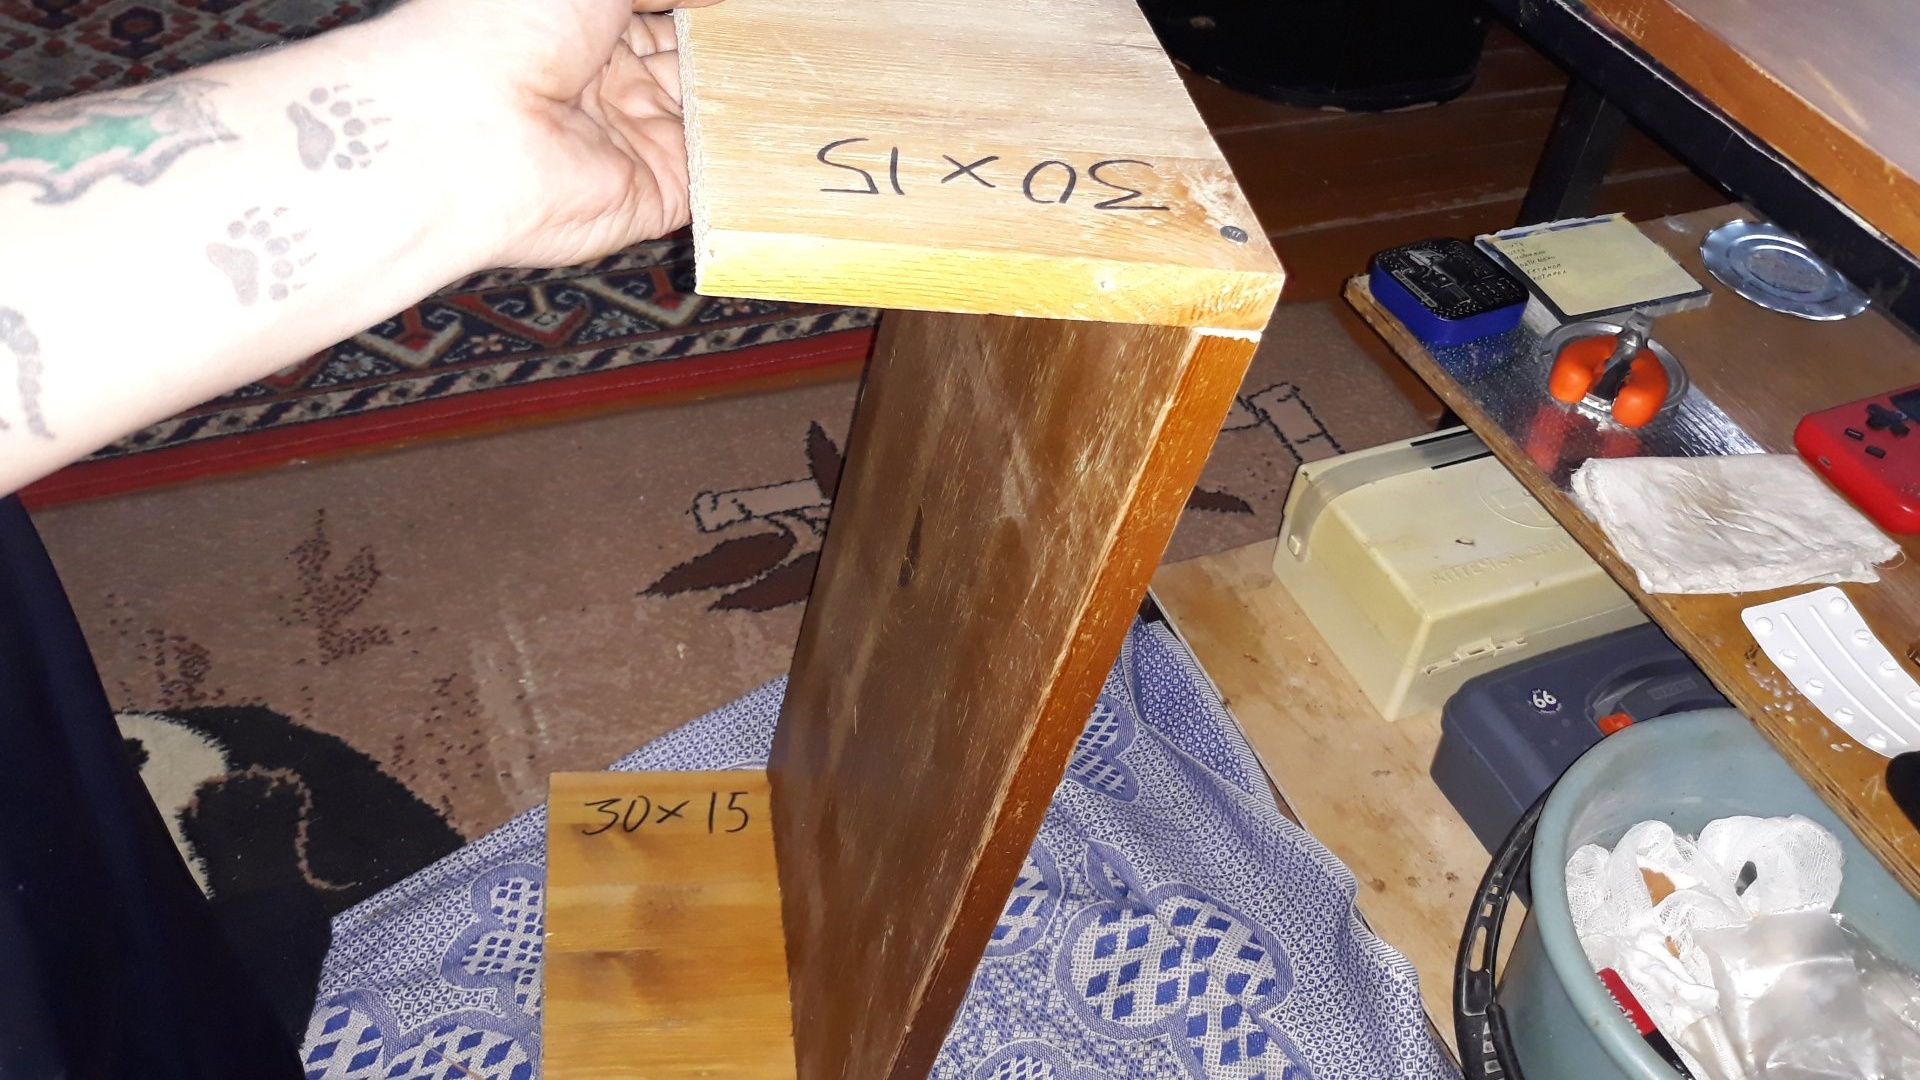
- Two boards 30×50×1 cm.
- Two boards 30×15×1 cm.
- Two planks 30×4×1 cm.
- A can of white acrylic paint (for wood).
- Marker.
- Roulette.
- 2 mm drill.
- Wood screws 3.5×32 mm.
- Screwdriver.
- Paraffin candle.
- Knife.
- Lighter (preferably turbo).

Making an organizer stand for a monitor
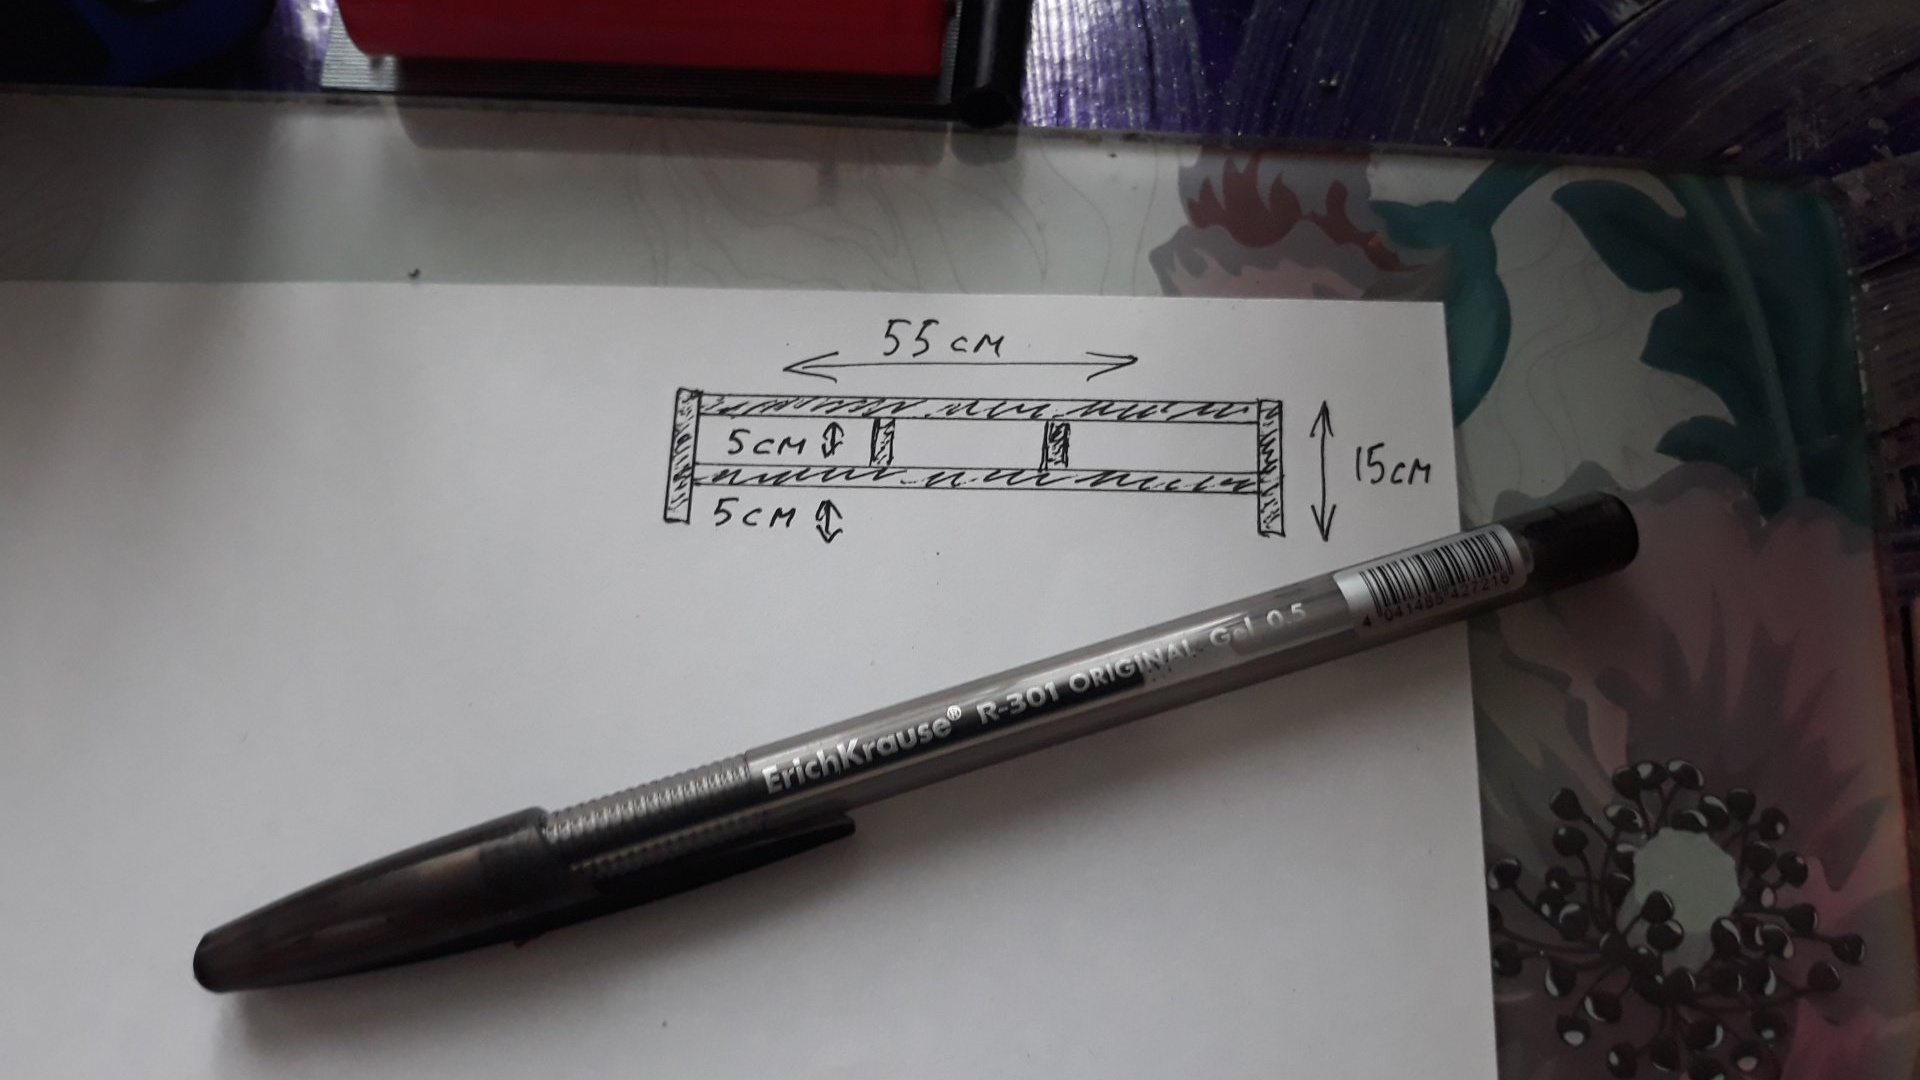
To begin with, of course, it is necessary to design the future structure on paper. Even without drawing skills, you need to make at least a schematic sketch with parameters so as not to get confused during manufacturing.
Then we begin the main work - sawing wood boards with the required parameters.

It is worth noting that here everyone is free to choose the parameters of the product to suit their requirements. I just gave an example on my monitor. The same applies to the compartments in the organizer, their number, height, and depth. So, after cutting the required quantity and size of the board, you should treat the cut edges with sandpaper to avoid injury in further work.
Next, each cut must be thoroughly rubbed with paraffin from a candle and scorched with a turbo lighter. So that they become even and smooth. This is necessary because the spray paint will be absorbed into these sections like water into a damp sponge, and we will simply get tired of touching up these places. On the treated cut surface, the paint will lie in an even layer.

If there are any dents in the board, recesses from knots, or holes after wooden choppers, they should also be filled with molten paraffin.

After this, you should drill 2 mm holes with a drill in the places where the boards are fastened to each other with self-tapping screws.

Since these fastening points are located at the very edges of the boards, without drilling there is a high probability that the board will burst towards the edge. After all the procedures described above, we fasten all the parts into a single structure with self-tapping screws.


I repeat: the width and height of the organizer compartments can be arranged in a way that is convenient for you. The heads of the screws should be recessed into the wood so that they do not stick out on the surface.After this, again, we cover the recesses from the heads of the screws with paraffin.

You also need to cover the gaps in the joints of the boards, if any are found. This can be done with hot glue, and then cut off the excess with a knife. I, in the absence of hot glue at the right time (as usual!), covered the gaps with the same paraffin. This is what you should end up with:

All that remains is to cover the product with any color you need with paint. I chose white.


After the paint on the surface of the wood has dried, preferably after the time specified in the instructions, you can cover it with some kind of decorative film, or paste it with self-adhesive wallpaper of the texture you need.


If you can’t find the right height pallets for the shelves in the organizer compartments, then using scissors and superglue, it won’t take long to assemble them from corrugated cardboard from underneath the boxes. Here's a useful little thing we'll end up with:

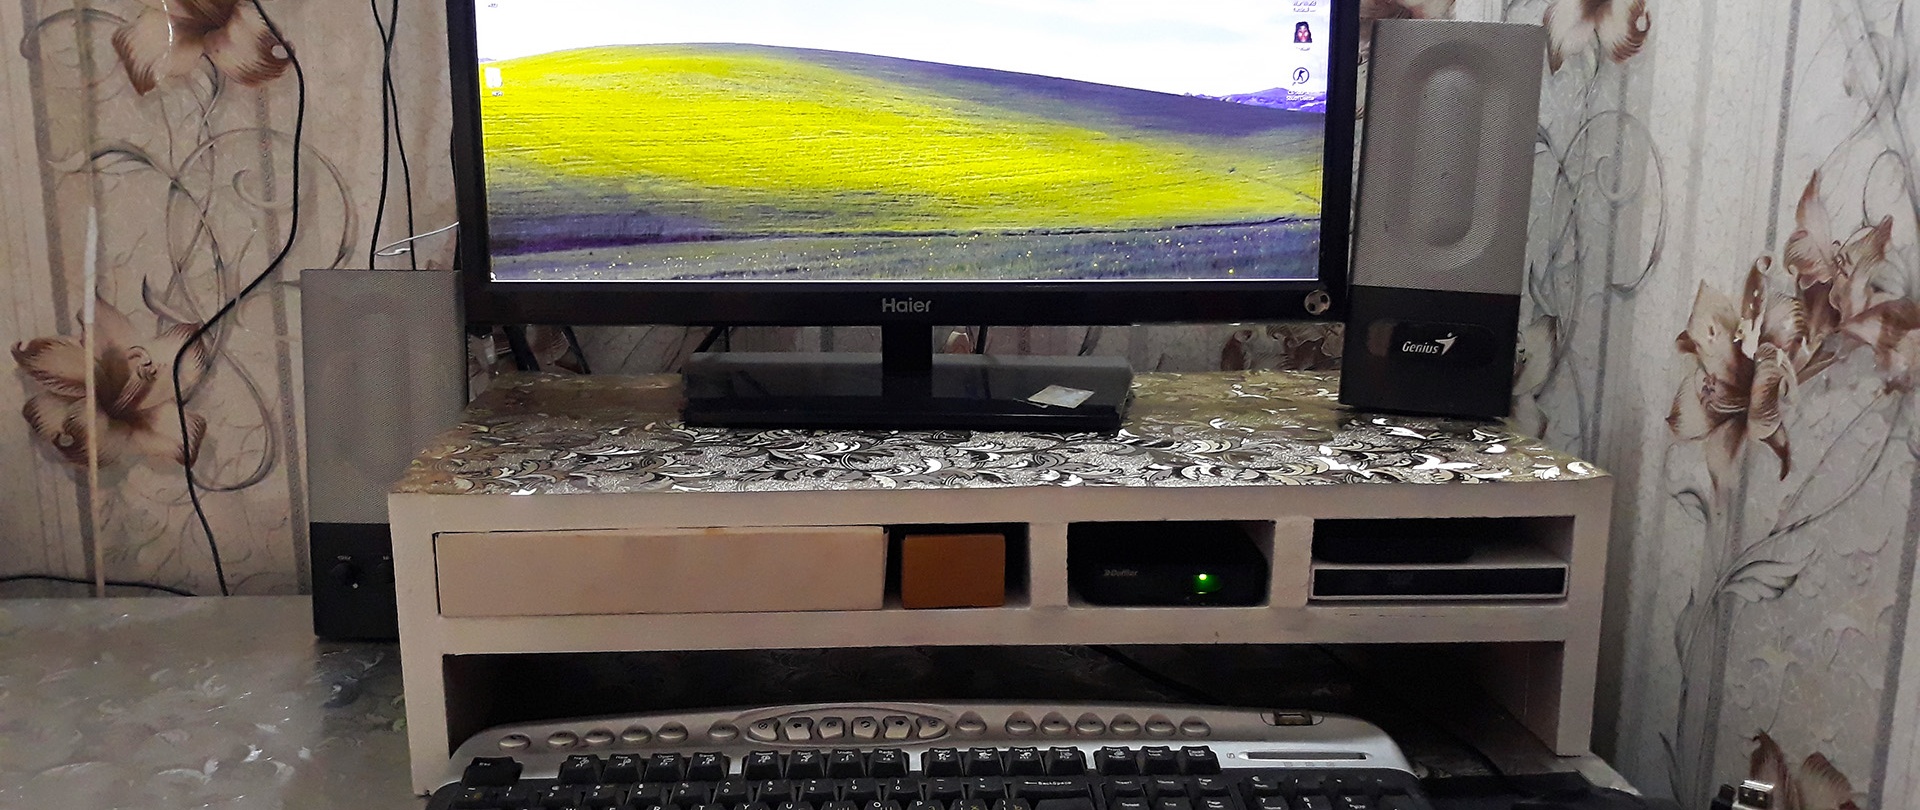
Since my monitor is connected simultaneously to both the PC system unit and the DVB-T2 set-top box, it turned out to be very convenient to hide the keyboard and mouse inside the stand when you are not using the PC. Also in this organizer there was room for a hard drive, a second drive, a DVB set-top box, and a couple of shelves with a variety of related junk, such as cables, flash drives, adapters, etc. And what’s especially pleasing is that the monitor is now higher! Exactly at face level. Now you don’t have to hunch over the monitor, trying to see small print or small details in the game. In addition, a significant part of the table, which was previously occupied by what is now inside this stand, has been freed up.