Do it yourself
Life hacks, master classes, useful tips, recipes.
home » Construction and repair » Repair » Installation of suspended ceiling
The problem on upper floors is often chronic leaks from the ceiling. In this case, a leak in the kitchen ceiling became an obsessive nightmare for a young family.

Installation of suspended ceiling


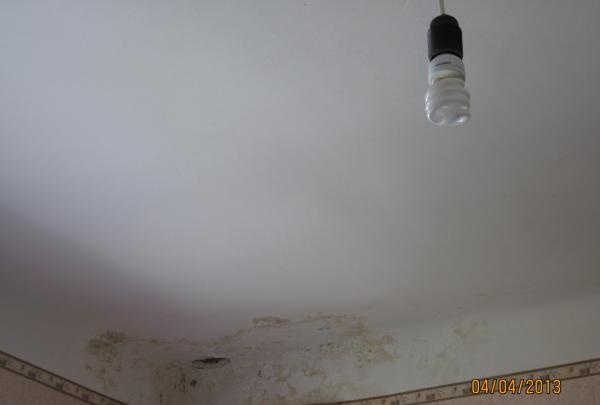
As a result, it was decided to hang a plastic ceiling with built-in lamps and forget about the annoying problem once and for all.
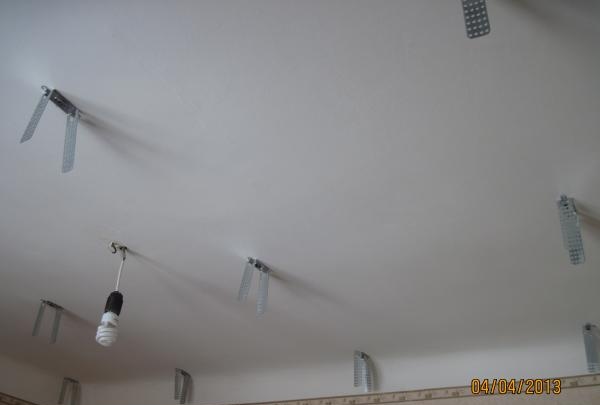
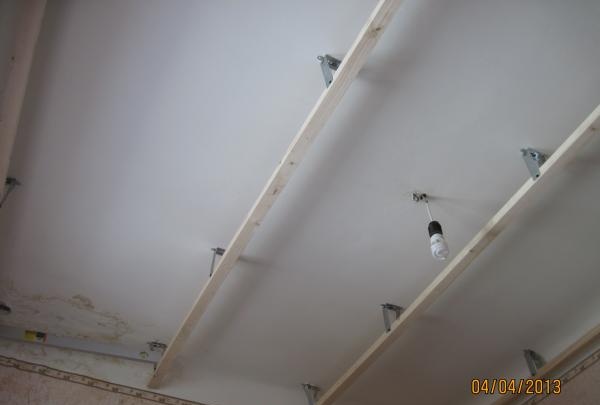
The first and most difficult procedure in installing a ceiling is securing the metal hangers. To do this, use a hammer drill or a powerful drill to make holes in the ceiling, into which dowel-nails 60 mm long are inserted. Metal hangers are secured to these dowel nails.


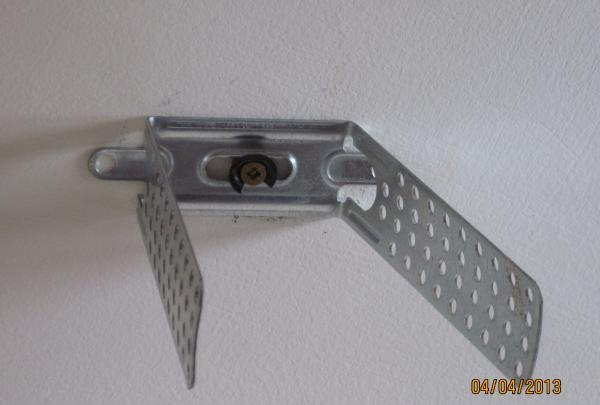
Suspensions are placed in parallel strips. The distance between the hangers is 60 cm.


When the hangers are fixed over the entire area of ​​the ceiling, we screw wooden slats measuring 25x40 mm to the hangers with metal screws.


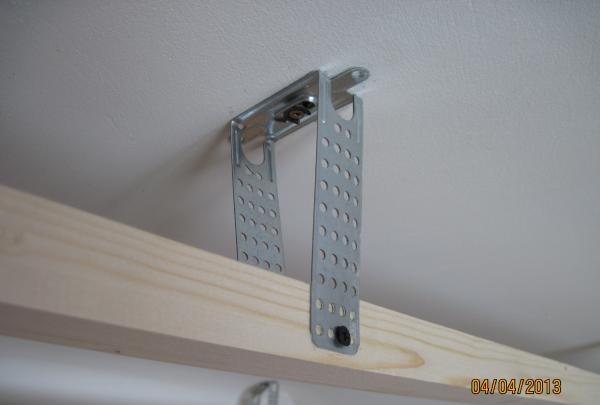
When securing the slats, you need to make sure that they are all in the same plane; for this you must use a building level.


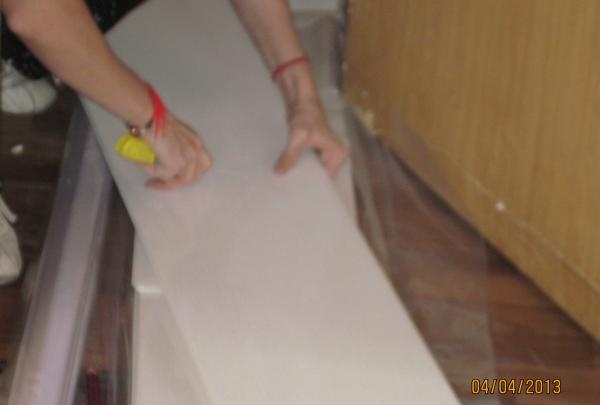
Carefully measuring the length, we cut off the plastic panels of the required size. This is done with a sharp mechanical knife.


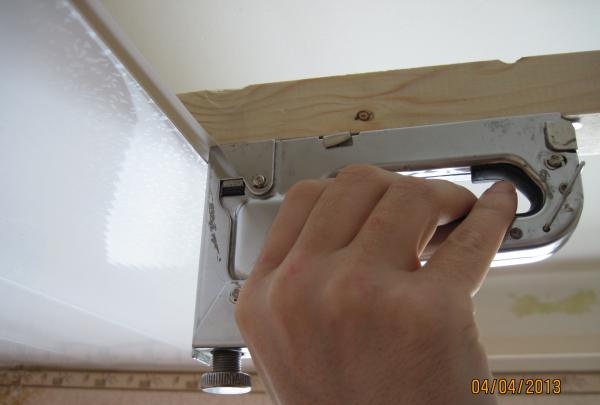
We attach the panels to the slats using a construction stapler.


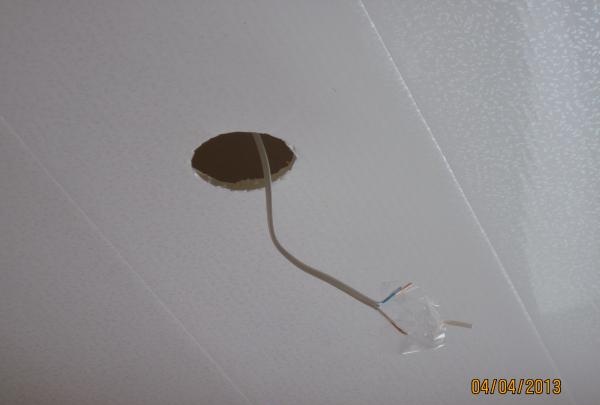
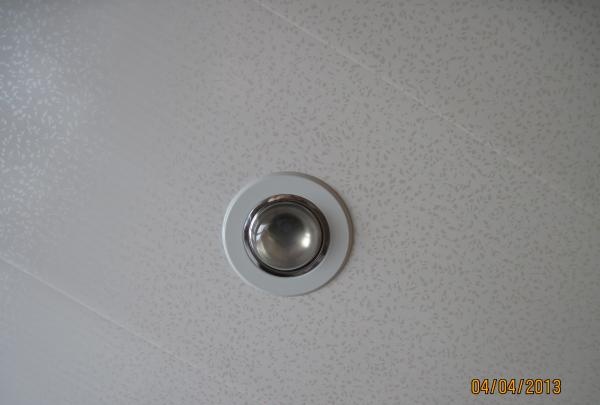
In places where the lamps will be built-in, you need to cut holes of the required size and bring out the electrical wires, having previously insulated the ends.


When all the panels are already securely fastened, we mount the lamps and insert them into the prepared holes.


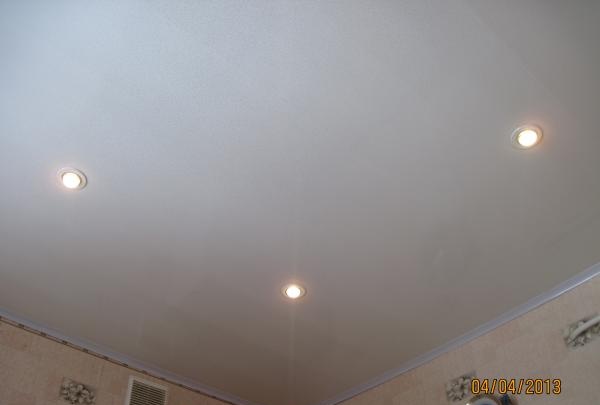
Now the ceiling is almost ready and looks completely different.


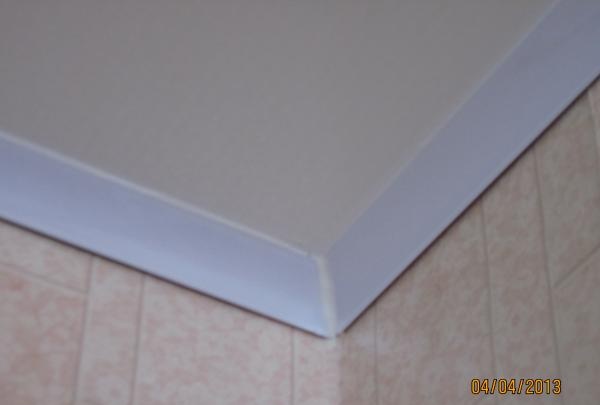
We fix the ceiling plinth around the perimeter with white mounting adhesive.


Now the ceiling is ready and looks great.
come back
Comment
  • bowtiesmilelaughingblushsmileyrelaxed relaxedsmirk
    heart_eyeskissing_heartkissing_closed_eyesflushedrelievedsatisfiedgrin
    winkstuck_out_tongue_winking_eyestuck_out_tongue_closed_eyesgrinningkissingstuck_out_tonguesleeping
    worriedfrowninganguishedopen_mouthgrimacingconfusedhushed
    expressionlessunamusedsweat_smilesweatdisappointed_relievedwearypassive
    disappointedconfoundedfearfulcold_sweatperseverecrysob
    joyastonishedscreamtired_faceangryragetriumph
    sleepyyummasksunglassesdizzy_faceimpsmiling_imp
    neutral_faceno_mouthinnocent
3+three=
Comments (0)

Learn horizontal welding using various techniques

Metal crafts | Page 20 | Do it yourself

Scrapbooking master classes | Do it yourself

Pastry cones for baking | Do it yourself

«Do it yourself - with your own hands» - a site of interesting homemade products made from scrap materials and items at home. Step-by-step master classes with photos and descriptions, technologies, life hacks - everything a real master or just a craftsman needs for needlework. Crafts of any complexity, a large selection of directions and ideas for creativity.

We recommend reading

Washing machine error codes