Birch sap is real living water. Source of vitamins and beneficial microelements. Unfortunately, this source is extremely unstable - a couple of weeks a year. And preparing birch sap for future use, in my opinion, is an extremely unpromising and disastrous activity - fresh sap quickly deteriorates and turns sour, and in the sterilized version, all the useful substances and vitamins our body needs disappear. You can, of course, freeze some juice in the freezer, but this is quite a bit - not everyone has a separate freezer in their apartment. So you need to seize the moment! But how to extract sap from a tree without causing much harm to it?

Someone makes cuts and grooves on the trunk with a knife, someone even barbarically makes deep nicks with an ax. This is all unnecessary. Many people mistakenly believe that the more extensive and deeper the damage appears on the trunk, the more sap will leak out. This is wrong. This is not the body of a mammal - there is no pressure in it for a fountain of liquid to flow from there.For a good sap collection that is not harmful to the tree, all you need is a small depression in the trunk and a regular medical dropper. Yes, no matter how funny it may sound, we will put an IV on the tree! Of course, not for administering medications, but for collecting juice.

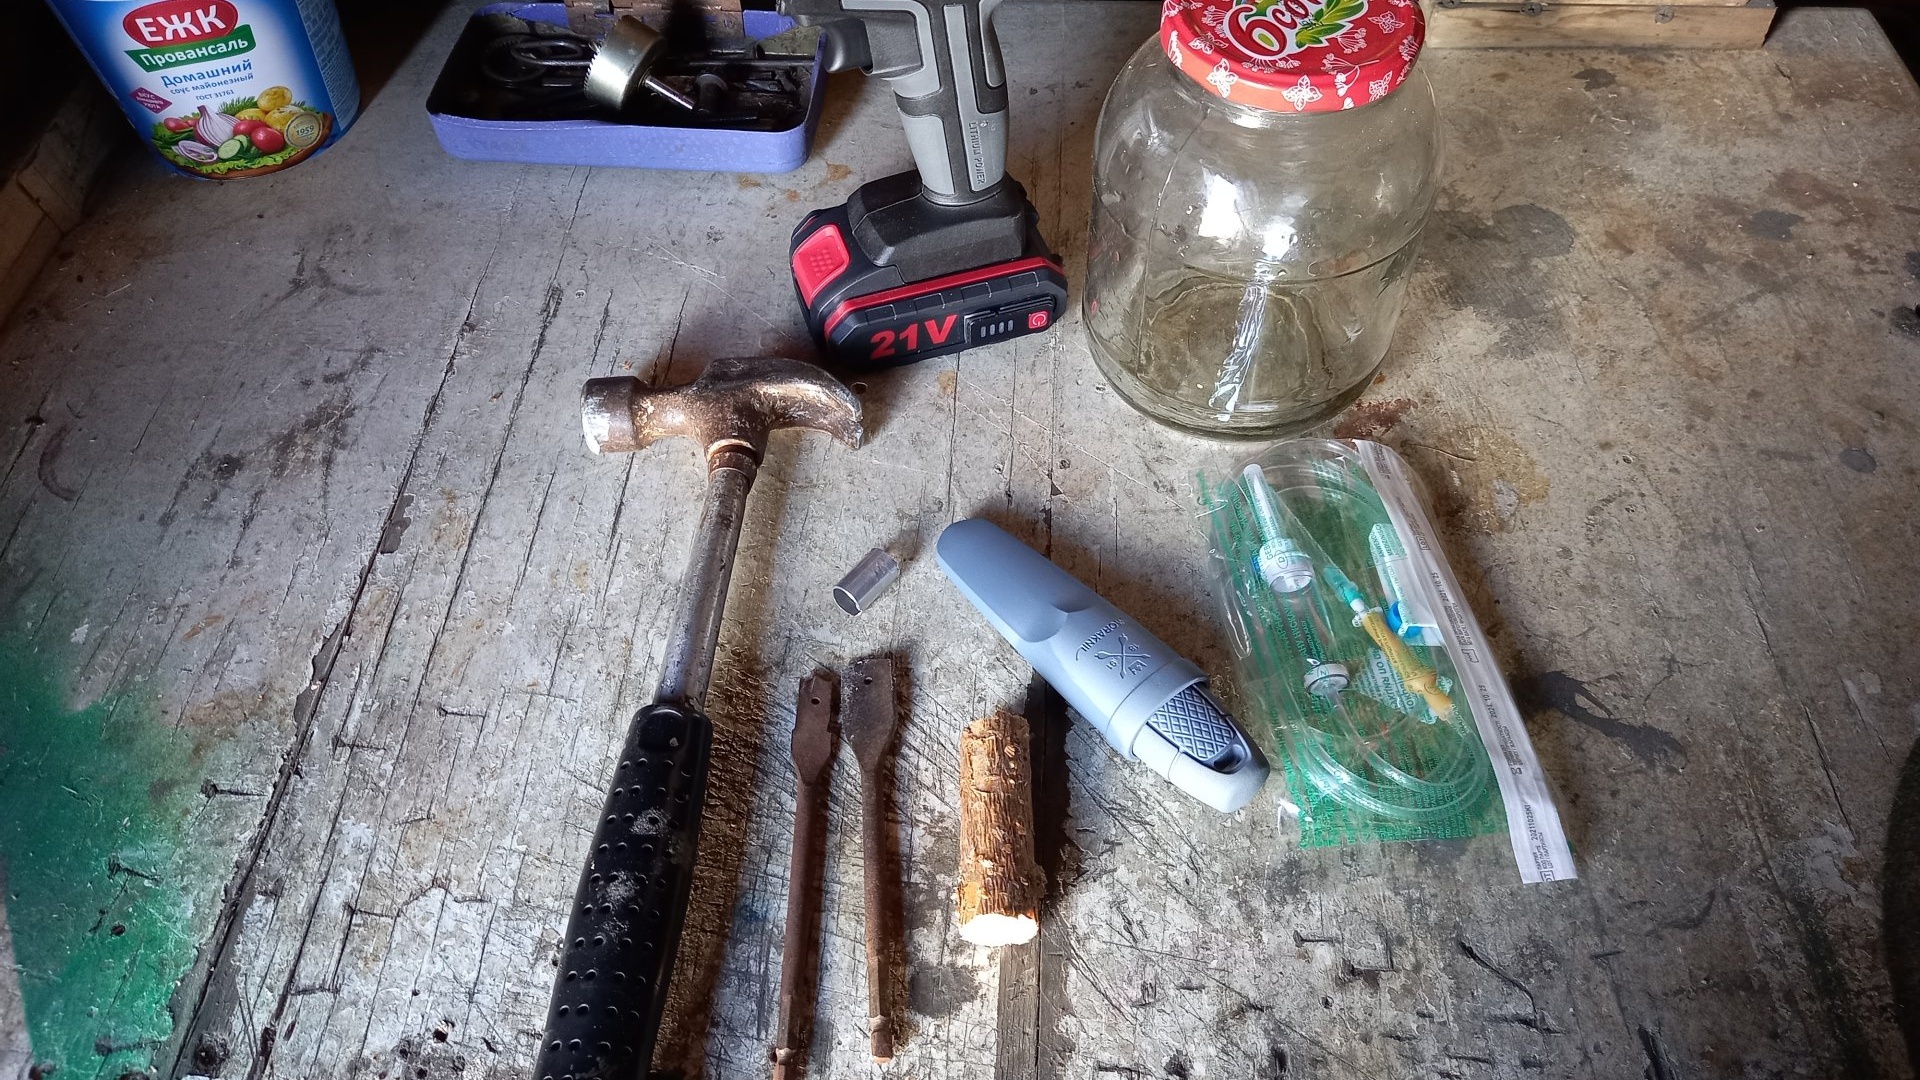
Will need
- Cordless drill.
- Nib 20mm.
- 12mm nib.
- 7mm drill bit.
- Knife.
- Tube 12mm, length 2-3cm.
- A piece of wooden cutting, 20 mm in diameter and 50-70 mm long.
- Hammer.
- Saw.
- Infusion system (dropper).
- Juice container. Can or bottle. With lid.
Proper collection of birch sap
First, of course, you need to prepare everything - the tool and the necessary consumables.
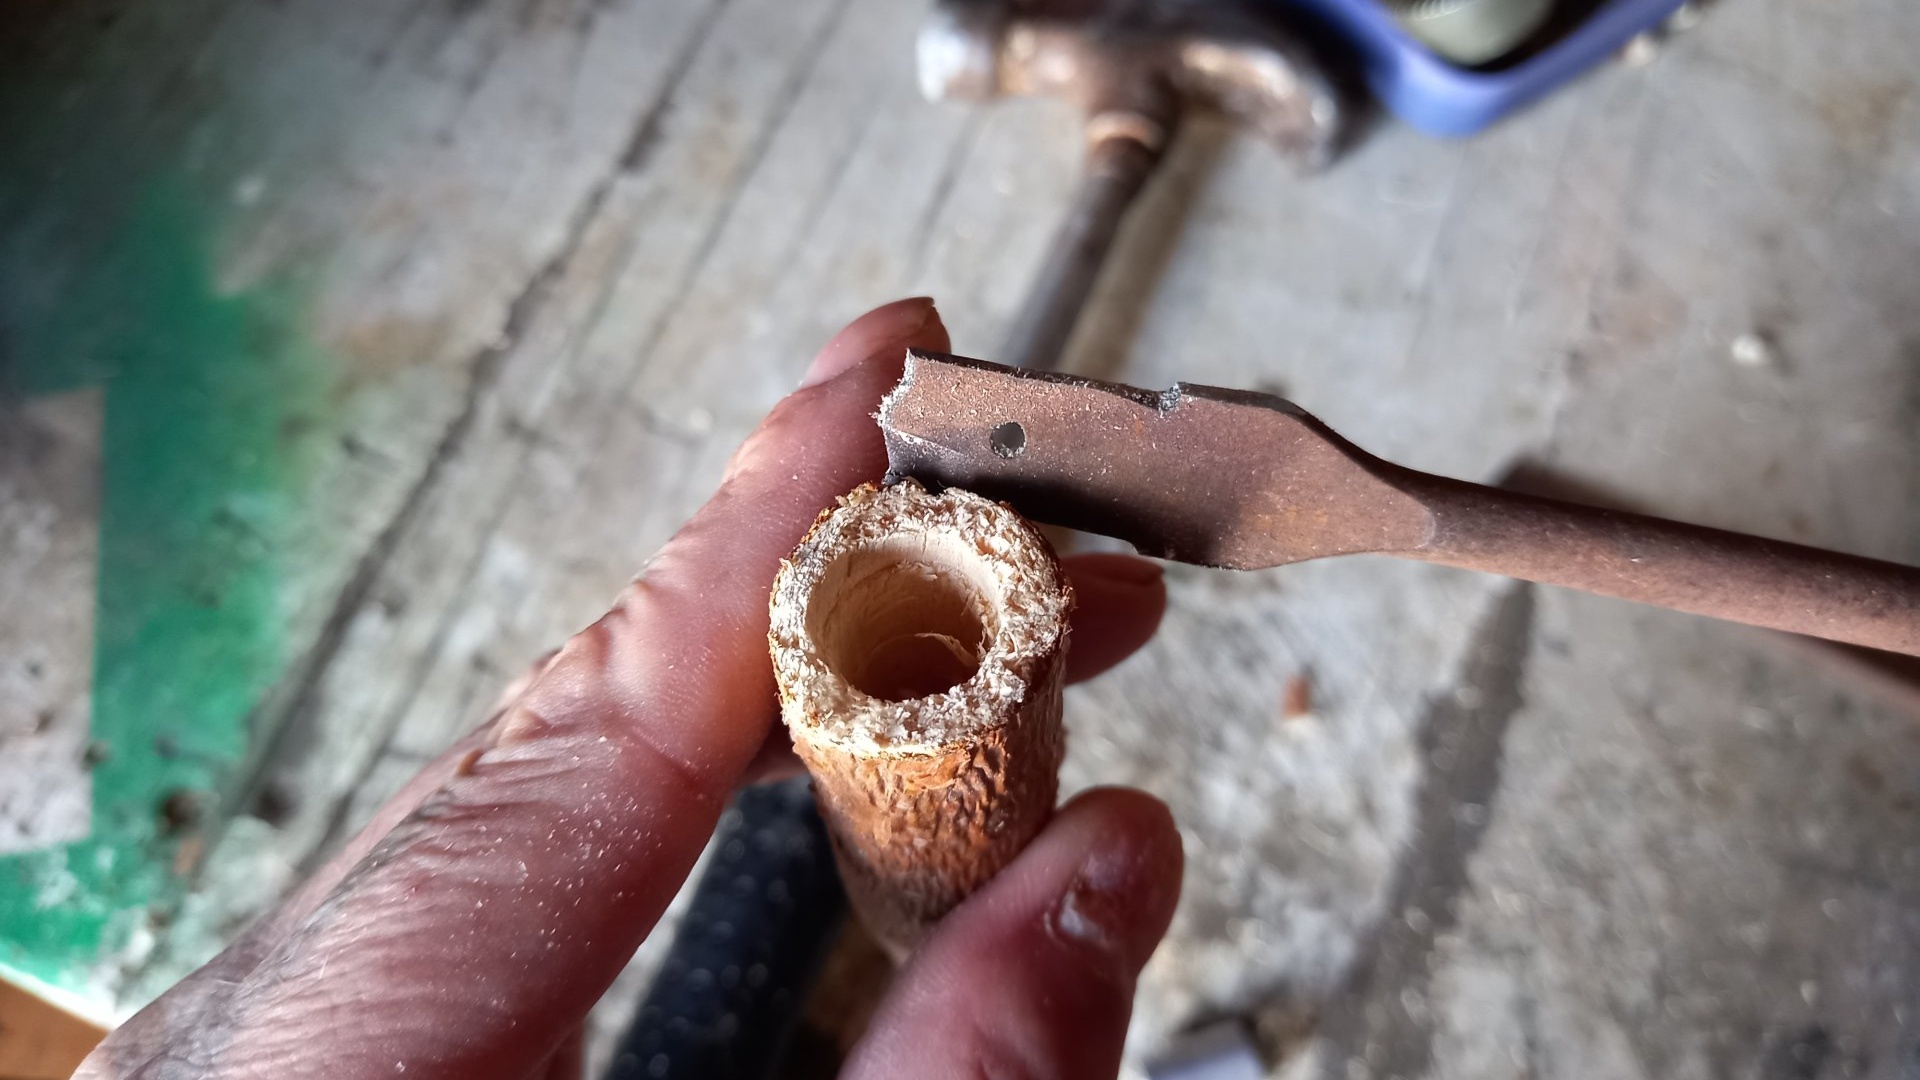
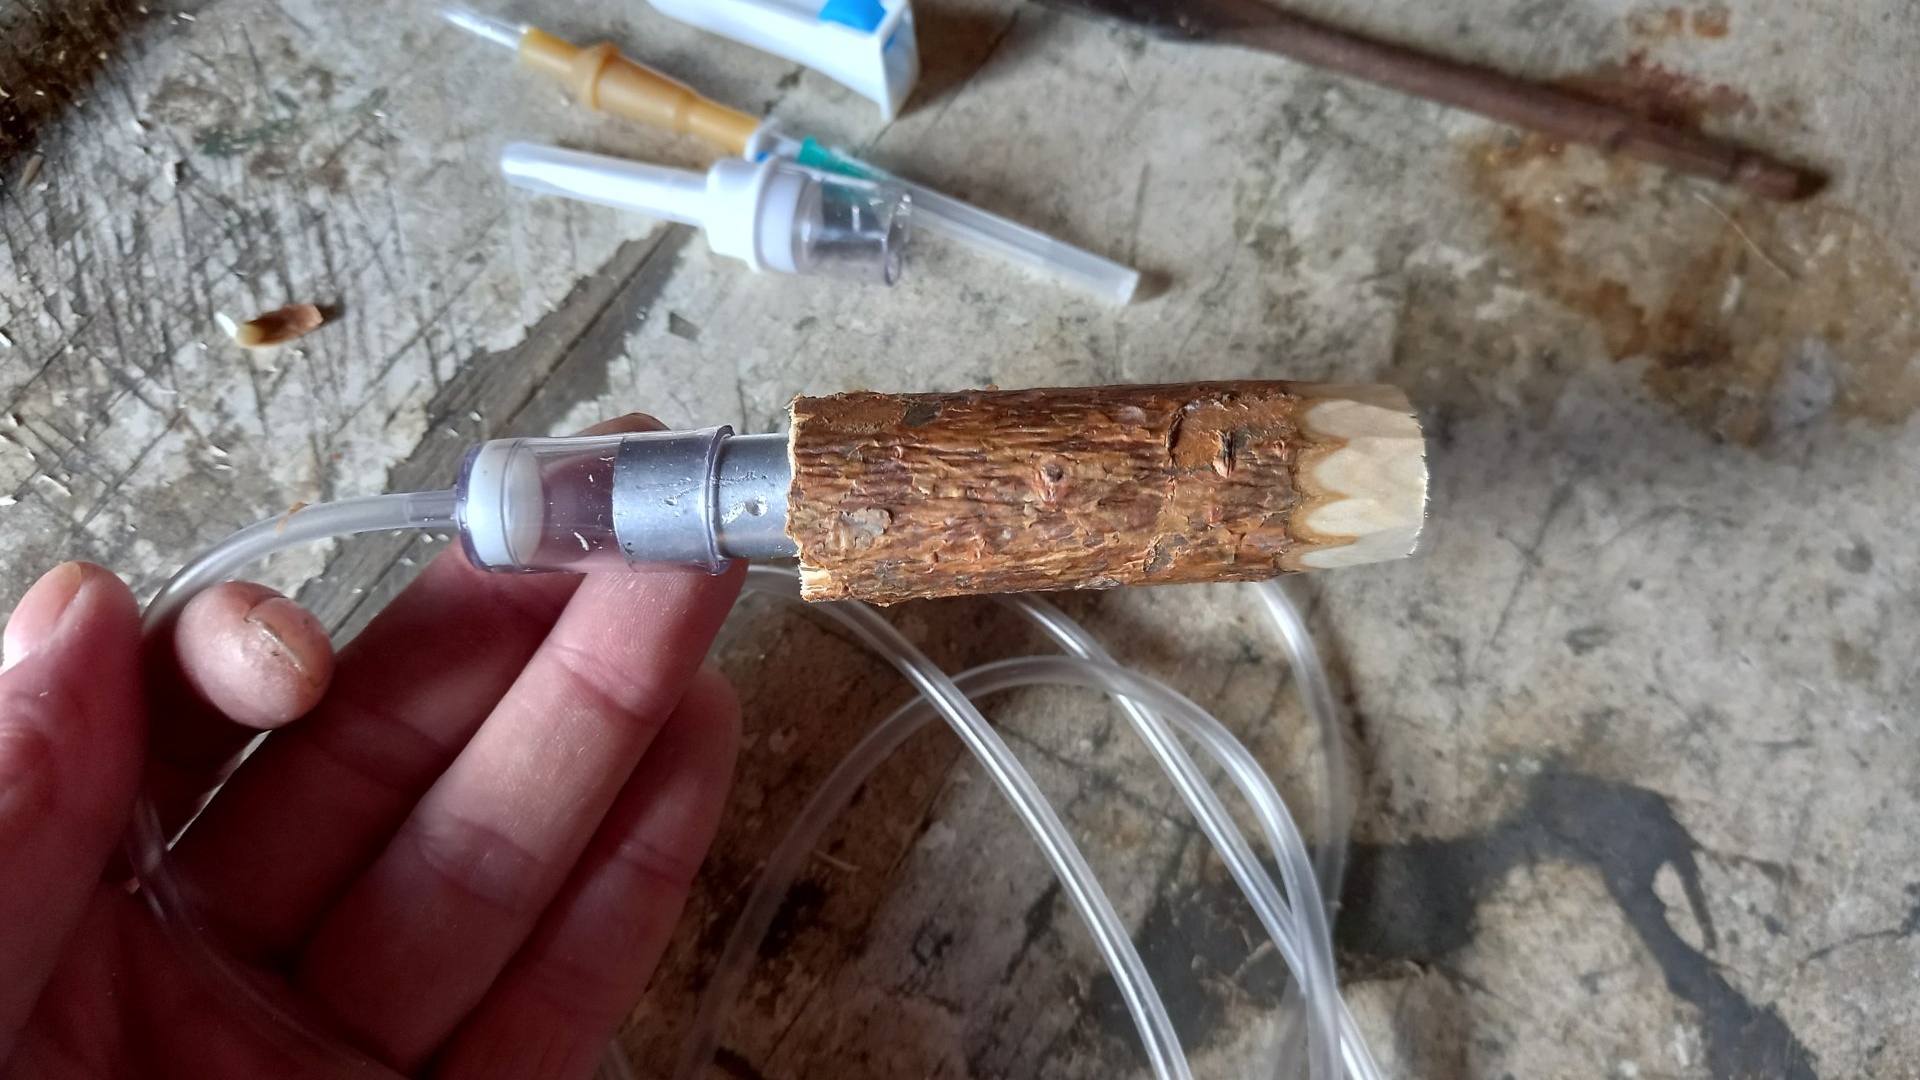
First of all, let's prepare a wooden chopper with a through hole.

This can be any branch, or a piece of cutting, with a diameter of at least 20 mm. If the diameter turns out to be a little larger, it’s not a big deal; you can bring it to the desired size with a knife. We drill it through, lengthwise, with a 5-7 mm drill.
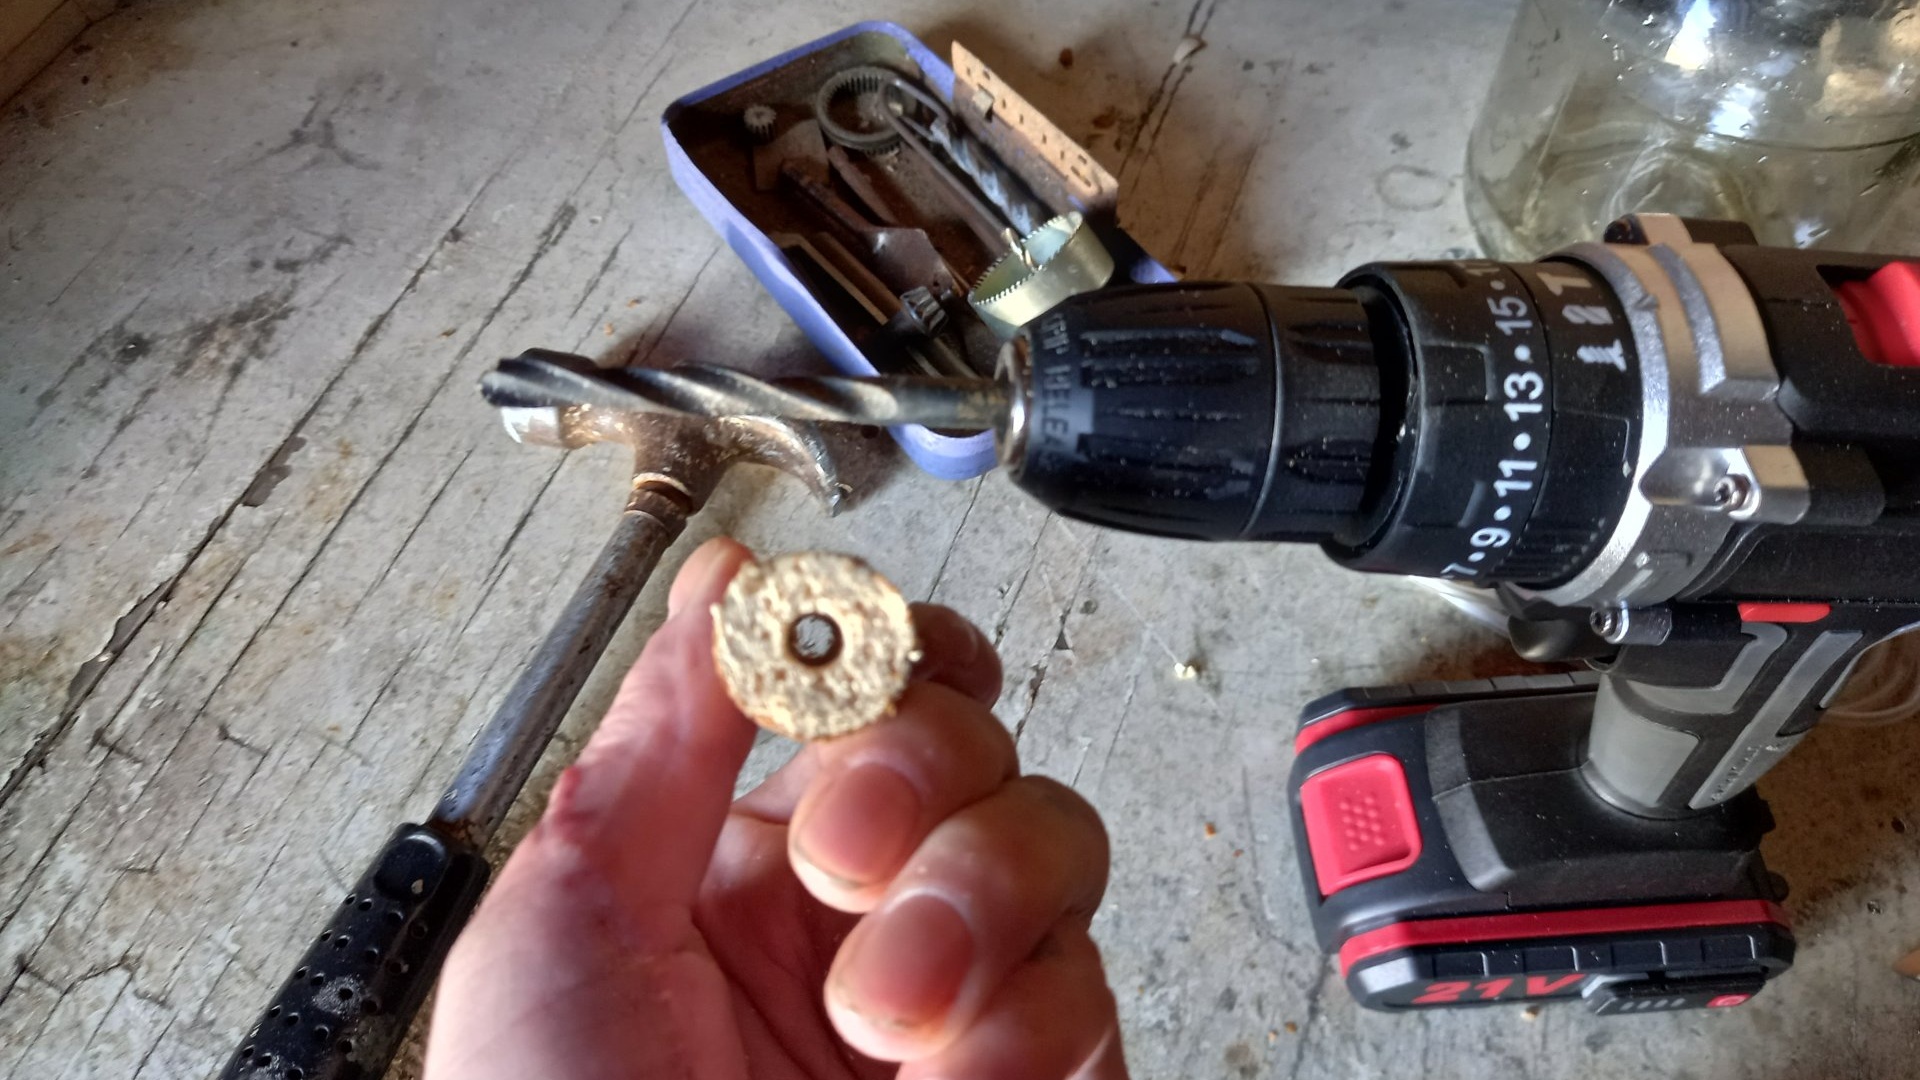
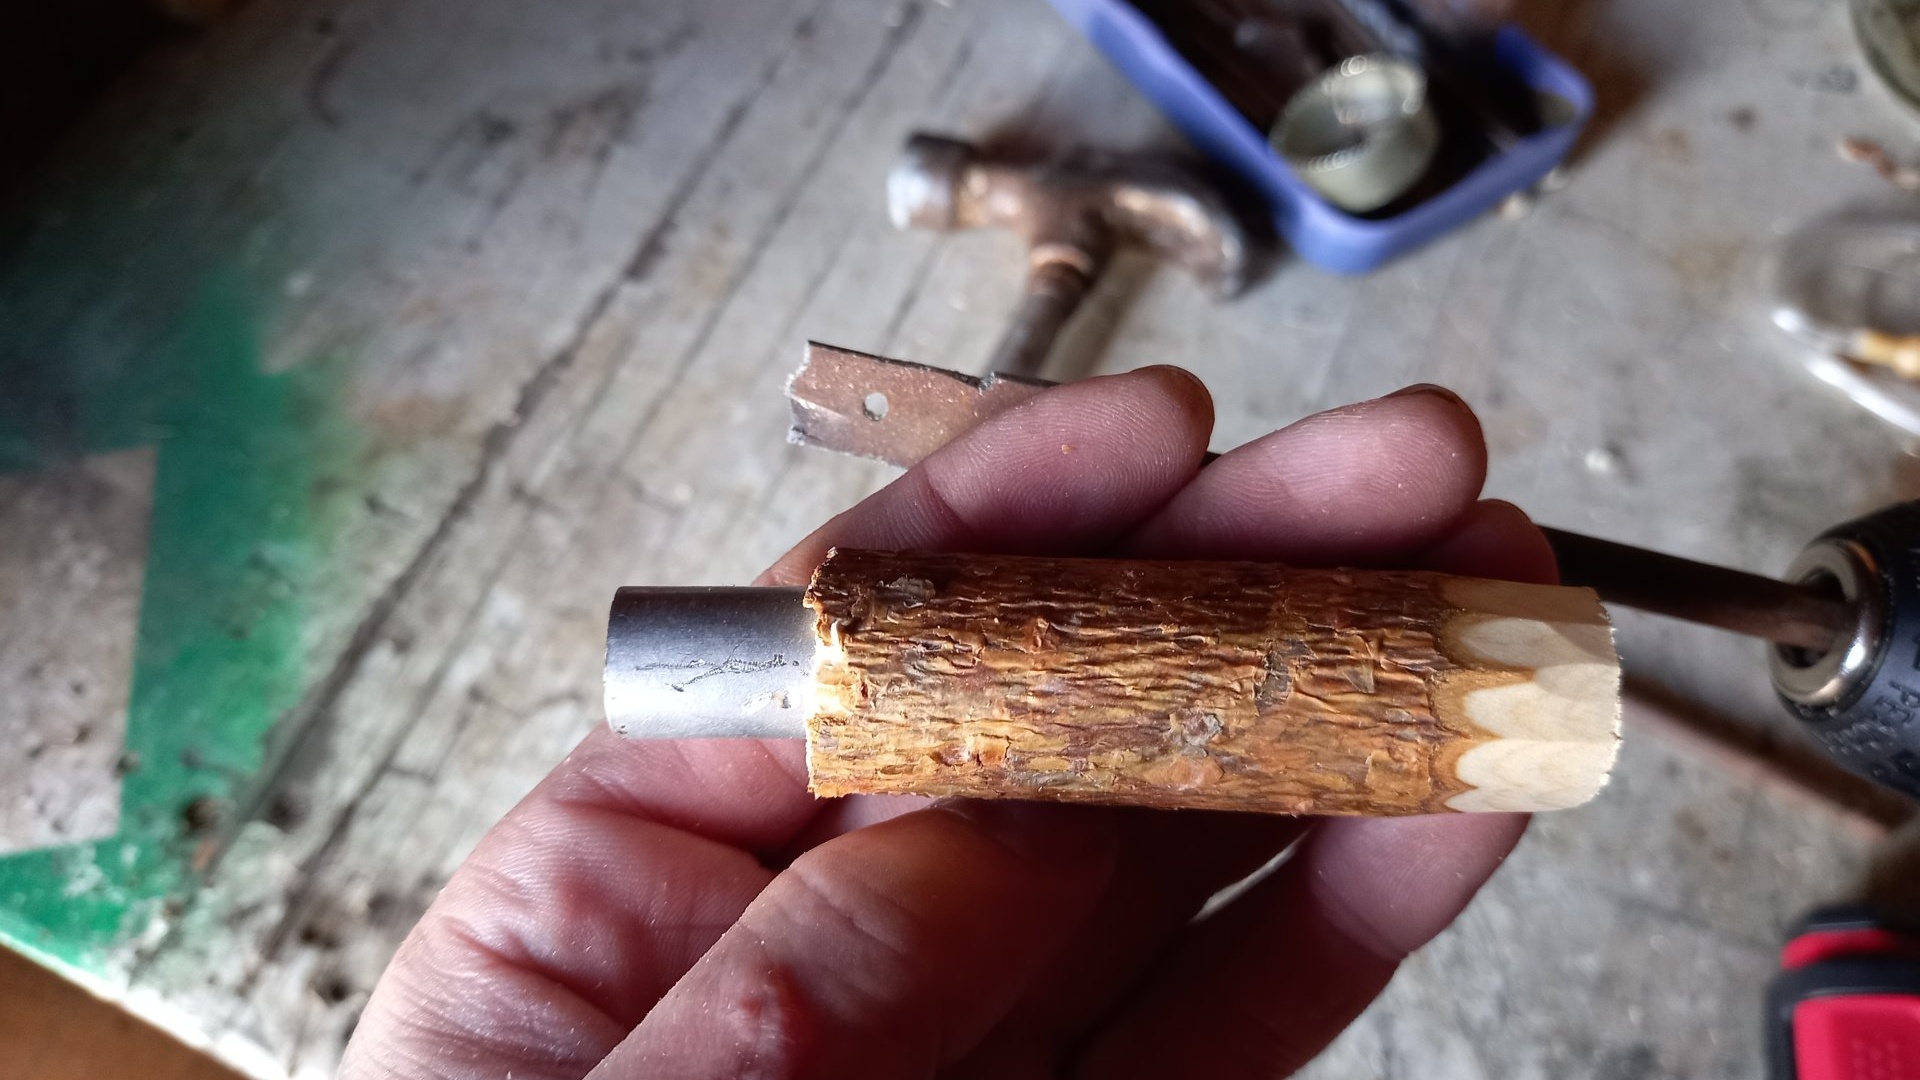
Next, use a 12 mm pen at one end to expand the hole to 12 mm.
We try on a 12 mm piece of tube into the expanded hole.
Now let's prepare the dropper. More precisely, its individual parts. We only need a flexible tube and the dropper itself - a polyethylene flask in which the solution drips.
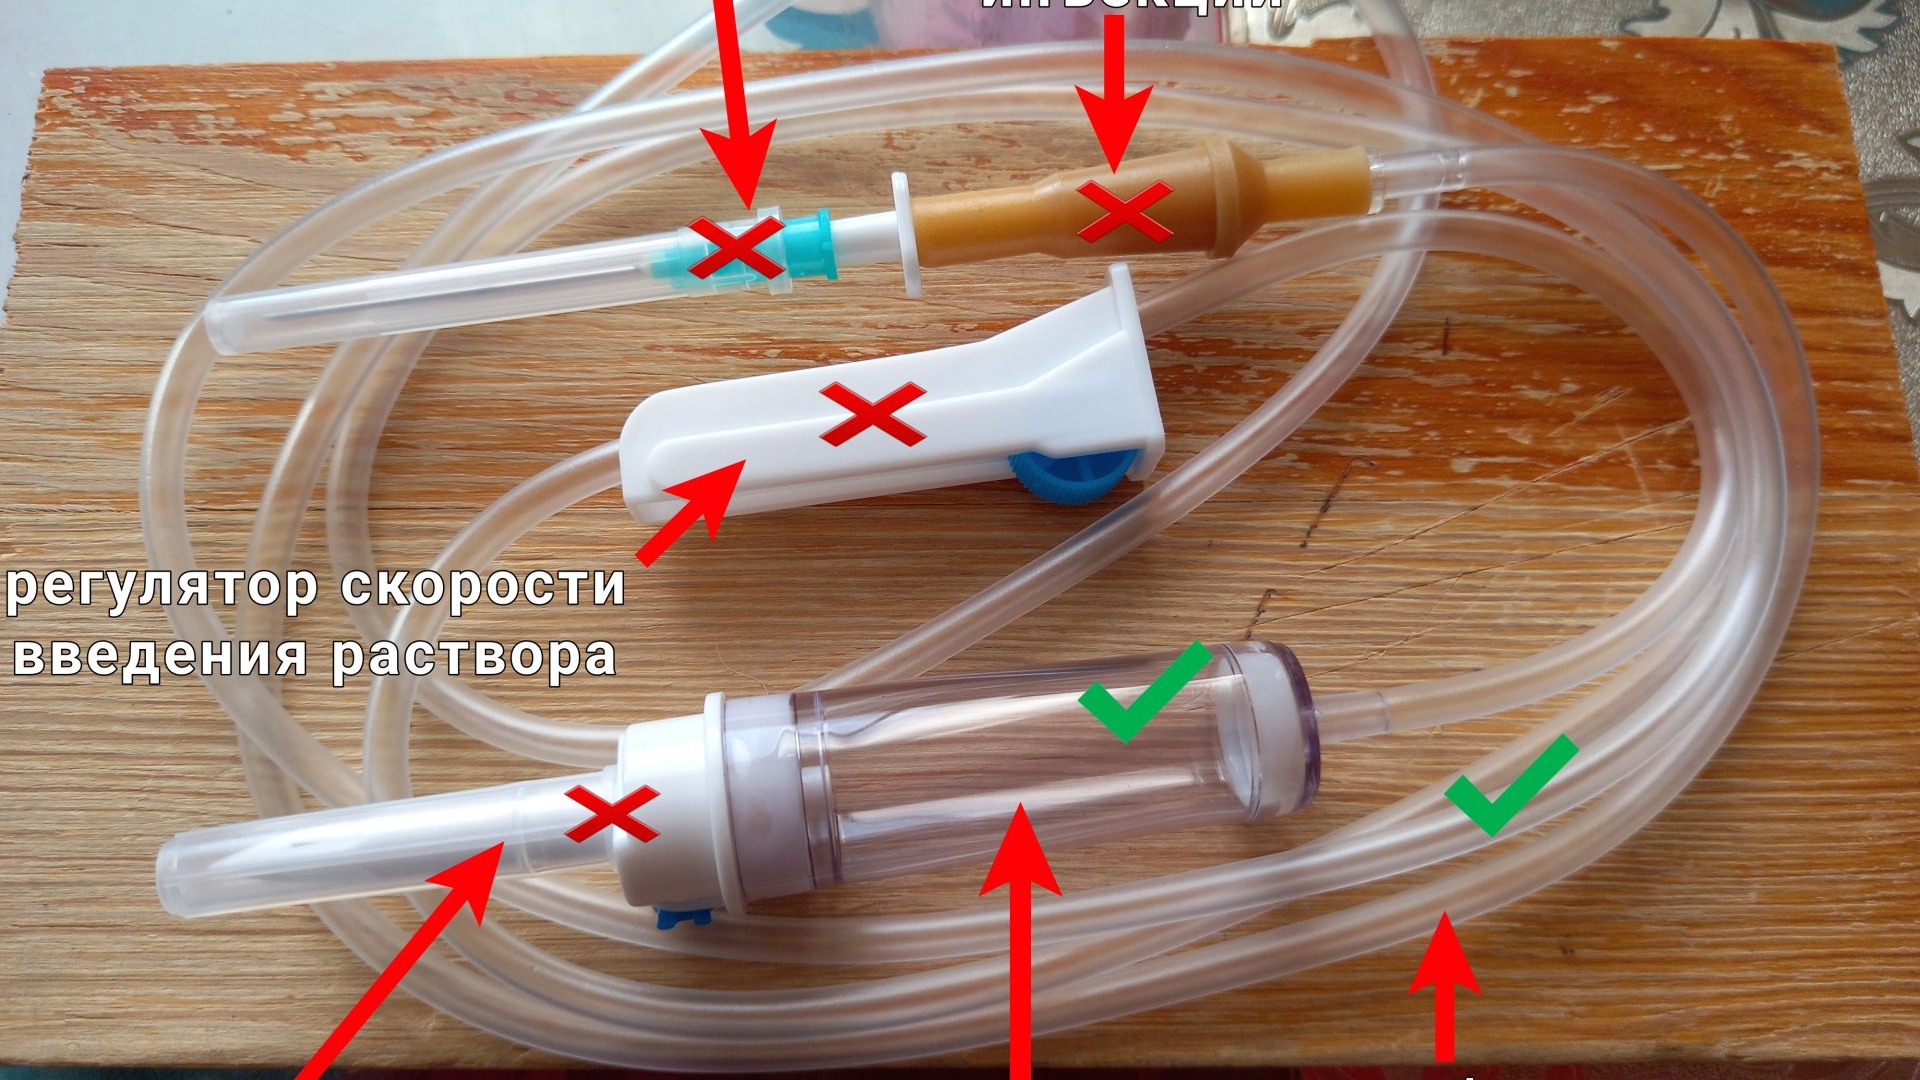
Cut the dropper flask in half.

Let's try all the parts together. This is what it should look like:
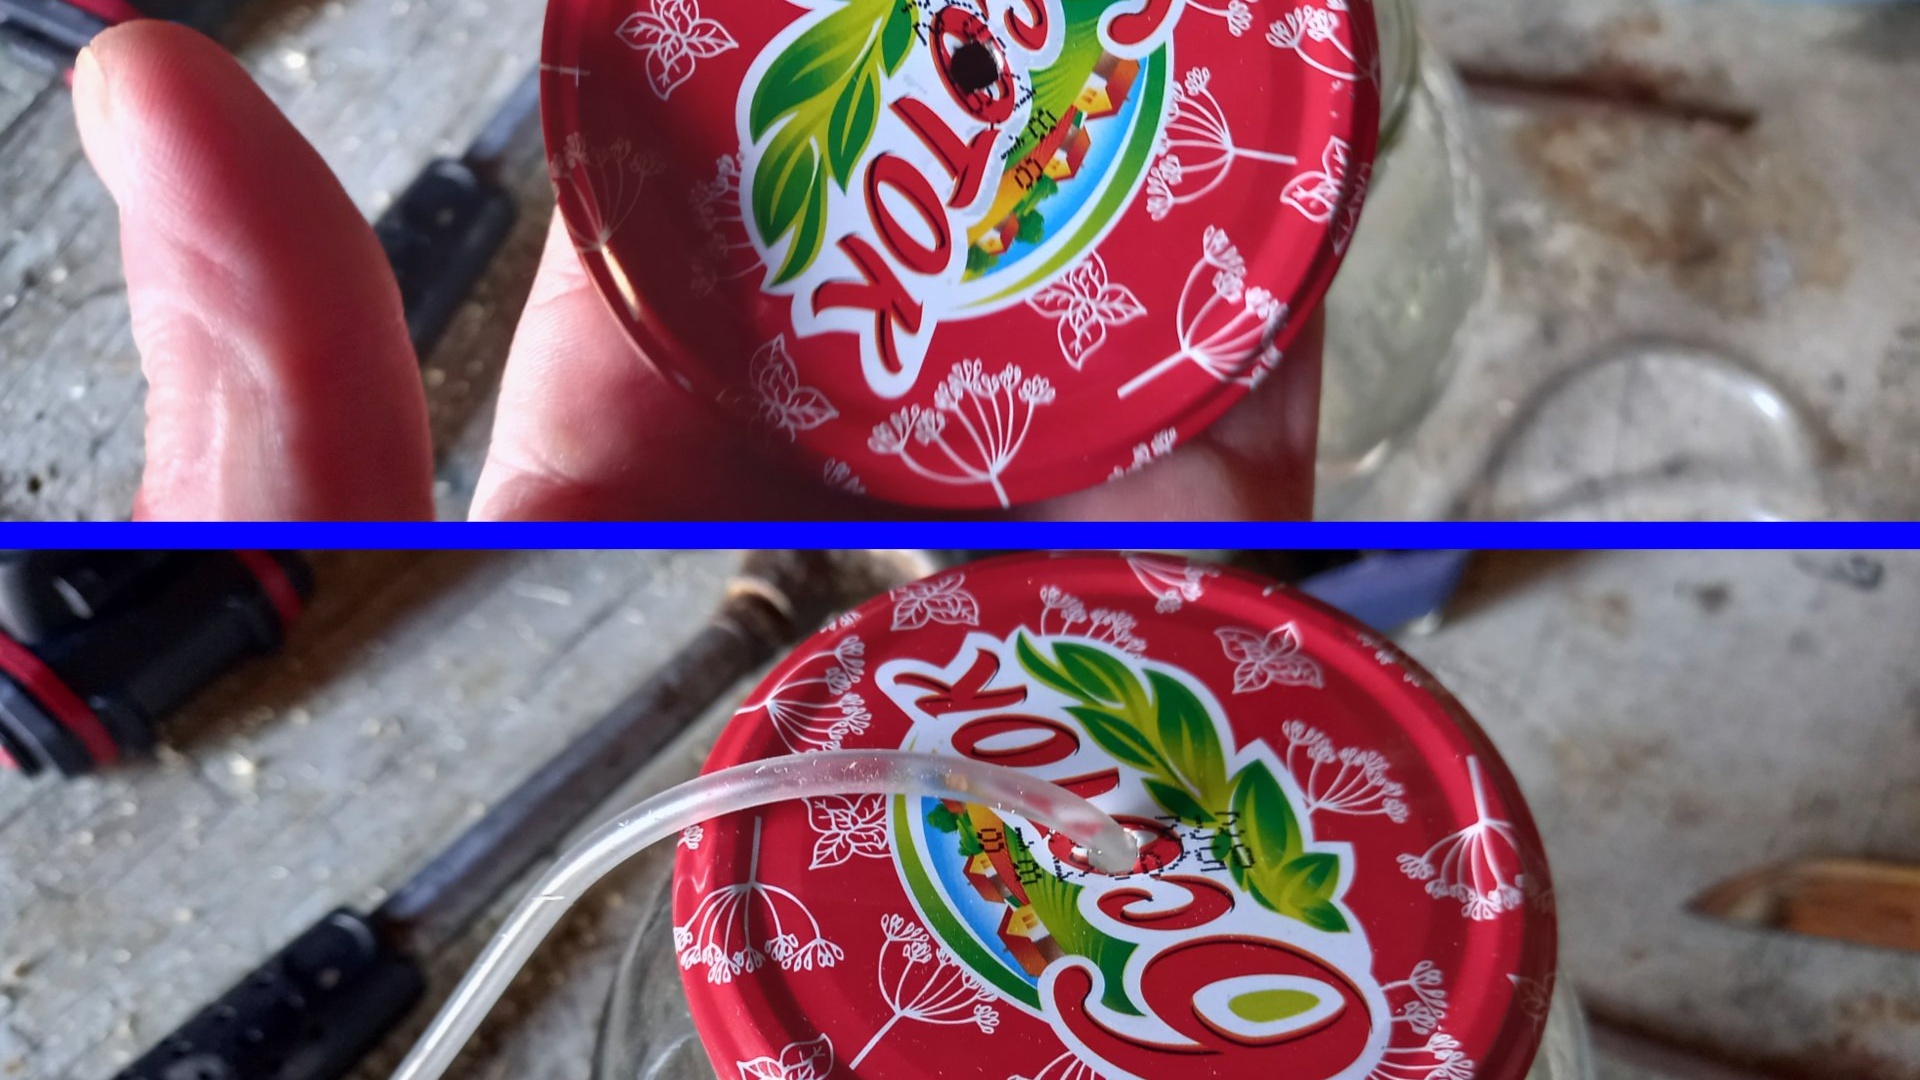
Next, let's prepare the required container. Namely, we will make a hole in the lid for the tube from the dropper.
A lid is needed to prevent flies, ants, and other glucose lovers from getting into the jar of juice. At this point, the preparation of the material is completed, and it’s time to start installation. Using a drill and a 20 mm pen, we make a depression about 3 cm deep in the trunk.

The tree must be mature, thick, with a diameter of at least 25-30 cm, with white or light beige bark. It is better not to touch young, thin, as well as diseased and crooked birch trees. Take a closer look at the tree. If there are parasitic fungi on it, there is a lot of moss-lichen on the branches, there are sour growths on the trunk, or the trunk itself is too dark in color, then the tree is most likely sick or too old. It is not worth making a recess deeper than 3-4cm. Firstly; we cause more harm to the tree than our task requires, and secondly; this makes no sense, since the flow of sap passes closer to the bark. Of course, no one will be pleased if another, additional hole is made in his body - any wound is, first of all, damage. But there is no other way! The main thing is not to forget to seal the wound in the trunk after the sap collection procedure, so that pests and parasites do not reach it. So, we drilled it. Using a hammer, install a wooden chopper into the hole, with the widened hole facing outward. Using the same method, we install a piece of tube into the chopik.

We pull a dropper onto a piece of tube, like this:

We bring the end of the infusion tube into the hole in the lid of the jar.

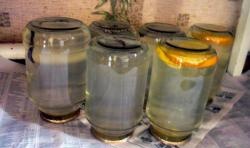
It is not worth installing a metal tube directly into a tree trunk, bypassing the stage of fiddling with the chopper - it will always fall out; the wood will swell from moisture and simply squeeze out the tube. All you have to do is wait until the jar is full and then enjoy your fresh vitamin drink. During the day the juice flows quite briskly.
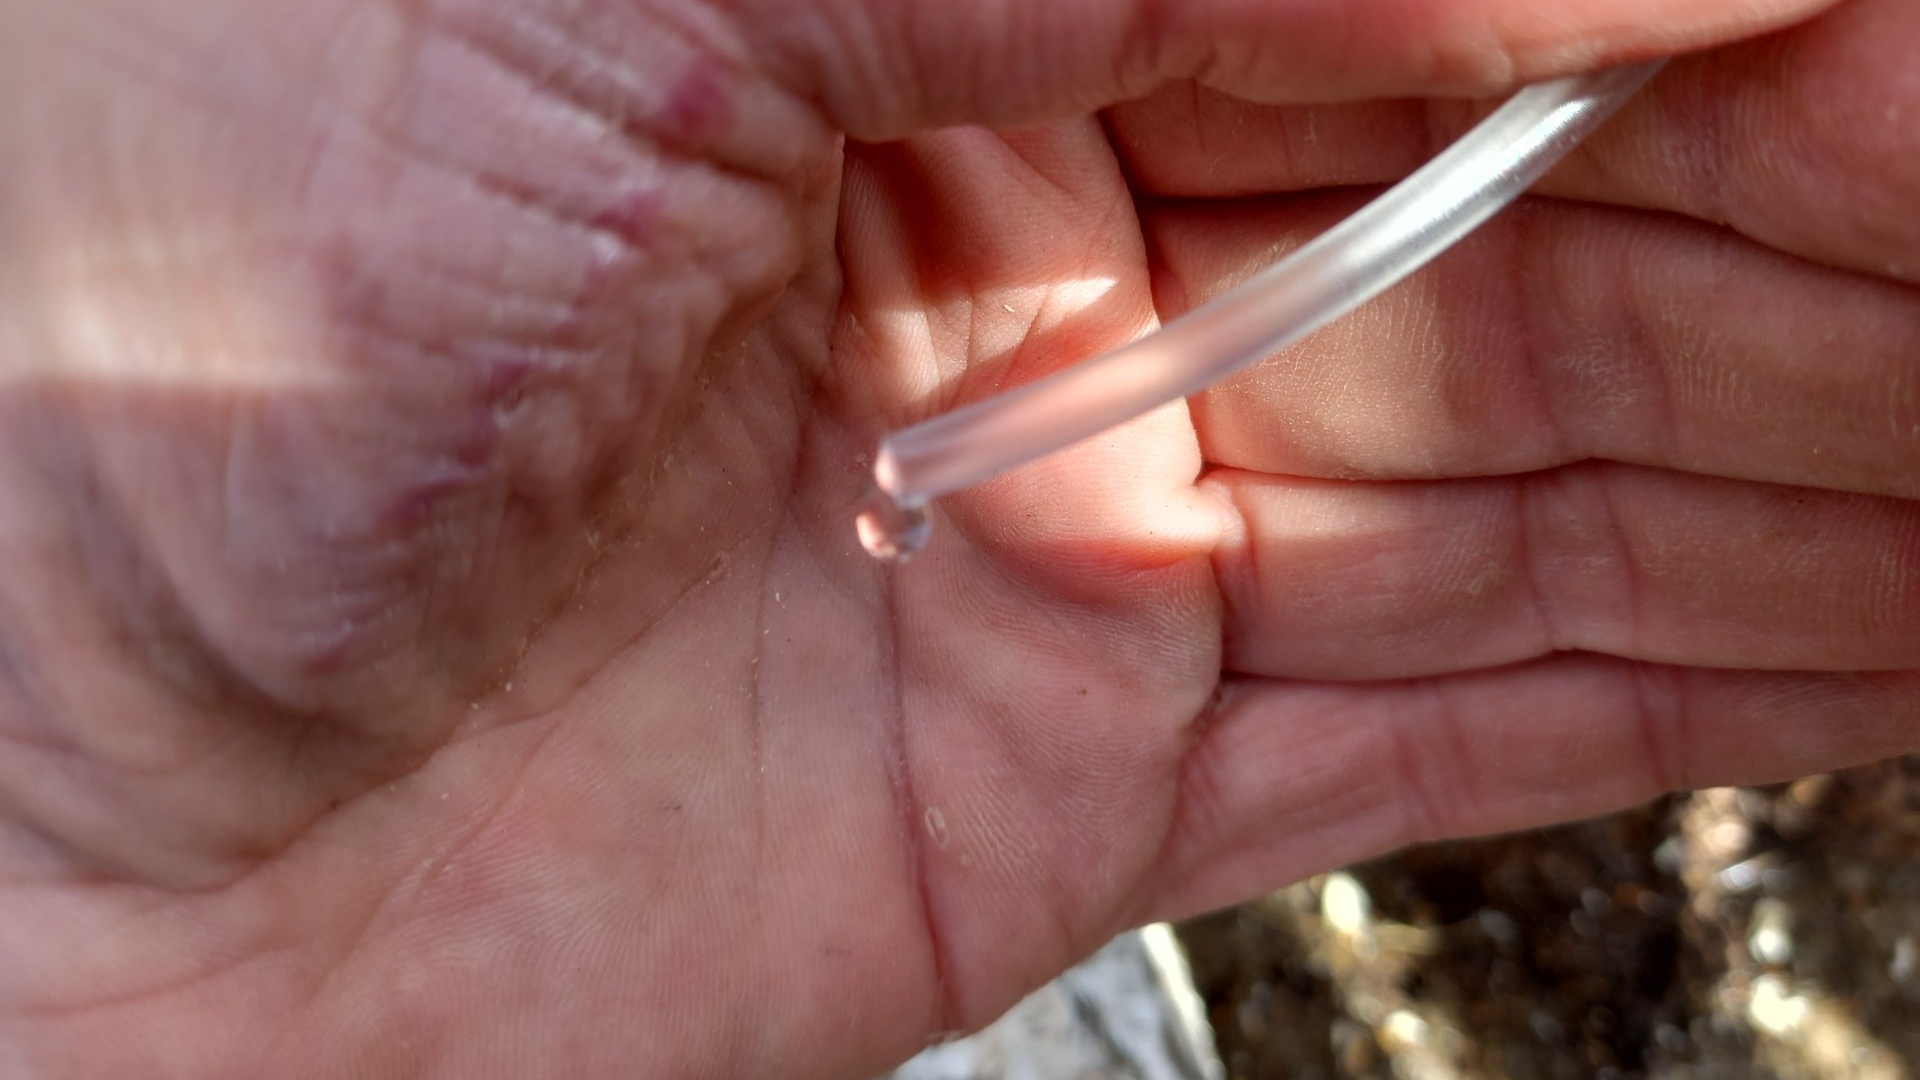
At night, due to the colder weather, the secretion of juice will not be so intense. Also, the location of the tree is important for good and maximum sap release.If it, for example, grows on a hill or hillock, then the juice from it will be less than from a tree growing in a lowland, ravine, on the shore of a reservoir, or near a swamp. Also, sweeter sap will come from birch growing in a deciduous forest than in a mixed or predominantly coniferous forest. Ideally, of course, if it is a birch grove. My tree grows near the house, in my yard, so I don’t collect sap in the forest. This is quite enough for me. In half an hour it comes up with about half a liter.

The main thing is not to forget to empty the container at night, or put larger dishes. At the end of the sap collection season, we remove everything that we installed there from the trunk and carefully seal the hole with clay. You can drive in a blank wooden chop of a suitable caliber.