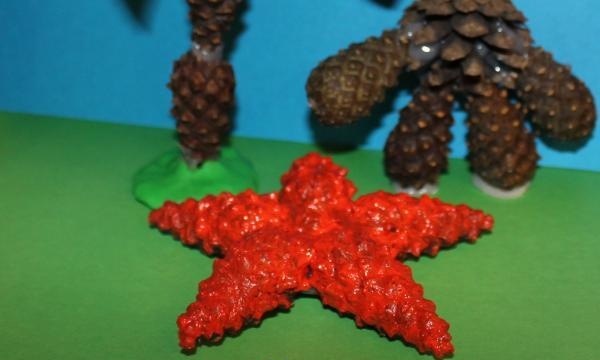
Autumn is the time when children enjoy collecting colorful leaves, fancy twigs and fragrant pine cones. How to use this natural material to benefit a child’s development? A simple and effective craft made from pine cones is one of the most common options. Find half an hour of free time and devote it to creativity together with your child - creating a luxurious starfish from pine cones.
For crafts we need:
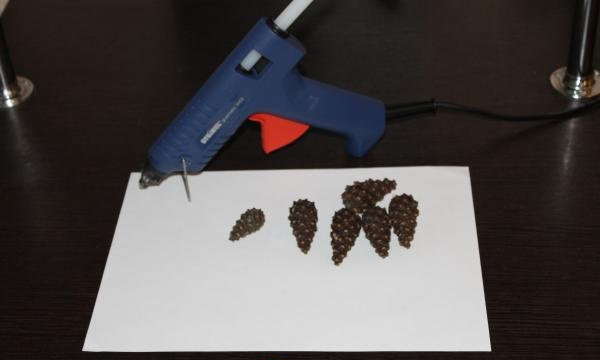
• 6 unopened pine cones with a pointed nose. 5 of them should be approximately the same size, 1 slightly smaller;
• glue gun and glue sticks;
• large sharp knife;
• scarlet acrylic paint (cinnabar is suitable) and a hard brush (you can use a glue brush);
• a sheet of paper or newspaper to protect the table from glue and paint.
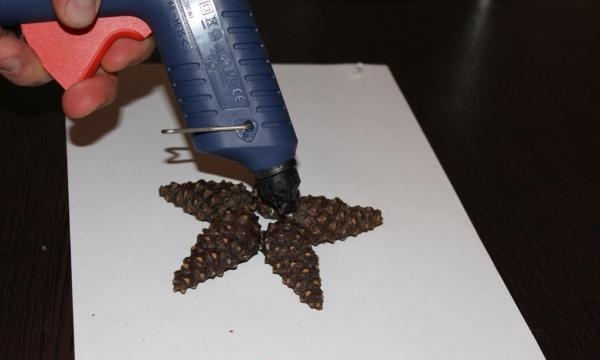
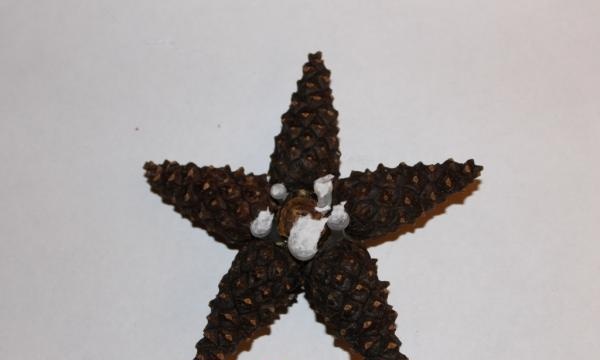
Step 1. We collect the “rays” of the star. Clean the cones from dust and pine needles, cut off their tails. Set the small bump aside for now. Fold the prepared natural material into a five-pointed star. Carefully apply hot glue to where the barrels of the pine cones touch. Wait for the glue to cool.
Step 2. Filling the middle of the craft. Using a knife, cut the small pine cone in half crosswise.
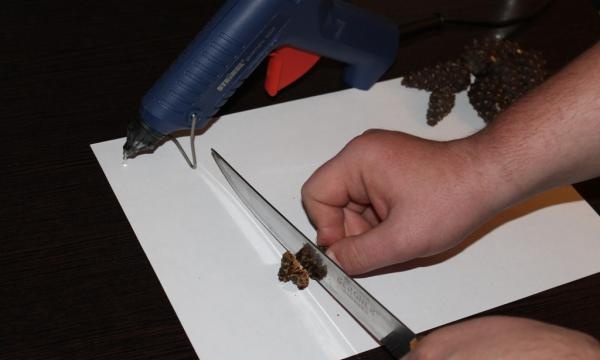
We will not need the spout, but place the expanded part in the center of the star, thus closing the hole in the middle. Apply hot glue to the star again, securing the middle. Once the glue has cooled, the star is ready to paint!
If the paper or newspaper on which the gluing was made sticks to the cones on the back side, it’s not a problem. Carefully tear it off, and the traces of the newspaper will then be securely hidden under a layer of paint.
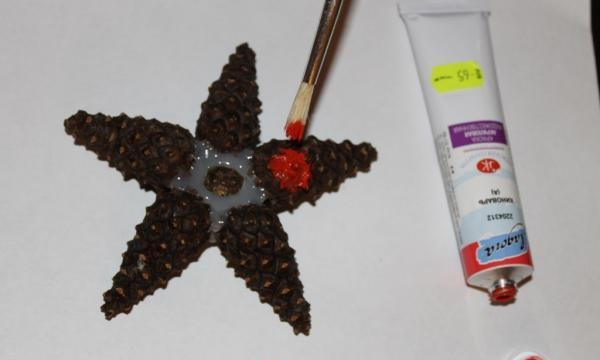
Step 3. Painting a starfish. This stage of work is certainly the most enjoyable. It can be safely entrusted to a child over 4 years old. Paint the craft together with the little ones: acrylic paint spreads easily over the surface of the cones and can be easily washed off if the little ones get dirty. It is better to take a hard brush: it will better paint the rough surface of the cones. After covering one side of the starfish with paint, leave it until completely dry (from half an hour or more, depending on the thickness of the acrylic layer applied). Then turn the work over and paint the other side.

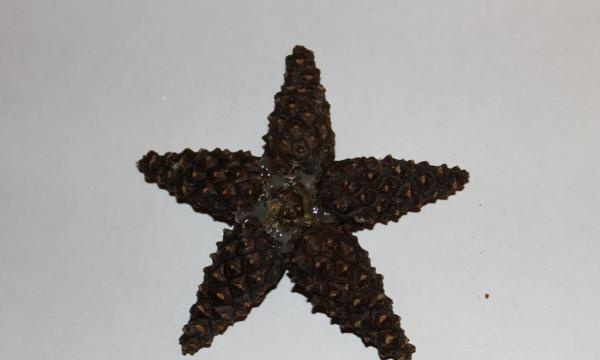
The bright craft is ready! Thanks to hot glue and acrylic paint, the star turned out to be very durable, so it can be safely used in children's games and in interior decoration.