Do it yourself
Life hacks, master classes, useful tips, recipes.
Where to put the remains of plastic (aka polymer clay), those multi-colored pieces that remain from large products? For me, the answer is always the same: mix everything until a uniform color and fashion jewelry, covering the finished products with gold or colored mother-of-pearl. Today I will tell you how to easily and simply make beautiful, stylish “antique” earrings, or rather, ancient ones - as a result of simple manipulations with polymer clay, we will get luxurious “golden” earrings in the ancient Egyptian style.

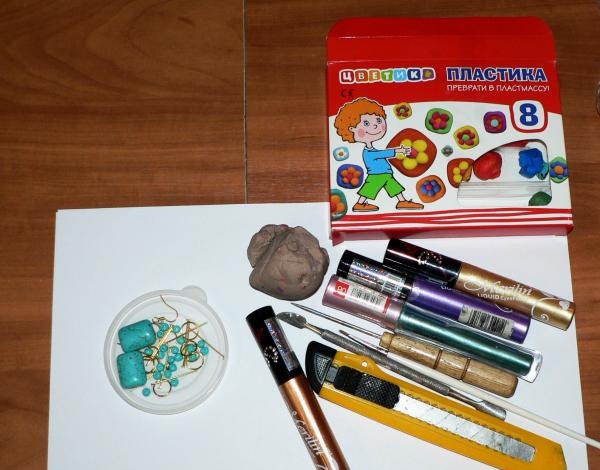
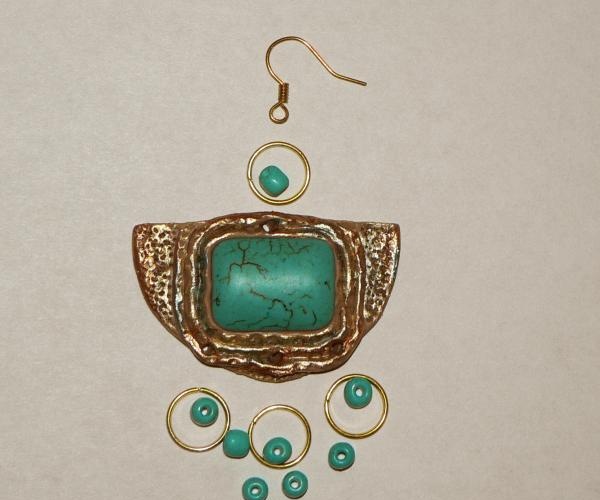
To work we need the following:
- polymer clay (mix the leftovers or take any color, but not too dark);
- two stones of rectangular imitation turquoise (the shape of cabochon stones is variable, you can take oval or round, as you like or what you have on hand);
- an even number of large turquoise beads, turquoise beads;
- accessories for earrings (earrings, rings, pins);
- gold for coating (this can be gold acrylic paint, I use gold-colored liquid eye shadow);
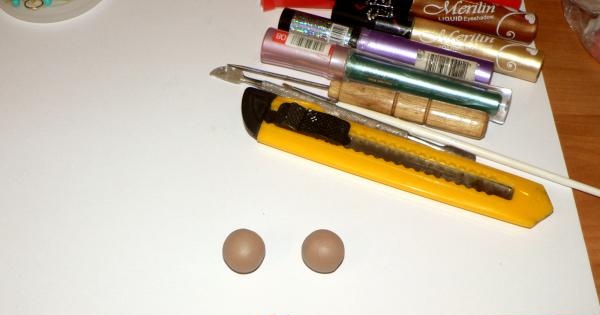
- tools (pusher, stationery knife, toothpicks, awl).

For work we need


We roll two identical balls of polymer clay, keeping in mind the size of the stones, so that they fit freely in the center of the product.

Roll two identical balls


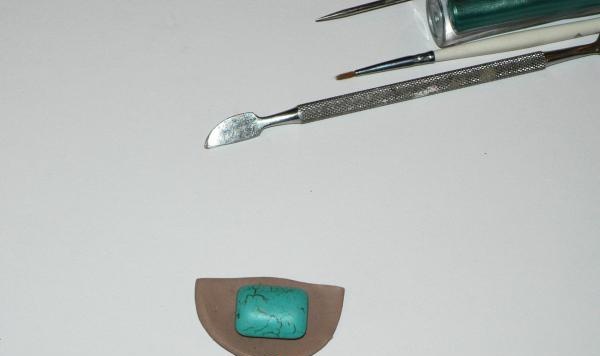
We roll out the circles, cut off the top with a stationery knife and get this interesting shape.

Roll out circles


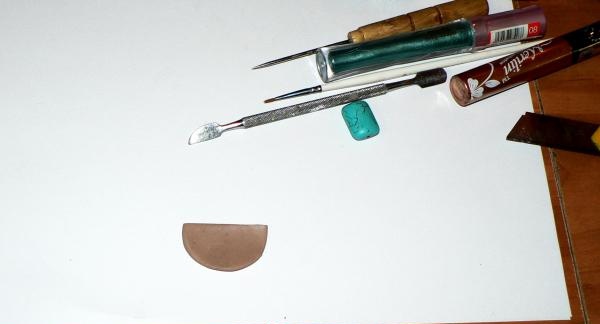
Place stones in the center.

Place stones in the center


Roll out thin sausages from polymer clay and place them around the stones like this. We make notches that imitate embossing.

Rolling out polymer clay


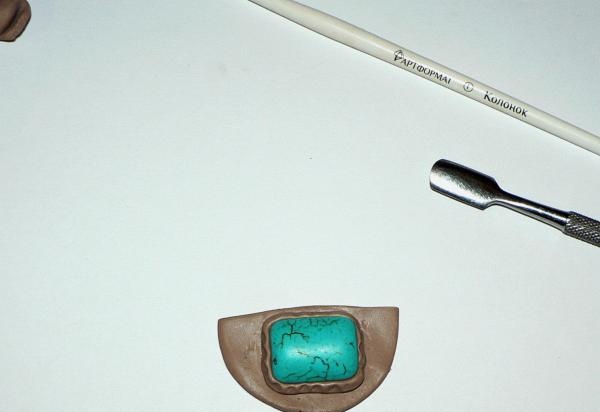
Lay two more rows like this:

Lay two more rows


Apply the relief using toothpicks or an awl.

Applying relief


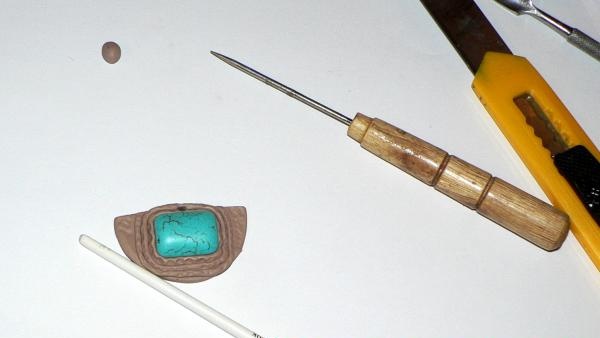
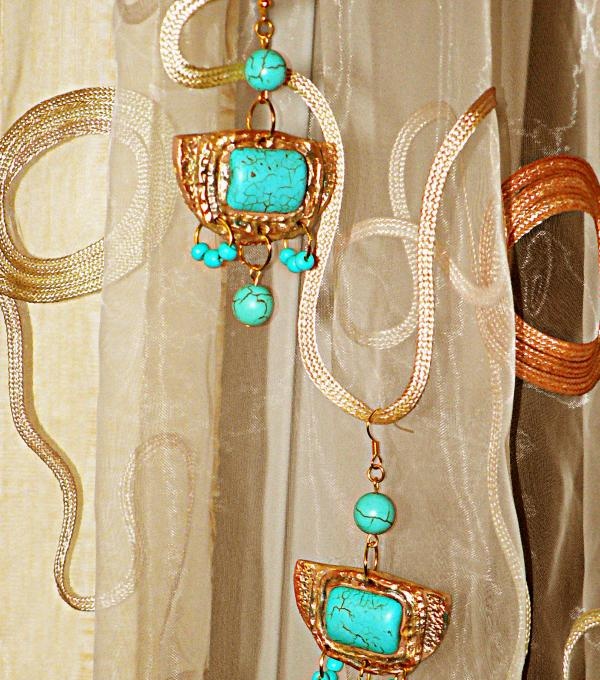
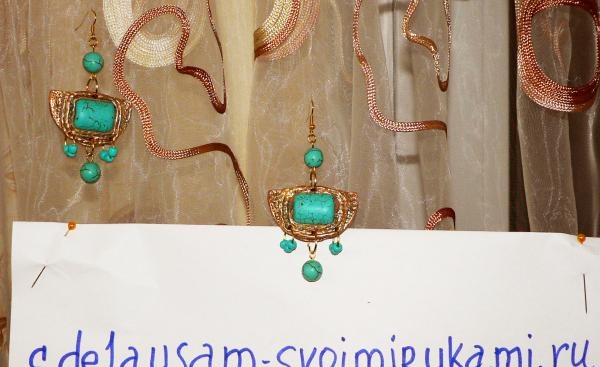
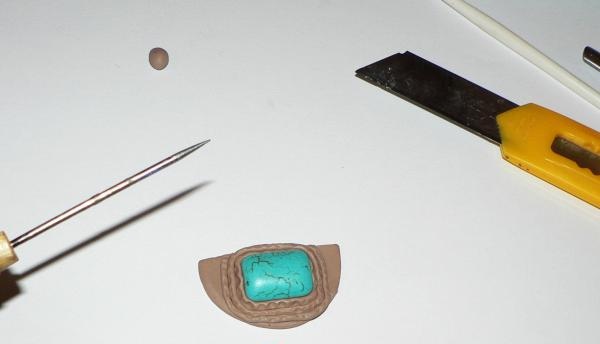
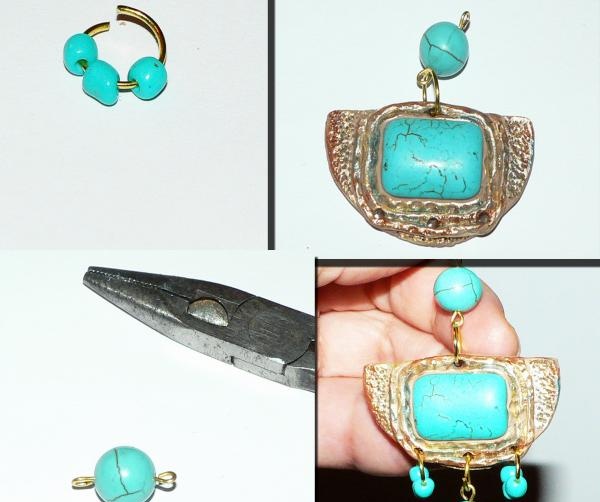
We make holes in the center at the top (under the ring to which the earrings will be attached), three at the bottom for pendants, and attach fittings to see what our decoration will be like.

Making holes


We apply gilding.

Applying gilding


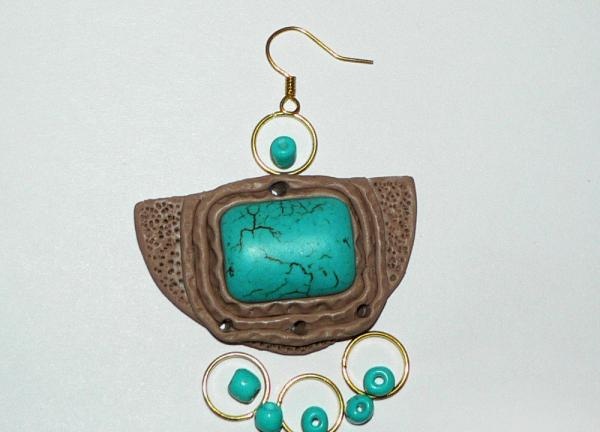
Now the product can be baked in the oven at a temperature of 110 degrees, naturally, observing safety precautions (avoid burning, as the plastic in this case becomes toxic). Let it sit for 10 minutes (you can check the baking time on the box of polymer clay, as it varies depending on the company). We cool the products and coat them with varnish so that they do not lose their gilding over time, we begin assembling the jewelry, for this we thread rings through the holes. We insert nail pins into the beads and beads, cut off the excess, make loops, and hang them on rings. We fasten the earrings.

bake in the oven


The earrings are ready! Now all that remains is to wait for the right occasion to “walk” them in a stylish outfit. These earrings will look great with a boho, oriental or ethnic outfit.

Egyptian earrings

DIY Egyptian earrings
come back
Comment
  • bowtiesmilelaughingblushsmileyrelaxed relaxedsmirk
    heart_eyeskissing_heartkissing_closed_eyesflushedrelievedsatisfiedgrin
    winkstuck_out_tongue_winking_eyestuck_out_tongue_closed_eyesgrinningkissingstuck_out_tonguesleeping
    worriedfrowninganguishedopen_mouthgrimacingconfusedhushed
    expressionlessunamusedsweat_smilesweatdisappointed_relievedwearypassive
    disappointedconfoundedfearfulcold_sweatperseverecrysob
    joyastonishedscreamtired_faceangryragetriumph
    sleepyyummasksunglassesdizzy_faceimpsmiling_imp
    neutral_faceno_mouthinnocent
5+two=
Comments (0)

Making a Native American Dream Catcher | Do it yourself

How to make large clamps for gluing furniture panels from available materials

How to make a high-speed engine from a bolt and nut

Various | Page 3 | Do it yourself

«Do it yourself - with your own hands» - a site of interesting homemade products made from scrap materials and items at home. Step-by-step master classes with photos and descriptions, technologies, life hacks - everything a real master or just a craftsman needs for needlework. Crafts of any complexity, a large selection of directions and ideas for creativity.

We recommend reading

Washing machine error codes