We prepare the necessary things.
In our case, what is necessary is your own hands, a sufficient amount of cord and a base. There are various designs, but here is the most basic one; to make it you don’t need a drill, a machine, or even a shuttle.
Straight bars of any cross-section are suitable for the base. Your humble servant chose what was at hand - two shovel handles, cut to the required length (110 cm).The length of the base will be the width of the hammock, so choose the size of the bars based on your own anthropometric data. In principle, any rope in composition will work as a raw material for fabric, however, it is worth considering this:
- natural ones are more pleasant to work with, they are more convenient to work with, but if the finished product is expected to be constantly on the street, then they will last a maximum of two seasons;
- artificial ones last longer, depending on the material they may differ in ease of use, but contact with the body is always unpleasant;
- combined ones can combine both the advantages of both options and their disadvantages, so do not forget to touch them when purchasing (literally) and ask about reliability, soilability and durability.
I chose the third option, and I took a product from the same manufacturer in different colors; you may prefer a single-color or two- or three-color option to your liking. My choice was based on the fact that I would have to work with long lengths of cords, and multi-colored ones come in very handy here, especially if I get tangled.
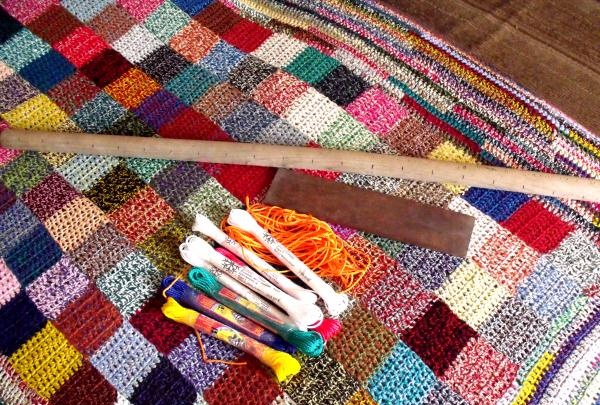
In the photo you see a small die, this is a template. In principle, you can do without it, but since it cannot be called a special device, but it is easier to work with, I allowed myself to take it too. Whether you personally need it, decide after reading the description of the process.
The amount of cord is determined by its thickness, material, as well as the desired parameters of the hammock. Here the rope is 2.5 mm thick, which is quite enough (proven in practice) for a person weighing up to 75 kg, provided that we are talking about a fabric with a number of lines from 18-20, and the cord itself is artificial or semi-artificial.With natural raw materials, it is better to take the thickness in reserve, and in general, no one limits you in this. But you need to remember that the thicker the rope, the greater its consumption, which is important when planning. With the specified parameters, for a hammock with a fabric of 200x100 cm, you need to prepare 150 meters of cord.
If you initially cook less, this is fraught with problems with extensions and the appearance of extra nodules!
Let's get to work.
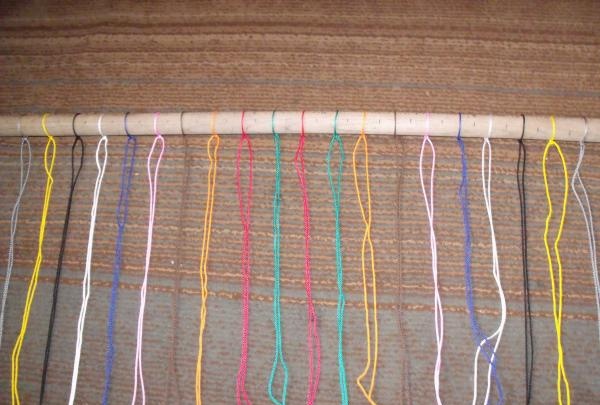
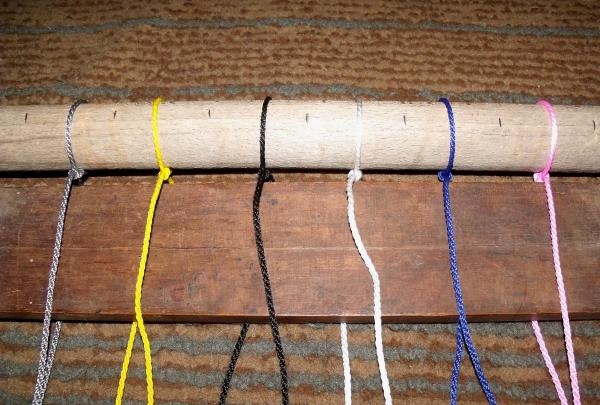
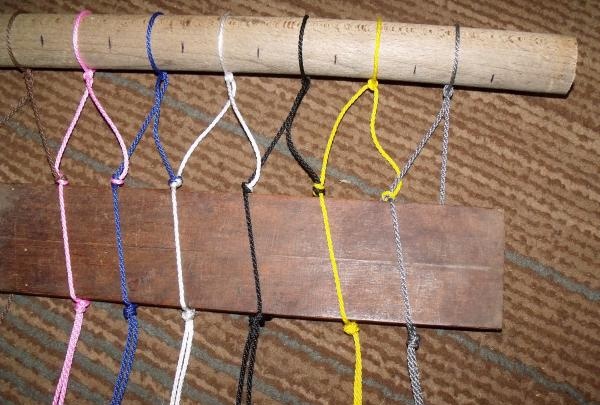
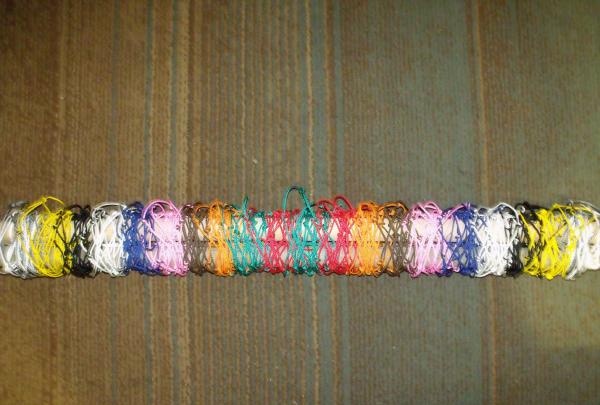
We take one of the bars and mark it according to the future number of lines. We have 20 of them, so we take 5 cm between the marks, and the outer ones are a little more distant from the cuts - 7.5 cm. We will explain why this is necessary later. We cut the prepared cord into twenty pieces of 7 and a half meters each. We fold each such segment in half and tie the resulting middle part to the base in the marked places. Decide for yourself how to tie it, just try to make it secure.
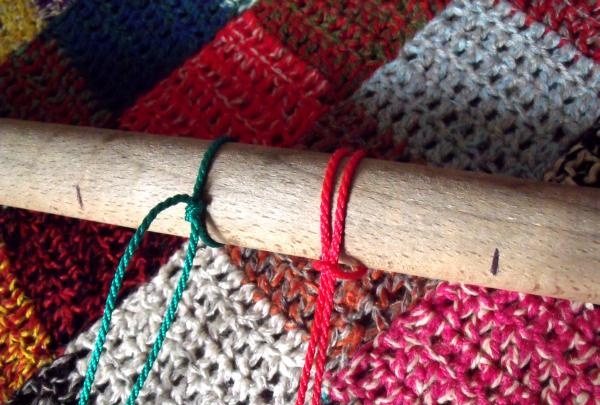
When we finish, we get a block and twenty pairs of 375 cm cords.
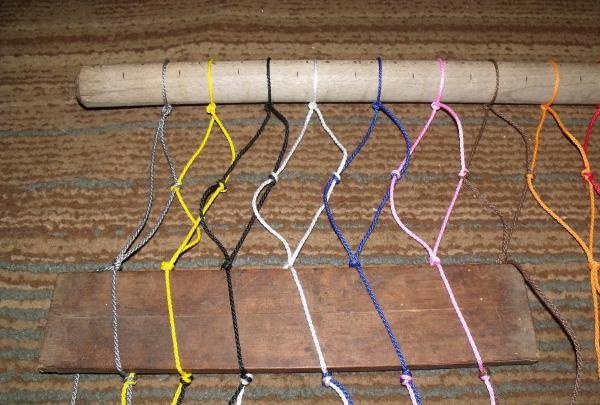
Now we will need the mentioned die. By the way, if you decide to use it, remember that its width determines the length of the side of the diamond cell. The smaller it is, the more knots and the greater the consumption of material, the more it is, the more inconvenient and weaker the canvas will become. I consider the option with a 5-7 centimeter “pattern” to be optimal for myself, but you can experiment. As for its length, the closer it is to the length of the base, the fewer times you will need to move it along the row. So, we apply the pattern die to the base so that one of the cords of the pair is on the bottom, and the second on top.
Now for the actual binding. In the first pair, leave the bottom lace, and connect the top one to the bottom of the next pair, and knit a knot.I am not a sailor or a climber, so I call the chosen connection option “pulling with a broach.”
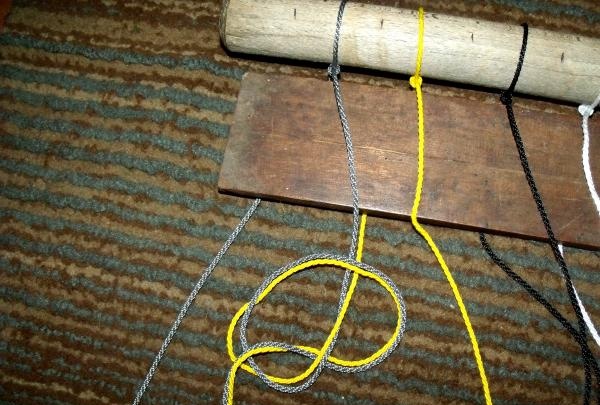
By the way, it can also be used if you decide to abandon the template, but then you will have to mark the distance on the threads themselves to ensure uniformity of movement. In any case, we go to the very edge of the first line, where the last cord should remain free. After this, we rearrange the template under the resulting row of nodes, and perform the same actions, but with one difference - the free outer cord is connected to one of the nearest pair.
When the second row of knots is made, we will have the first row of diamond-shaped cells. We rearrange the template die and knit identically to the first row.
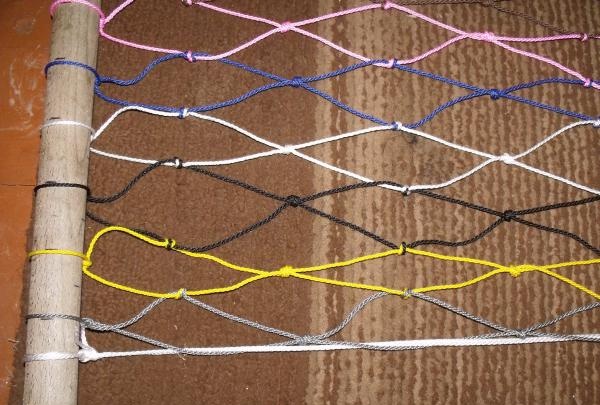
We go on like this until we get the canvas of the intended length, the main thing is not to forget to then tie the ends to the second half of the base.
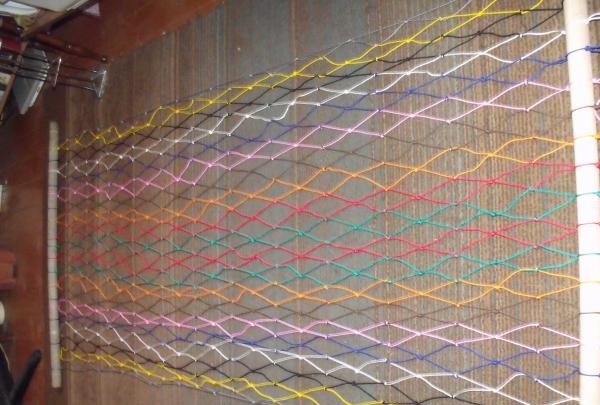
You should not leave the canvas in this form - the outermost cells on the long side can quickly tear. Therefore, we take another rope, one and a half to two times thicker than the one we are using (or simply make a double cord from the one we have) and, stepping back a little from the outermost knot, tie it to the base. Then we intertwine it with the outer thread, stretch it along the entire length of the hammock, and tie it on the opposite bar.
Storage and installation.
If you don’t plan to go outdoors yet, then our product can be folded and rolled up so that it takes up less space and put into storage; fortunately, in this form you can put it almost anywhere.
When the desire to hang in the air overpowers the joy of simply owning it, you can attach a hammock in a place you like. There are even special mobile spacer stands that can be used for this purpose.But, since our idea is to ignore any third-party devices, we simply go out into the garden, select two suitable trees, and use two thicker and stronger ropes to hook our product.
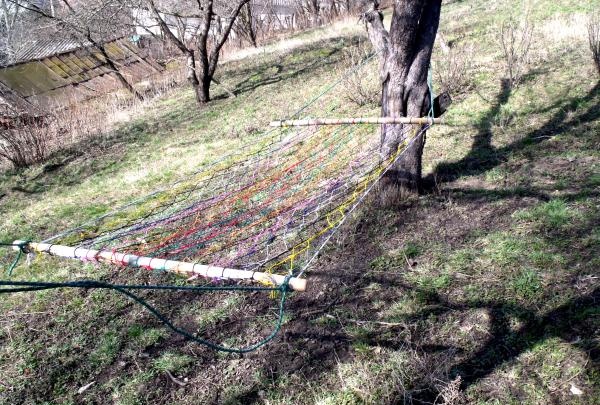
We will not write how exactly the height is calculated, because everything here is purely individual, and depends on the length and width of the hammock, the raw materials and thickness of the ropes, the distance between the supports and the weight of the potential couch potato. So experiment, have an easy job and enjoy your holiday!