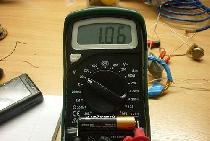
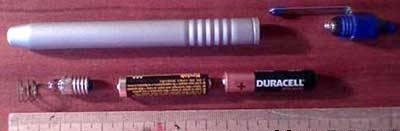
Here we will be upgrading a miniature pen light. There was an incandescent light bulb. With this flashlight, a significant decrease in the brightness of the incandescent lamp was noticed when the batteries were lowered. And naturally, low efficiency and service life. But we will fix everything.
Light-emitting diode! - This is the solution to our problems. But change Light-emitting diode that's not all. It is necessary to assemble a mini converter for LED. Our flashlight had two batteries, so we will hide the converter in place of one of the batteries.
Let's look at the diagram.

The diagram shows a generator - converter. Excitation is achieved by transformer coupling.
The circuit used a transistor KT315, super bright Light-emitting diode.
Let's talk about the transformer separately. To make it, you will need a ferrite ring - approximate size 10x6x3 and permeability of about 1000 HH. Wire diameter is about 0.2 mm. Two coils of 20 turns each are wound on the ring. If you don’t have a ring, you can use a cylinder of similar volume and material.You just have to wind 60-100 turns for each of the coils. An important point: you need to wind the coils in different directions. At worst, you can use a nail, but a large nail, and about 150 turns are required for one coil. In addition, the efficiency of a nail is much lower than that of ferrite.
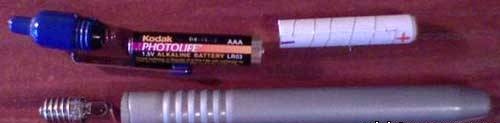
Let's get down to business. Let's disassemble the flashlight. All its parts are clearly visible.
So - we are making a housing for our converter.
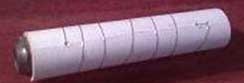
Using the battery we make a cylinder. It can be made of paper or a piece of any rigid tube made of non-conductive material can be used. current.
We make holes along the edges of the cylinder, wrap it with tinned conductor, and pass the ends of the wire into the holes. We fix both ends, but leave a piece of conductor at one end so that we can connect the converter to the spiral.
Let's start assembling the converter itself. Let's start with the transformer, I didn't have a ferrite ring (and it wouldn't fit into the flashlight), so I used a cylinder made of a similar material - the cylinder was taken from an inductor from an old TV.
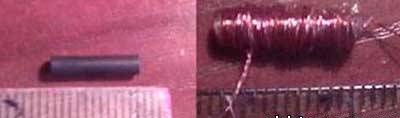
The first coil is carefully wound onto it. The coils are held together with glue. I got about 60 turns. Then the second one swings in the opposite direction. I got 60 or so again; I definitely didn’t count it - I couldn’t wind it neatly. Secure the edges with glue.
We assemble the converter according to the diagram:
Everything is located as in the figure: transistor, capacitor, resistor, etc. Passive and active elements have been assembled, we solder the spiral on the cylinder, the coil. The current in the coil windings must go in different directions! That is, if you wound all the windings in one direction, then swap the leads of one of them, otherwise generation will not occur.
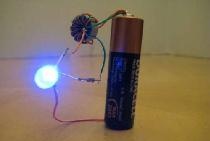
The result is the following:
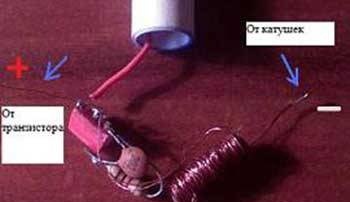
We insert everything inside, and use nuts as side plugs and contacts.
We solder the coil leads to one of the nuts, and the VT1 emitter to the other. Glue it.
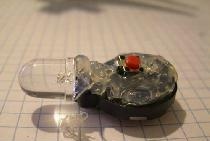
You got something similar to what is shown in the previous figure.
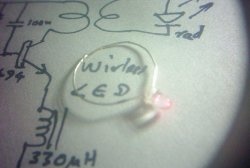
Now you need to make an LED light bulb. You and I have done this before, so we won’t stop.
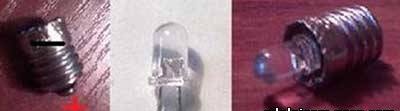
One thing: there must be a minus on the base LED. Otherwise nothing will work.
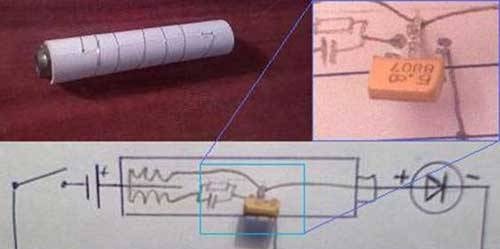
There was another solution to the problem. Of course, you can directly create a converter module with an LED in one package. In this case, as you have probably already noticed, you only need two contacts.
As is clear from the figure, the converter is a “substitute” for the second battery. But unlike it, it has three points of contact: with the plus of the battery, with the plus of the LED, and the common body (through the spiral). However, its location in the battery compartment is specific: it must be in contact with the positive of the LED. To put it simply, the assembly sequence in the picture cannot be changed.
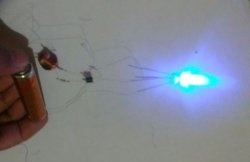
Flashlight in action:
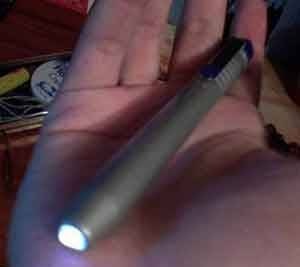
This flashlight is more economical and, due to the absence of a second battery, is lightweight. And the main advantage! All parts can be found in a landfill!
Good luck!