But the desire to buy a garden flowerpot comes into conflict with issues of price, transportation and assortment. Good flowerpots are not cheap, they weigh a lot, and the choice is very limited.
However, anyone who has mixed cement mortar, held a screwdriver and a hammer in their hands at least once in their life can cast a street flowerpot with their own hands right on the site.
All the costs for making an original flowerpot are three or four trowels of cement, about the same number of meters of adhesive tape and an hour or two of active labor. Most likely, you won’t have to buy anything special. Pieces of polystyrene foam, scraps of fiberboard, plywood, and boards can always be found around the household by inspecting the basement, pantry, or attic.

Search form
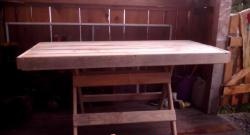
You can use anything as a form for a garden flowerpot - old tanks, boilings, buckets, boxes, boxes.
In our case, a plastic stool caught our eye, which, with a little modification, will serve as a frame for making a mold.By the way, you can take for work a classic wooden stool that has served its time, which you don’t mind disassembling later, or you can build a frame yourself - square, trapezoidal, rectangular, multifaceted - from scrap materials.
Our task is to convey the idea, and there are a lot of options for its implementation. So, let's begin.
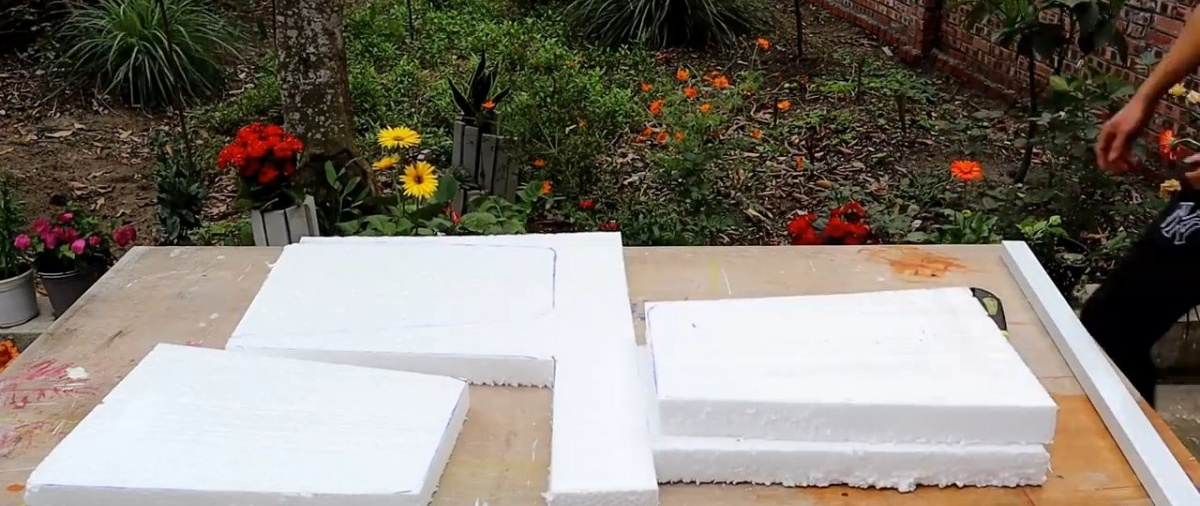
1. We take sheet foam as the outer side walls for the mold and mark it.

2. Using a utility knife, carefully cut out the sides.
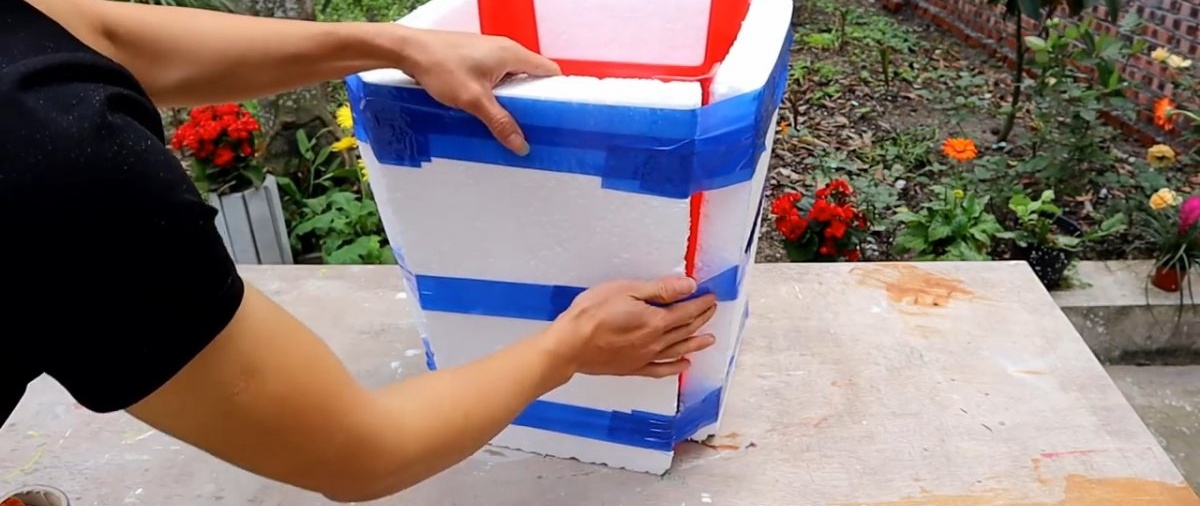
3. Using tape, we fix the foam walls on the sides of the stool.

4. We wrap the foam sides several times with the same tape to give greater strength.
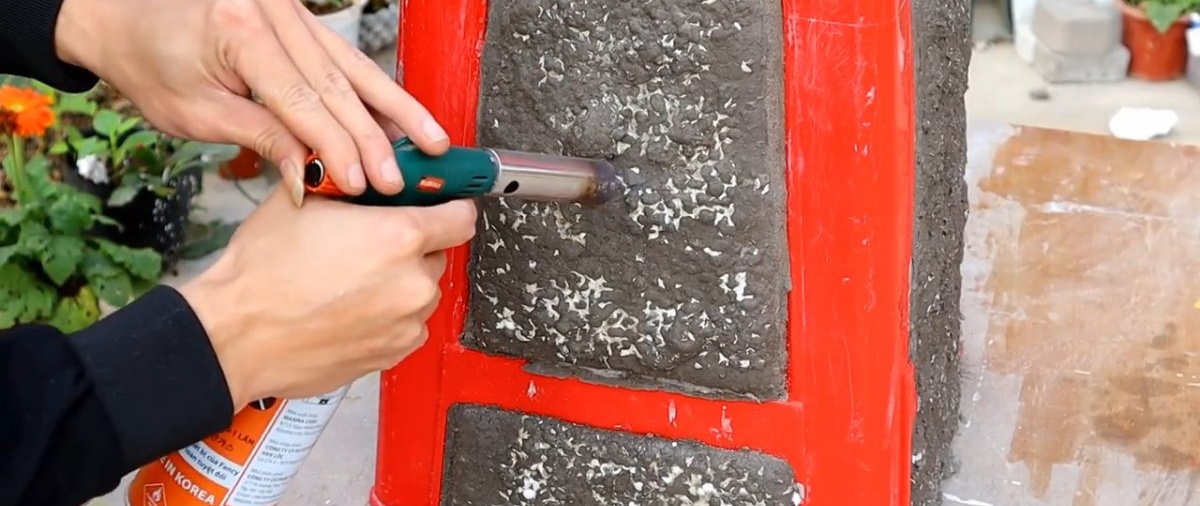
5. Using a gas burner, we melt the foam from the inside and set the texture of the pattern, which will subsequently appear on the finished product.
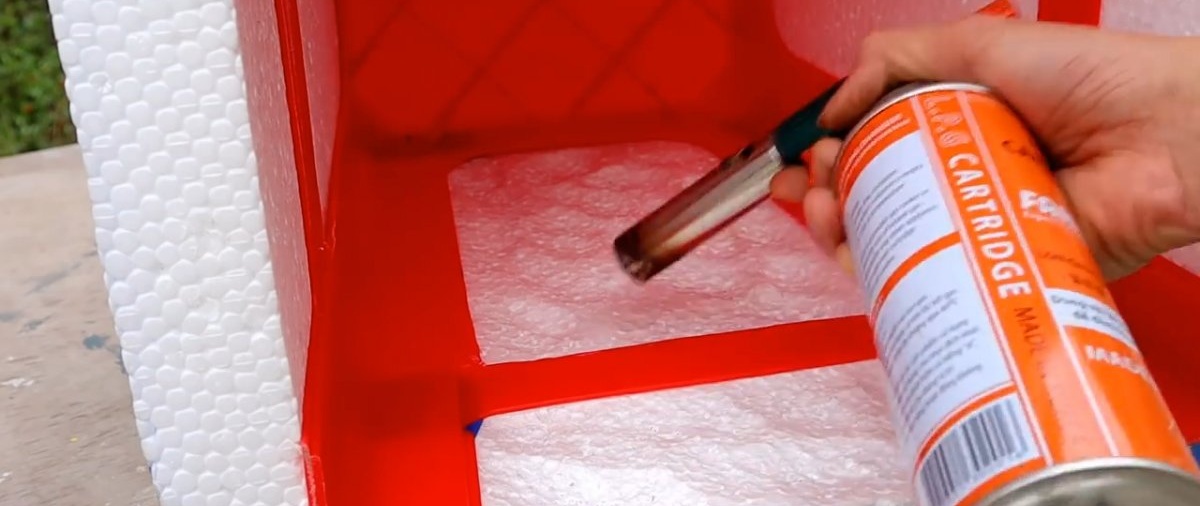
6. Fill the joints between the foam and plastic with sealant.

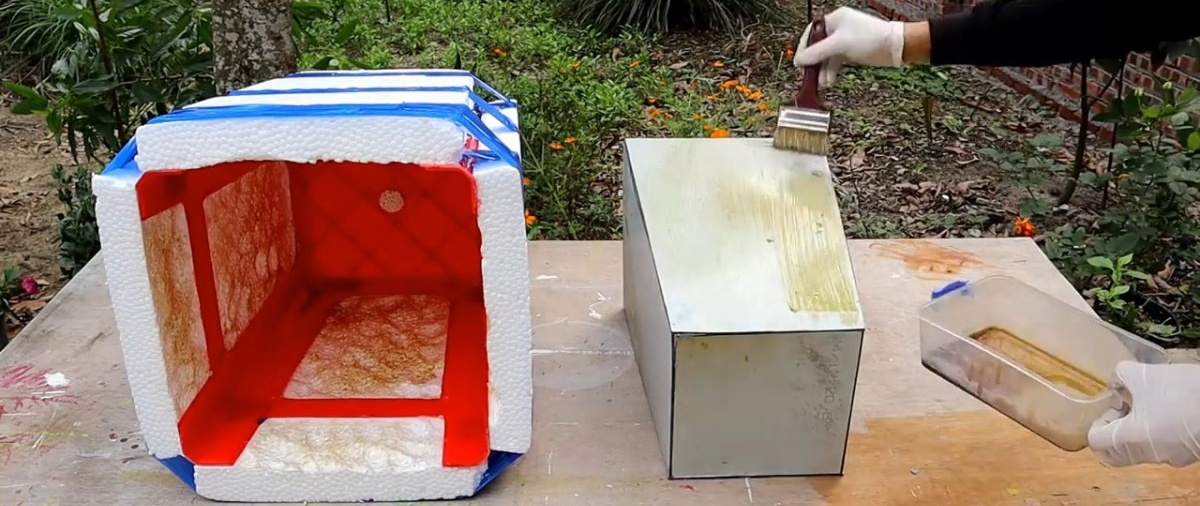
7. Glue the inside of the flowerpot shape from thin fiberboard with a polyurethane or other waterproof compound, having previously marked, cut and secured the structural parts with tape.

8. Lubricate surfaces that will come into contact with cement mortar, vegetable oil or other fat.
9. Fill the bottom of the outer mold with sand, moisten it and tamp it down, not forgetting to first make a hole for drainage and close it with a stopper (if the flowerpot will be used as a flowerpot, then the hole is not needed), equal in length to the thickness of the bottom of the flowerpot.
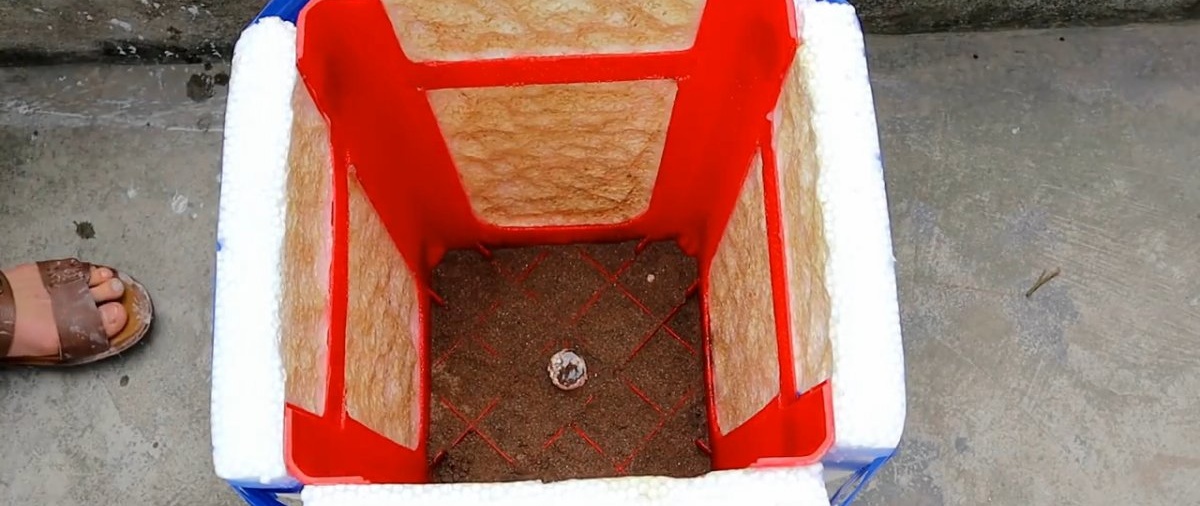
10. Mix the filling solution in equal proportions of sand and cement and fill the bottom of the mold to the level of the plug.
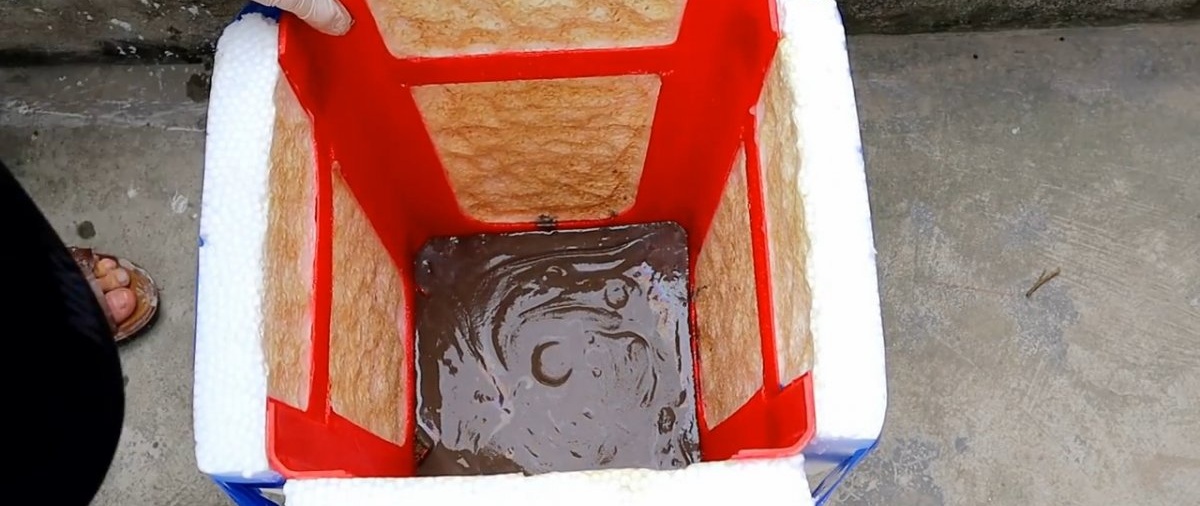
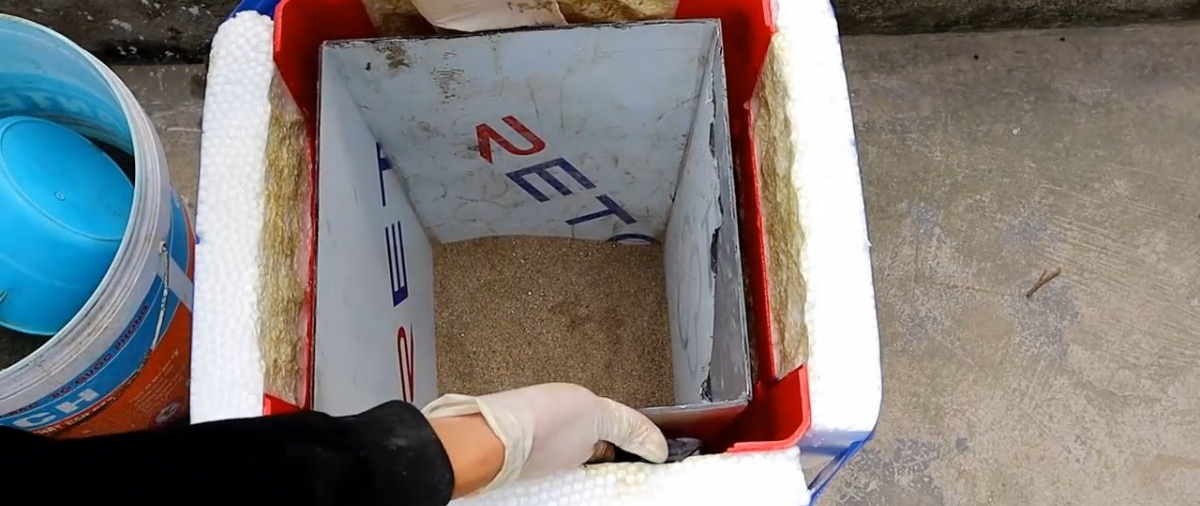
11. Place the inside of the mold and fill it a quarter full with sand.
12. Pour the concrete solution into the resulting voids using a ladle through a watering can with a wide neck, pouring sand into the mold as it is filled, and leave it to harden until the next morning.

13.After the concrete has hardened, remove the sand from the mold and disassemble it.

14. Use a gas burner to burn off the remaining foam.
15. Completely release the flowerpot from the mold and let it dry for several hours.

16. Paint and leave to dry.

17. The flowerpot is ready! All that remains is to find a worthy place for it in the garden landscape. Or maybe even in the house! It’s somehow a pity to keep such a magnificent handmade creation in the yard.
If, after all, fate is destined for it to remain in the open air, then it would not be amiss to reinforce it with steel or fiberglass construction mesh during the process and cover it with primer before painting.