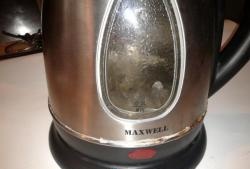
Even if you have a gas stove, it is much easier and faster to heat water in an electric kettle without leaving your guests. Moreover, this can be done in a couple of minutes.
Therefore, when our “dear”, warm-giving, electric friend one day stops heating, this can be very upsetting.
It is no secret that manufacturers of these devices do not pay much attention to the quality of their products, their electrical circuits and contacts. And this can apply not only to cheap, little-known brands, but also to expensive, reputable brands.
It is enough to go to the page of some online store and read dissatisfied customer reviews of supposedly branded products.
Here, of course, it depends on who is lucky, that is, we can say there is a lottery effect. Two people can take the same model of kettle, but for one it will last for many years, and for the other it will break in two weeks.
In any case, don’t get upset and plan to buy a new kettle if the old one shows no signs of life; sometimes the breakdown can be easily fixed.
Many people have a screwdriver, a dial and some kind of pliers. This will be enough to carry out repairs.
Sometimes, instead of ordinary screws, self-tapping screws for a special hex screwdriver are used in the kettle, probably so that repairs are carried out only in service centers. But it doesn’t matter, if you don’t have such a screwdriver, you need to pick up or file a straight screwdriver so that it fits exactly between the faces of the hexagon. Tested by practice, the screw can be unscrewed without any problems.
But most often you don’t have to file a screwdriver if you have several pieces of different sizes at home, suitable for a straight cut. Some kind will definitely fit the width of the working part of the hexagon.
When the screwdriver is selected, we proceed to disassembling the device. Sometimes the screws are so hidden that they are not that easy to find, but they are usually quite visible.
The main rule is: if you're not sure, don't pick. It is very easy to break the plastic parts of the kettle. And if it was given for repairs, then you can create unnecessary problems for yourself. Therefore, we do everything carefully and slowly.
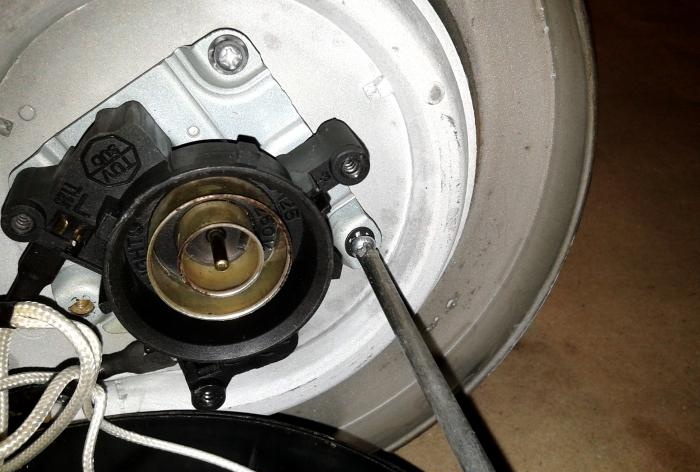
The first thing you need to do is remove the bottom of the kettle. This will make it possible to get to its “insides” and, if necessary, disassemble the handle.
To do this, turn the kettle upside down and unscrew the fastening screws around the perimeter of the bottom. There are usually three screws. It is advisable to put all the parts in a pre-prepared box.
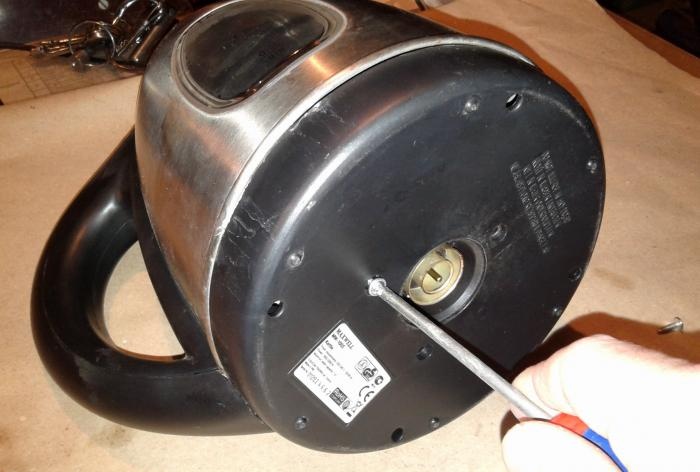
Once the screws are removed, the bottom of the case should come off easily. Sometimes, you need to apply a little force by turning the cover by hand, or prying it from the side with a screwdriver.
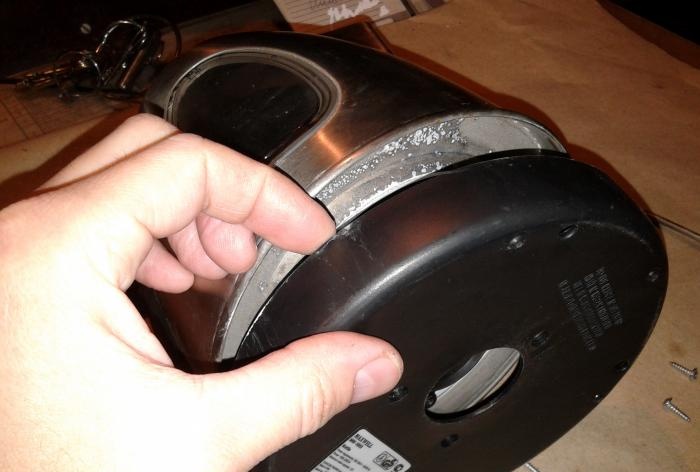
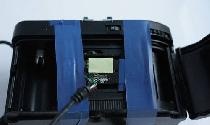
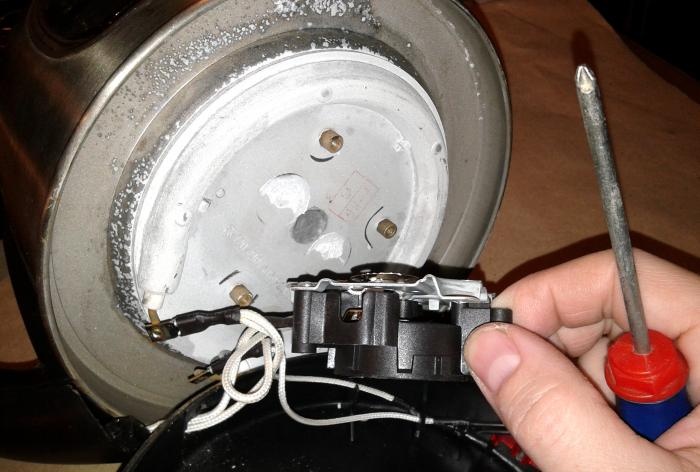
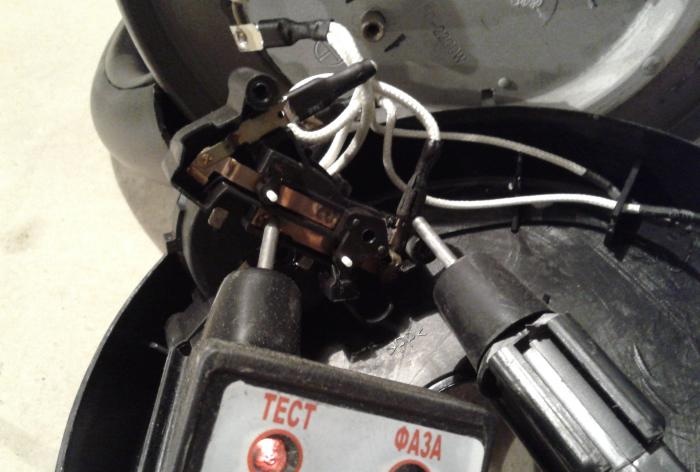
Under the cover you can see the heater itself (heating element), overheating protection and other circuit elements.

Now we move on to the second stage of repair - this is checking the integrity of the heating element for a break. It would also be a good idea to check its resistance to the housing.
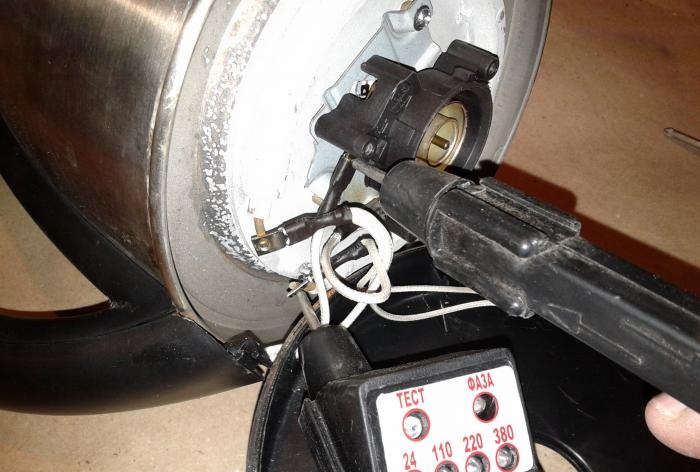
We check for a break.
To do this, we connect the continuity cable to the heater terminals. For more accurate measurements, it is recommended to temporarily remove the connector with the wire from one end of the heater.
If the device shows a “circuit”, it means there is a break in the nichrome, there is no break inside the heating element.
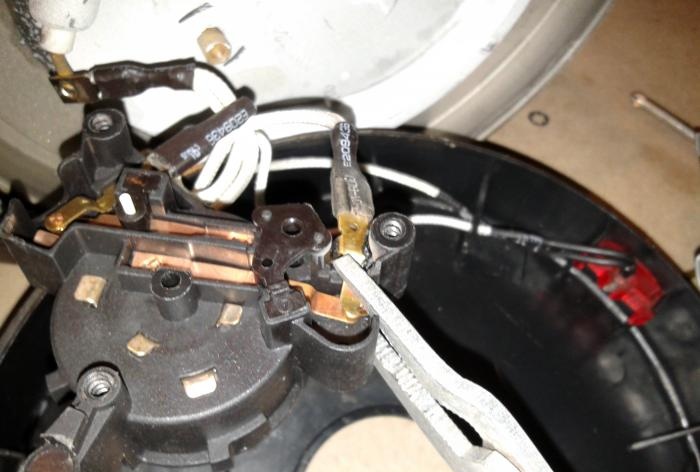
Body resistance.
This indicator is necessary in order to know whether there is an electrical connection between the nichrome heating element and its body. If it is, then using such a kettle, although possible, is extremely dangerous. This is especially true for its use in private homes and in the country, where it is very close to the ground.
The body of the kettle is under the “phase” and if the insulation from the ground is poor, you can get a strong, even fatal electric shock. Of course, this doesn’t stop some, it heats the kettle and it’s good, but the consequences can be disastrous. In such cases, either change the heating element or throw the kettle in the trash. At least those who care about their family and neighbors do so.
So, let's measure the resistance. To do this, connect one end of the dial to any terminal of the heating element, and the other to the metal “sole” or body of the kettle.
If there is no chain, then everything is in order.
In general, this procedure is correctly done with a 500-volt megaohmmeter. This device will show more accurate readings, so to speak, under operating voltage, but in the absence of it, a continuity test will be sufficient.
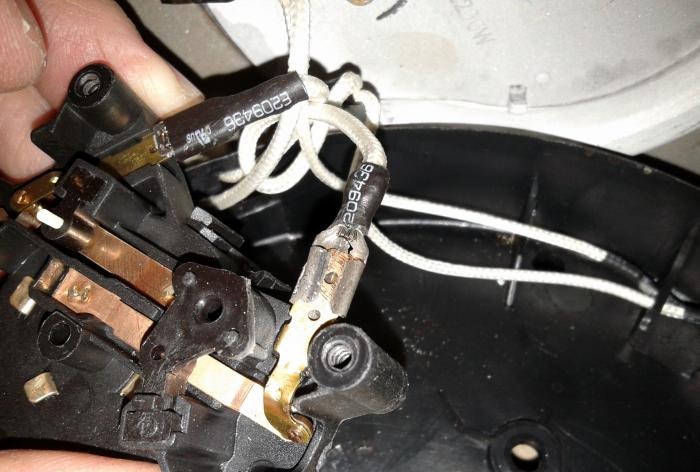
As you can see in the photo, in the case of this kettle the heating element is not damaged.
The third stage is to check that the overheating protection is working properly.This protection should turn off the kettle when there is no water in it or it has boiled away.
The principle of this device is quite simple. When overheated, the bimetallic plates on the “bottom” of the kettle bend and press on the ceramic rods. They, in turn, press on the electrical movable contacts, which, when pressed, open.
After the bimetal cools and returns to its original state, the same happens to the electrical contacts. They close again and pass current to the heater. And this can continue until someone disconnects the device from the network.
Of course, such protection is not designed for repeated shutdowns. Most likely, after a couple of dozen such overheating cycles, the heating element itself will burn out, but thanks to it, it may not lead to a fire.
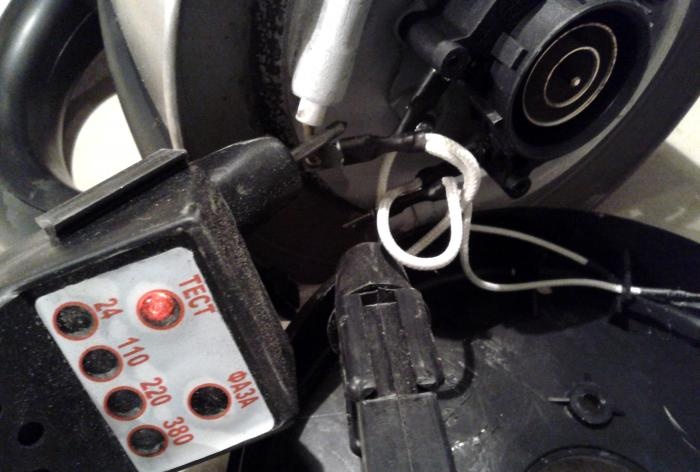
Let's move on to disassembling this module.
Unscrew the screws securing the protection block from the “sole” of the kettle. Here, not self-tapping screws are used, but 4 mm screws.
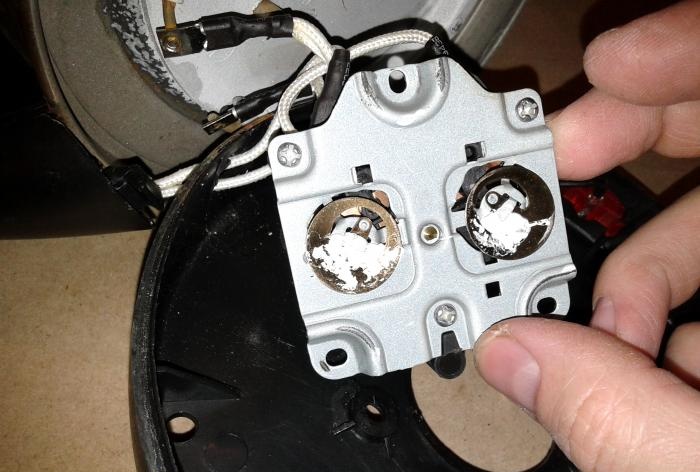
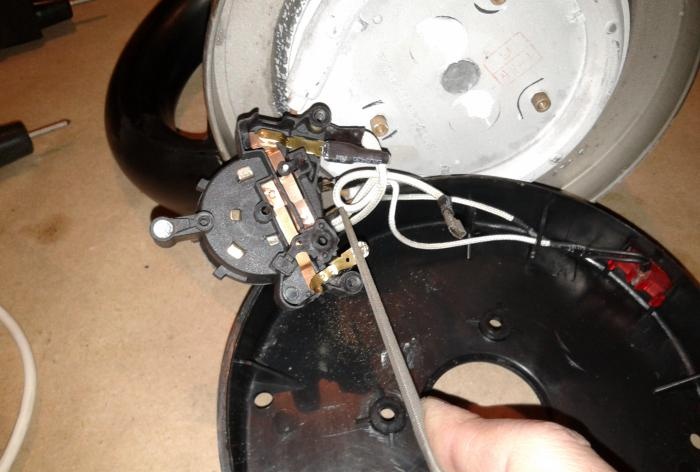
Having unscrewed them, you can see two round bimetallic elements, which, for better heat transfer, are connected to the body through thermal paste.
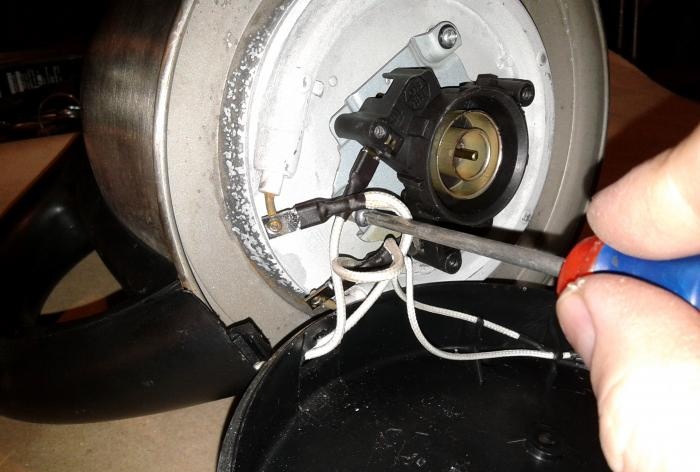
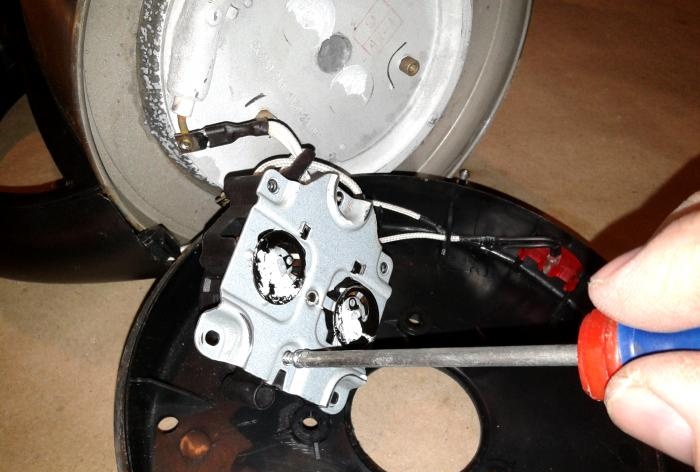
Next, to get to the contact plates, you need to unscrew two more screws. They connect the kettle's power connector to the overheating protection unit.
In the photo, the ceramic rods and current-carrying contacts mentioned above are very clearly visible.

You need to be very careful not to lose these ceramic rods, as they easily fall out of their seats.
It is better to immediately take them out and put them in a box while this unit is being repaired.
Now, we check by dialing whether there is a circuit through the contacts. In this particular case, there was no chain. It appeared only when the plate with the contact was pressed forcibly.It is also clear from the appearance that the contact and plate overheated and lost their properties.
But this problem can be solved by bending the contact all the way.
They must first be thoroughly cleaned of carbon deposits. It wouldn’t hurt to clean the second group of contacts, as well as the connectors.
This will extend the life of the device, especially since you have already disassembled it anyway.
We check the chain again and put everything back together in the reverse order.
There is no need to place the ceramic rod on the bent contact. The main thing is not to forget to insert it into the work group of contacts. This will be enough to protect the kettle, if anything.
Such repairs will not take much time, will add confidence to your abilities, and most importantly, will save you from unnecessary expenses on a new kettle.