Do it yourself
Life hacks, master classes, useful tips, recipes.
home » Electronics » Simple circuits » Sensitive microphone for computer
The simplest computer microphone is a Chinese capsule connected to the input. This capsule microphone is also powered by the computer input. It consists of a condenser microphone with a field-effect transistor amplifier.
Sometimes the sensitivity of such a capsule is not enough; you have to bring it close to your face so that the sound level is normal.
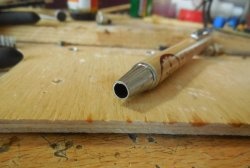
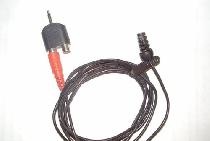
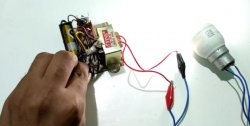
I want to share with you a very simple pre-amplifier circuit for a capsule microphone using a single transistor. This circuit can be used to modify an existing computer headset, or to make an additional microphone in the housing, say, from a syringe. Or just blow it with heat shrink.
There should be no problem finding capsules: they are used almost everywhere in telephones, headsets, Chinese cassette recorders, etc.
The circuit is powered from the computer input and you do not need an additional power source.

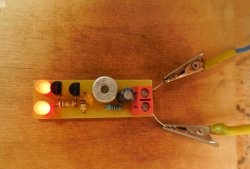
To assemble the sensitive microphone circuit we will need:


1. Transistor BC547 or KT3102, you can try KT315.
2. Resistors R1 and R2 with a nominal value of 1 kOhm.To increase the sensitivity of R1 for the capsule, rated from 0.5 - 10 kOhm.
4. Disc ceramic capacitor with a nominal value of 100-300 pF. It can be omitted if initially there are no “spikes” or excitations of the amplifier.
5. Electrolytic capacitor 5-100 µF (6.3 -16 V).
Sensitive microphone for computer

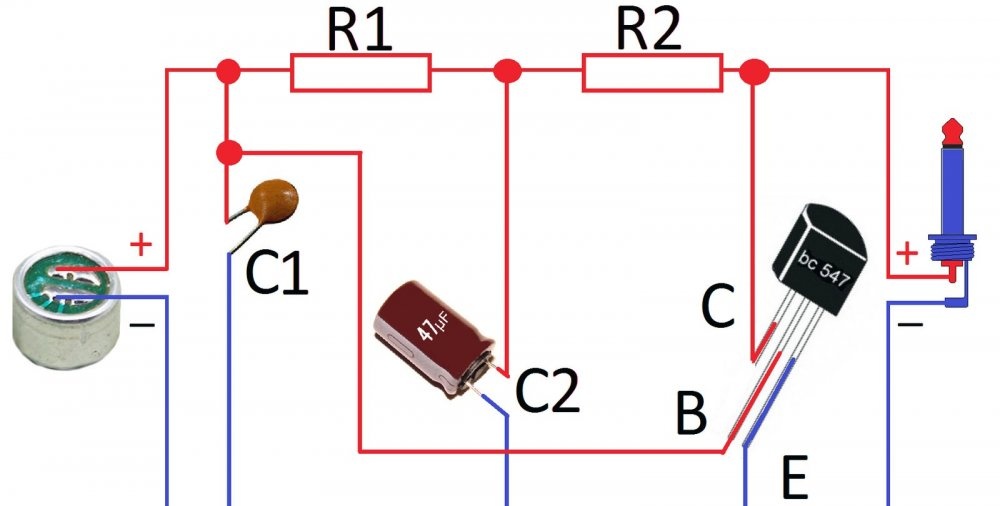
First of all, let's determine the polarity of connecting the microphone capsule. This is done simply: the minus is always connected to the body. Then we assemble the circuit, either by surface mounting or on a mini-board. The entire sensitivity of the preamplifier will depend on the gain of the transistor and the selected resistor R1. Usually the amplifier is assembled and works immediately; its sensitivity should be sufficient with a reserve.

The recording was made using a capsule without a preamplifier circuit.
Sensitive microphone for computer

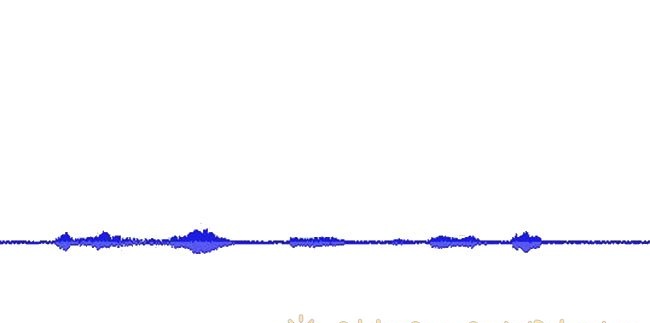
The recording was made on a capsule from a pre-amplifier circuit.
Sensitive microphone for computer

The difference is visible to the naked eye. Now you don’t have to hang a microphone around your neck and shout into it. You can easily put it on the table and speak without any extra effort. Well, if the sensitivity turns out to be too high, then you can always reduce it without any problems using the settings in the operating system.

come back
Comment
  • bowtiesmilelaughingblushsmileyrelaxed relaxedsmirk
    heart_eyeskissing_heartkissing_closed_eyesflushedrelievedsatisfiedgrin
    winkstuck_out_tongue_winking_eyestuck_out_tongue_closed_eyesgrinningkissingstuck_out_tonguesleeping
    worriedfrowninganguishedopen_mouthgrimacingconfusedhushed
    expressionlessunamusedsweat_smilesweatdisappointed_relievedwearypassive
    disappointedconfoundedfearfulcold_sweatperseverecrysob
    joyastonishedscreamtired_faceangryragetriumph
    sleepyyummasksunglassesdizzy_faceimpsmiling_imp
    neutral_faceno_mouthinnocent
4 minus one =
Comments (6)
  1. something doesn't sound right
    #1 something doesn't sound right Guests 7 March 2018 22:49
    0
    hands hooks?
  2. Anonymous
    #2 Anonymous Guests 11 March 2018 15:39
    2
    does not work
  3. Guest Pavel
    #3 Guest Pavel Guests 14 November 2019 18:41
    0
    Everything is working.The only thing is that the microphone is on a high metal flexible stand. There was a strong background and there was very strong interference when touching the stand. I soldered the stand to the negative side, and everything worked perfectly and without interference. I didn’t install R3 and had to set the microphone settings in Windows to almost minimum. Thanks for the diagram. Now I plan to assemble this into a headset using SMD components, because... There's also a crappy microphone.
    1. Sergei Mikhailovich Suslov
      #4 Sergei Mikhailovich Suslov Guests February 25, 2022 00:55
      0
      Keep in mind, the microphone is a condenser and not a dynamic one. The ohmmeter should not show resistance. Otherwise, the transistor will close and will not work.
    2. sergejRU555
      #5 sergejRU555 Guests February 25, 2022 00:59
      0
      Where did you see R3?
      1. Guest Sergey
        #6 Guest Sergey Guests 7 June 2022 19:57
        0
        In this circuit, R3 is replaced by a jumper running from the point between R1 and R2 to C2
        R3 should be in its place

How to make a wind generator from a grinder gearbox and other junk with your own hands

Useful and interesting | Page 49 | Do it yourself

4 useful inventions for your DIY workshop

How to balance a grinding wheel on sandpaper

«Do it yourself - with your own hands» - a site of interesting homemade products made from scrap materials and items at home. Step-by-step master classes with photos and descriptions, technologies, life hacks - everything a real master or just a craftsman needs for needlework. Crafts of any complexity, a large selection of directions and ideas for creativity.

We recommend reading

Washing machine error codes