This project may be intimidating due to its apparent scale, but in the end it is not difficult. You just need to cut out a couple of parts and put them together: it's quite simple, but at the end you will have a blissful feeling of accomplishment.
Materials
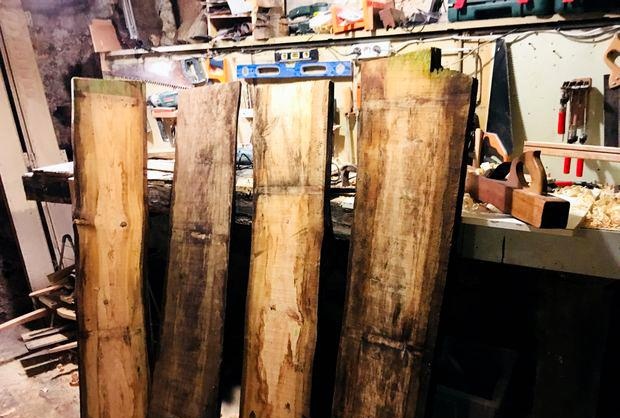
The first thing you need is wood. You can use a variety of woods for this project, but I recommend a hardwood like oak to ensure a strong base. It was my first time making a rocking chaise lounge and I didn’t really want to dwell on the issue of choosing a wood, so I used pine, which (despite its softness) suited perfectly.
For this project, two boards of 25 and 15 mm thick, measuring 30 x 280 cm, will be enough.
In my project, I focused on the low cost of materials.
You will also need plywood, which turned out to be the most expensive element for me, because I could not find anything suitable at home.
Fabric and foam rubber will also be needed. They can be purchased both in a specialized store and online.
Tools
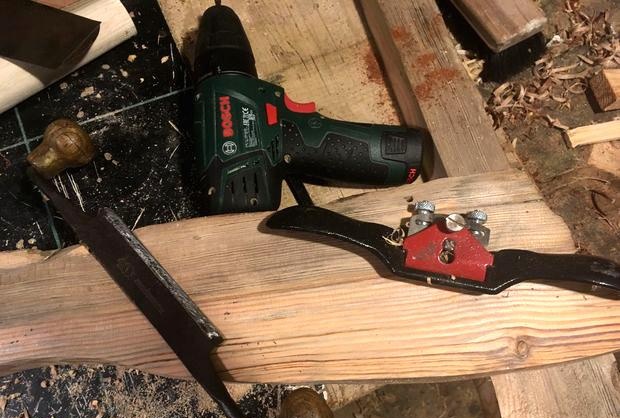
While working I only used a drill, a jigsaw and a few hand tools like a stapler and files. If you have a band saw, the process will go much faster.To give a certain shape to the elements of a chaise longue, you can use different tools, but a stapler and a curved plane seemed to me the most convenient.
Preparing chaise lounge templates - rocking chairs
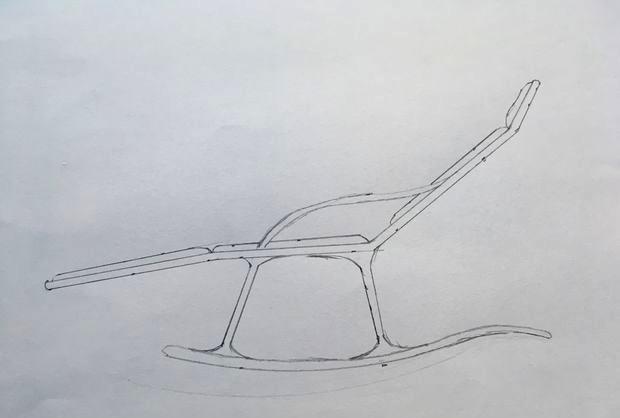
The first thing I did was go online to see what a rocking chair might look like to get an idea of what parts it was made of.
Then I sat down at my desk and started drawing to let my idea form into something with more precise shapes. When this work was done, I had in front of me a 1:10 scale sketch of some parts that could be used to make templates.
I then transferred the designs onto construction paper and cut them out. Now I could transfer the outlines of the parts onto plywood and cut everything out with a jigsaw.
Cutting out elements
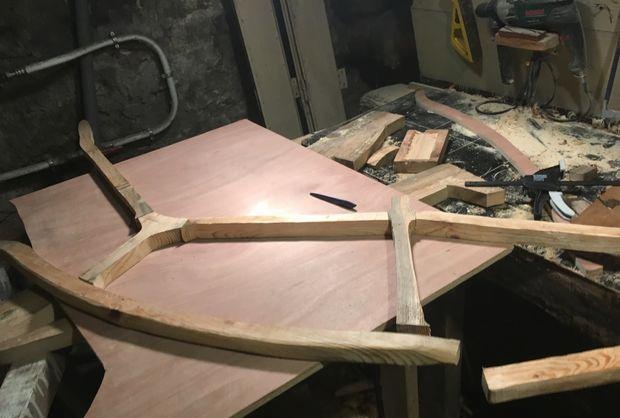
Once you have ready-made templates, you transfer their shape to the wood from which you are going to make the element, and cut everything out with a jigsaw. A band saw is ideal for this job, but I, like many people, don't have one.
When sawing along a line, it is better to leave an extra gap of a couple of millimeters so as not to accidentally ruin the part.
You need to cut 17 elements:
- front legs - 2 pcs.
- rear legs - 2 pcs.
- foot side - 2 pcs.
- back side - 2 pcs.
- armrests - 2 pcs.
- rocker arms - 2 pcs.
- crossbars - 3 pcs.
- headrest.
- back.
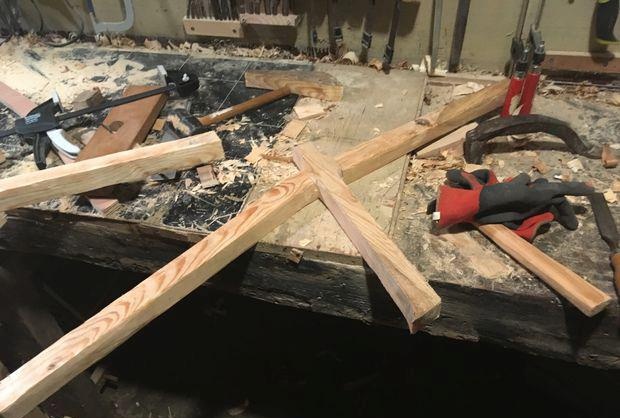
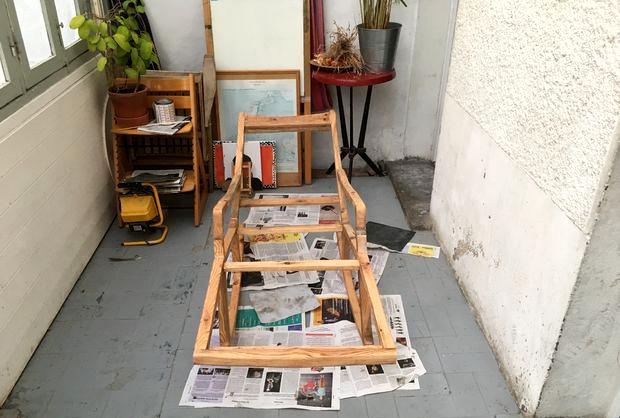
We process the elements of the sun lounger
This part of the work gave me the greatest pleasure. Take a rasp, staple or any other tool in your hands and give the elements the desired shape. It is in this part of the work that those couple of extra millimeters will help you, because they provide the opportunity to correct mistakes.
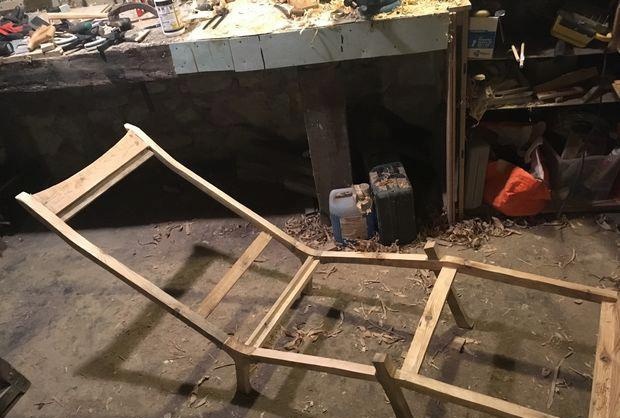
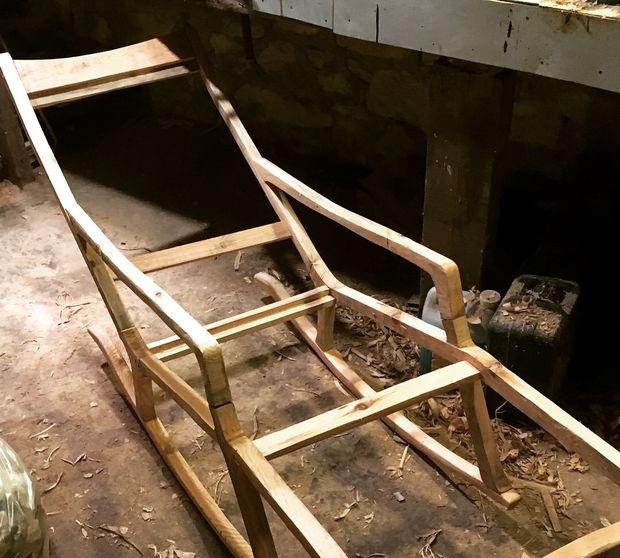
Housing assembly
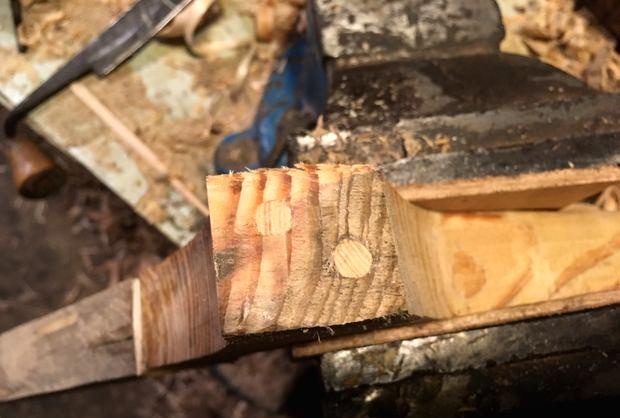
To put the pieces together, I used dowels with glue. For me, this is the easiest way to attach wooden elements, which is also quite reliable. And in this project, a strong structure plays an important role. As I already said, dowels are very easy to install: you just need to prepare a hole, insert a dowel into it and put another connecting element on it. For greater reliability, I used two dowels in each connection.
Another type of joint I used was the half-tree joint. But I will not dwell on it in detail, since there is enough information on the Internet.
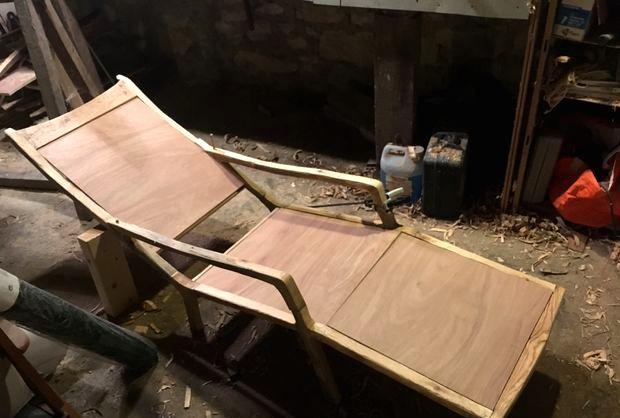
Making pillows
After all the parts have been assembled, you need to cut out the base for the pillows that will rest on the base of the chaise lounge from sheets of plywood.
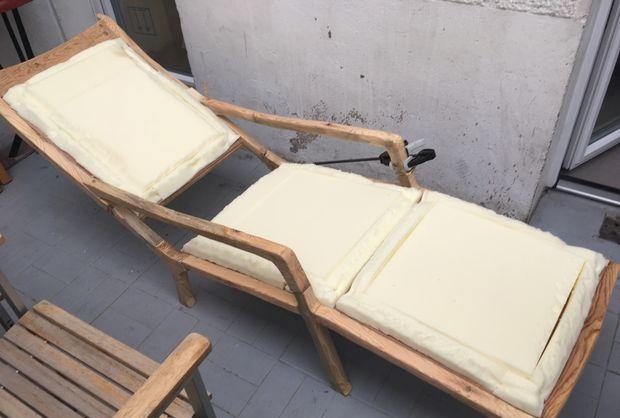
Once you are sure that the cut plywood fits properly, you can begin making the soft parts. First, cut the foam rubber to the size of the plywood. I made 45 degree bevels on the corners, but you can do it your way.
Next, cut the fabric to the desired size and cover it with foam rubber. You can fasten it using a furniture stapler to the back of the plywood.
Grinding
Now you need to sand everything thoroughly. I started with P80 grit sandpaper and gradually worked my way up to P500.
After sanding, I coated the wood with three coats of Danish oil and a coat of wax at the end. For me this combination seems to work best, but you can do this part however you like.
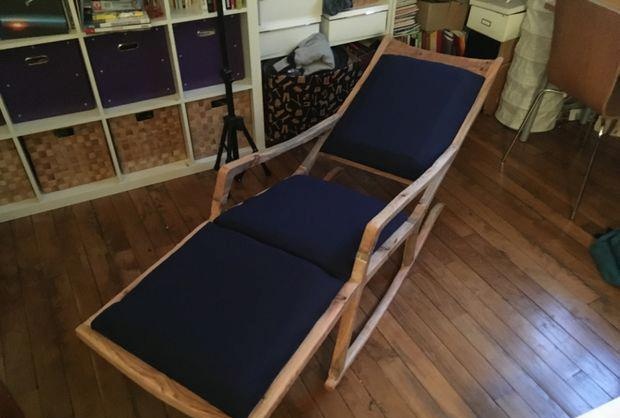
That's all. Your rocking chair is ready.
Thank you for reading my master class.
Original article in English