Do it yourself
Life hacks, master classes, useful tips, recipes.
home » Useful and interesting » Wireless bedside table for charging gadgets
“Wireless” bedside table for charging gadgets: neat and functional!
Wireless bedside table for charging gadgets

This project is very simple and can be done by anyone with basic woodworking skills. As for consumables, for the most part it’s plywood and cheap electronics.

Making the bedside table frame


Wireless bedside table for charging gadgets

Wireless bedside table for charging gadgets

Wireless bedside table for charging gadgets

Wireless bedside table for charging gadgets

Wireless bedside table for charging gadgets

Wireless bedside table for charging gadgets

Wireless bedside table for charging gadgets

Wireless bedside table for charging gadgets

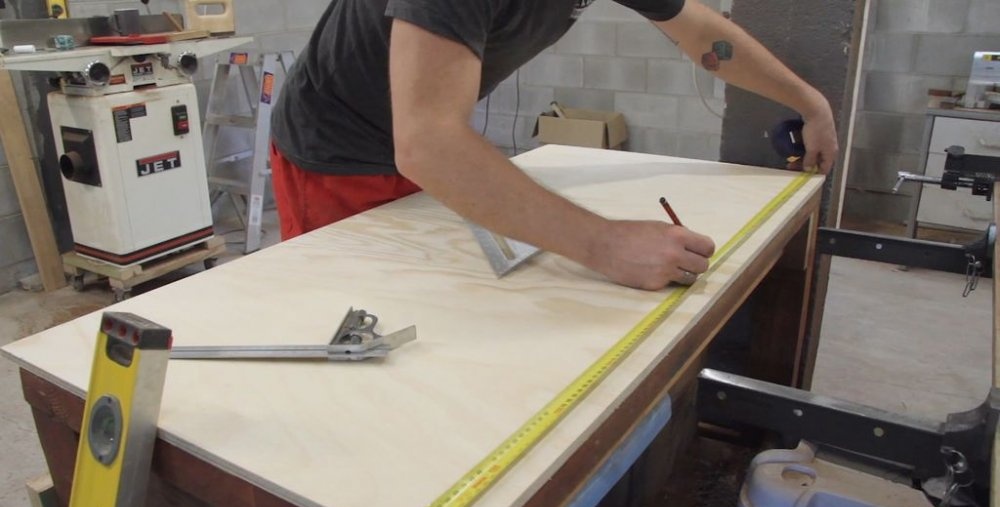
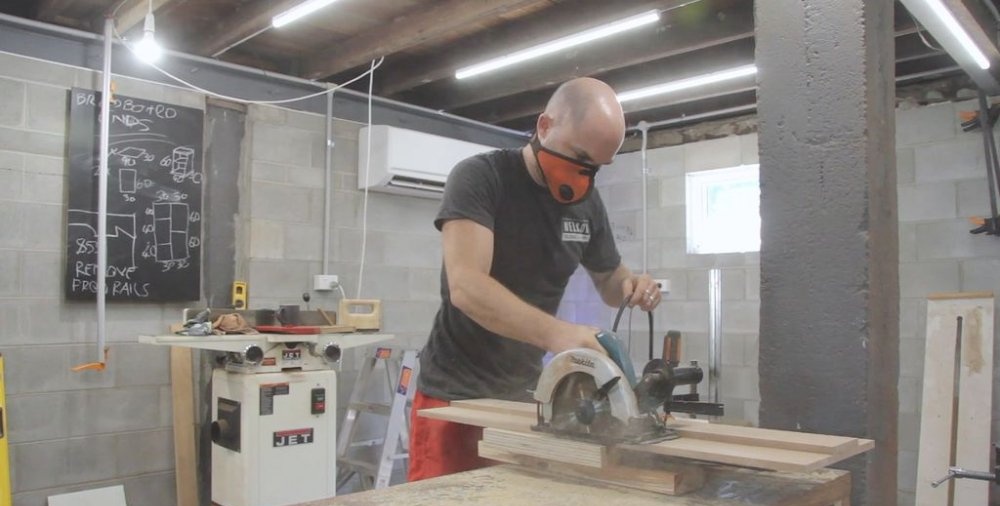
First, you need to build a frame, the main part of the future structure. For these purposes, you can use, as in this case, plywood or MDF!
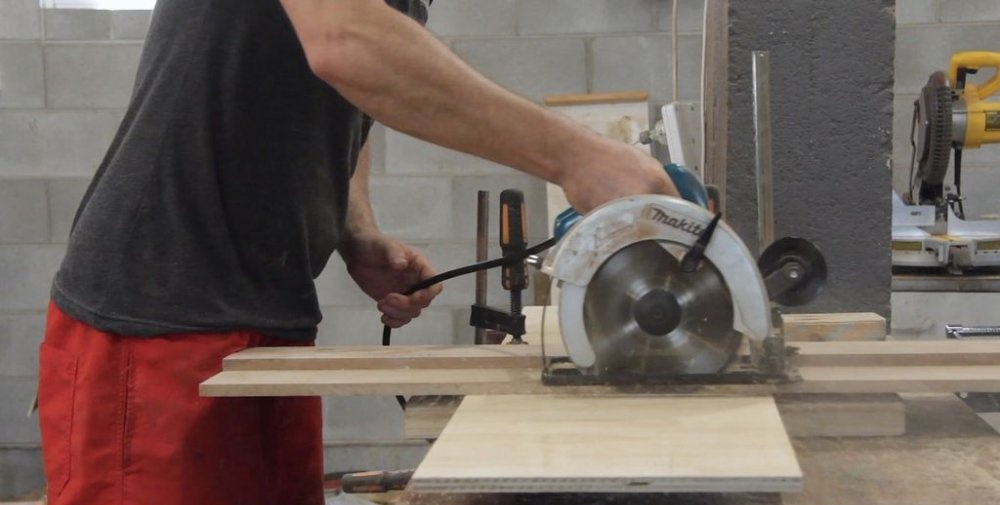
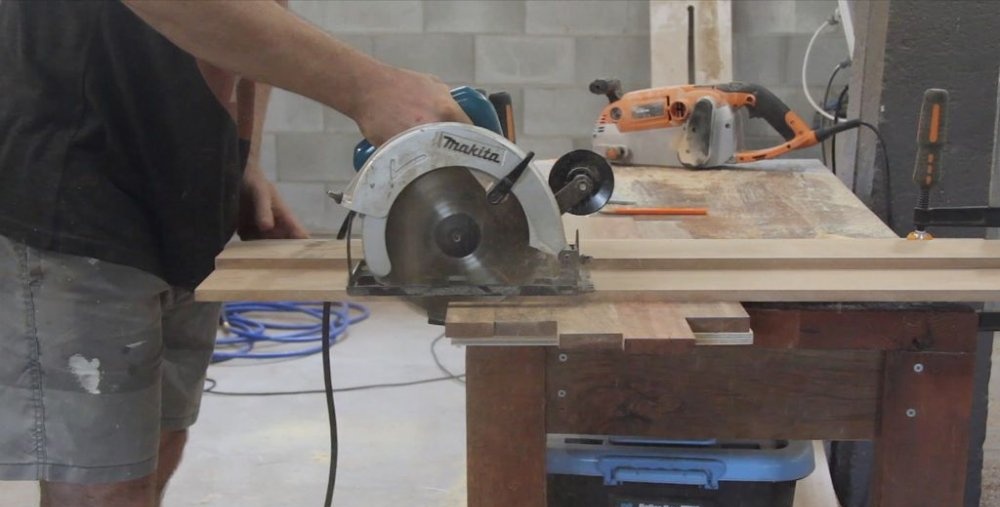
You will need one sheet measuring 1200 mm x 600 mm. It needs to be cut into 2 side panels and 3 internal shelves. It is recommended to cut the shelves together at once to achieve 100% the same size.
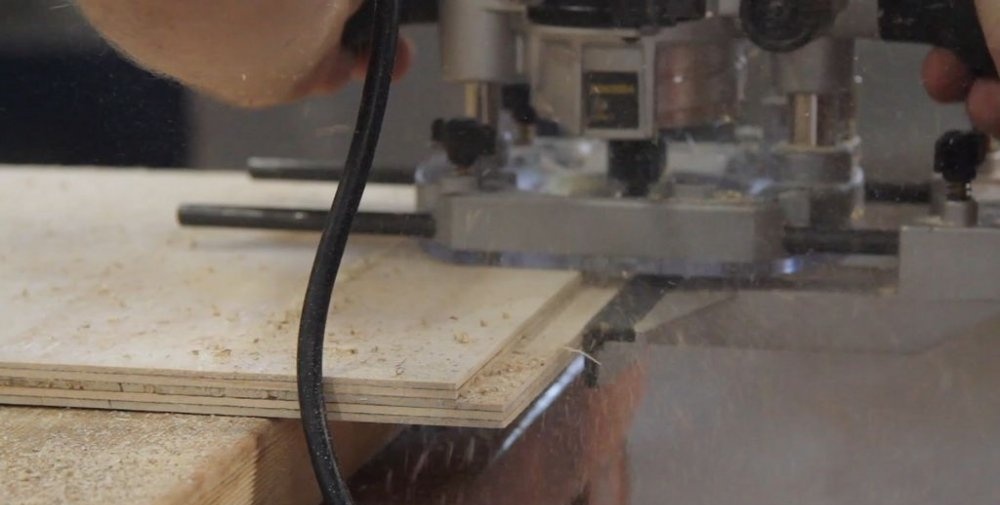
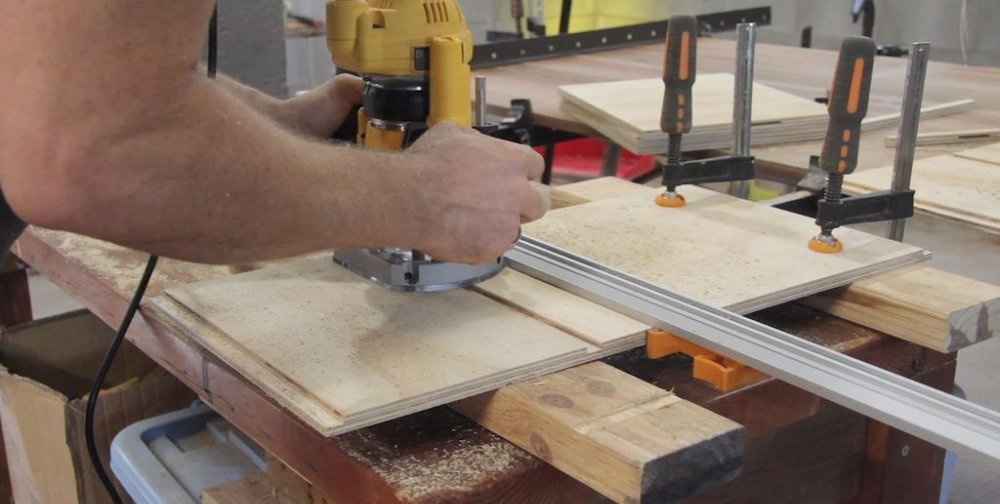
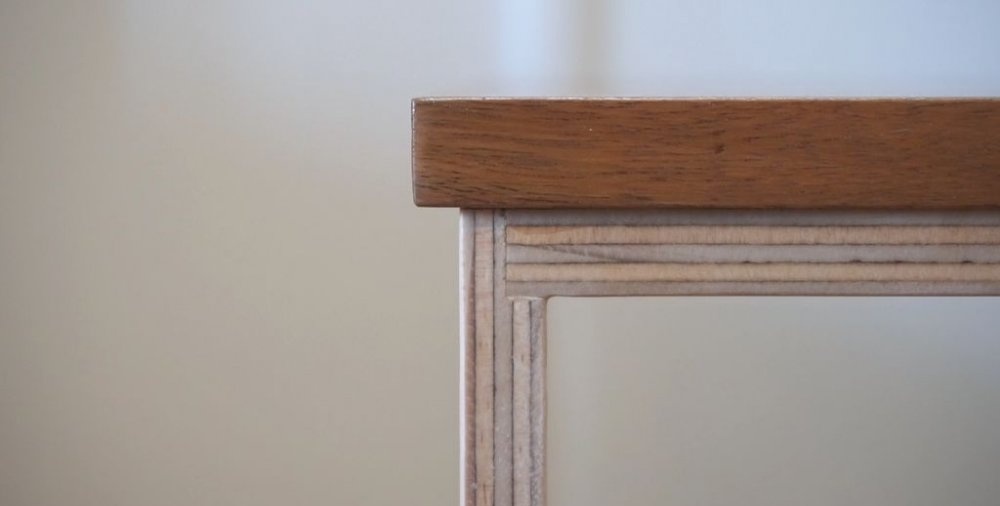
To create the legs, you can use a router to create 3 grooves the same width as plywood. This added visual clarity, plus the necessary strength for the connection.
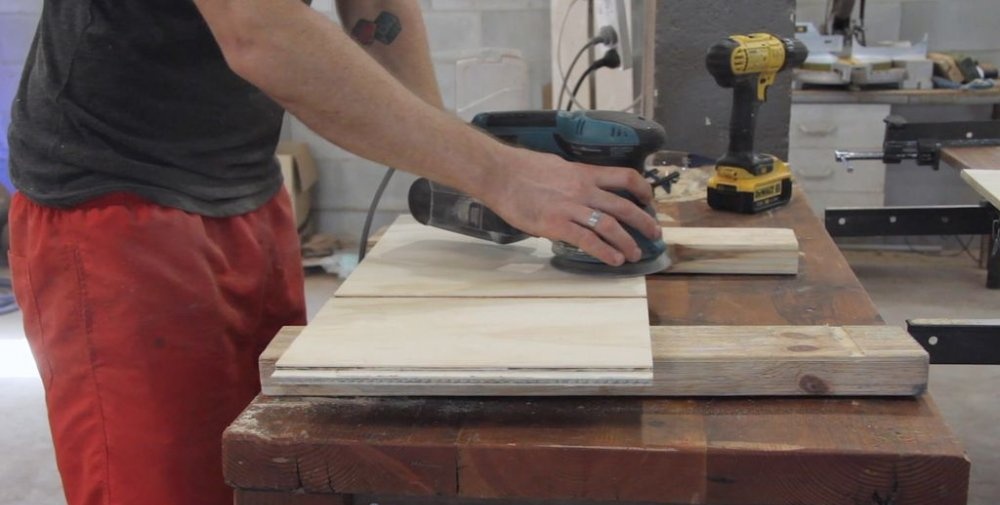
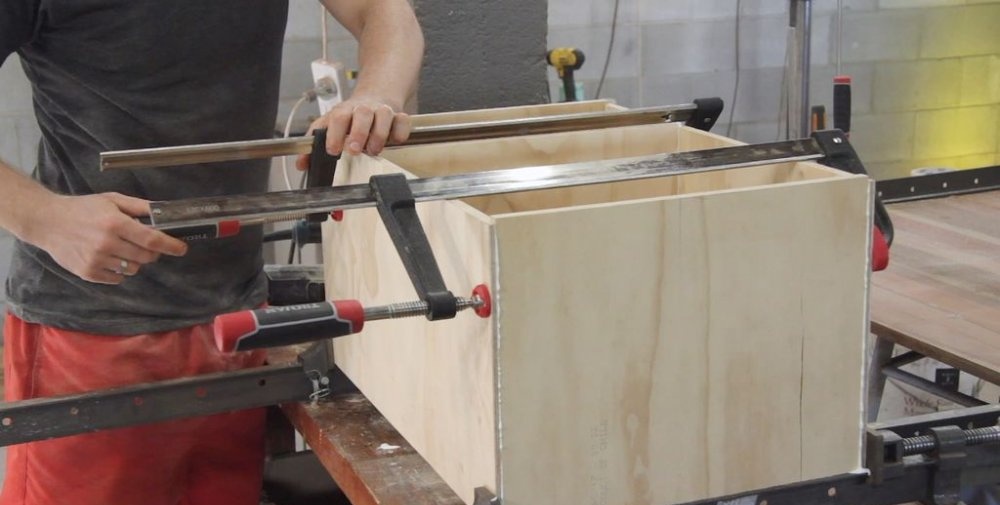
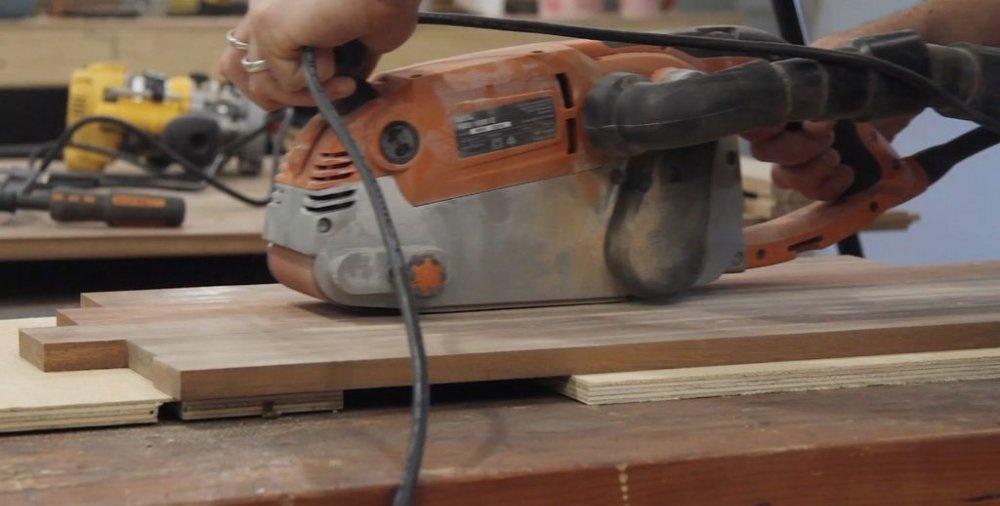
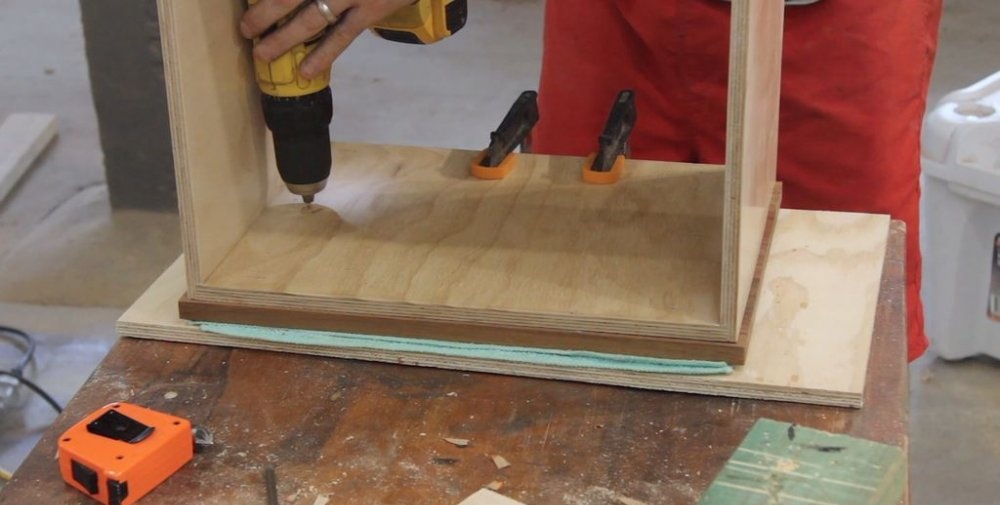
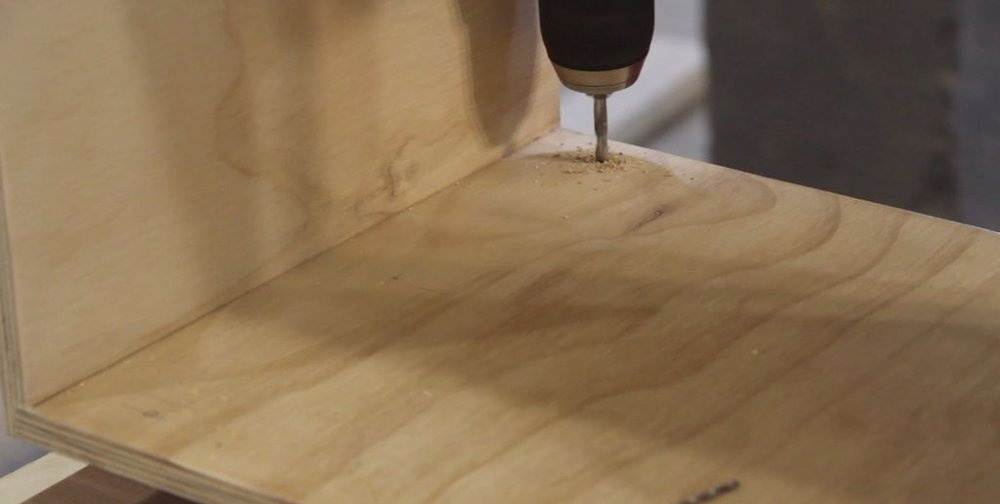
Before gluing the elements, all internal surfaces are thoroughly polished. This is much easier and more convenient to do now that they are easily accessible.
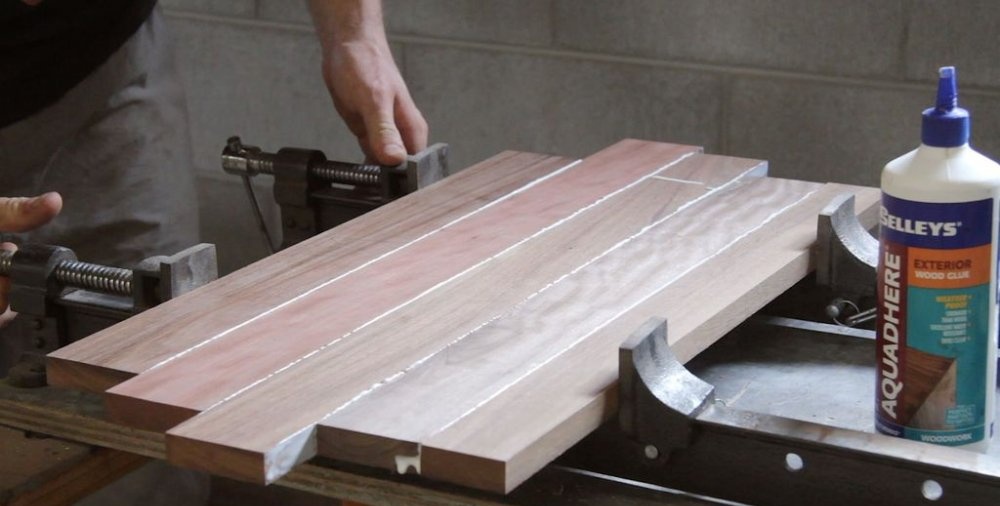
The boards are glued together.It is recommended to drive several dowels into the shelves through the legs to provide additional structural strength.

Making a tabletop for a bedside table


Wireless bedside table for charging gadgets

Wireless bedside table for charging gadgets

Wireless bedside table for charging gadgets

Wireless bedside table for charging gadgets

Wireless bedside table for charging gadgets

Wireless bedside table for charging gadgets

Wireless bedside table for charging gadgets

Wireless bedside table for charging gadgets

Wireless bedside table for charging gadgets

Wireless bedside table for charging gadgets

Wireless bedside table for charging gadgets

Wireless bedside table for charging gadgets

Wireless bedside table for charging gadgets

Wireless bedside table for charging gadgets

Wireless bedside table for charging gadgets

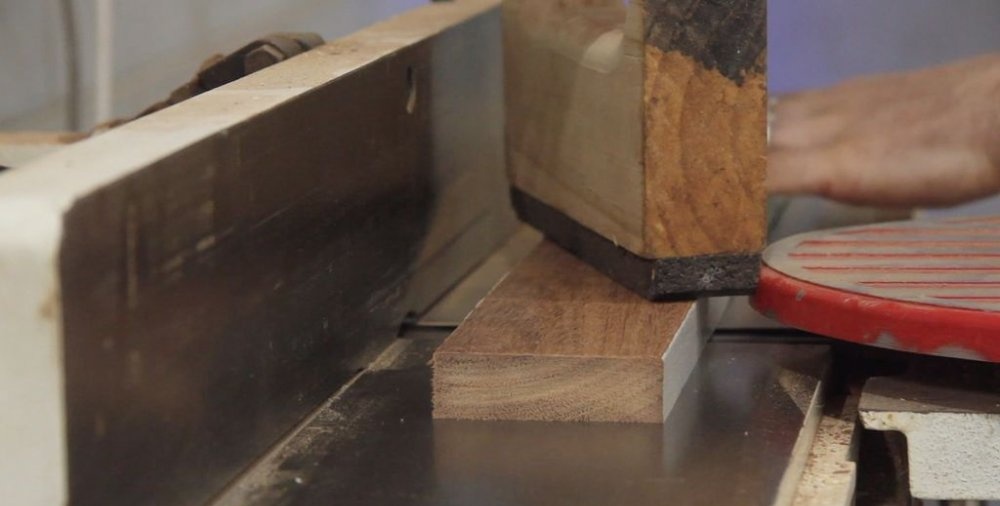
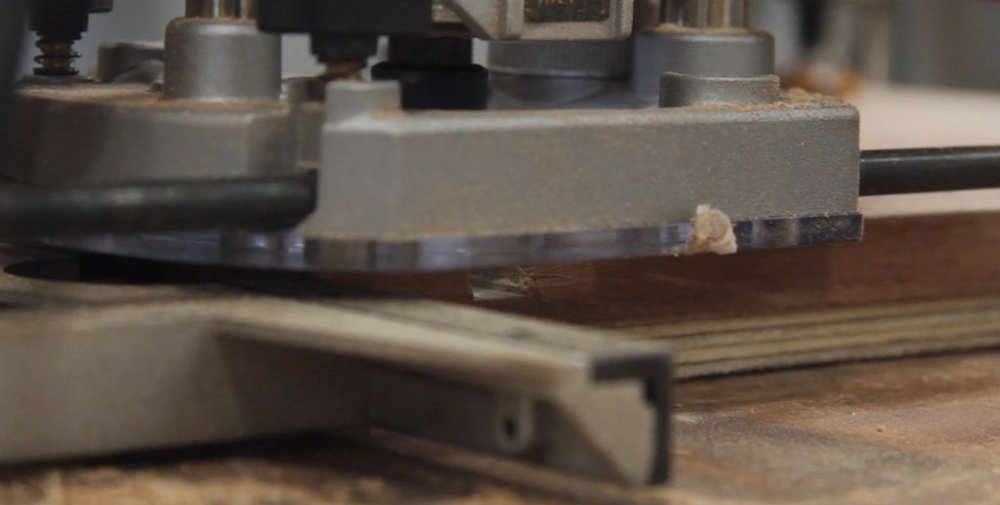
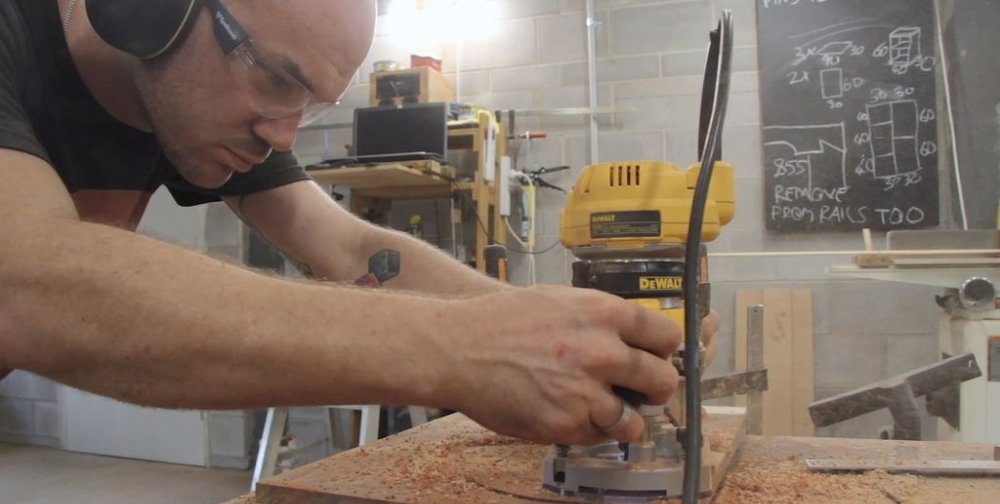
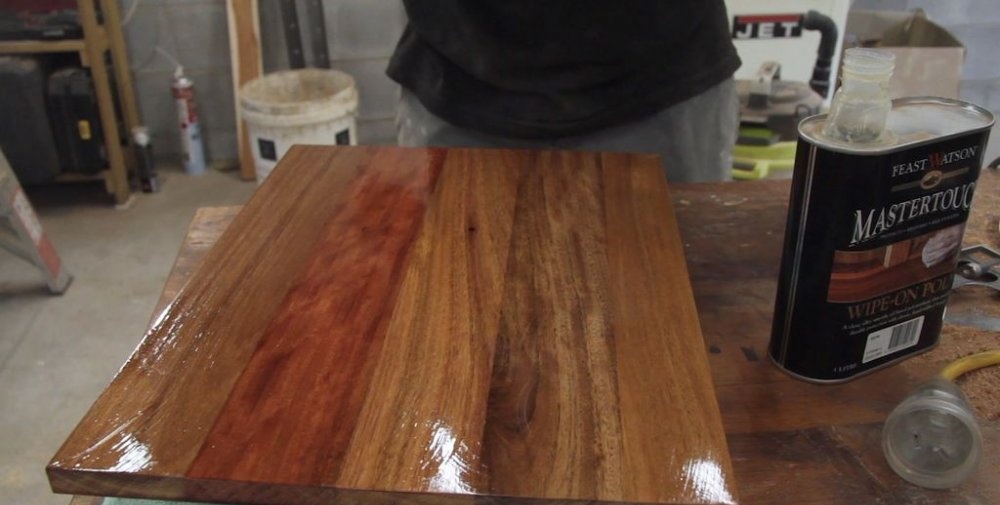
Initially, it was planned to use the same sheet of plywood for these purposes, but such a design might not be very reliable. So solid wood was used instead, but the router's pitch remains the same.
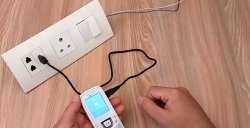
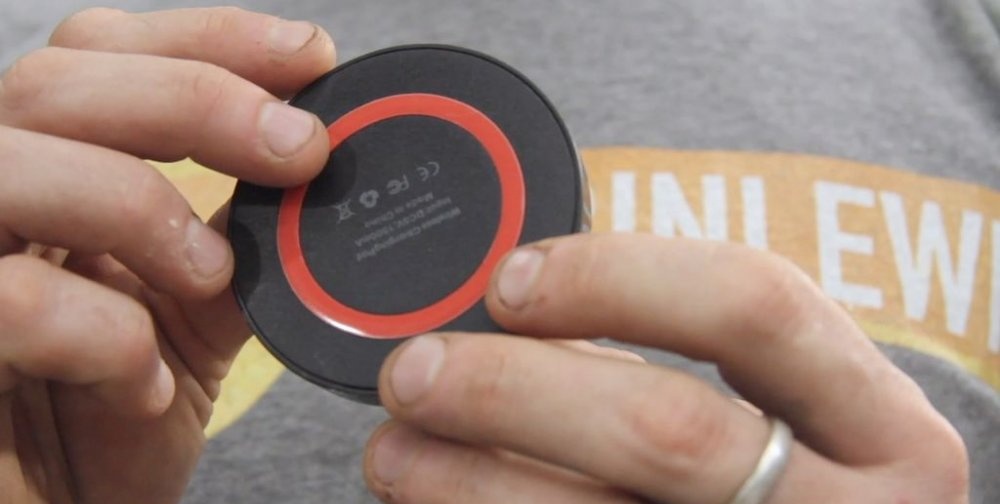
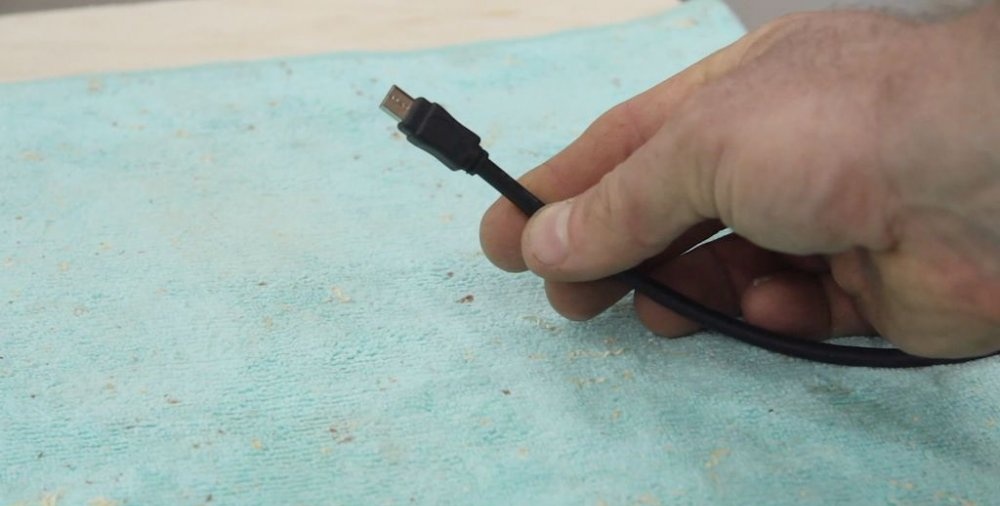
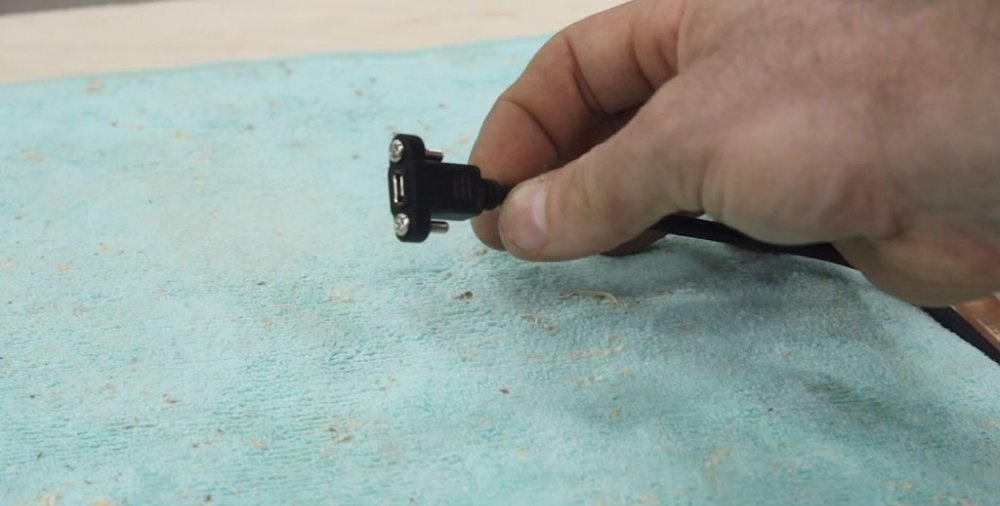
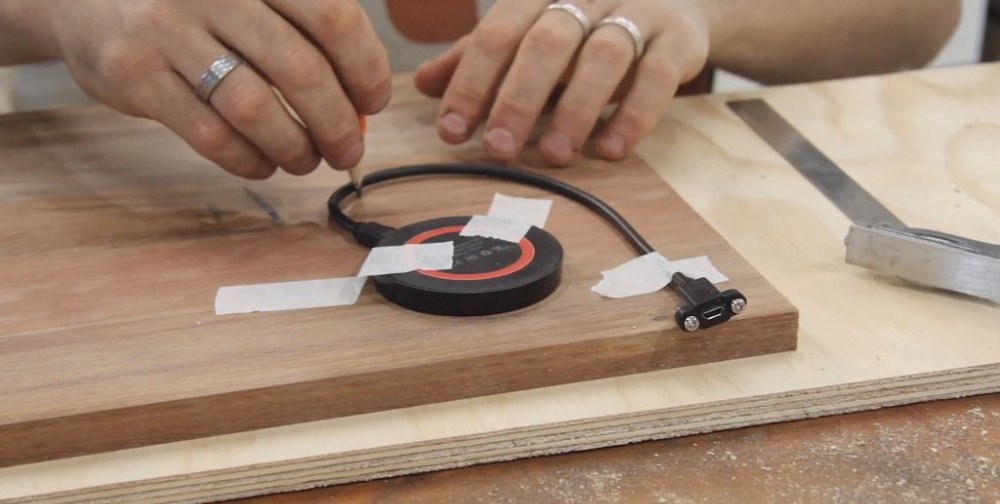
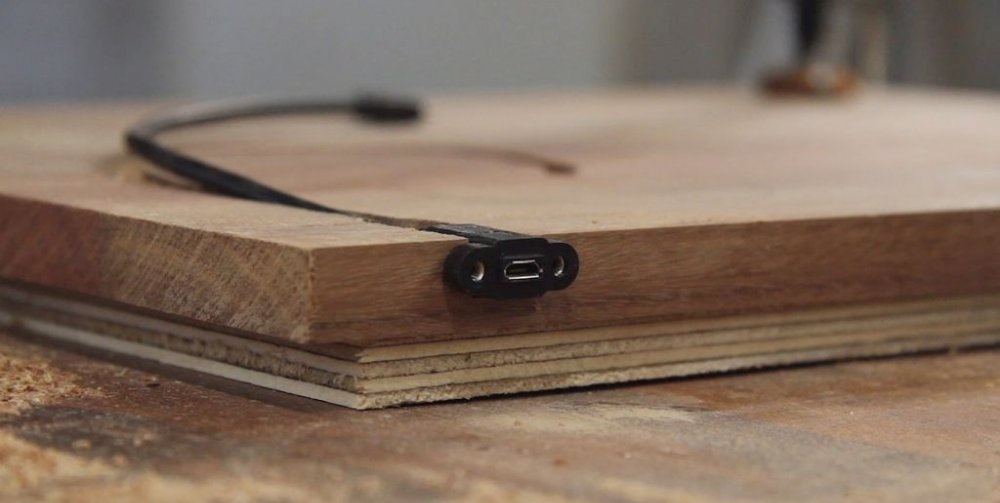
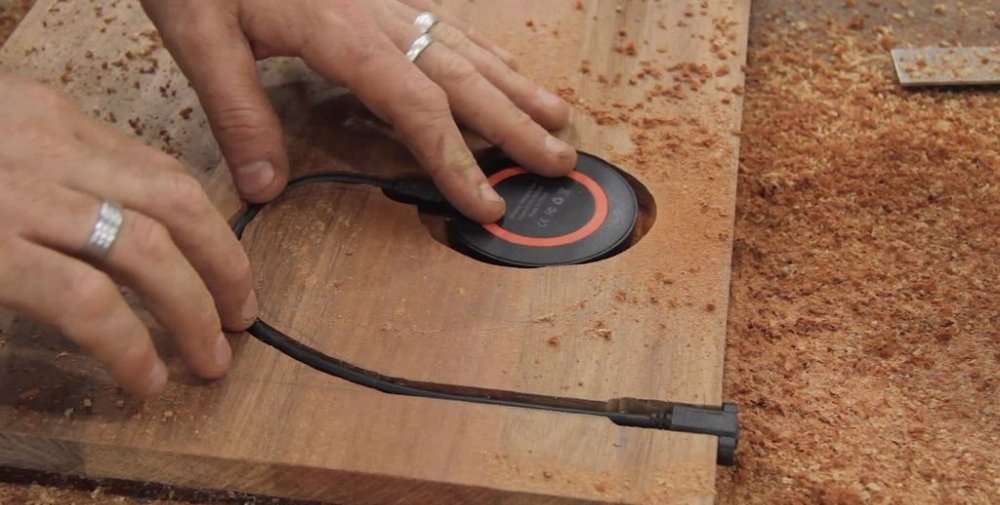
Once you have cut the top to the required dimensions, the next task is to prepare the required space for the charger. I use the simplest and most inexpensive charger with a micro USB cable. There are mounting screws at one end of the cable.
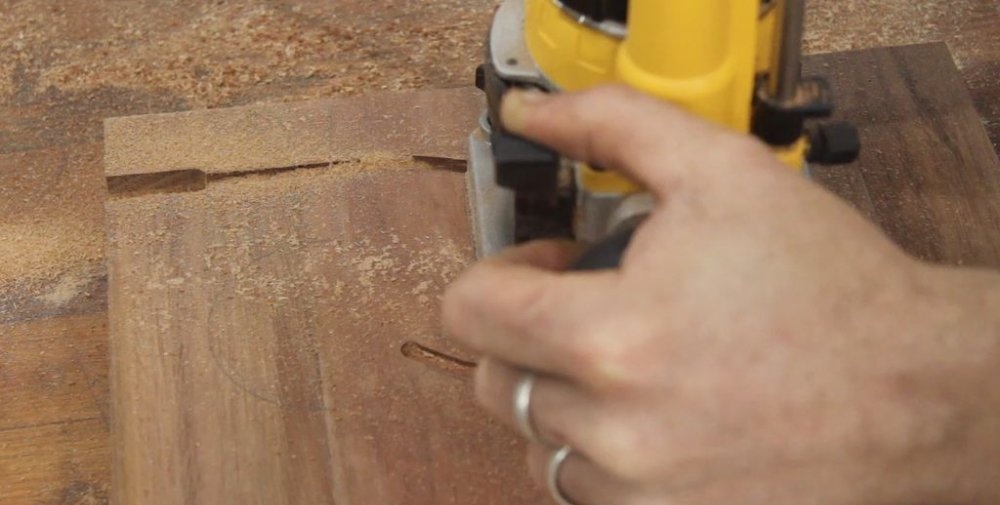
The most important thing is to pay attention, so to speak, to testing to find out what is the permissible distance between the gadget and the charger. In our case, this is 5 mm that needs to be “removed” from the table in order to form a neat recess where the charger will be inserted.
Once the notch is made, attach the charger and cable to the tabletop for clarity and draw the lines to be cut. Then start removing, “accelerating” to the required depth.
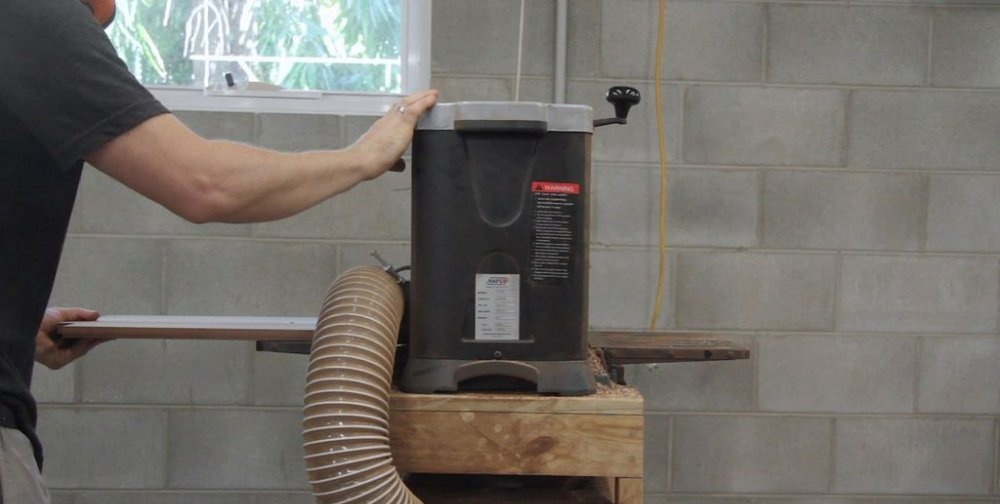
At the final stage, you need to sand the resulting tabletop and carry out finishing treatment (varnishing) to make it look attractive

Assembling the bedside table


Wireless bedside table for charging gadgets

Wireless bedside table for charging gadgets

Wireless bedside table for charging gadgets

Wireless bedside table for charging gadgets

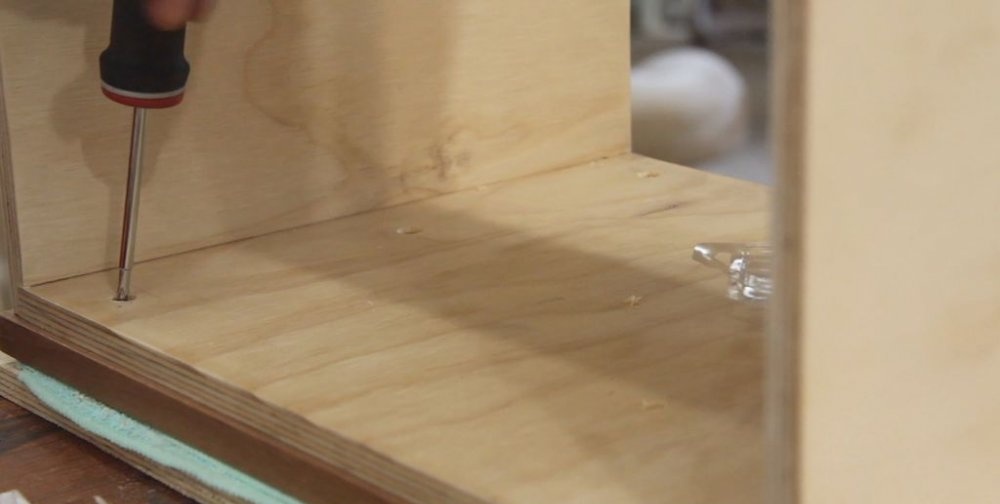
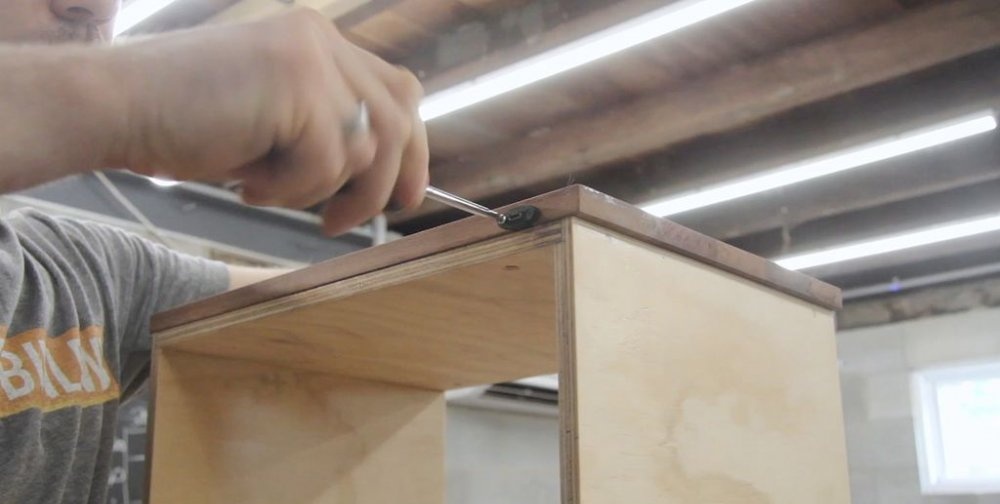
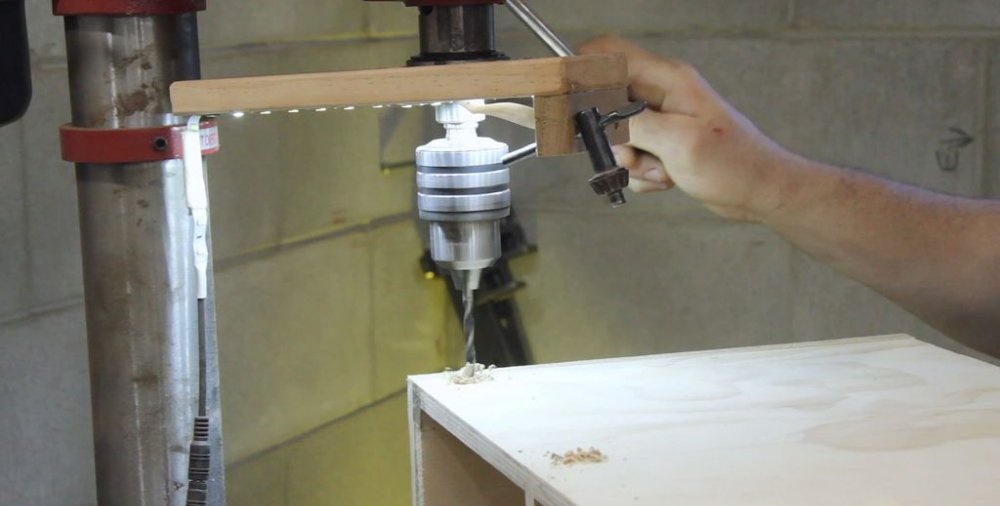
Once the top of the table is completely dry, lay the tabletop upside down on the frame, aligned in the way you want it to look later. Secure the top in place and drill the holes. Do this carefully so as not to drill through the countertop.
Since our version used hardwood to create the tabletop, the holes widened slightly to account for potential seasonal changes (expansion).
Then you need to countersink the holes (using a multi-edge cutting tool to get cylindrical recesses), screw 2 together.
Finally, a USB connector is inserted into the tabletop for further use.

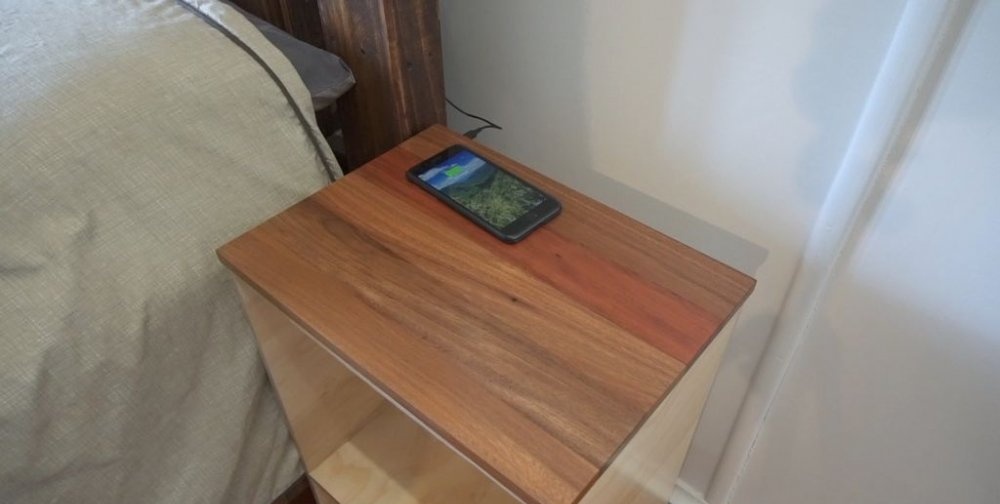
Testing and verification


Wireless bedside table for charging gadgets

Wireless bedside table for charging gadgets

Wireless bedside table for charging gadgets

Wireless bedside table for charging gadgets

Wireless bedside table for charging gadgets

Wireless bedside table for charging gadgets

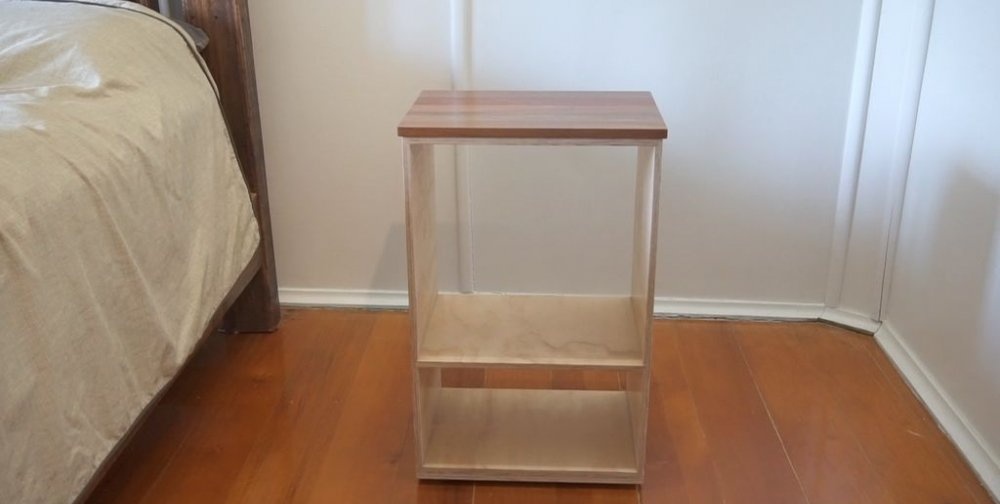
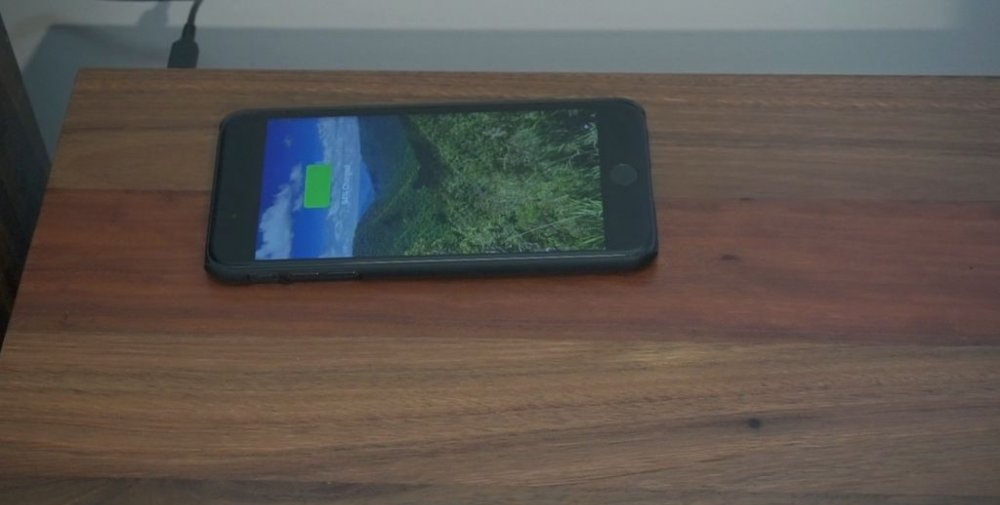
If all the previous steps were completed correctly, all that remains is to enjoy the fruits of your labor and connect the gadget to charge.

Watch the video


Original article in English
come back
Comment
  • bowtiesmilelaughingblushsmileyrelaxed relaxedsmirk
    heart_eyeskissing_heartkissing_closed_eyesflushedrelievedsatisfiedgrin
    winkstuck_out_tongue_winking_eyestuck_out_tongue_closed_eyesgrinningkissingstuck_out_tonguesleeping
    worriedfrowninganguishedopen_mouthgrimacingconfusedhushed
    expressionlessunamusedsweat_smilesweatdisappointed_relievedwearypassive
    disappointedconfoundedfearfulcold_sweatperseverecrysob
    joyastonishedscreamtired_faceangryragetriumph
    sleepyyummasksunglassesdizzy_faceimpsmiling_imp
    neutral_faceno_mouthinnocent
3+three=
Comments (0)

How to increase the speed of an electric motor 10 times

Recipe for fluffy pancakes with kefir | Do it yourself

How to level the floor under the laminate without dismantling it yourself

Sewing | Page 7 | Do it yourself

«Do it yourself - with your own hands» - a site of interesting homemade products made from scrap materials and items at home. Step-by-step master classes with photos and descriptions, technologies, life hacks - everything a real master or just a craftsman needs for needlework. Crafts of any complexity, a large selection of directions and ideas for creativity.

We recommend reading

Washing machine error codes