Why do you need a drawer cabinet?
First, let’s try to ask ourselves a question and try to answer it objectively. The question is: how long has it been since I went into a store and was interested in new products in the furniture industry, their modern features aimed at improving human life? Alas, my personal answer is never. I am unfamiliar with the statistics on visits to furniture stores and similar online sites, so I will have to generalize from the recent past.The psychology of most people in Russia is approximately the same: “what is is good.” Of course, there are also those who feel depressingly ordinary in interior items and strive to change something as quickly as possible and do it as often as possible. Feng Shuist critics may speak out here, but I will not take their bread from them. I just want to have something convenient and practical at my disposal. And also not to be an investor in some “developing” store with a speculative bent.
More recently, the so-called wall - a pile of cabinets along the wall - has become popular. Having something like this was a luxury at one time, but this “wall” is the pinnacle of treachery:
- Heavy shields.
- Break-off handles.
- Crates flying out due to incorrect design approach.
- And also a unique back wall made of fiberboard sheet.
It’s just that at that time of trouble, people, yes, as always, developed that same mechanical thought: “what you are rich with is what you are happy with.” We're used to it. So now they are not as interested as I am. And those who are interested seem wasteful to me. But at one fine moment I realized that if I put my head to my hands, I would get a very stylish thing.
Design tasks
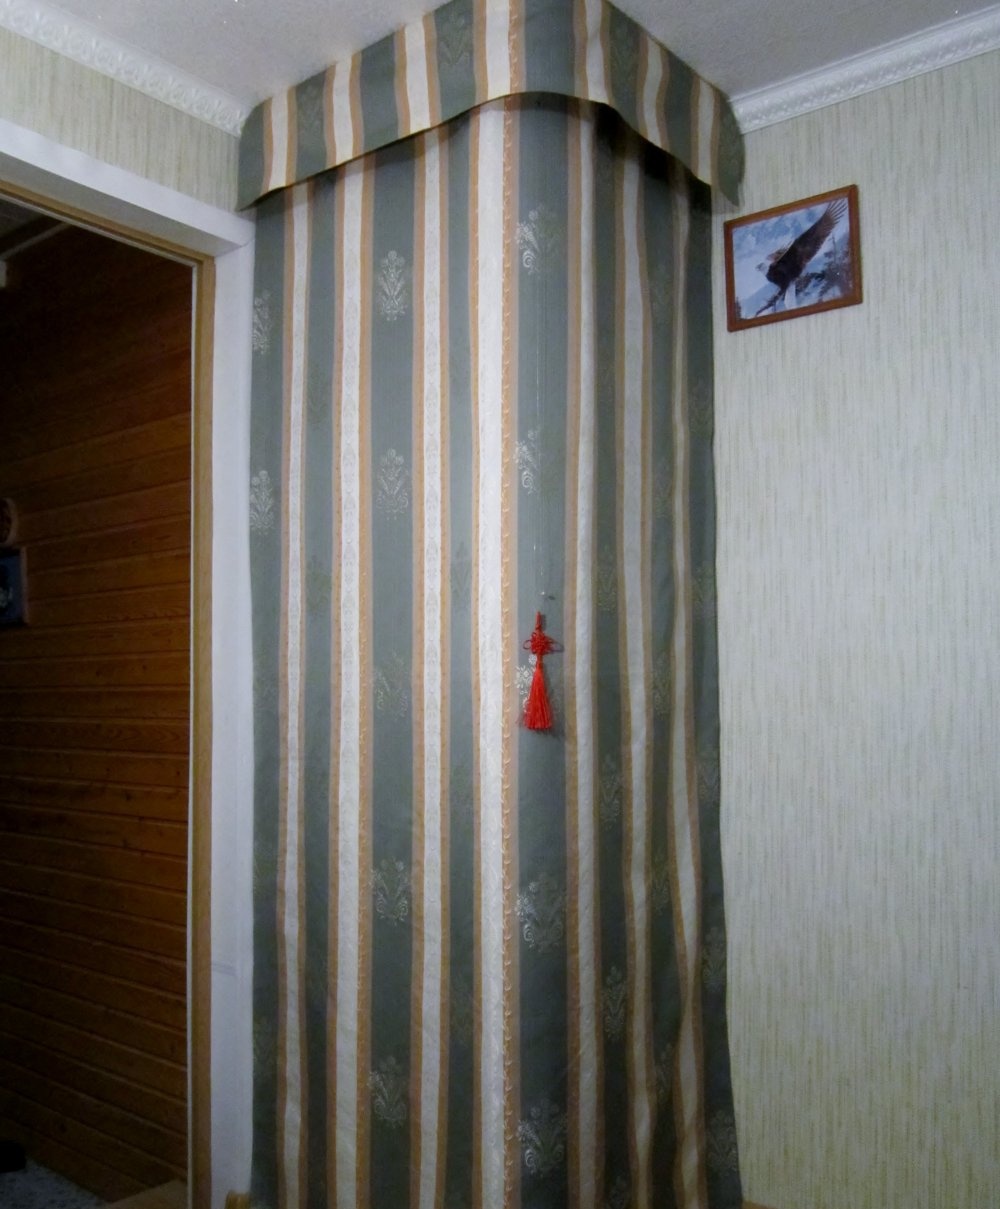
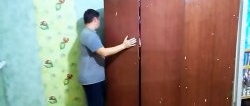
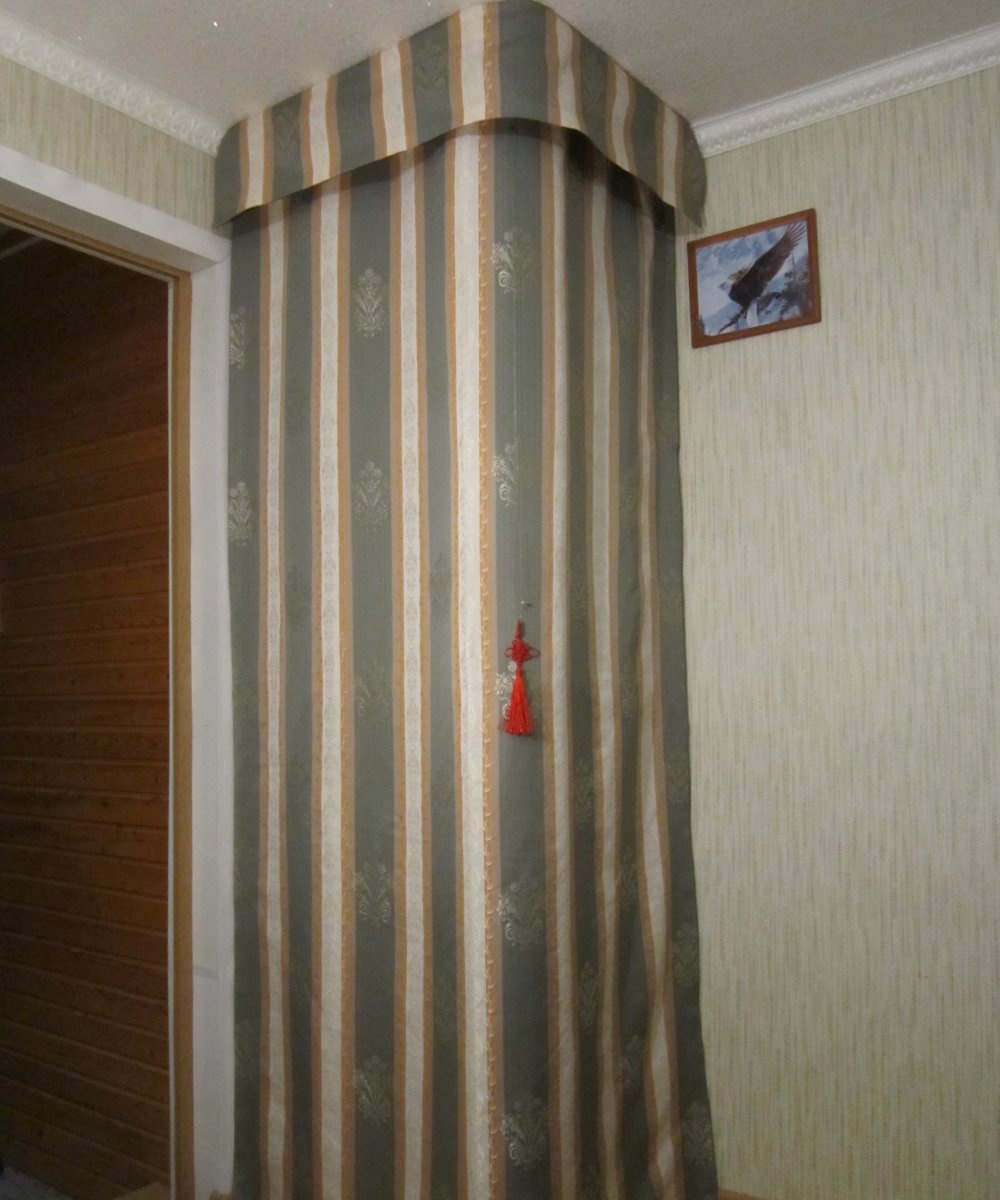
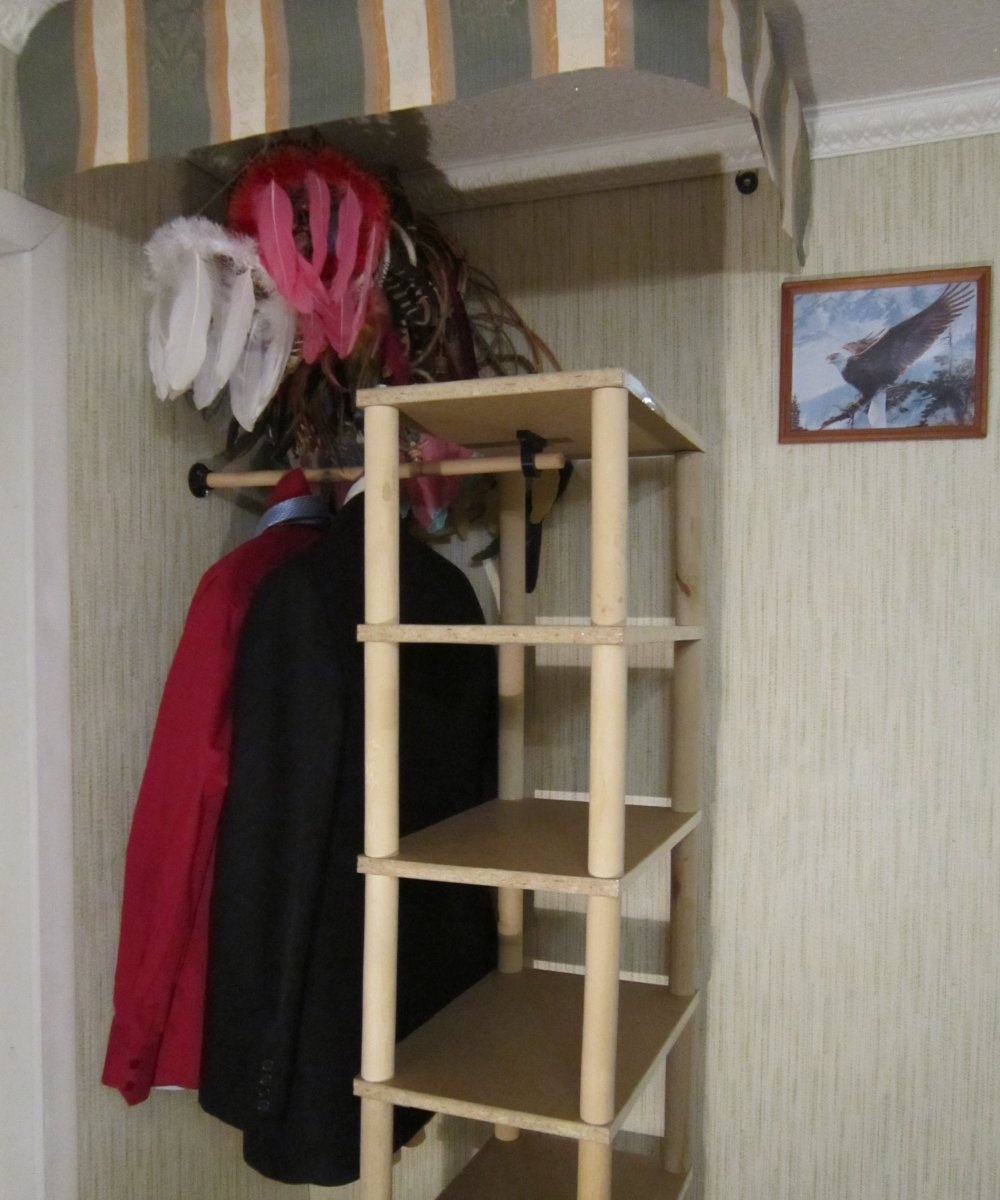
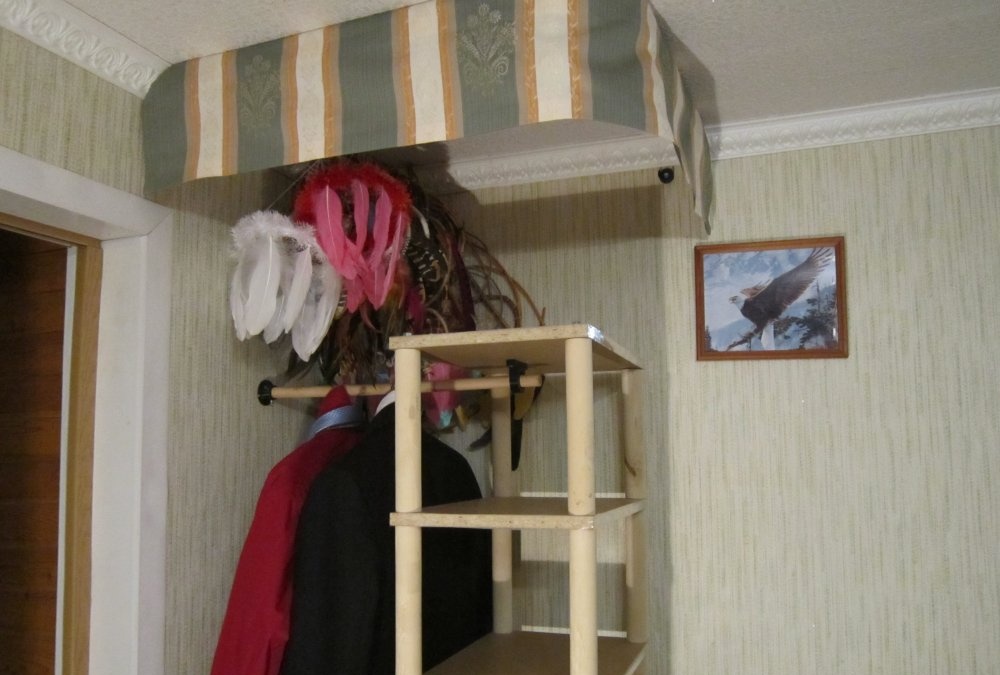
When designing the drawer cabinet, I wanted to use the space more economically, but at the same time intelligently. I also wanted to feel aesthetic lightness when contemplating the interior and when using the cabinet. Looking at my room, I identified that very modest corner that seemed very useless and did not fit into the overall atmosphere. I needed a wardrobe. With shelves and hanger bars. But I didn’t want to give up the precious centimeters behind the back wall to the slab structure.In addition, how much dust accumulates behind such structures. Another nuance is that the room is slightly trapezoidal. You understand: a perfectly straight wardrobe will reveal all the flaws in the not-so-right corners of the room (it was just converted into a warm one from the summer veranda). Sliding doors on runners would also not work. I was interested in the idea of blinds:
- You can adjust the height.
- Choose a color to match the wallpaper.
- But the price leaves much to be desired.
It was decided to use thick fabric.
Necessary calculations for the drawer cabinet
Having made a preliminary choice in a textile store, I settled on curtain fabric with vertical lines. The color matched both the wallpaper and the window curtains. According to calculations, the required length from floor to ceiling was 230 centimeters. And the total width of the curtain was 136 centimeters and completely fit into the width of a linear meter of 140 centimeters. That is, I asked the seller to cut the fabric from floor to ceiling plus the hem, plus a two-centimeter fold on all horizontal edges (two folds on the drawstring and two on the hem). I paid 750 rubles for this.
I wasn't inspired by the task of hemming the edges, so I bought adhesive tape for all the horizontal and vertical hems. It cost me 30 rubles. For reference, the paduga is the upper short strip 20 centimeters long, which retreats from the curtain by 5 centimeters. Performs two functions:
- Serves to protect against dust.
- Closes the mechanisms for fastening the scenes.
If you decide to make a curtain rod that can be adjusted to any width, you need to consider the gap between the wall and the curtain and the cost of the curtain rod itself.
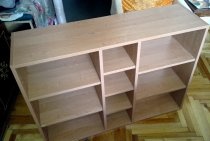
Let's move on to the shelves. When reviewing all kinds of racks, I was faced with their high cost and the impossibility of choosing the right size. Fortunately, another way was found:
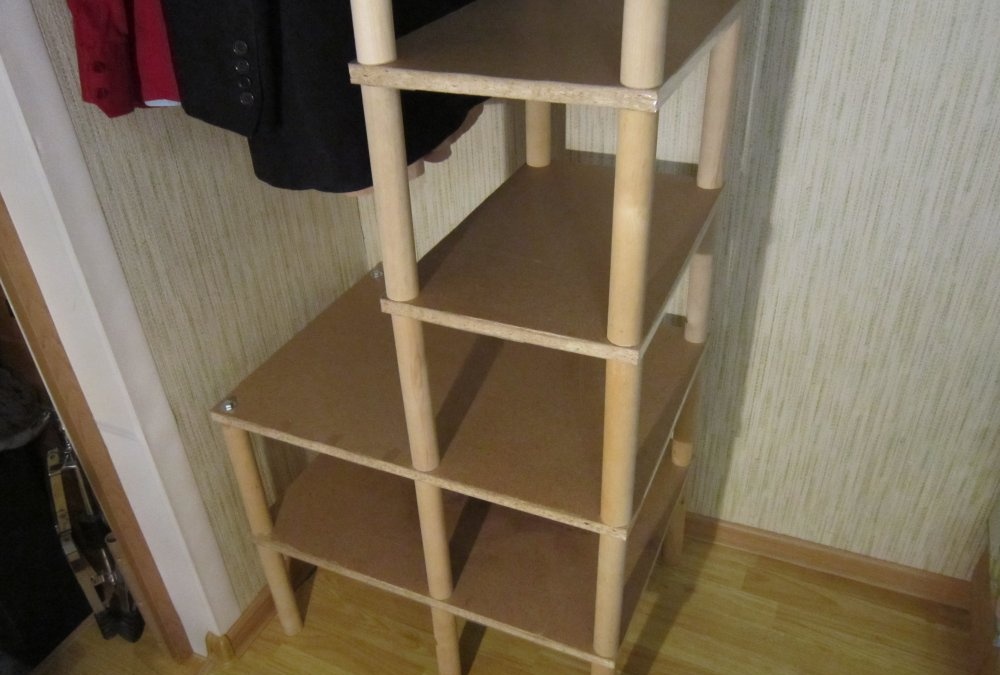
- I assembled a rack from chipboard shelves, the required size of which was extracted from a sheet of sanded chipboard 1.83 x 1.37 meters thick 16 millimeters using a jigsaw. The area of the entire sheet is 2.51 square meters and costs 459 rubles. I cut out two 47x63 centimeter shelves for the two lower floors and five 47x30 centimeter shelves for the upper ones. Thus, I realized approximately half of the entire sheet. You might also want to consider a laminated particleboard with an adhesive strip around the perimeter. Keep costs in mind when doing this. 237 rubles of the total cost suited me quite well.
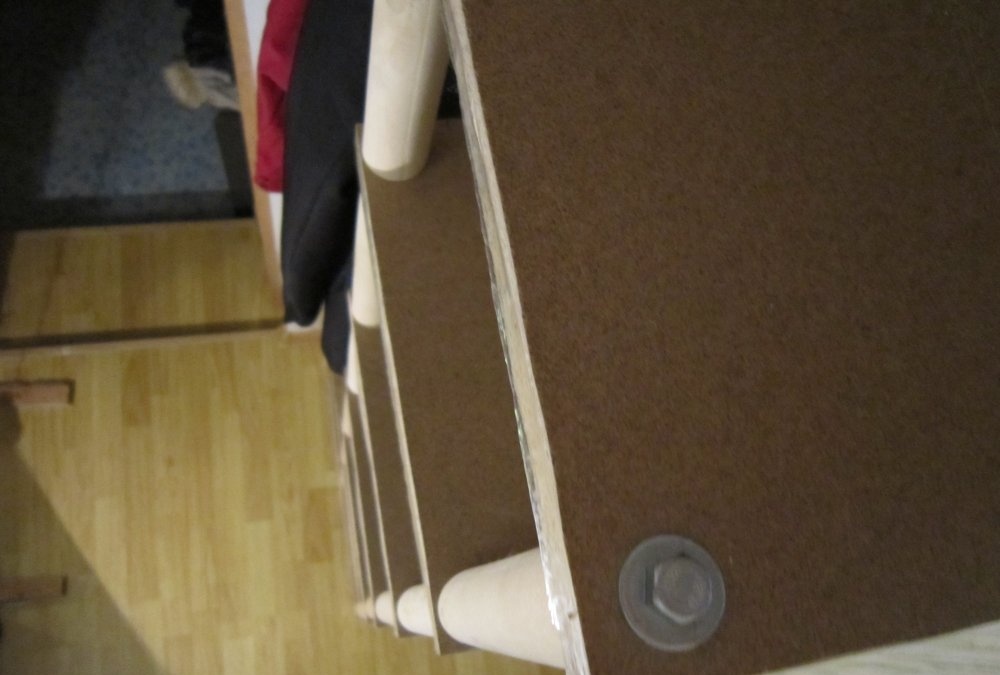
- Then I drilled symmetrical holes at the corners of the future shelves. I used shovel cuttings as legs, having first sawed them 24 centimeters long. 32 such blanks were needed. You can easily calculate the total cost of 8 cuttings 108 centimeters long - 456 rubles. Using a drill, I drilled two holes in them of different diameters: one for the stud, the other wider for the nut. Please note that the wider diameter is drilled out first.
- The 8 mm nuts were fixed with epoxy. Total: I needed 58 nuts, two rubles each, worth 116 rubles, plus epoxy resin worth 70 rubles.
- For bolts, I used ten-centimeter studs with a diameter of 8 millimeters, cutting three-meter ones with a hacksaw. They cost 84 rubles.
- The top six holes are closed with bolts and washers. They add another 130 rubles to the cost.
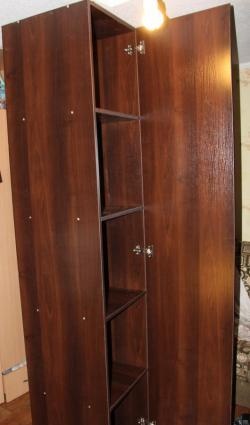
Installation of a drawer cabinet
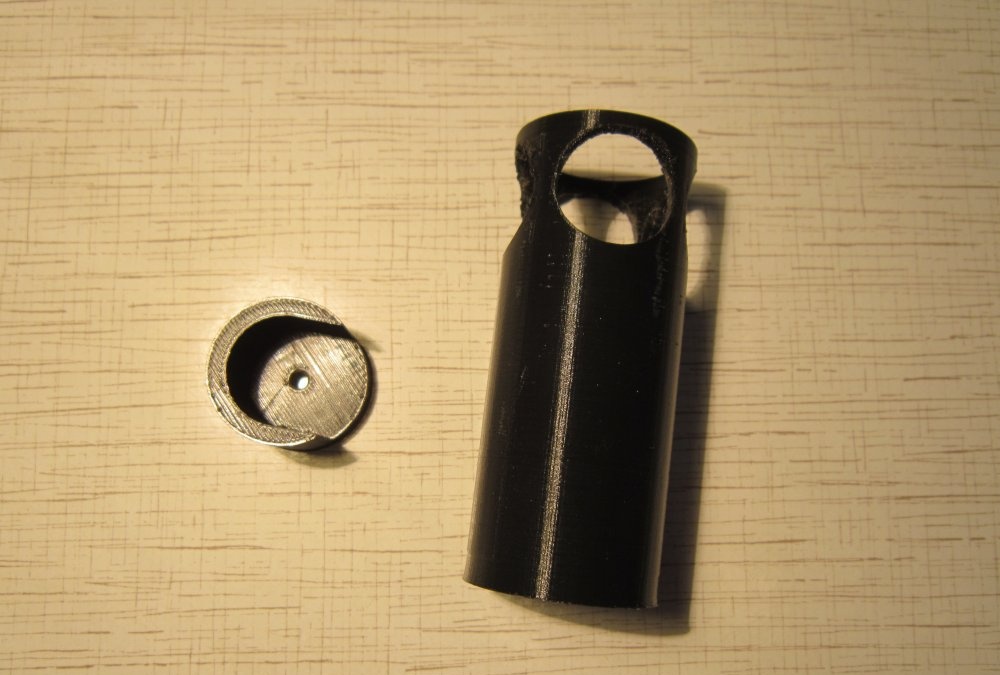
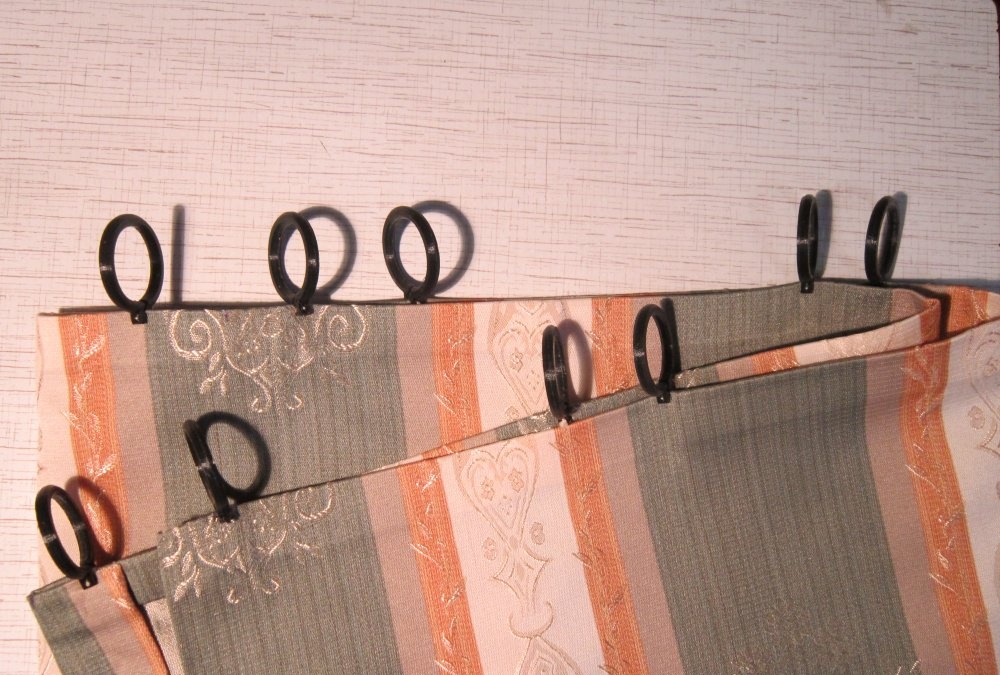
Let's move on to attaching the scenes. I have a 3D printer at my disposal. I printed 9 rings, 5 flanges, 4 brackets on it. They can be purchased at a regular store, but my cost was 70 rubles.The flanges and brackets were screwed to the wall in all appropriate sizes, and the rings were sewn to the drawstring. A handle with a smaller diameter was used as crossbars. I needed three of them for 90 rubles. I equipped the drawstring with an opening and closing mechanism using a fishing line.
The cabinet was assembled in a day. The cost of the material, minus time and work, was approximately 2,033 rubles. The savings are three times noticeable. I'm very pleased with my work and how it turned out. Strive to be creative.