Do it yourself
Life hacks, master classes, useful tips, recipes.
home » Useful and interesting » Lifehacks and useful tips » Simple rack for garden tools
Simple rack for garden tools

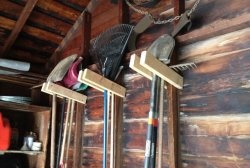
An incredibly simple rack that can be made in a short amount of time will help you bring order to your shed or garage. Mounted on the wall, all your rakes, shovels, hoes and similar tools will be clearly stored without disturbing anyone.

Will need


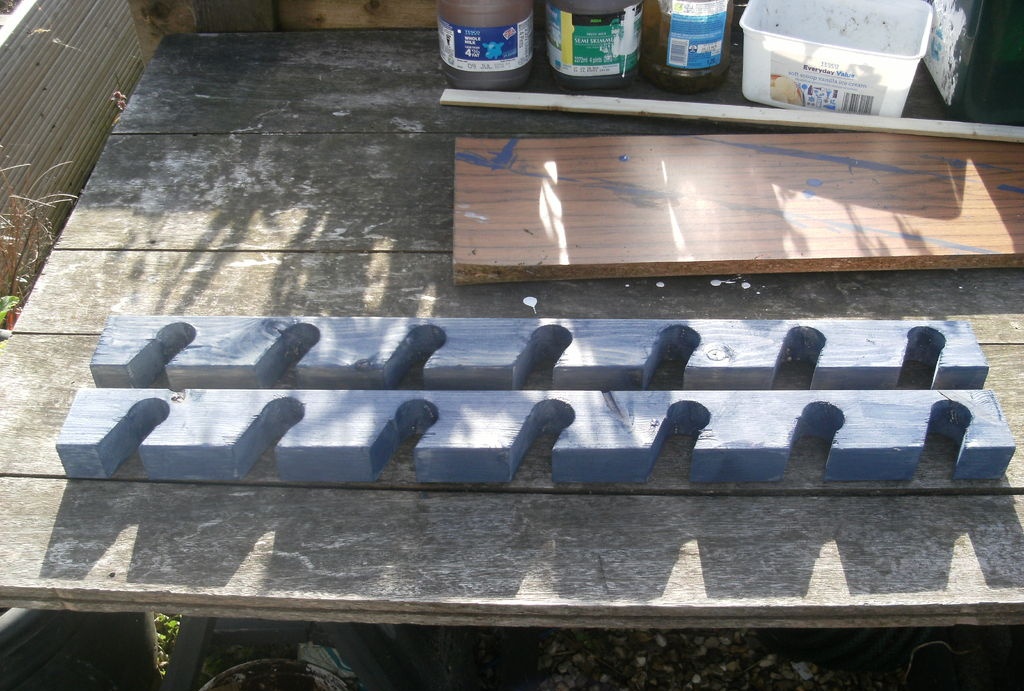
  • I took 2 pieces of boards measuring 38x68, 1.5 meters long.
  • Drill press or drill with 32mm spade bit.
  • A circular saw with the ability to set a cutting angle or a regular hacksaw for wood.
  • Sanding block and sandpaper.
  • Long wood screws.

Making a rack for garden tools


So, we adjust the two boards to the same length if they do not fit.
Simple rack for garden tools

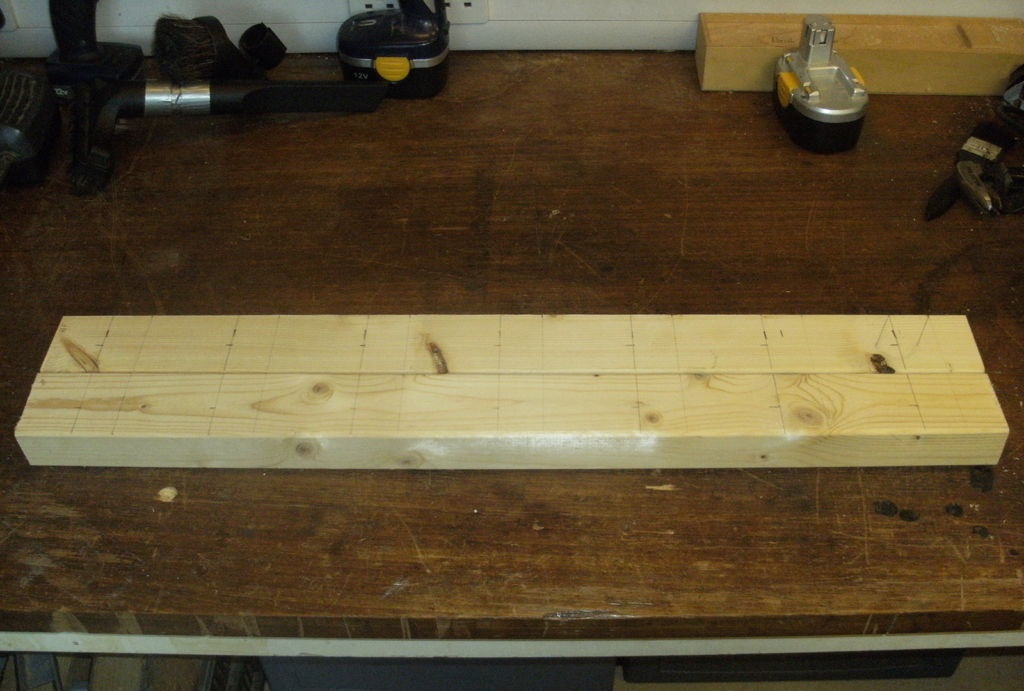
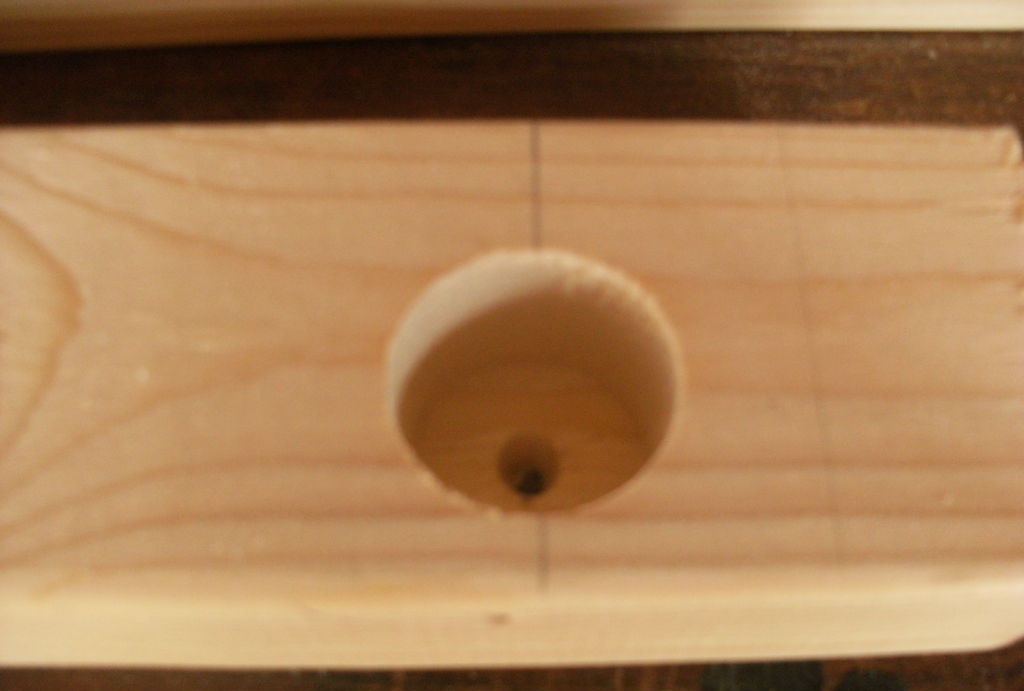
Let's mark it. You will need to make a hole first and then an oblique cut. The distance between such nests is 150 mm.
Simple rack for garden tools

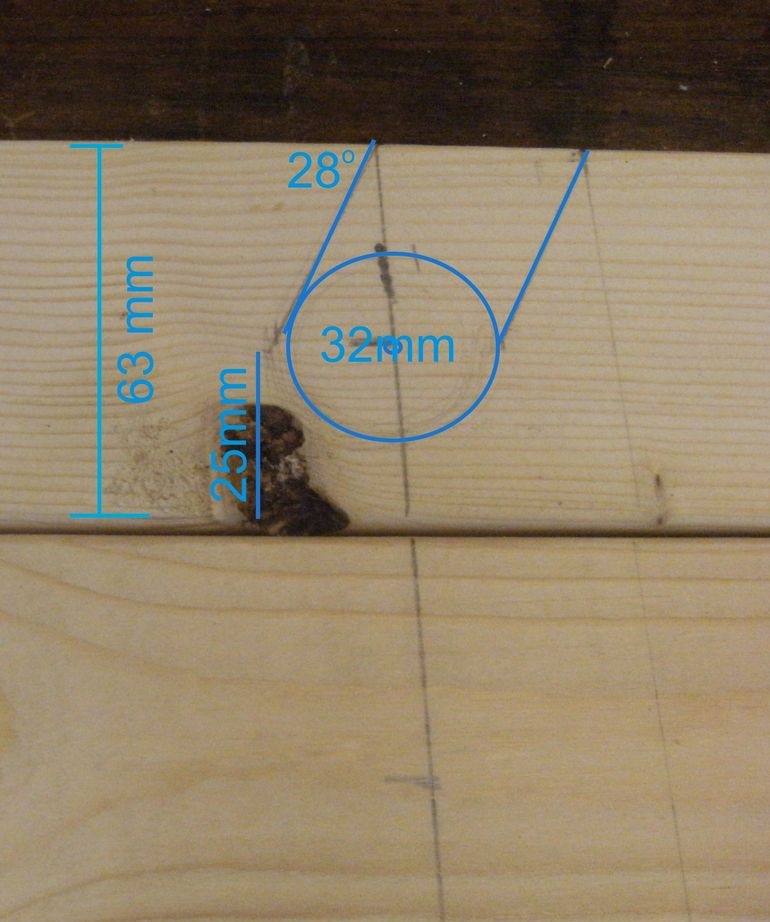
When everything is marked, take a feather drill and drill all the holes, but not through. If you immediately make a through hole, then the edge where the crease came out will not be smooth, but will have splinters sticking out.
Simple rack for garden tools

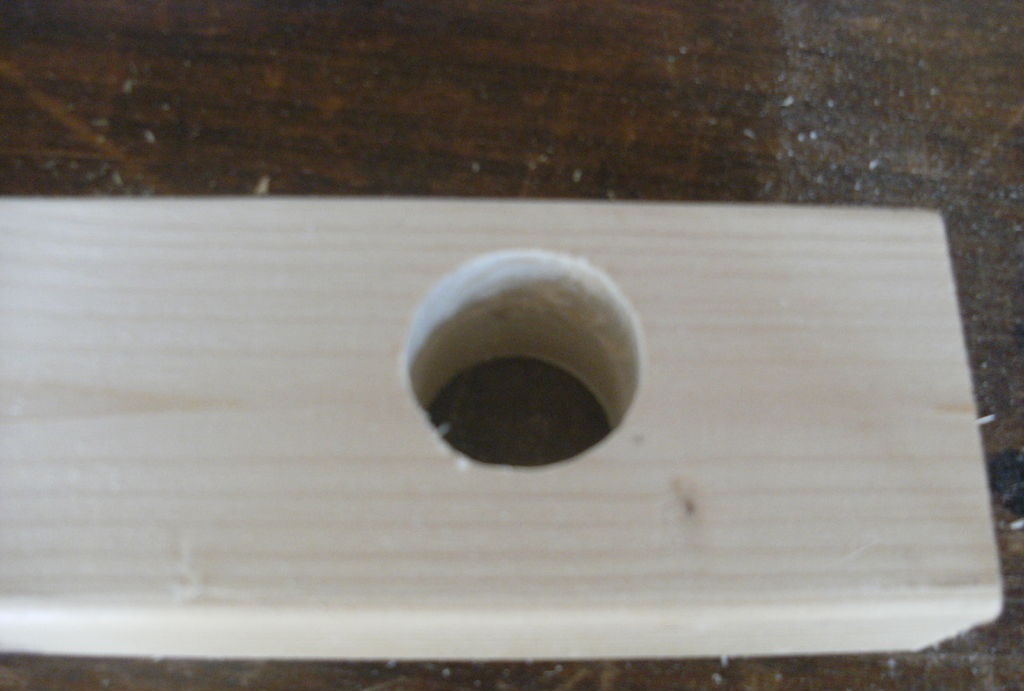
Turn over to the other side.
Simple rack for garden tools

And drill the hole all the way through.
Simple rack for garden tools

Let's do all these manipulations for both bars.
Simple rack for garden tools

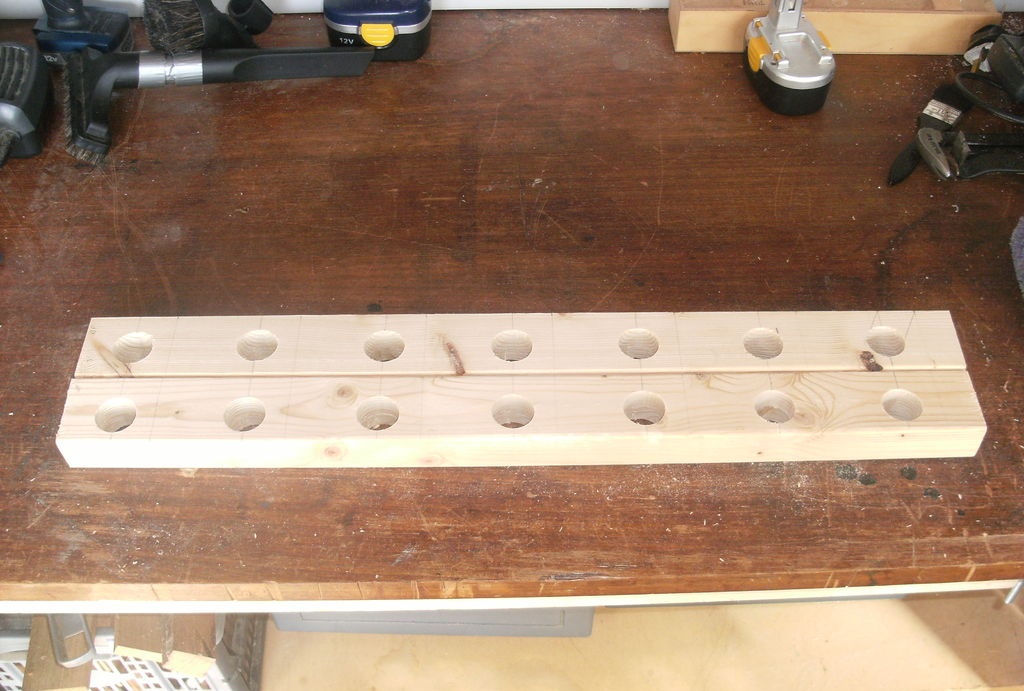
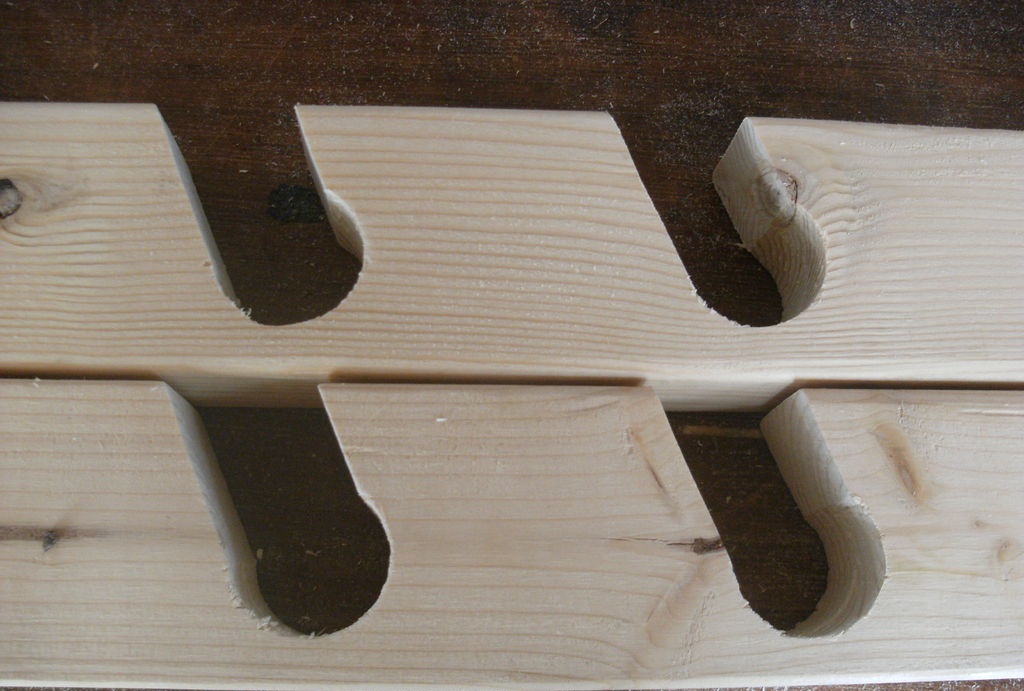
Now, using a machine or a hacksaw by hand, we make an oblique groove.
Simple rack for garden tools

Next, we sand the blanks to remove burrs and paint them.
Simple rack for garden tools

Then we hang it on the wall using self-tapping screws if the wall is wooden. If not, then drill holes for dowels and attach them to the wall through metal corners.
Simple rack for garden tools

You need to estimate the distance between the boards in advance, taking into account the minimum length of your tool.
After building such a rack, your shed will be in good order. The corners where this tool probably accumulated will be cleaned. Everything will be clearly visible and at hand.
come back
Comment
  • bowtiesmilelaughingblushsmileyrelaxed relaxedsmirk
    heart_eyeskissing_heartkissing_closed_eyesflushedrelievedsatisfiedgrin
    winkstuck_out_tongue_winking_eyestuck_out_tongue_closed_eyesgrinningkissingstuck_out_tonguesleeping
    worriedfrowninganguishedopen_mouthgrimacingconfusedhushed
    expressionlessunamusedsweat_smilesweatdisappointed_relievedwearypassive
    disappointedconfoundedfearfulcold_sweatperseverecrysob
    joyastonishedscreamtired_faceangryragetriumph
    sleepyyummasksunglassesdizzy_faceimpsmiling_imp
    neutral_faceno_mouthinnocent
4 minus one =
Comments (0)

Do it yourself - crafts and master classes | Page 85

Are you laying tiles? Make a device that will save time 2 times

Knitted jewelry: set of knitted beads | Do it yourself

The simplest LED brightness control | Do it yourself

«Do it yourself - with your own hands» - a site of interesting homemade products made from scrap materials and items at home. Step-by-step master classes with photos and descriptions, technologies, life hacks - everything a real master or just a craftsman needs for needlework. Crafts of any complexity, a large selection of directions and ideas for creativity.

We recommend reading

Washing machine error codes