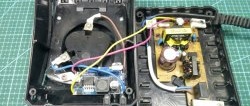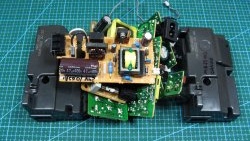
I have accumulated a number of computer power supplies. You can use them for their intended purpose. But I decided to do things differently. Moreover, the power is already low, mostly 200-300 watts. Do-it-yourselfers often modify them to suit their needs. And I decided to use them. I needed another charger, I have a lot of different ones. I liked the board from an ATX power supply, without a case. Markings on the FA-5-F board. The board is fully working. Modify only working boards, otherwise it will be difficult to find the fault.
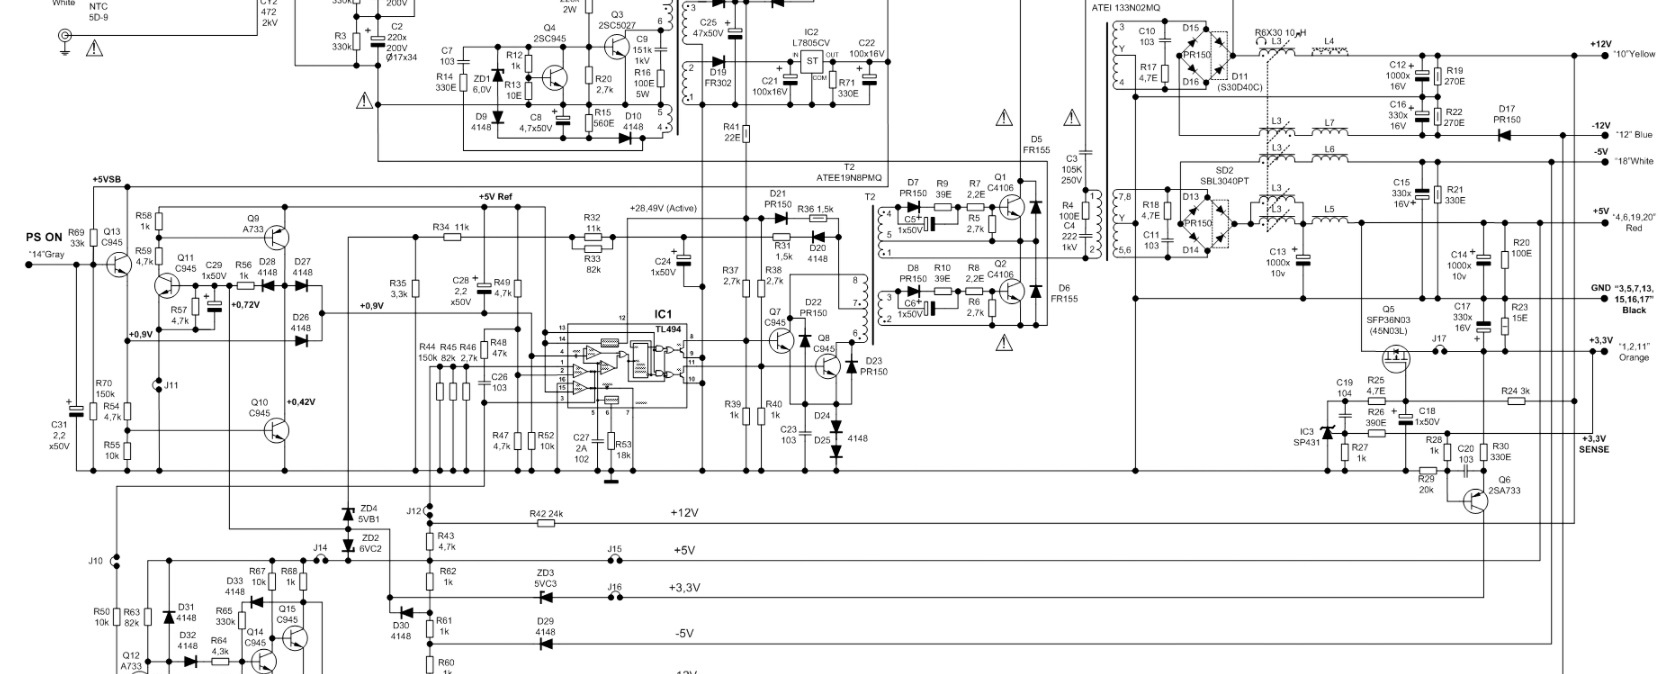
I found an approximate diagram for my board. Some of the components are different, but overall they are similar.
Let's move on to the rework
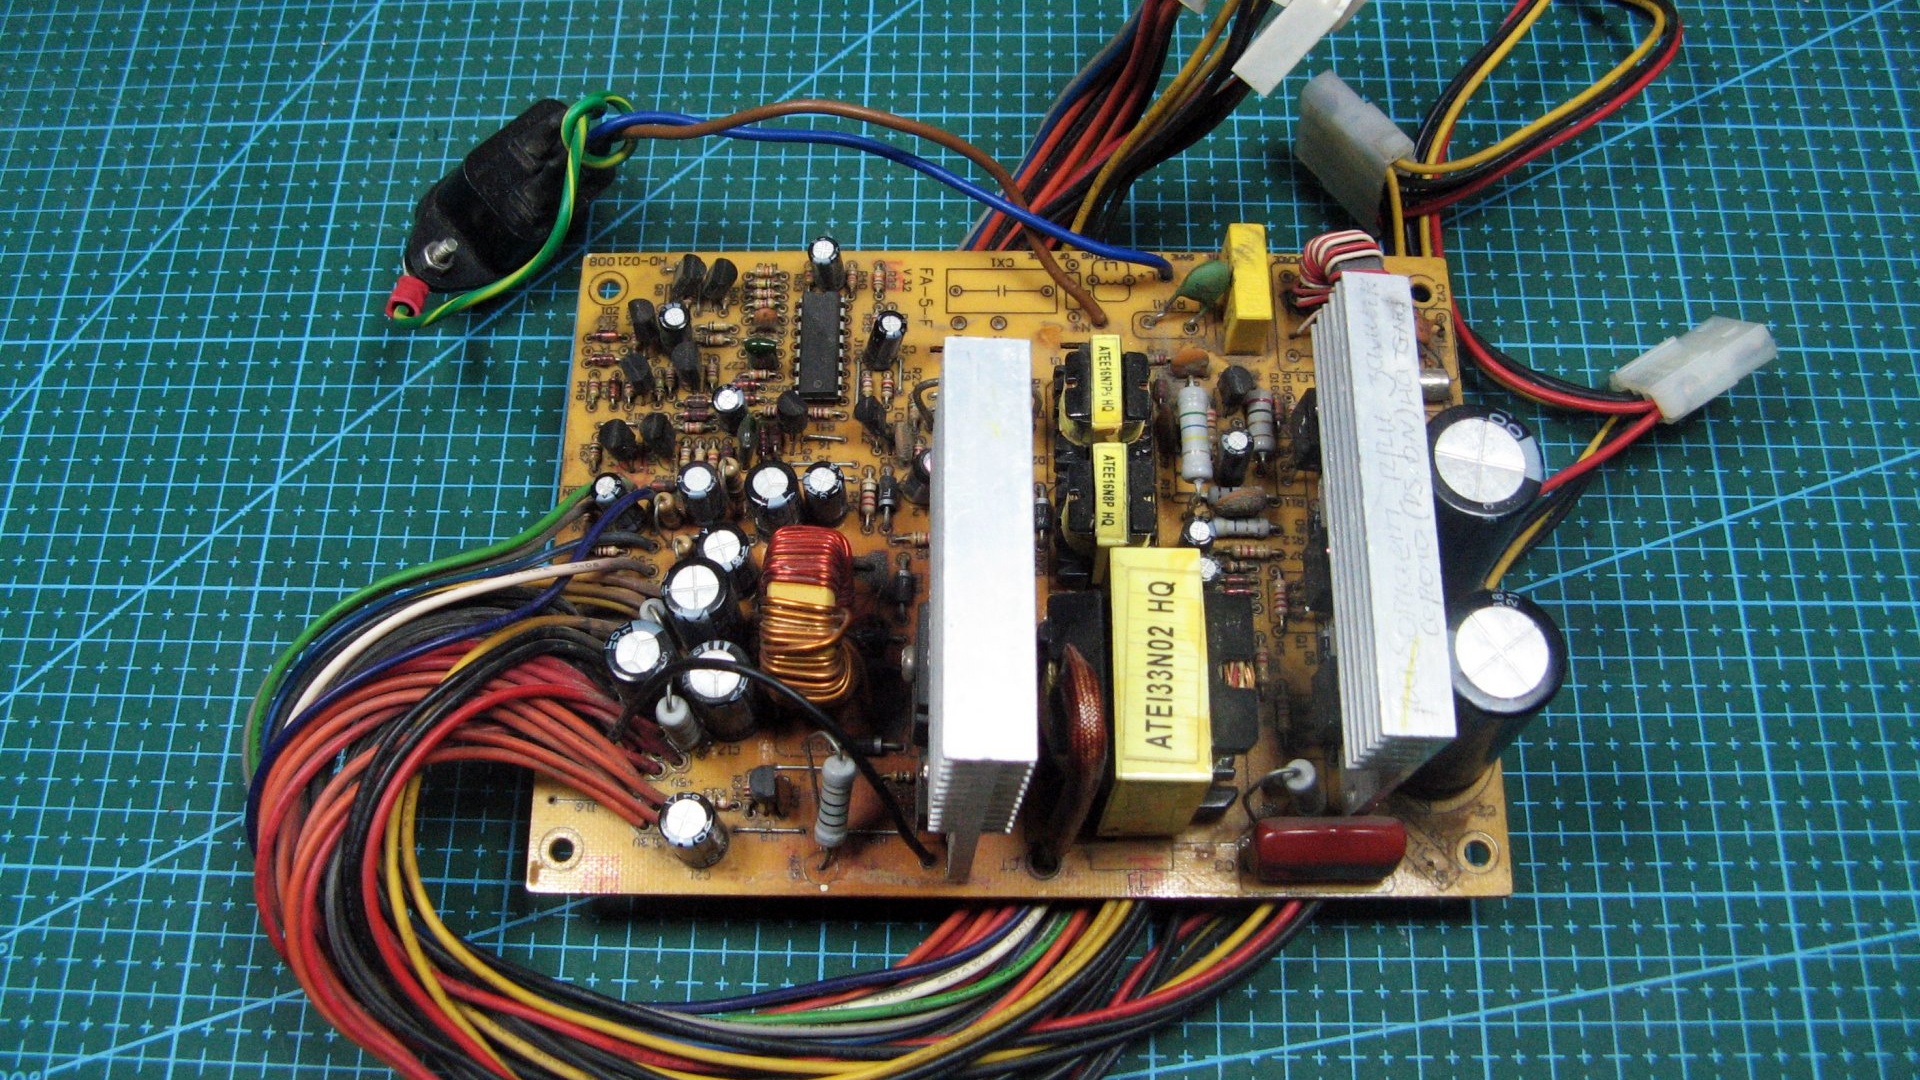
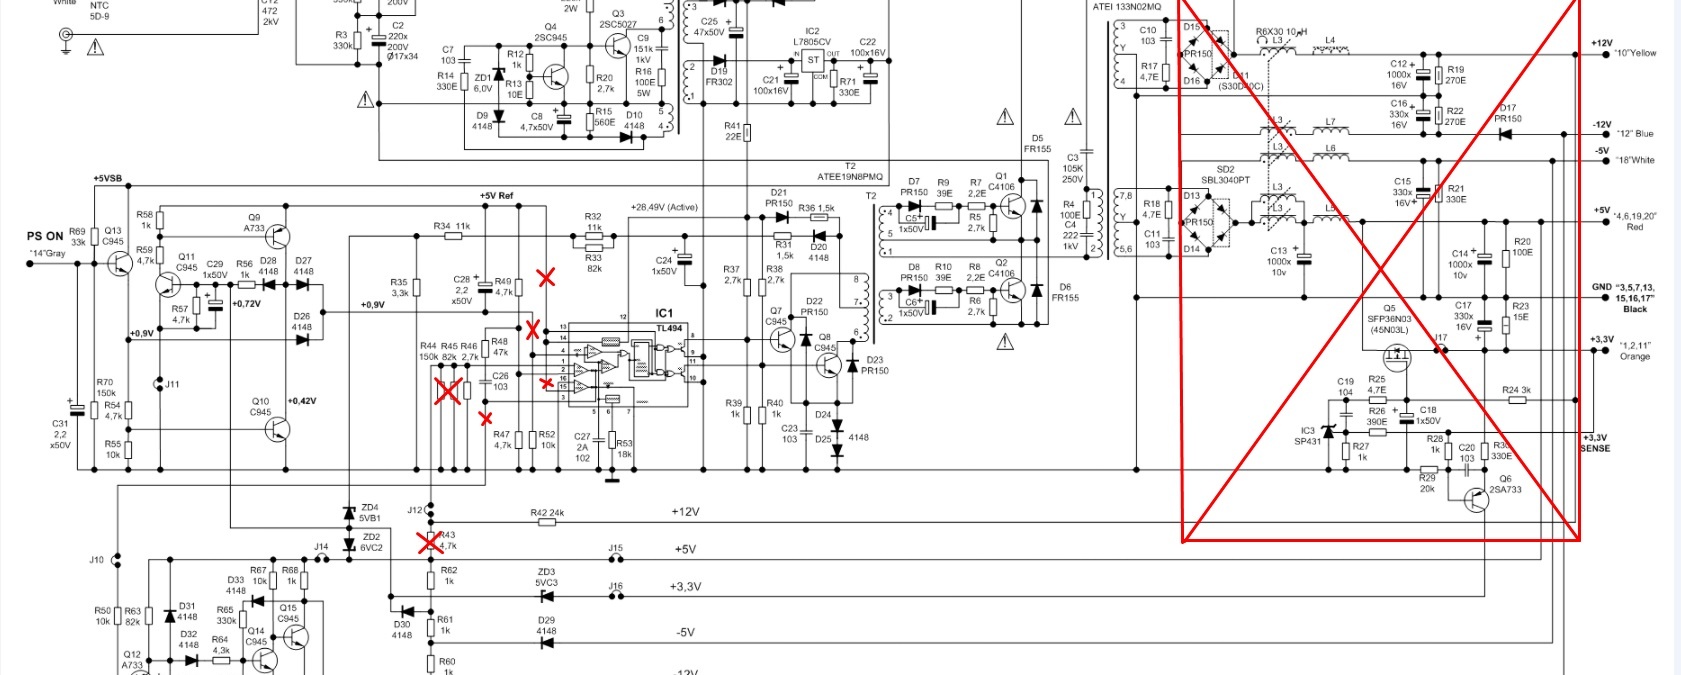
First of all, you need to remove the excess. We completely remove the power part according to the main voltages. We leave only the dual diode if it fits the parameters. I had an assembly installed at 12 amps and 200 volts, which suits me. I have highlighted in red what to remove. I used crosses to indicate where there should be no connection between elements.
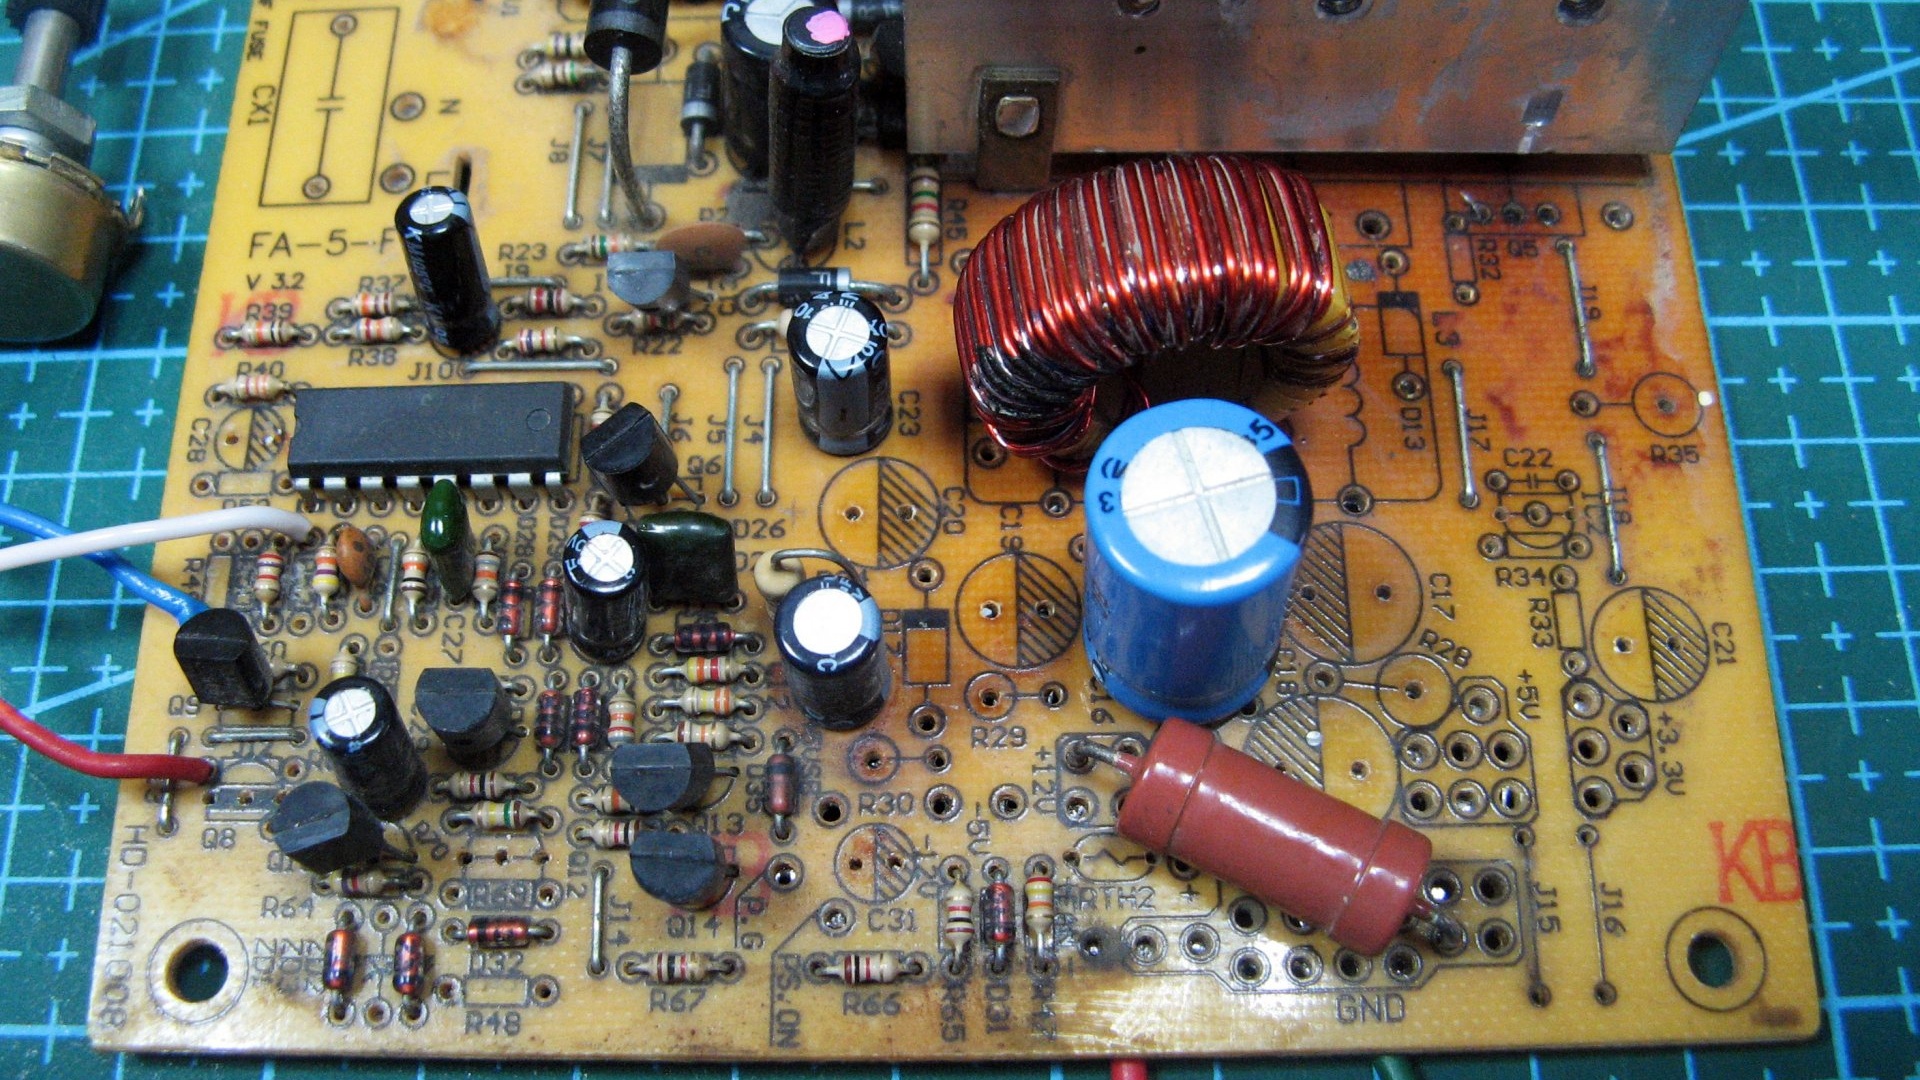
It turned out something like this. If you have a similar board, you can repeat it like mine.
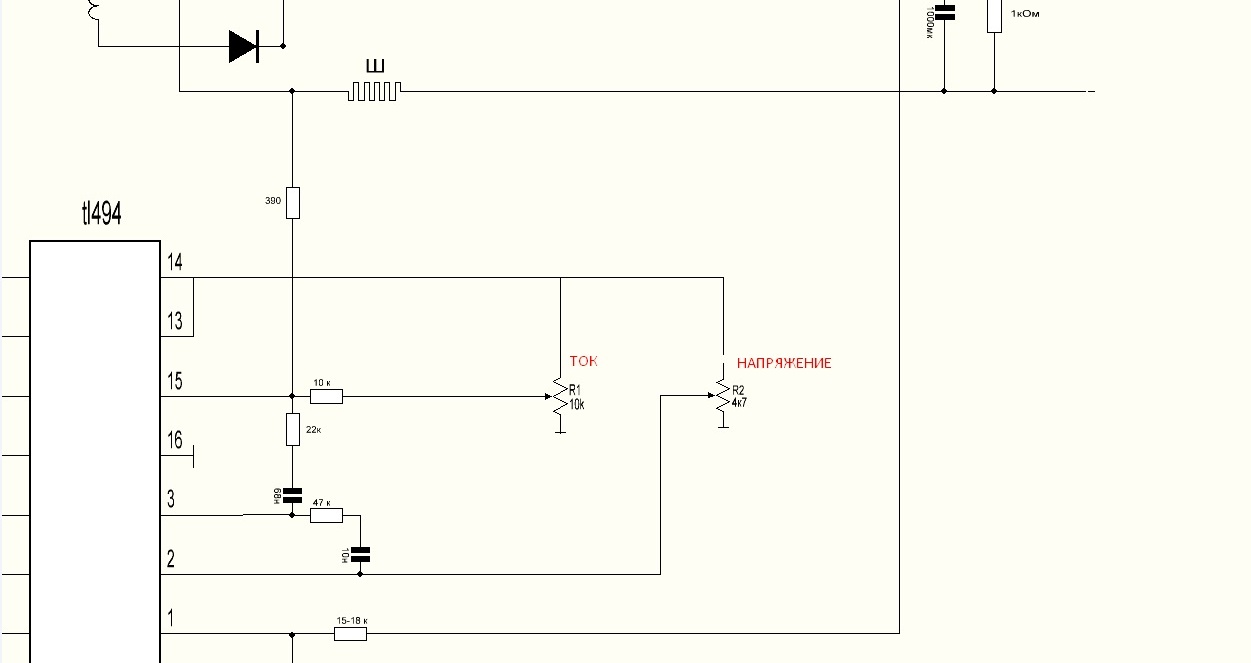
The result is a diagram like this
The resistor coming from the middle point of the transformer and to the 15th PWM leg determines the maximum output current.I advise you not to set it large, at least to begin with. The DGS (group stabilization choke) can be left as it is, I removed some of the windings. There remains a winding of +12 volts and part of the winding of -12 volts. It was simply impossible to remove the last one. The diagram does not show the pins of the PWM chip; they remain unchanged.
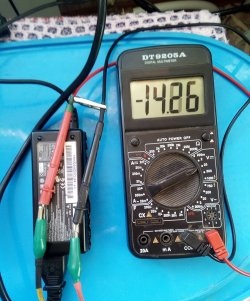
I carry out all the alterations through a protective light bulb. It can be soldered instead of a fuse. The first step is to check the voltage adjustment range. This voltage is minimal, almost zero volts.
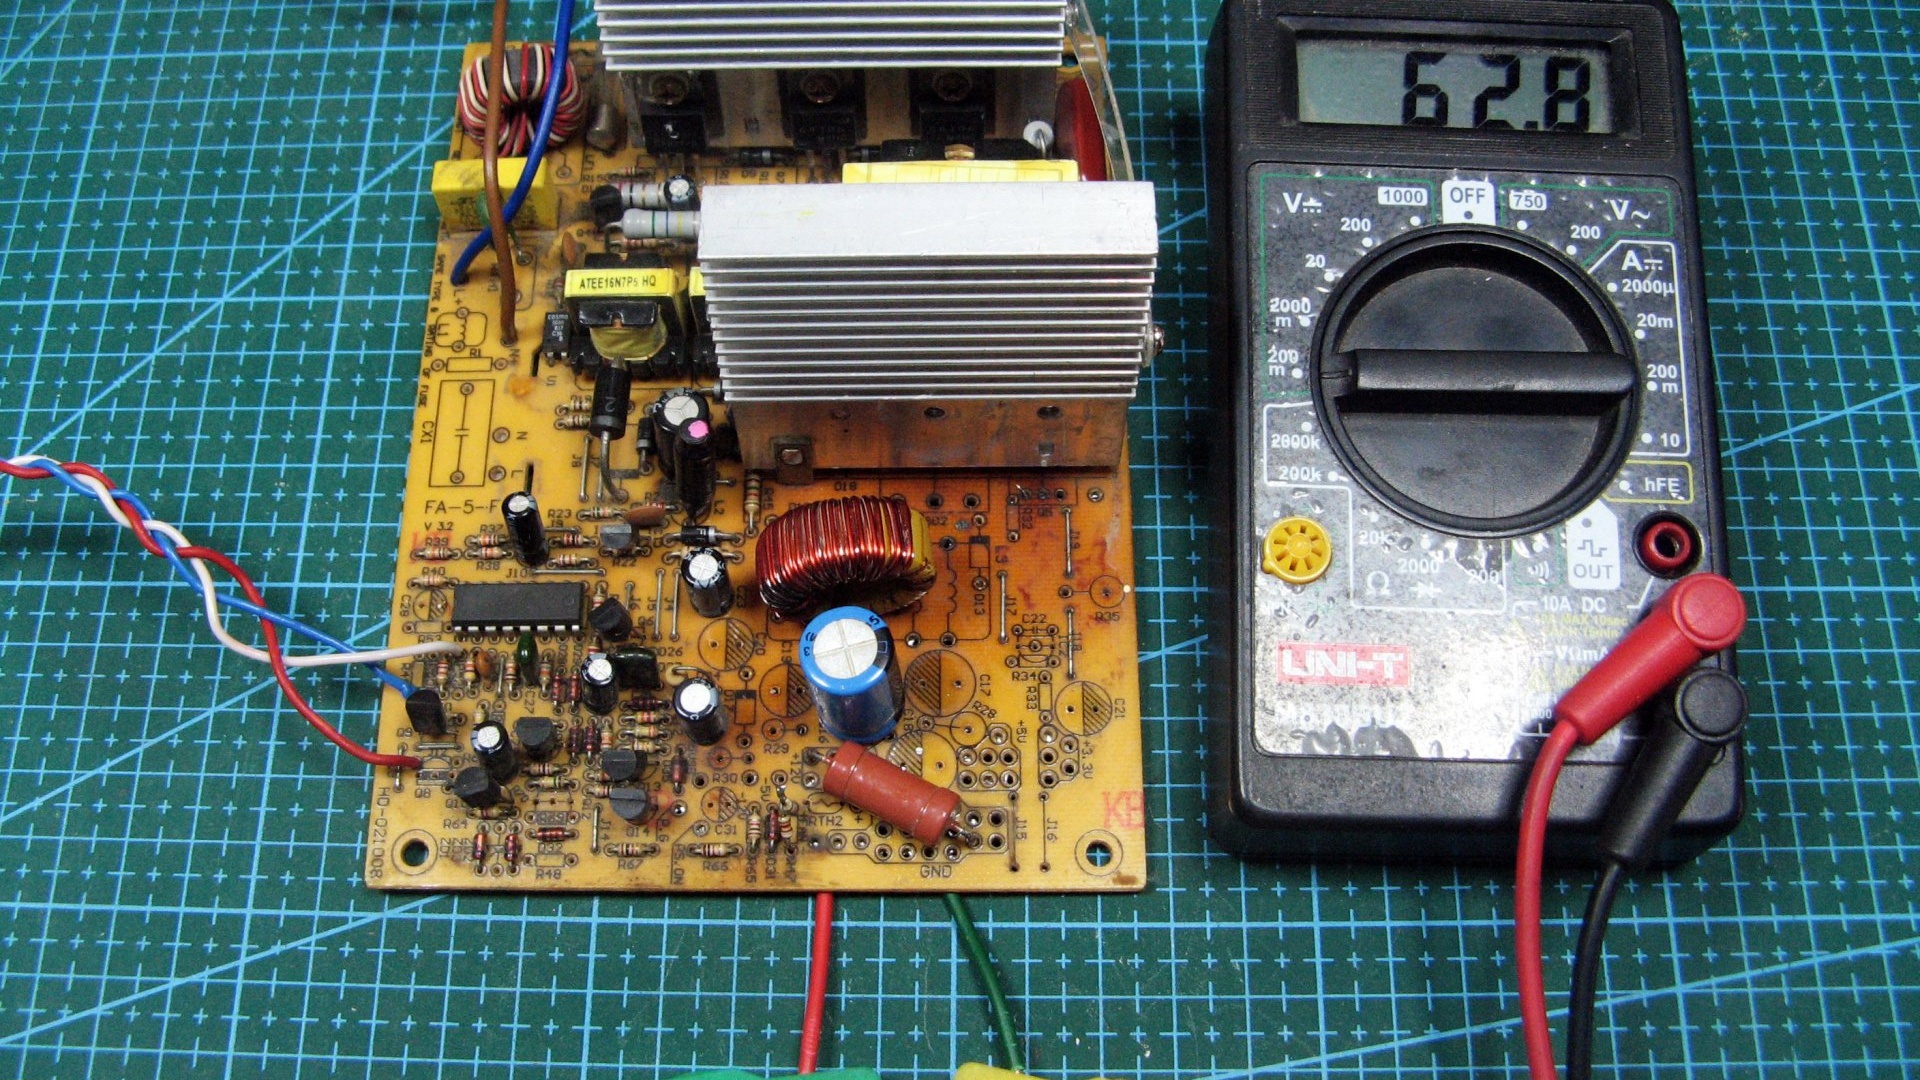
This voltage is maximum. Yours may be different.
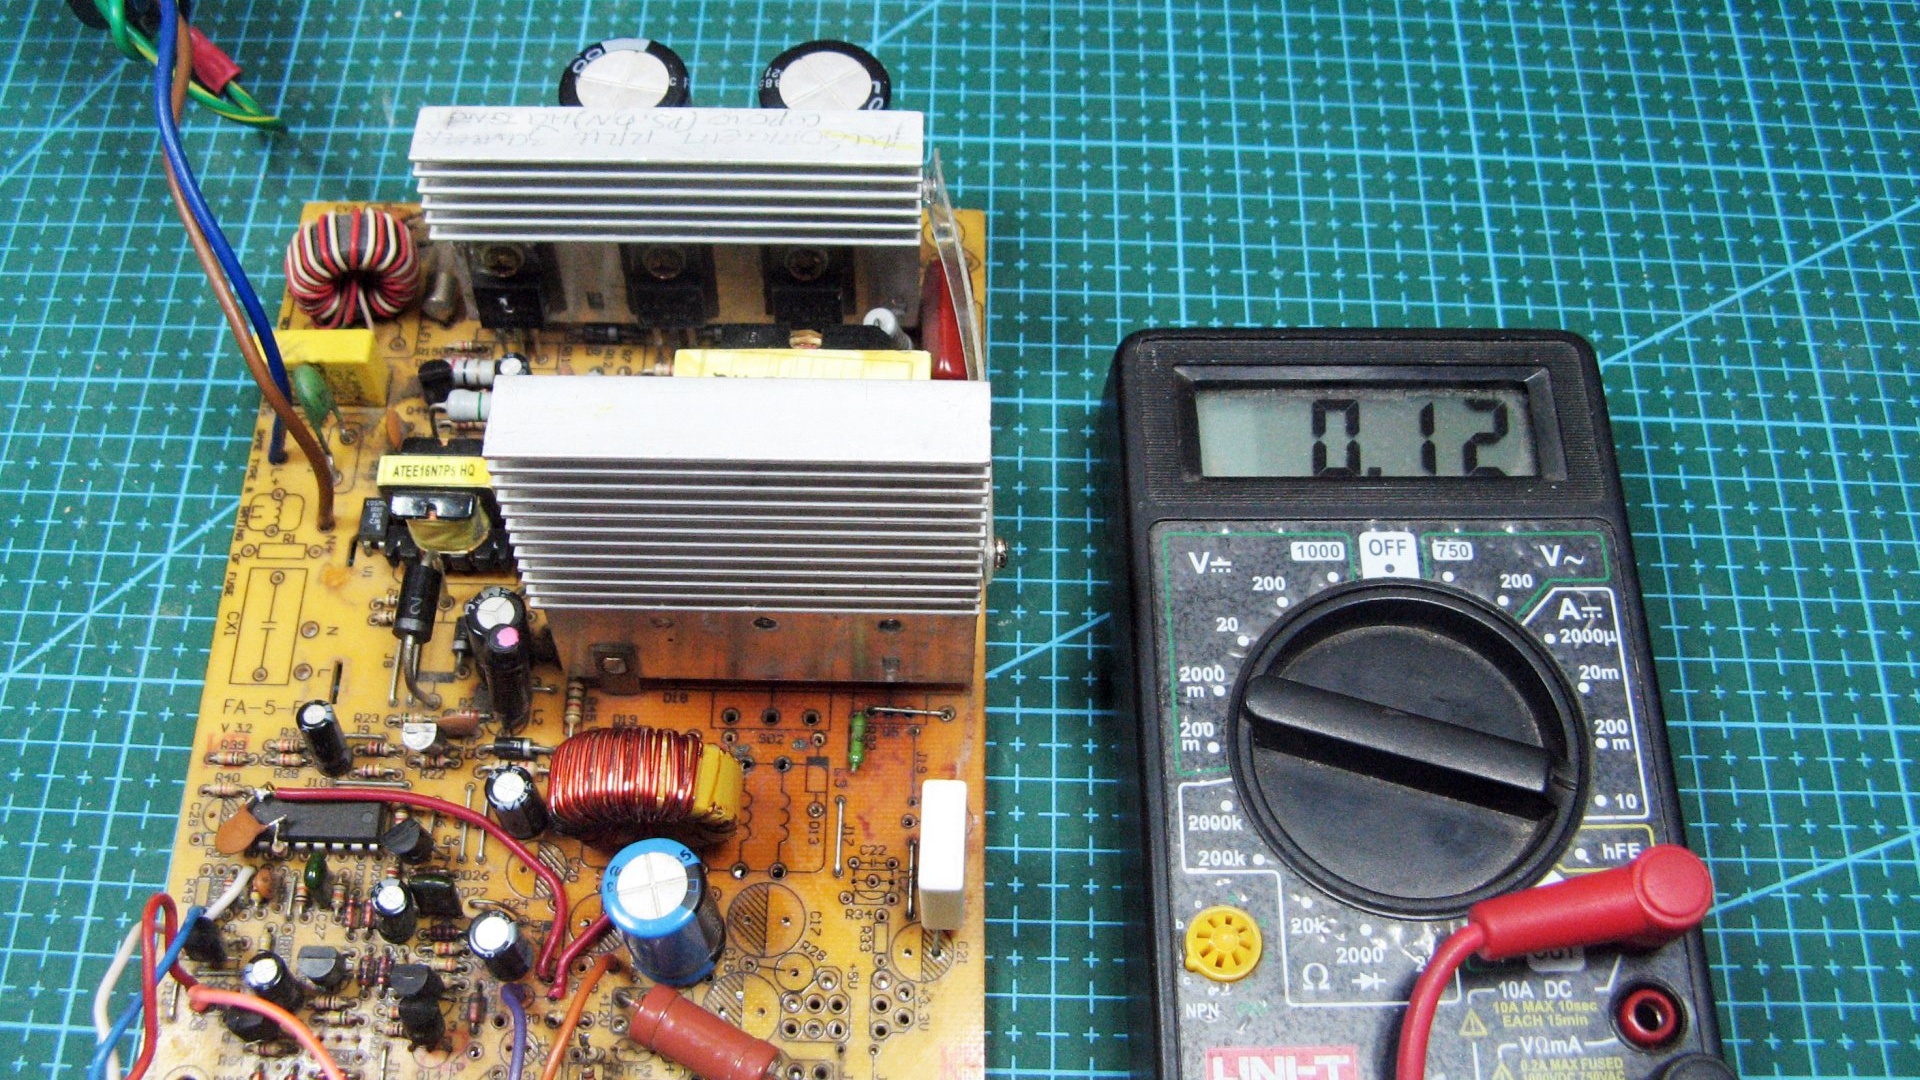
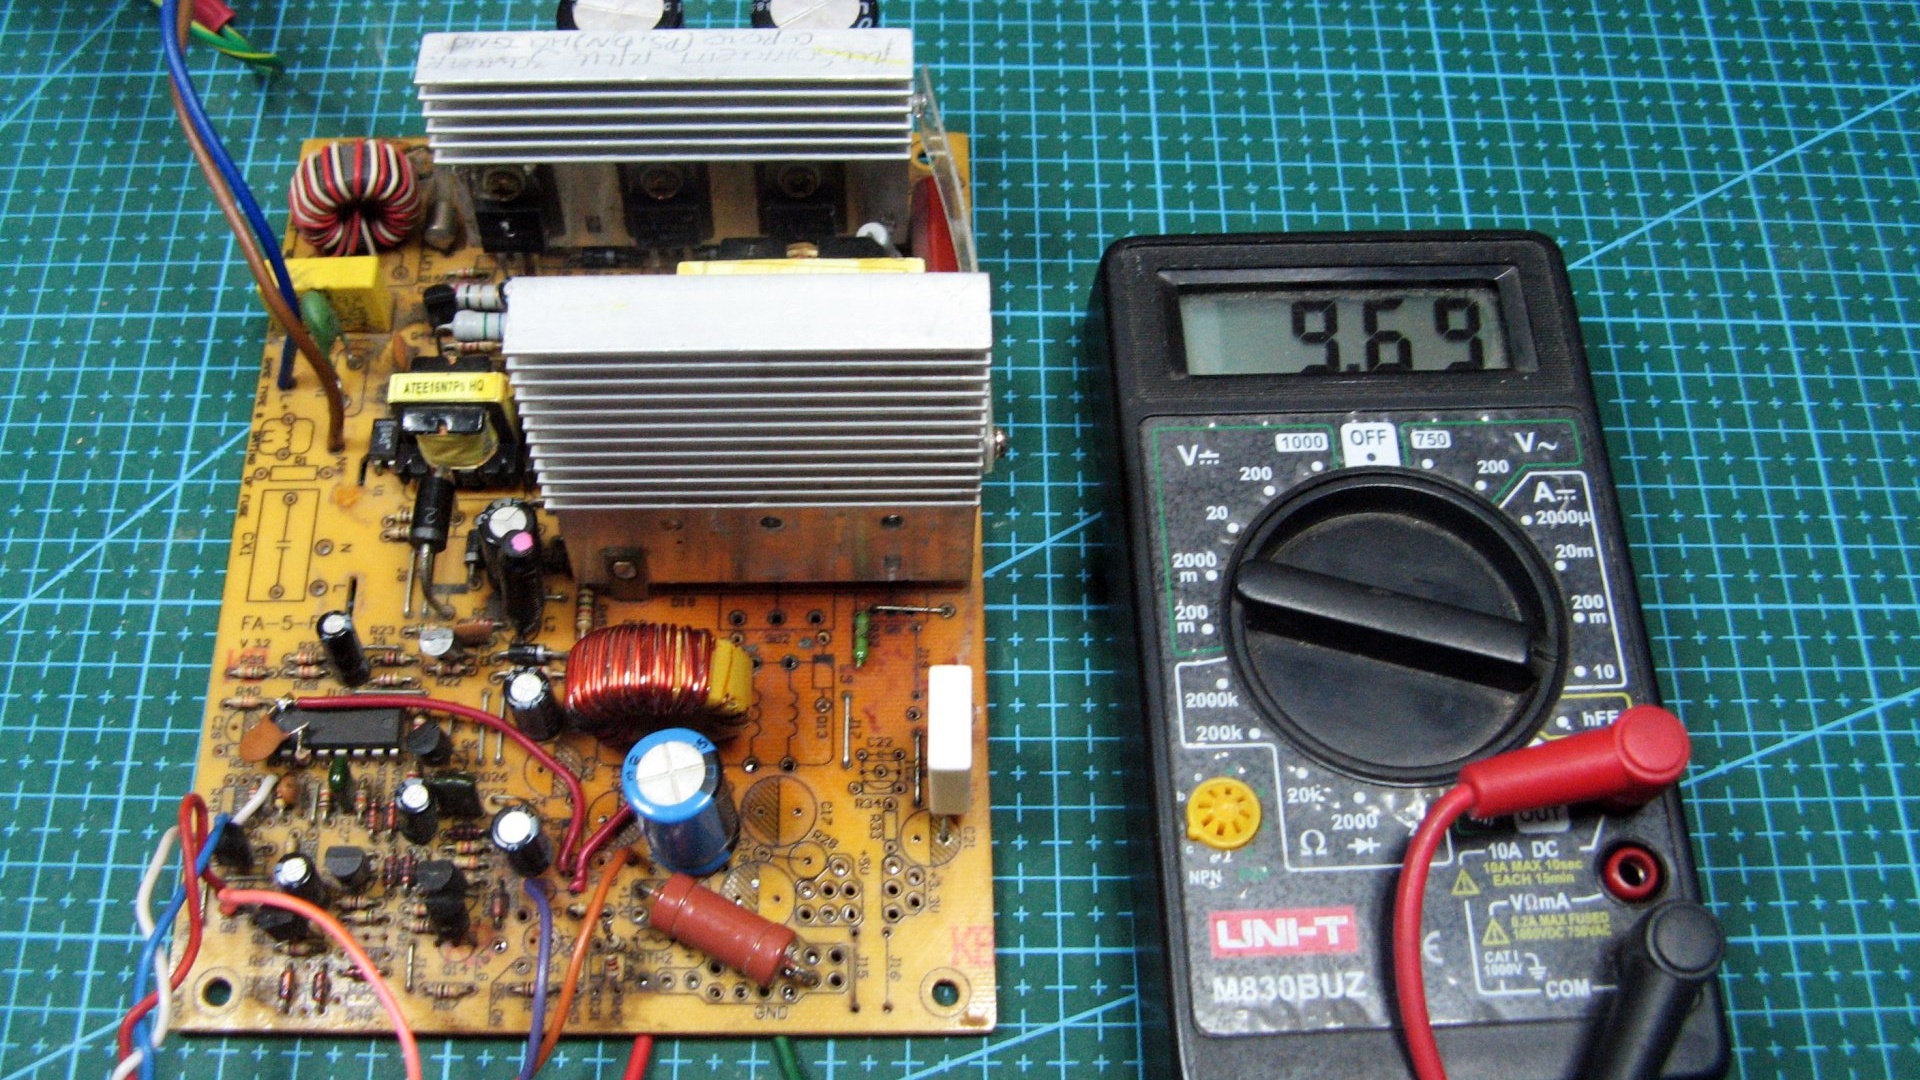
Having done the current part, I check the current. As a shunt, I have a 5 Watt and 0.01 Ohm ceramic resistor. This is my minimum current.

This is the maximum. If there is a lot of current, then the resistor from the middle point of the transformer needs to be reduced.
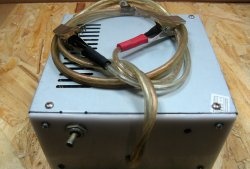
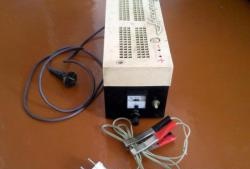
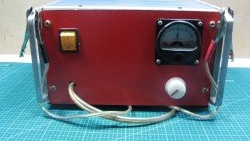
Basically, I achieved the result. All that remains is to install the board into the case. Install a voltmeter and ammeter.
I will decide on the body and controls and install it.
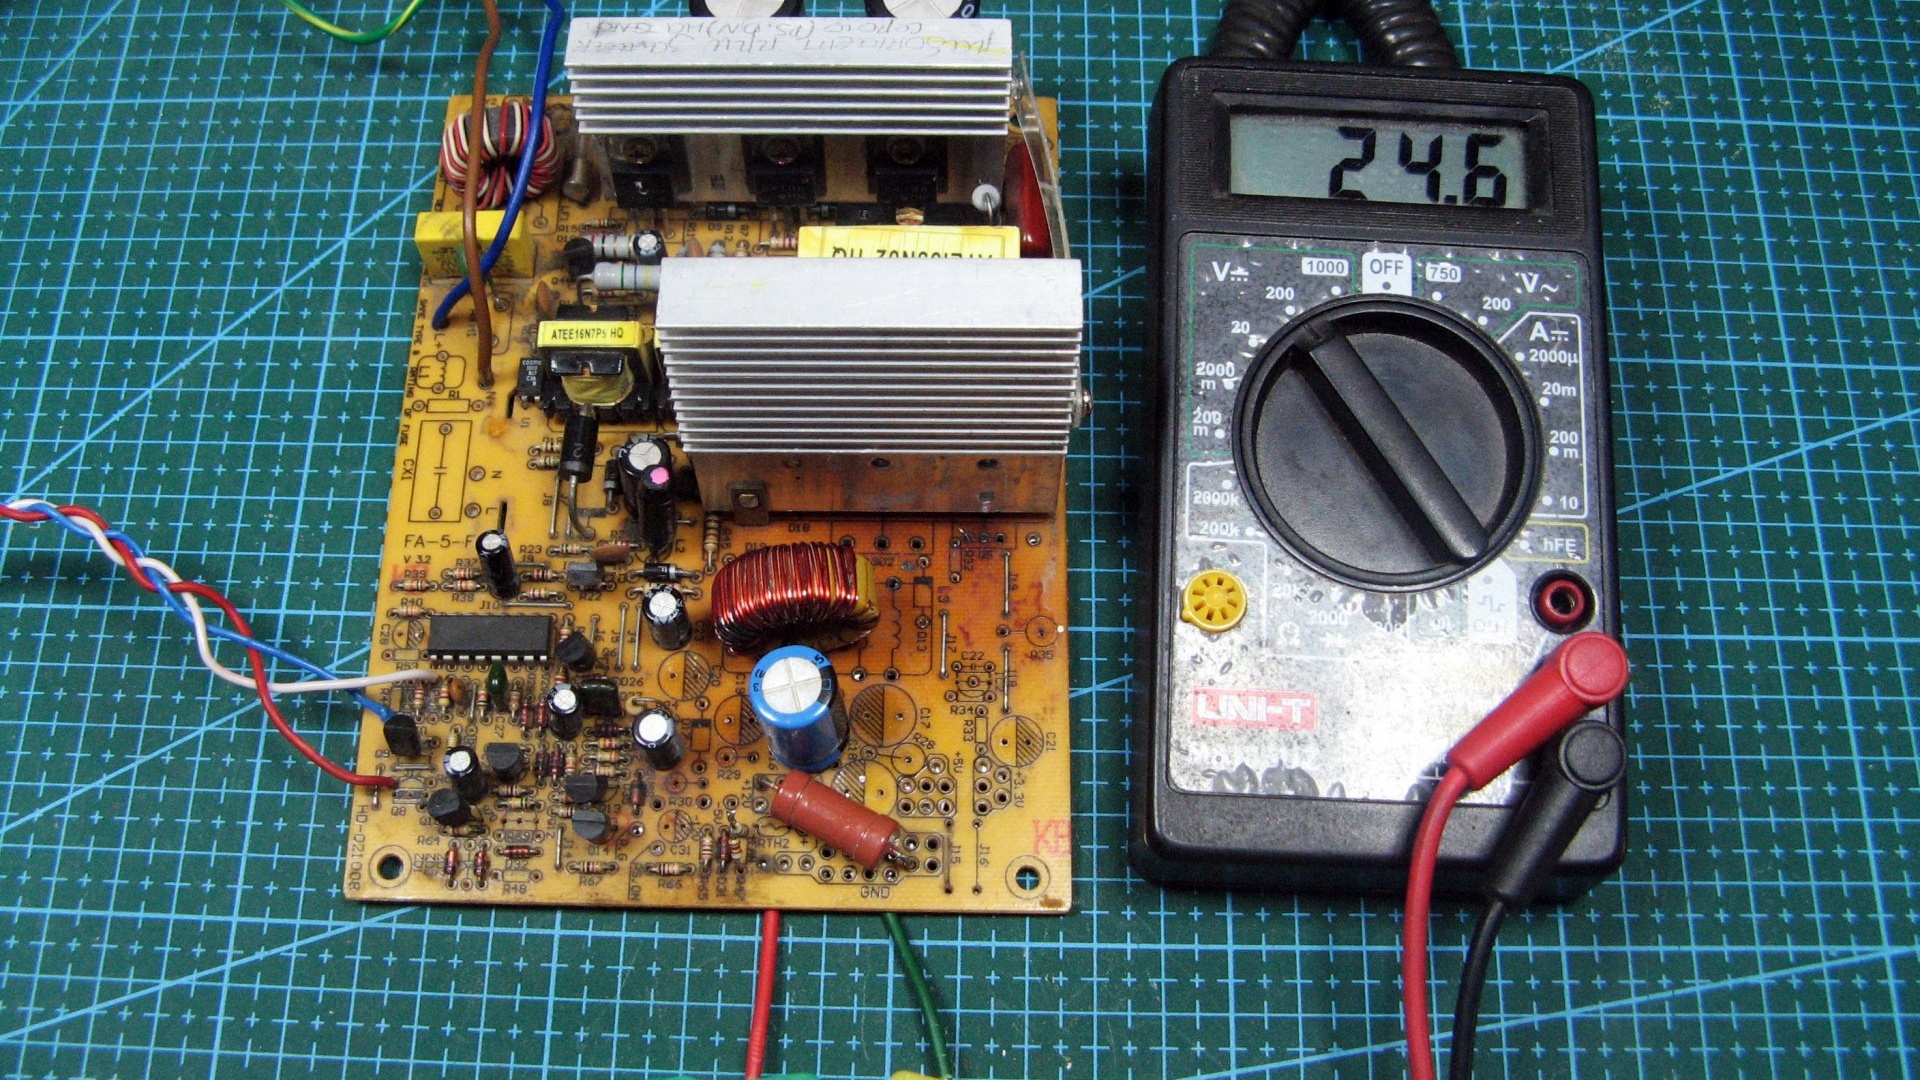
The result is the following regulated power supply:- The voltage is practically from 0 to 24 volts.
- The current is practically from 0 to 9 amperes.
You may succeed with other parameters. It all depends on the power supply and shunt. Also a resistor that determines the maximum output current.