A garden wheelbarrow without a cargo capacity in a country house or farmstead is not suitable for anything. It cannot be purchased separately in the store. But it can be made from 1 square meter sheet metal. m, which can be purchased from a thrifty neighbor or at a recycled metal shop.

Will need
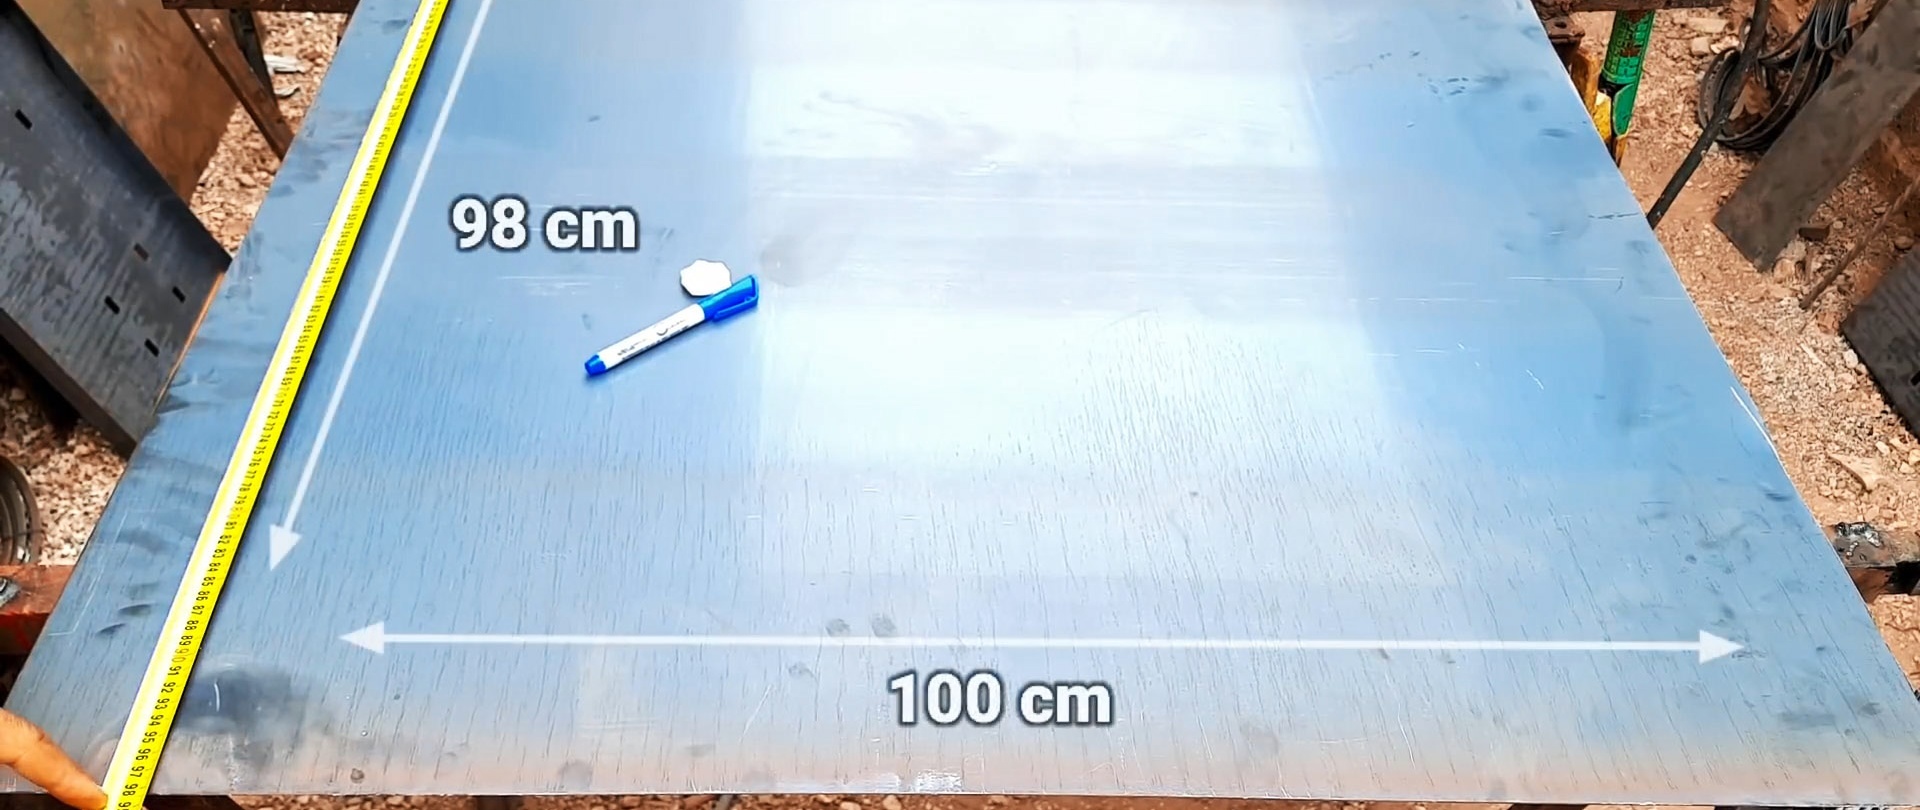
We will make the body for the garden wheelbarrow from sheet metal with a thickness of 1-2 mm and dimensions of 98 × 100 cm.
To turn a sheet into a cargo container, you will need:- Straightened steel strip;
- tape measure, chalk and marker;
- Bulgarian;
- welding;
- pliers;
- hammers (light and heavy).
The process of making a car body from a single sheet of metal
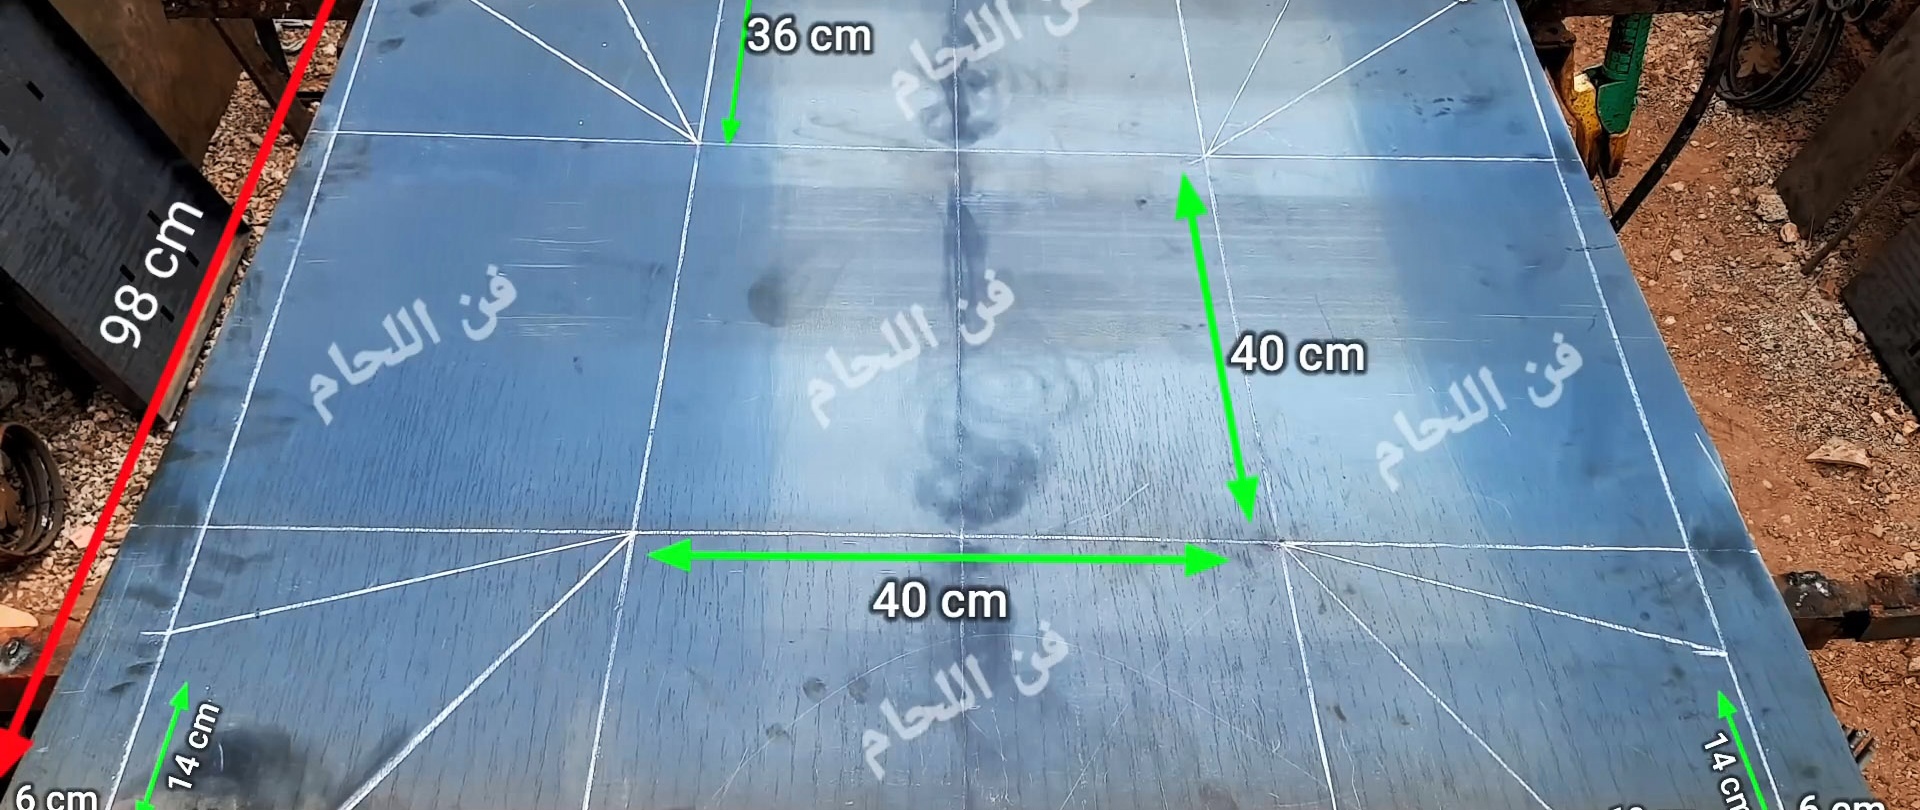
The highlight of this method of manufacturing a body lies in the unusual marking of a sheet of 100×98 cm. If it is done correctly, then everything else will be a matter of technique.
We mark and draw a median line along the length of the sheet at a distance of 50 cm from the edges. We measure 20 cm from it in both directions and also draw lines parallel to the median.
We set aside 36 cm along the long side of the sheet and another 40 cm from it. Draw lines along the marks parallel to each other and to the edges of the sheet.
On the edge of the sheet, 22 cm from the transverse line, measure 6 cm from two corners and connect the resulting points with opposite corners with lines.
From the point of intersection of a line drawn at an angle with the edge of the sheet, draw a line to the point of intersection of the midline with a transverse line, spaced 22 cm from the nearest edge. From the same point on a line drawn at an angle, set aside 14 cm and also connect it with that same point.
We draw the same lines between the corresponding points and on the adjacent section of the sheet, as well as on the other two corner sections, but with different markings, since they are larger than the first two sections.
Along the edge from the corner point we set aside 14 cm and measure the distance from the resulting point to the point of intersection of the sides of this section, which is 39 cm.
Using the point of intersection of the lines as the center of the circle, we find the point of intersection of the radius of 39 cm with the line drawn at an angle. It is 9.5 cm away from the corner. We connect the resulting points with the point of intersection of the sides of this section. We do the same on the second adjacent section of the sheet.
We erase the lines along which there will be no bend or cut. As a result, we received a marked sheet from which we will make a box with a bottom of 40x40 cm.
Using a grinder, we cut off half-wedges along the lines drawn at an angle on two opposite edges.
Then, in the corners of the sheet, we cut out wedges outlined by radius lines, and we get a cutting of the body, which we lay on a flat surface.

Standing with your feet in strong and hard shoes on the bottom, we bend the side cutting sections towards ourselves at an angle along the lines separating the bent section from the bottom.

We place the sheet bent on the sides on the trestles with the bottom up and grab adjacent sections in several places, aligning them along the line at the four corners.

We turn the body upside down and apply continuous welds from the bottom to the top edge from the inside on all sides to give the body the necessary strength.


Next, using pliers, bend the edges around the perimeter outward to the maximum possible angle.

We straighten the edges with two hammers: we strike with the smaller one, and place the second one from the inside.

The edges must be radius for safe and convenient work with the body mounted on a frame with wheels.