This indicator has no logical elements, is incredibly easy to assemble and extremely reliable in operation. Consists of only 5 elements, soldered in 5 minutes without paying.
The indicator is designed to monitor the critically low voltage of a 12 V battery. If desired, you can change the values of the circuit elements and make the indicator for a different voltage.
Will need
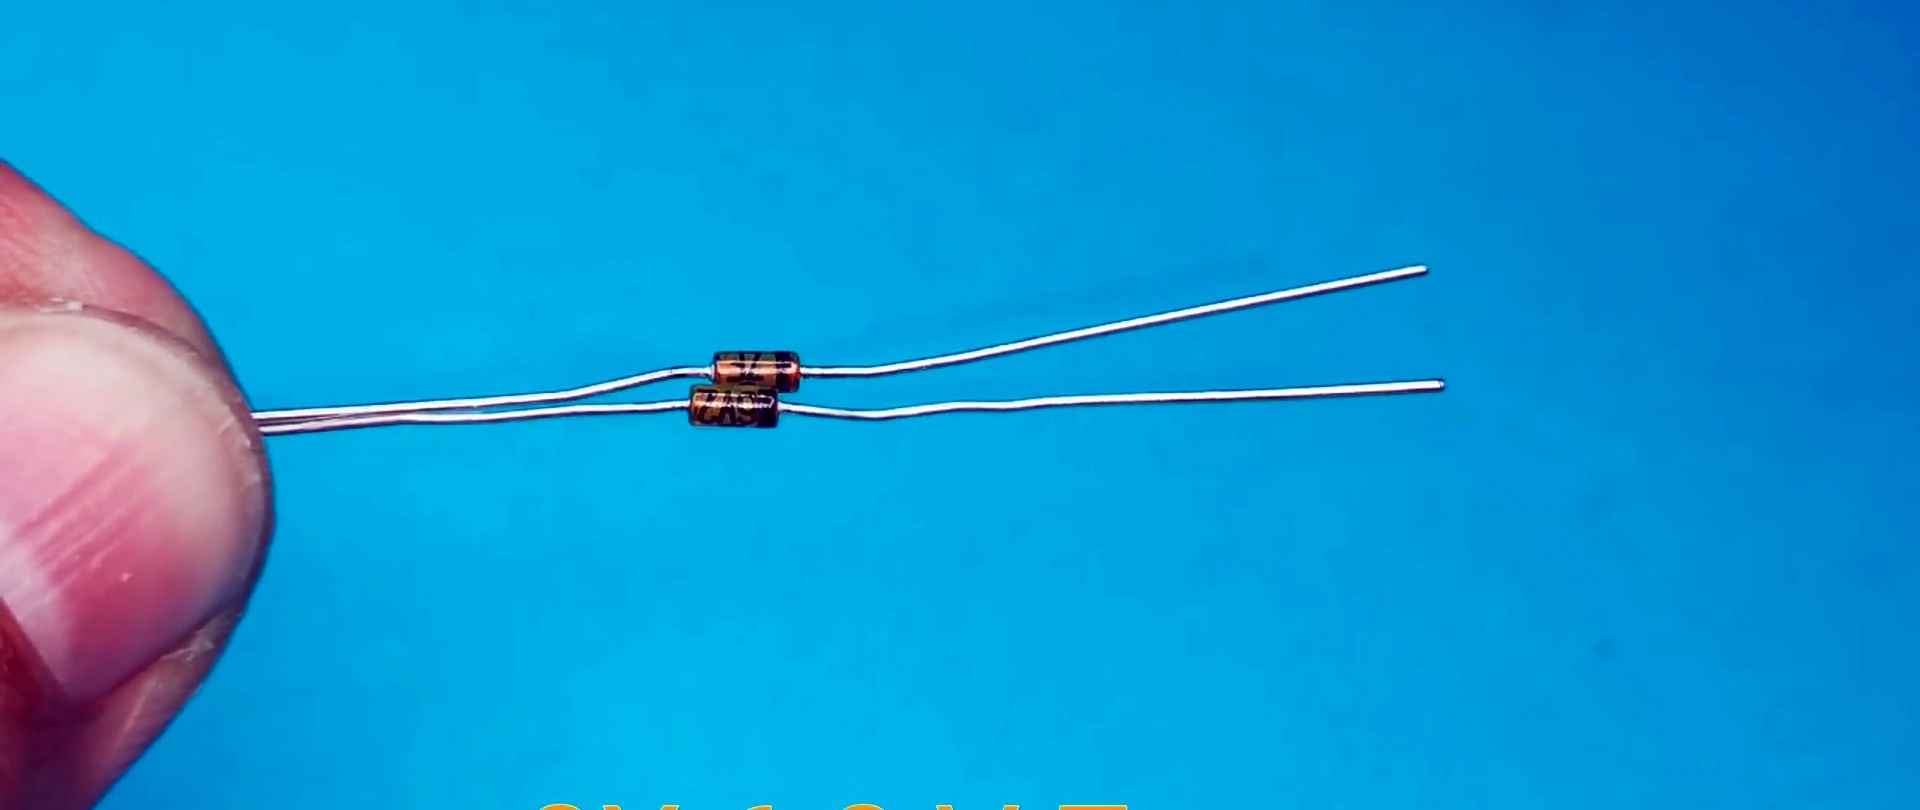
Zener diode 6.2 Volt - 2 pcs. - http://alii.pub/5myg53
Resistor 1 kOhm - 2 pcs. - http://alii.pub/5h6ouv

Light-emitting diode - http://alii.pub/5lag4f
How to make a low battery indicator without transistors
So, first we’ll assemble it, and then we’ll decide on the principle of operation.
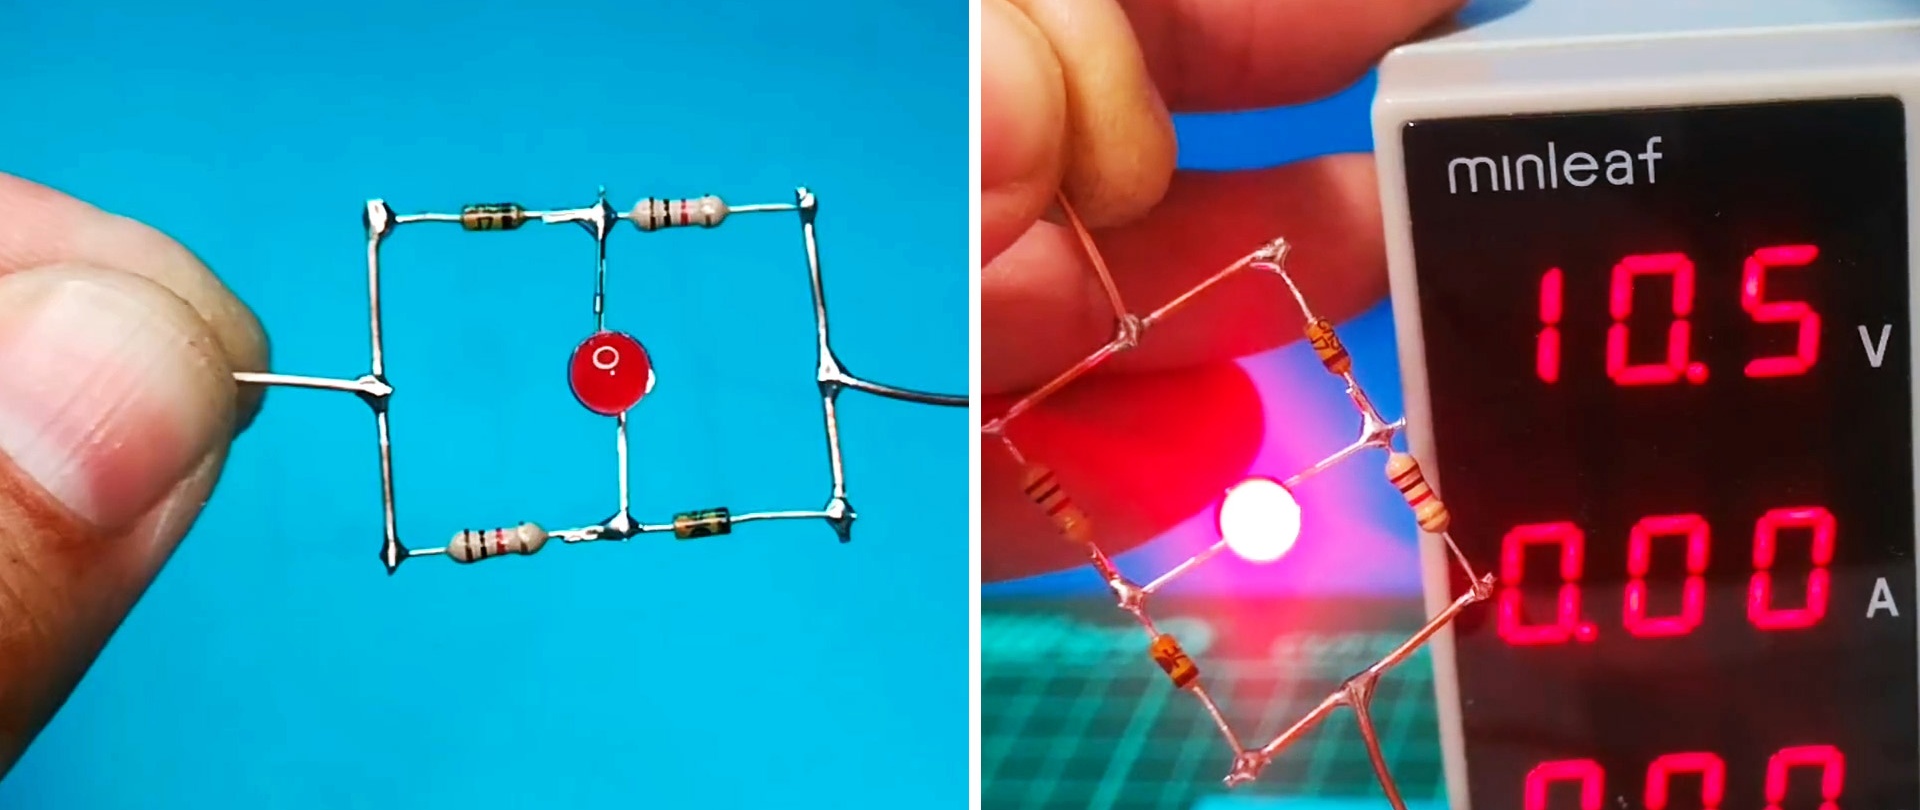
We take a piece of copper wire (this will be the “+” of the indicator) and solder a resistor to one end, having previously cut off the long lead.
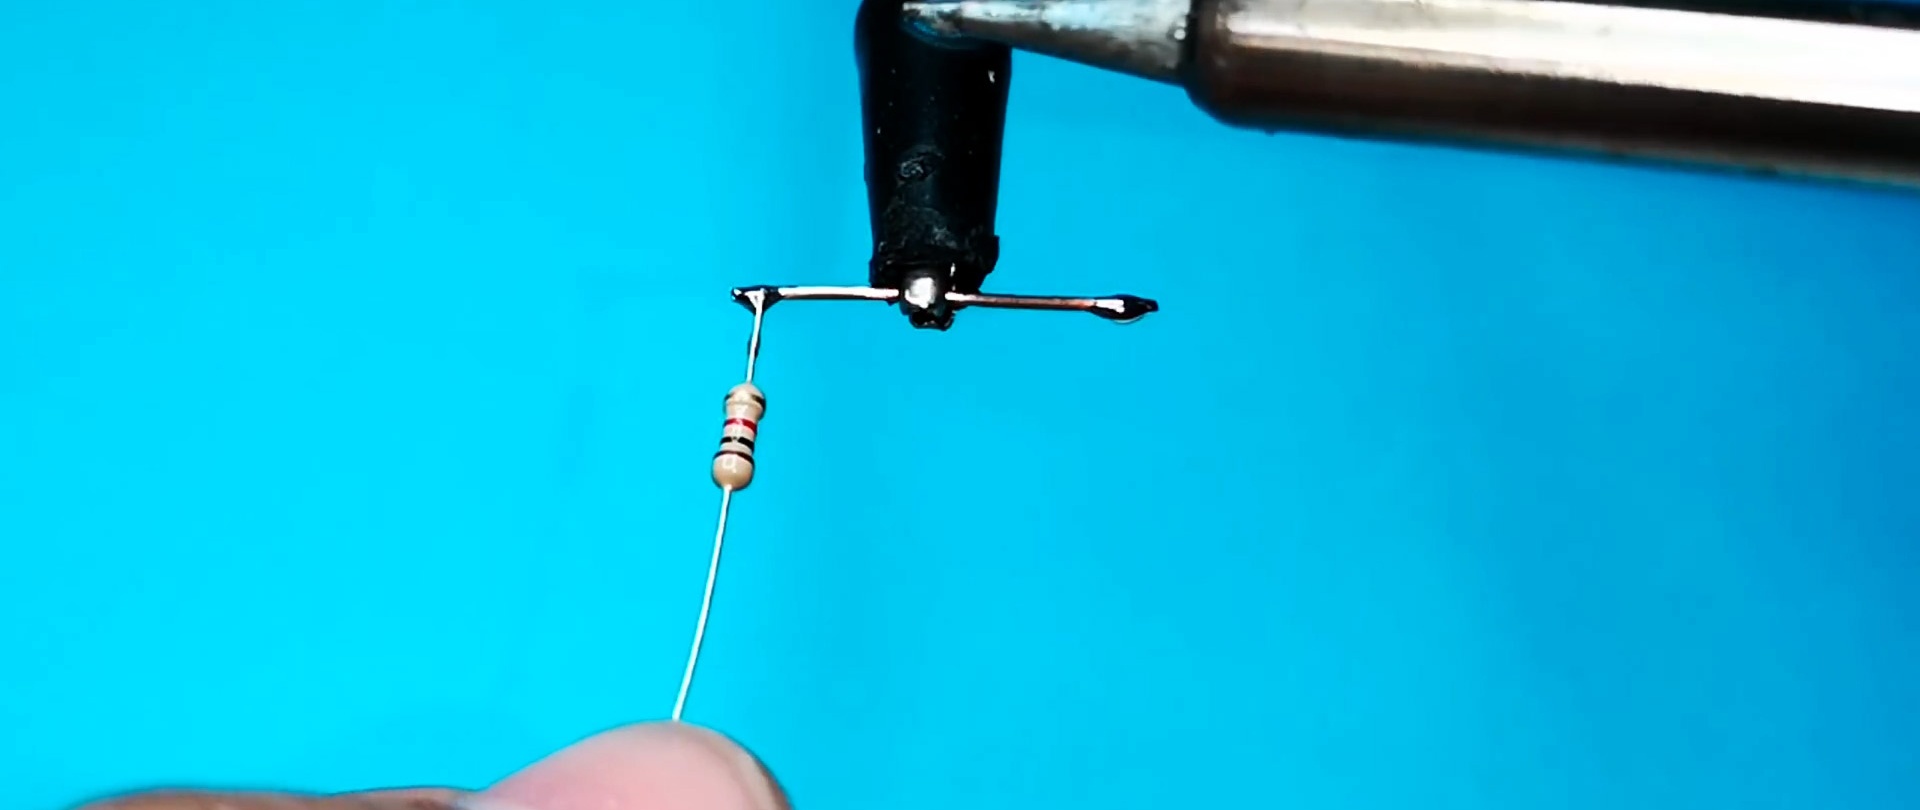
Then we solder the zener diode to the other edge of the segment with the cathode.

Solder between the resistor terminals and the anode of the zener diode Light-emitting diode. Connection polarity LED shown in the figure.

We bite off the extra output.
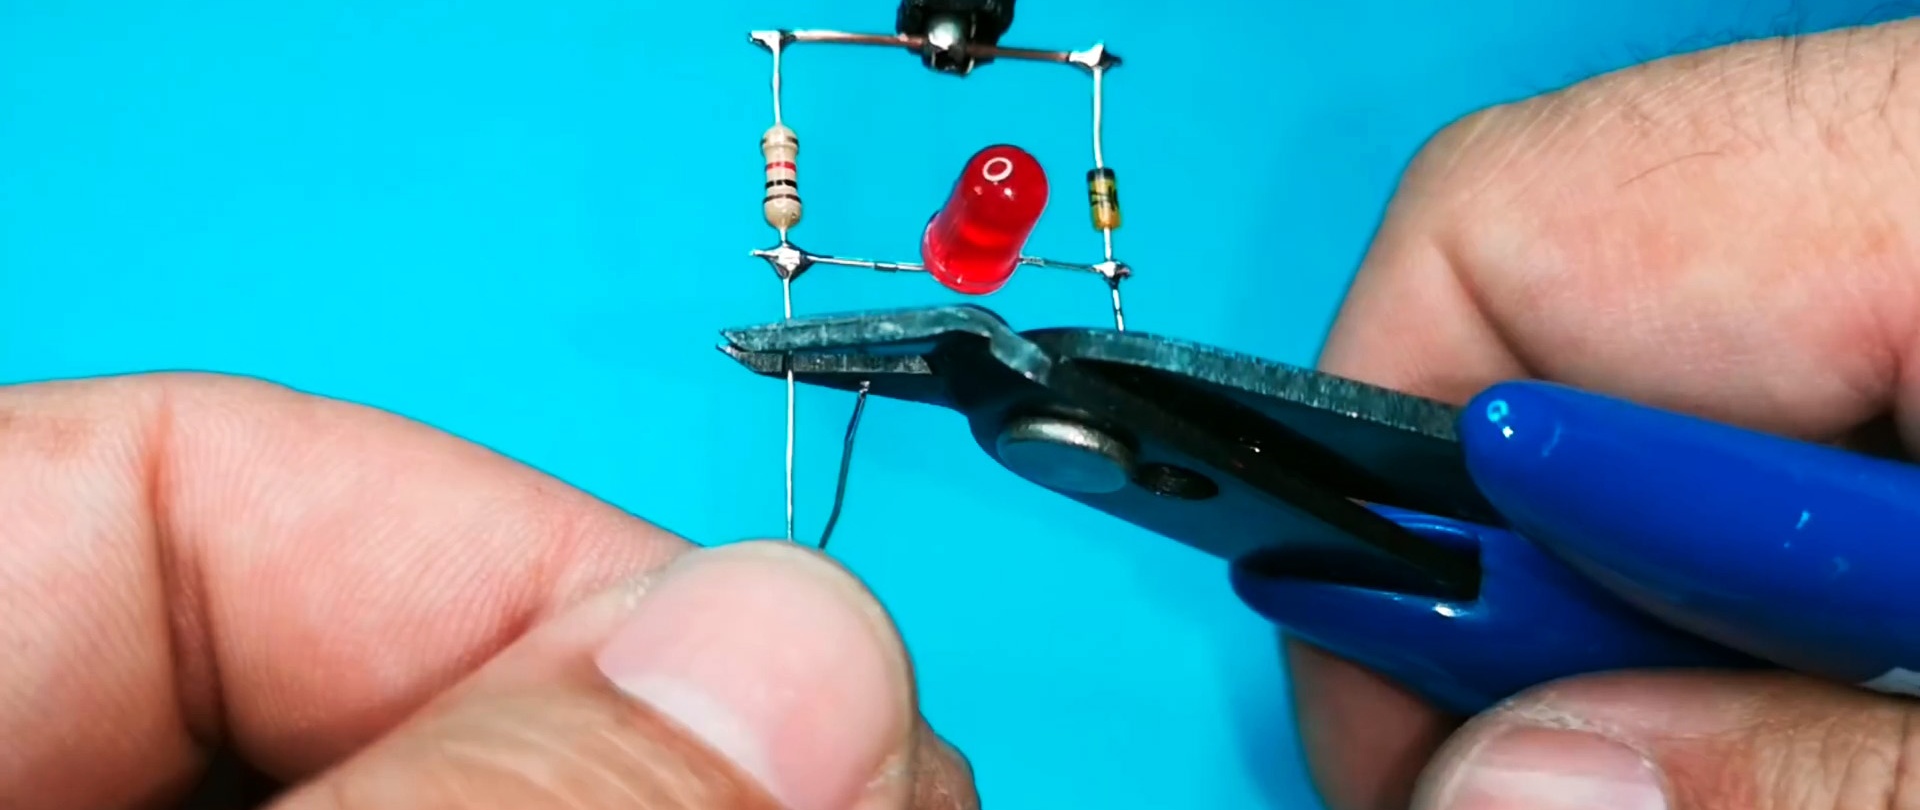
Below we solder the resistor to the LED and the cathode of the zener diode, see photo.

We connect the outputs with a jumper. This will be a “minus” of the indicator.

You can solder additional pins. The indicator circuit is assembled.

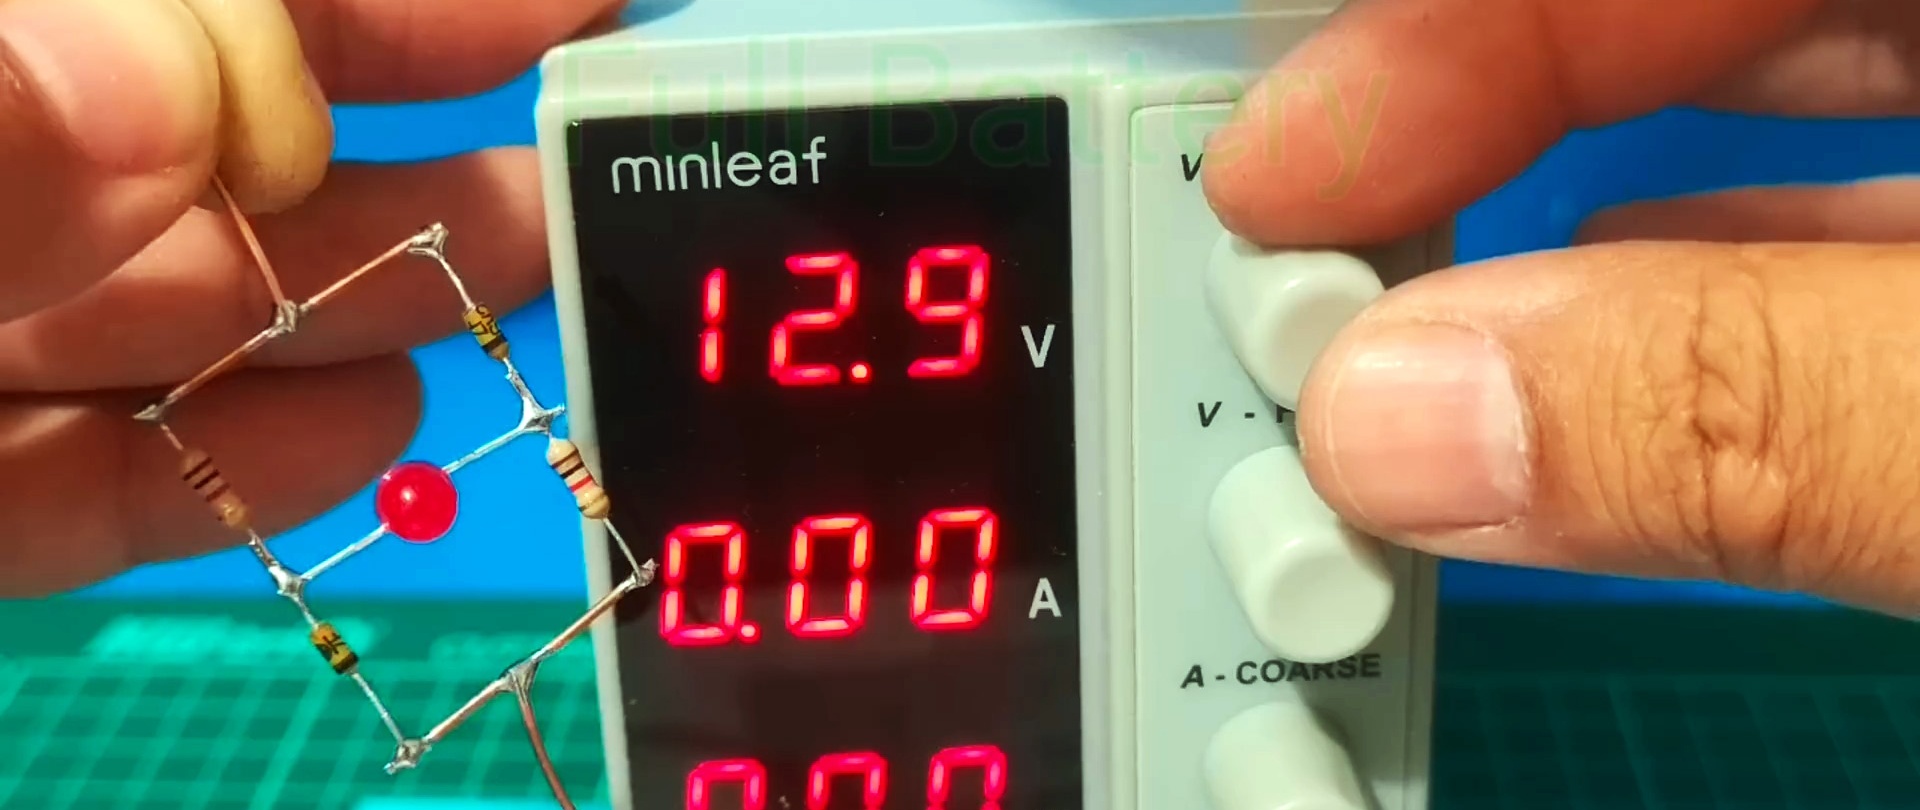
Checking the indicator
Now if you apply voltage to it from a charged battery, then Light-emitting diode will not light up as the battery is normal.
But if the voltage drops below 10.5 V (critical voltage for acid batteries), then Light-emitting diode it will light up immediately. Moreover, the response threshold is only a couple of tenths of a volt.
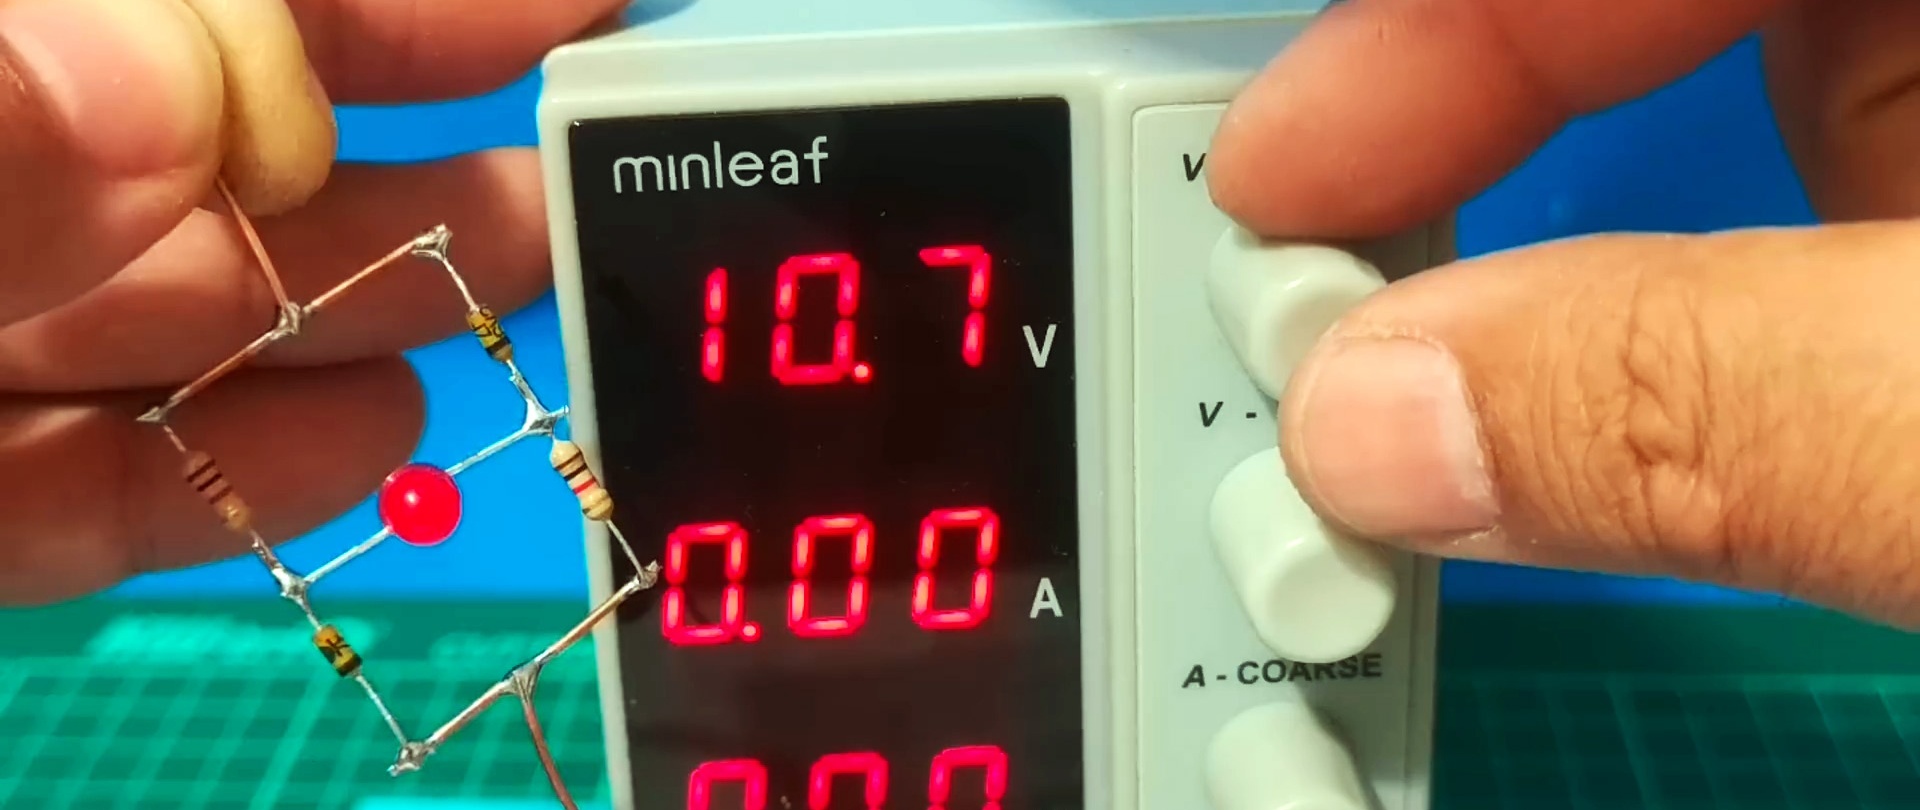

Therefore, even with a slow drop in voltage, the LED lights up almost immediately, without initial illumination.
All this is thanks to the circuit in which the LED is bridged. That is, when the voltage is above 10.5 V, there is almost zero value in the LED circuit. As soon as the voltage drops below 10.5 V, the zener diodes seem to close, and the resistors try to pull the LED each to its own power bus. Here is such a simple and quite practical scheme.