You can make a wonderful handmade chair from unnecessary boards, logs and old tires; all you need is desire and a set of tools. This chair will look great both in the backyard and in the garden. And thanks to the shock-absorbing properties of the tires, sitting on it will be very comfortable.
Tools and materials
To make a chair you will need:- milling machine;
- band-saw;
- miter saw;
- drill-driver;
- bit; hammer;
- hand saw;
- homemade clamps;
- sander;
- compressor and spray gun;
- old boards;
- thin logs (podtovarnik);
- nails and screws; PVA glue; brush and red paint;
- other little things that any home craftsman can find.
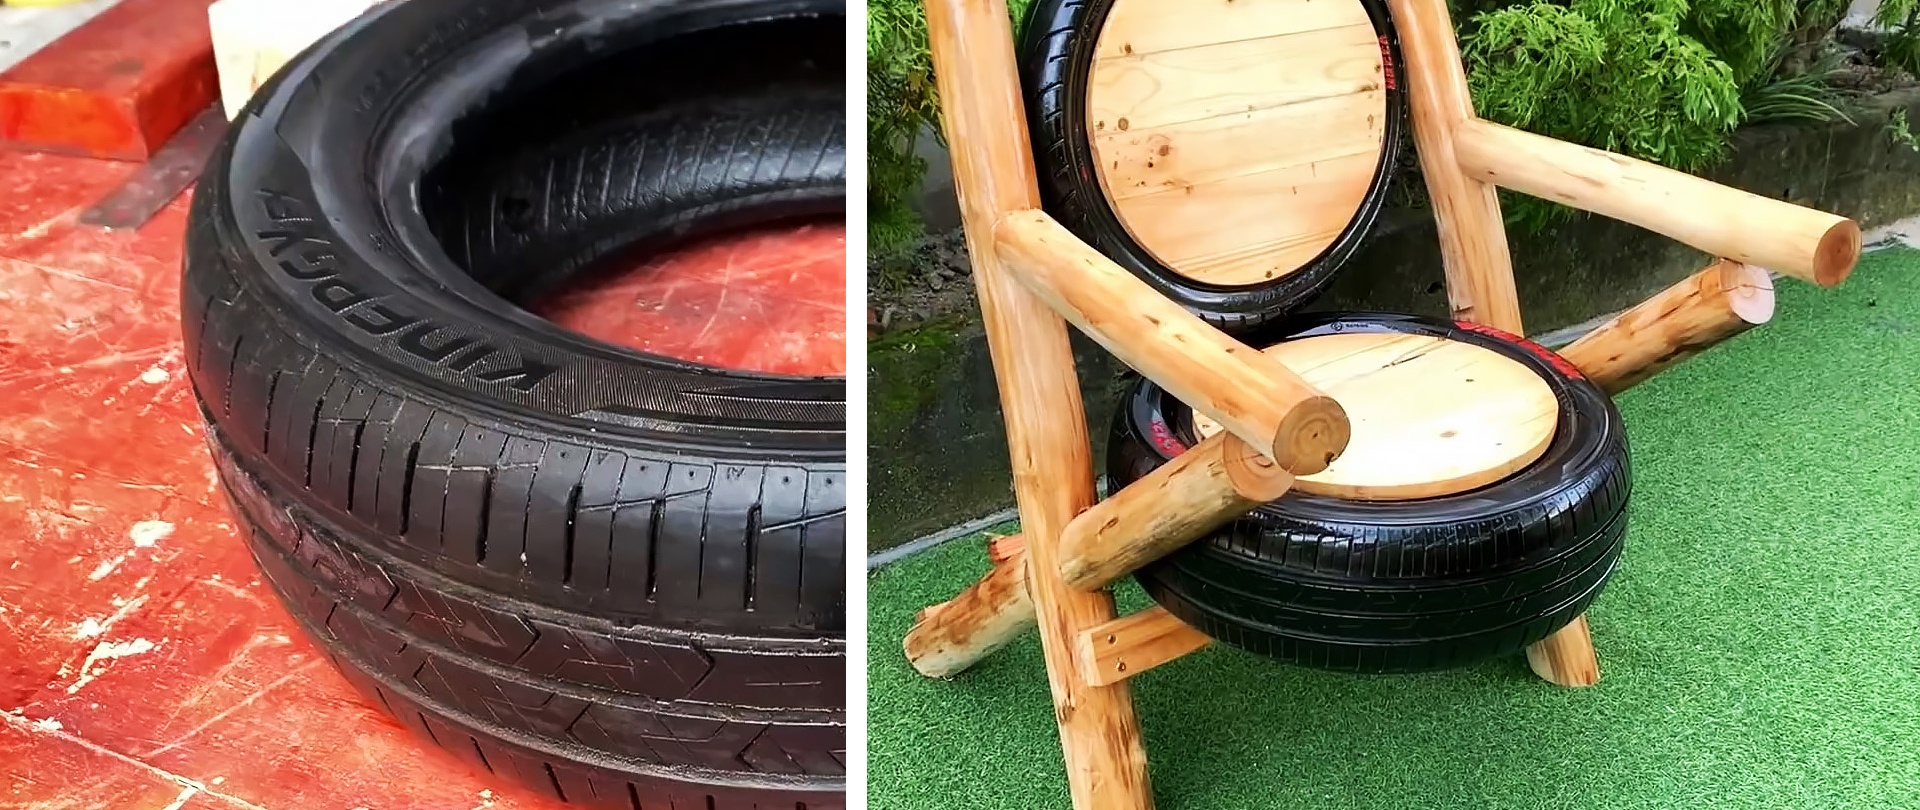
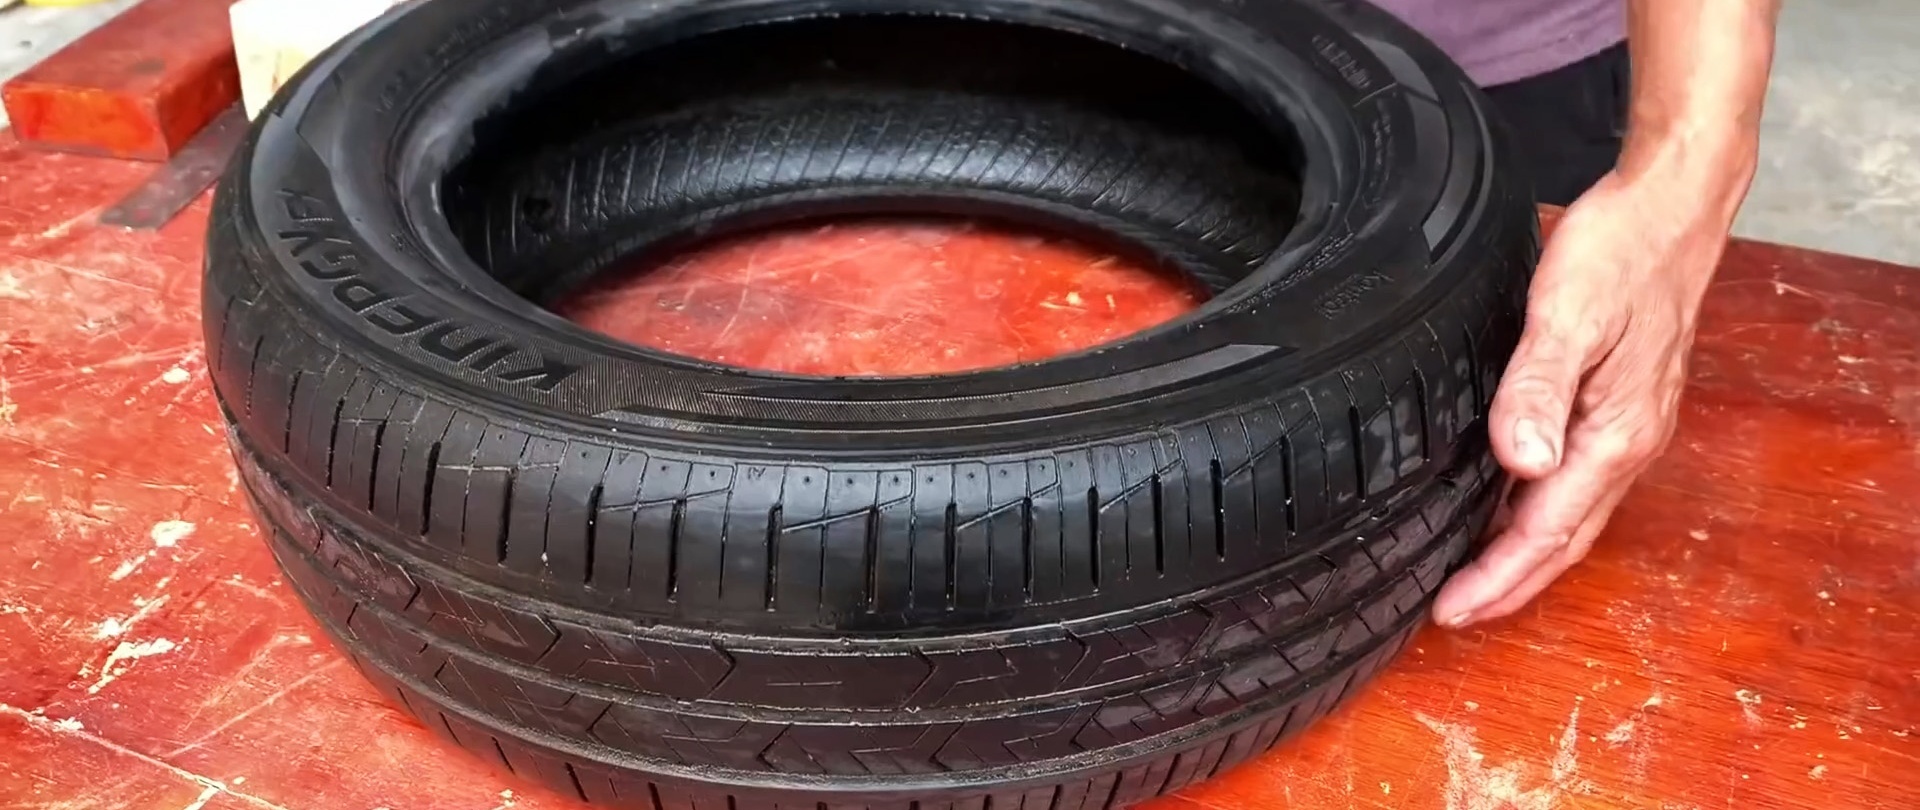
Tire preparation
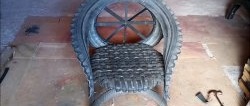
You need to prepare two old tires - one from a car, the second from a motorcycle. The car tire will go on the seat, the motorcycle tire will be used as the backrest.
Tires are thoroughly cleaned of dirt, first mechanically, then using detergents, and then washed with running water.
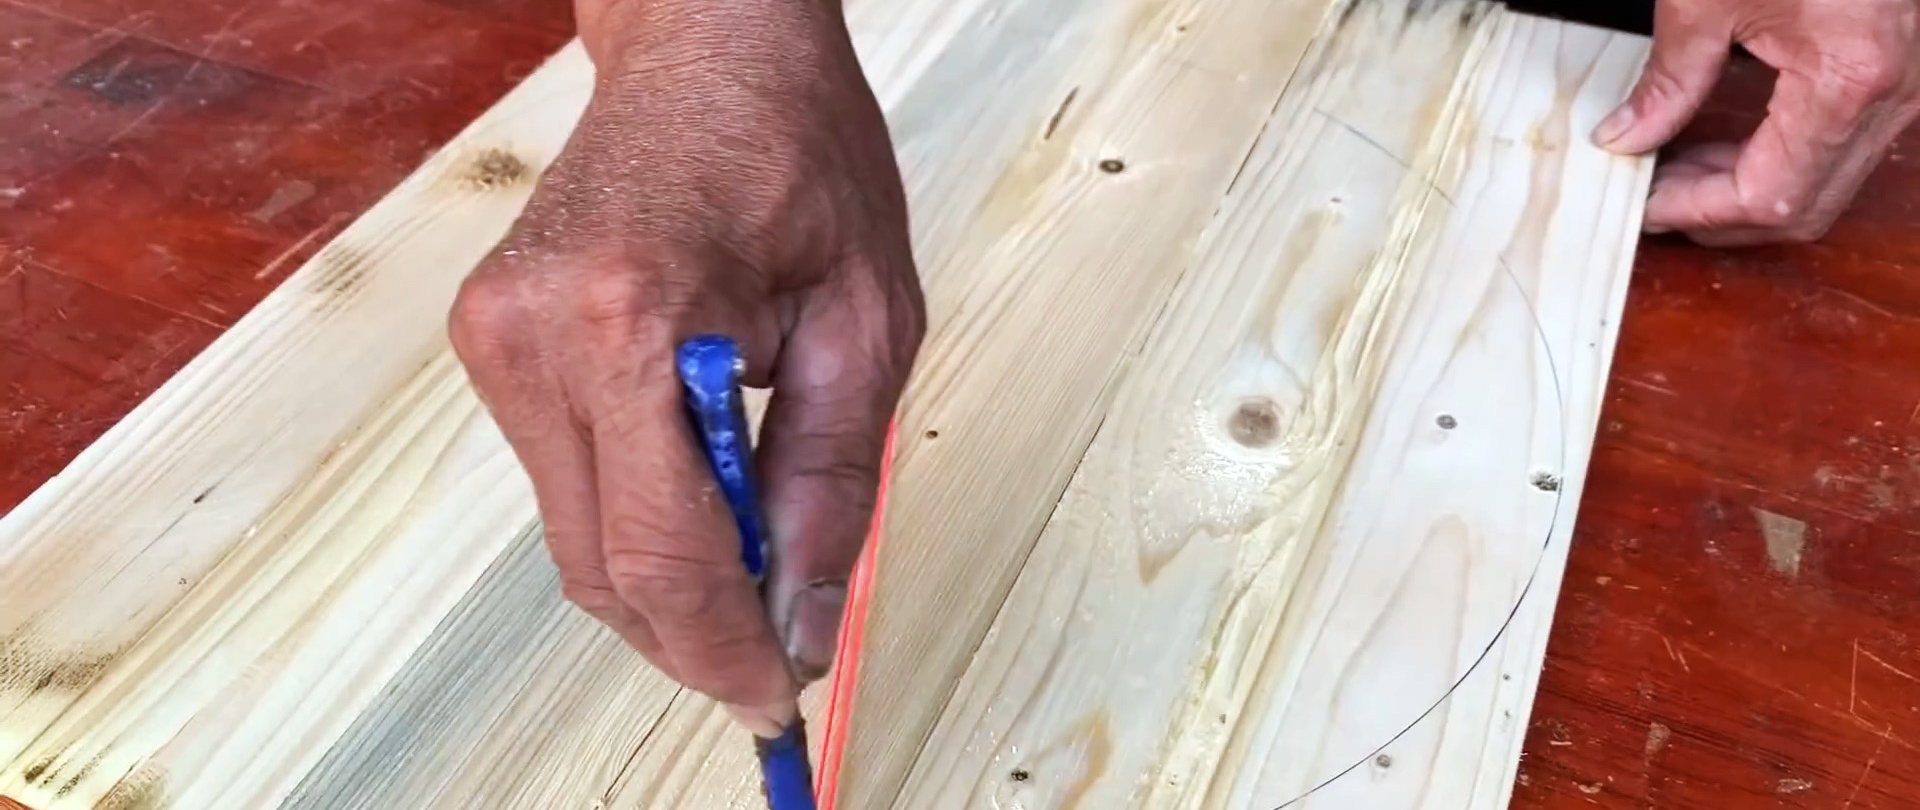
Making bases for seats
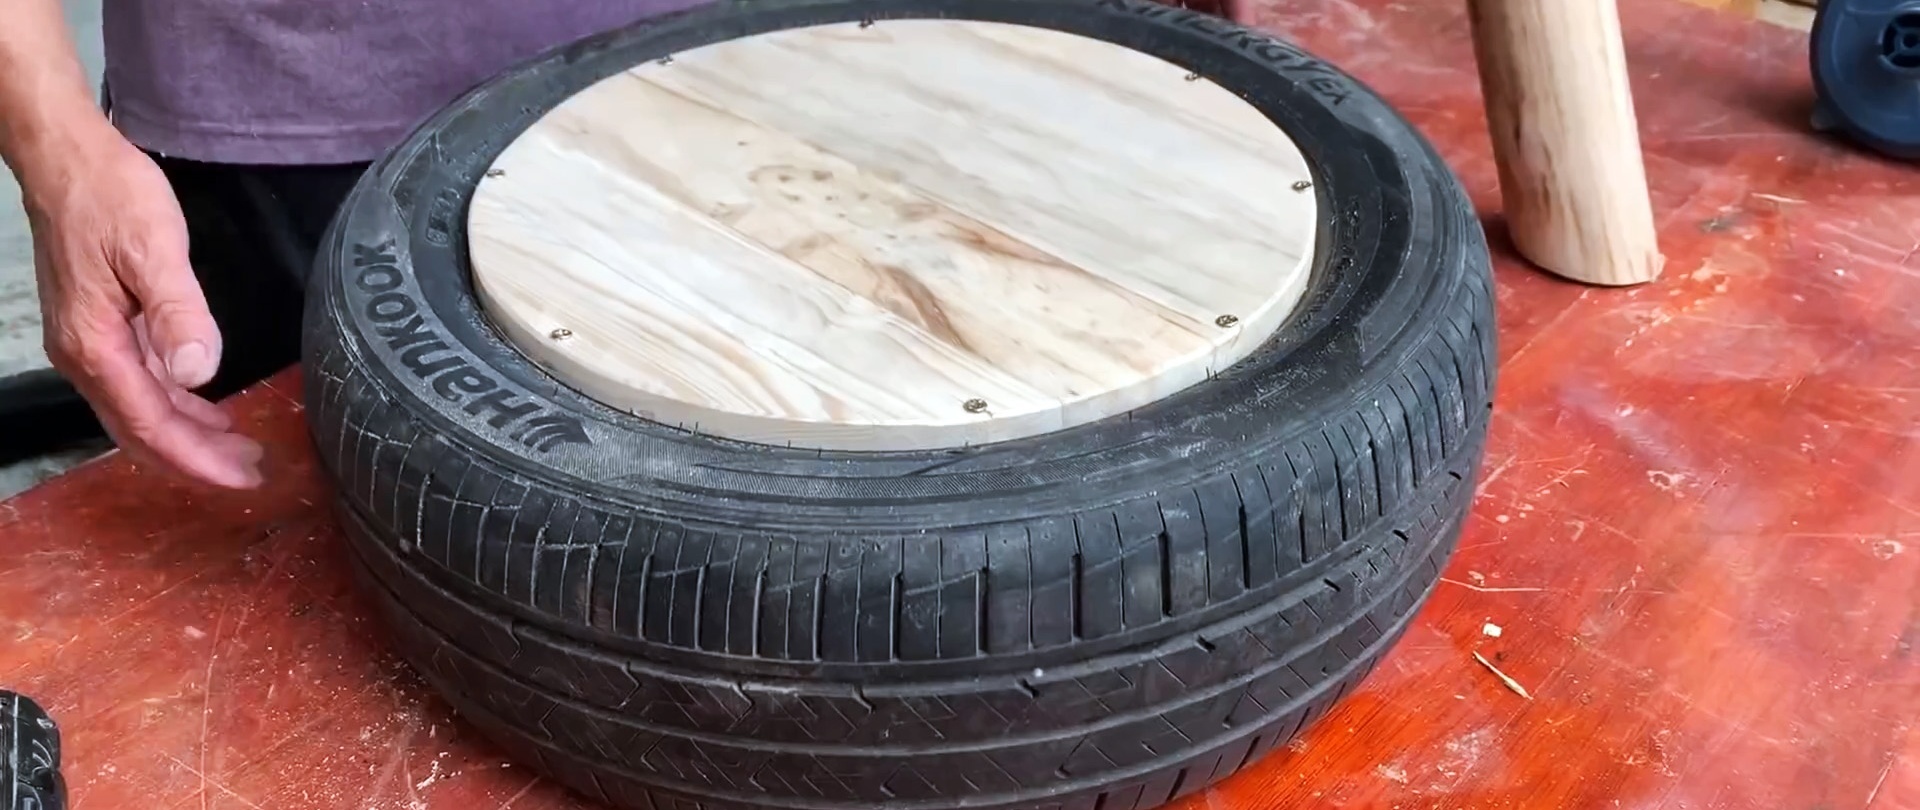
The boards need to be connected into solid panels.Unnecessary boards are milled on a machine to make a tongue-and-groove joint. You need to make several shields to cut out three round bases for the seat and back and one round base from two halves to make a niche in the seat for storing all sorts of small things. All bases must be the same size.
Milled boards are coated in the grooves and on the tenons with PVA glue, then connected to each other and fixed with a clamp for better gluing.

When the boards are dry, they are marked onto round base blanks. In order to draw even circles, a nail with a rope of a certain length is used.
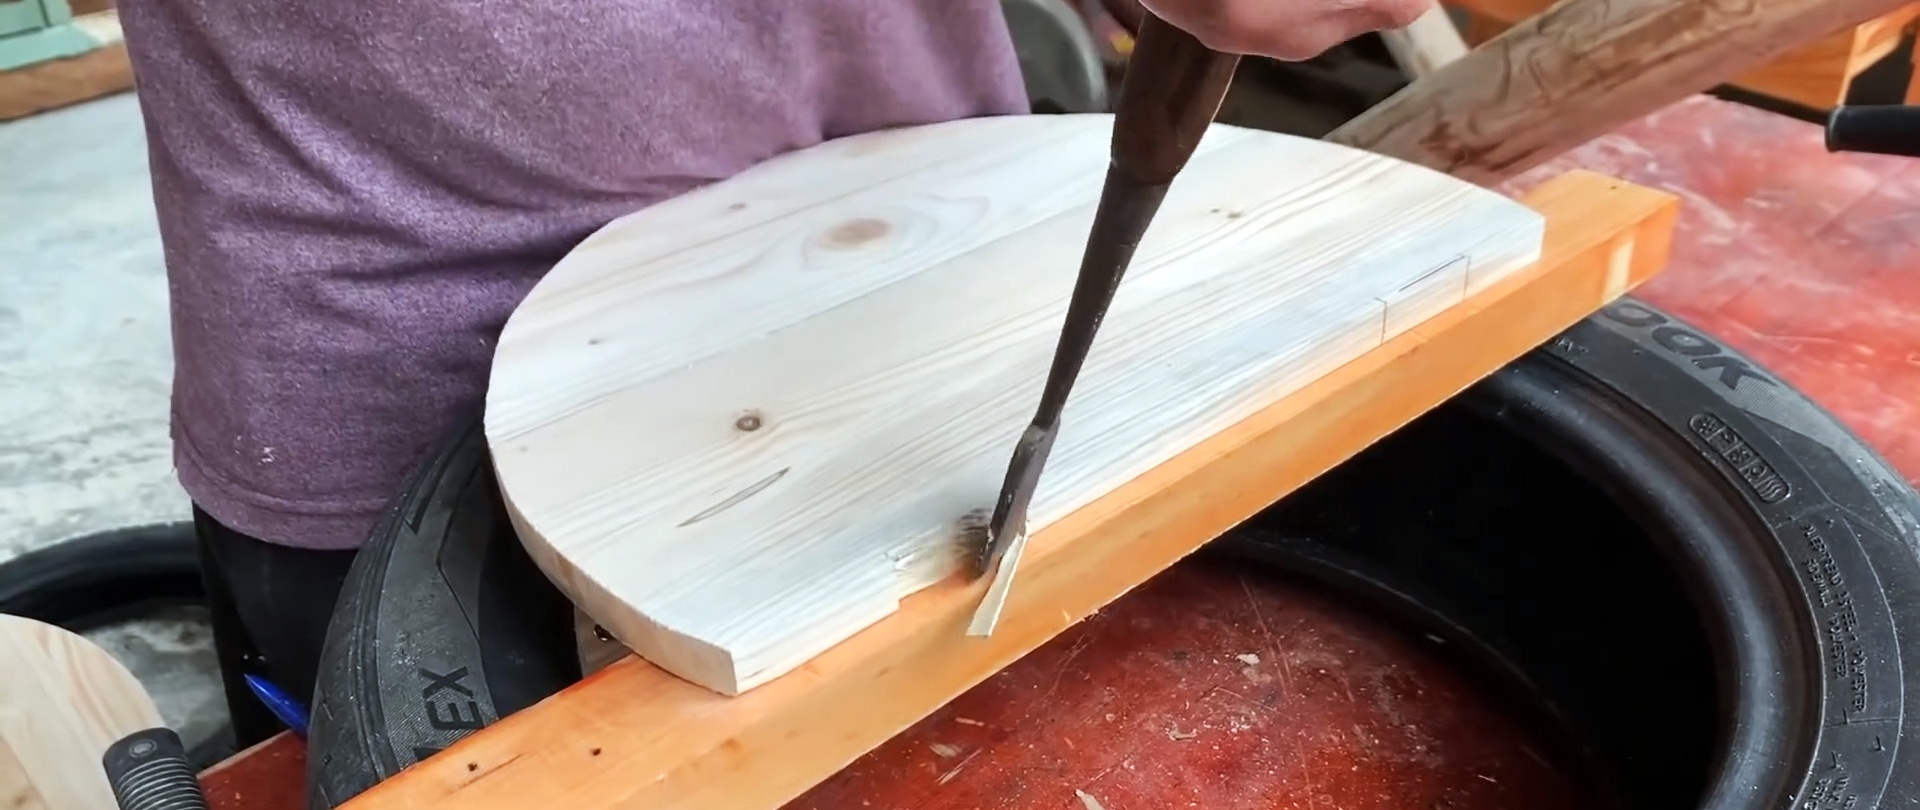
Round blanks are cut using a band saw. We cut one workpiece from two halves, one half should be smaller than the second, approximately 1/3 of the total volume of the workpiece.

Finished blanks for the seat and backrest are sanded with a grinder.
Making a base for a chair
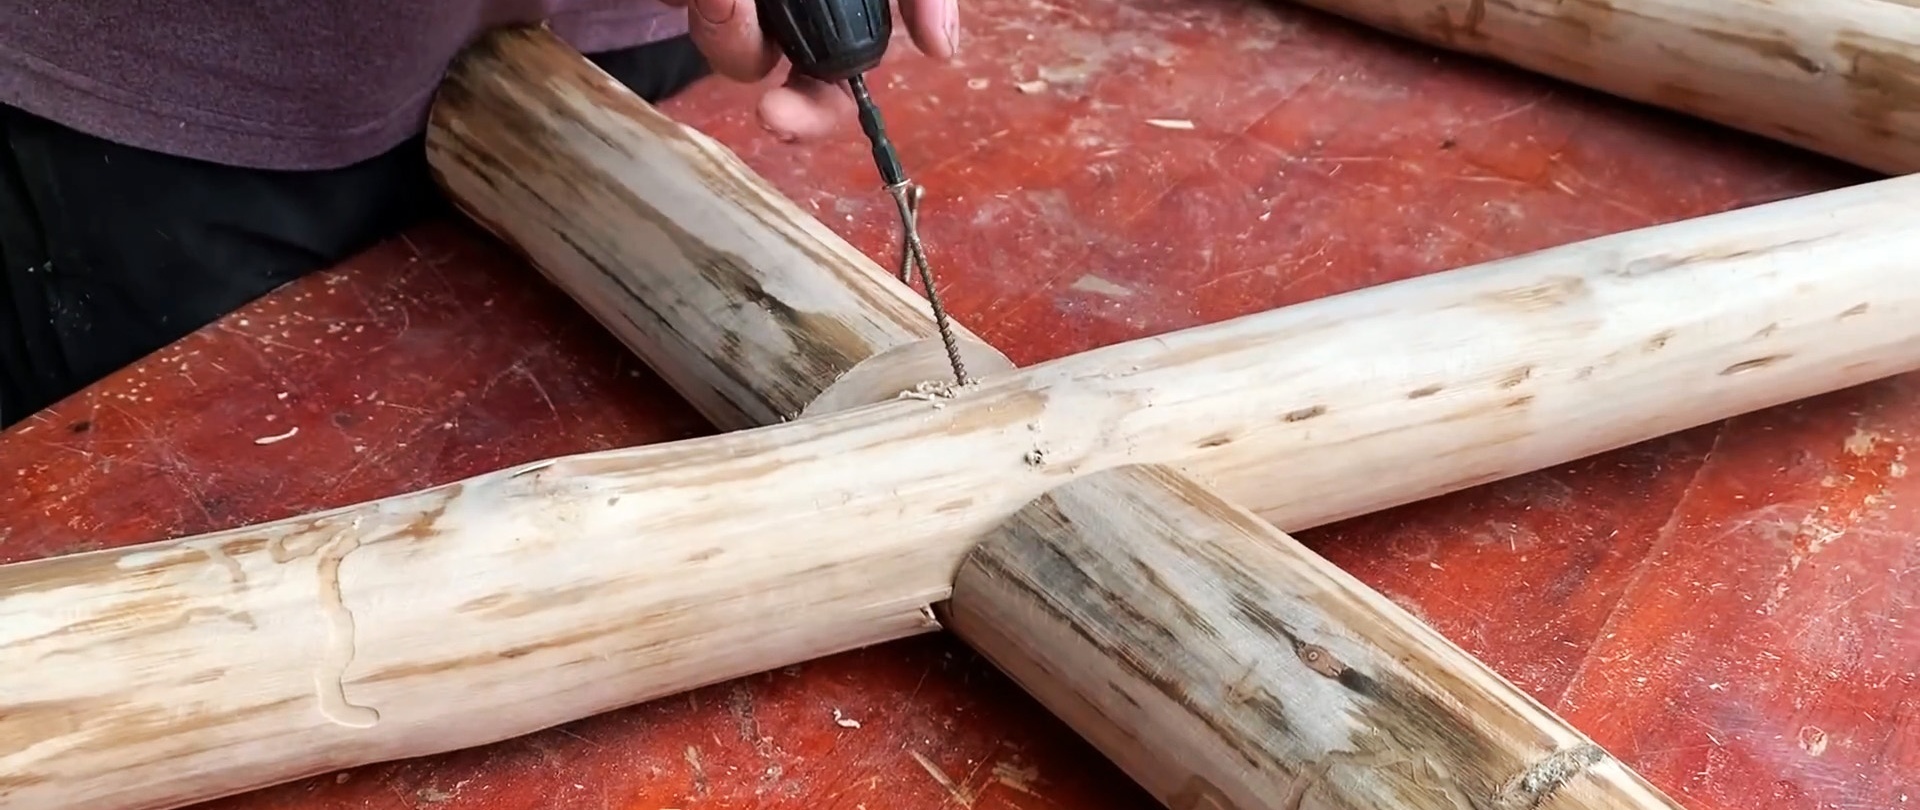
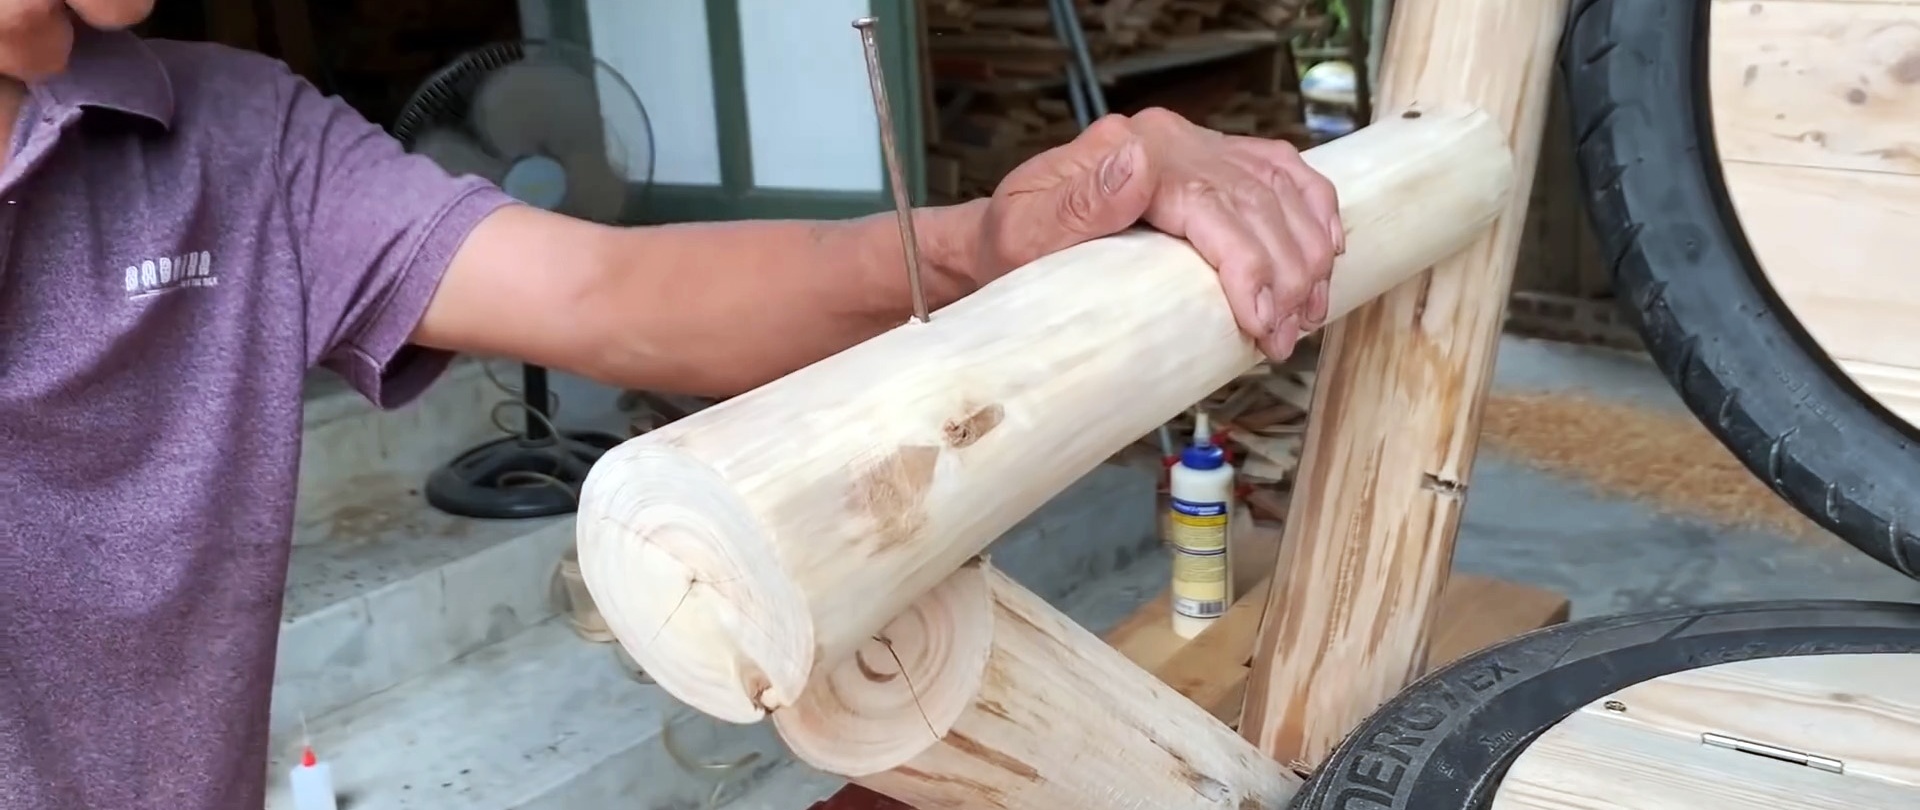
To make the base for the chair, you need 4 thin logs.

The logs are cleared of bark using a hammer and chisel, then polished with a grinder.

Two logs will be a third longer, two shorter. A groove is made on each log using a miter saw and chisel. The grooves must be made at an angle. In short logs, the grooves are made in the middle; in long logs, the groove is made after 1/3 of the length of the log.

At one end of each log, an oblique cut is made with a miter saw - due to this, the future legs of the chair will stand firmly on the ground. In long logs, the cut should be on the side where the groove is closest.
The logs are assembled crosswise through the groove using a mallet. To ensure a reliable connection, each groove is drilled twice and reinforced with long self-tapping screws.
Additionally, you will need two more logs to make handles for the chair; they will also need to be cleared of bark and sanded.
Assembly and installation of seat and backrest
The seat is assembled using a round blank and two halves of blanks.

The smaller part of the half of the workpiece is attached to the tire with self-tapping screws, the larger part will open on hinges.
The places for attaching the hinges are carefully measured, then cut out using a hacksaw and chisel. Hinges are attached to the prepared places and the second half of the workpiece is installed.

On the other side of the seat, a solid round blank is attached using self-tapping screws and a screwdriver.

The finished seat is attached to the base of the chair using screws and a screwdriver, and the opening niche is installed on top. The fastening takes place in the area of the cross connection of the base blanks for the chair.
At the bottom on both sides, where the seat hangs, slats are installed with self-tapping screws for secure fastening.

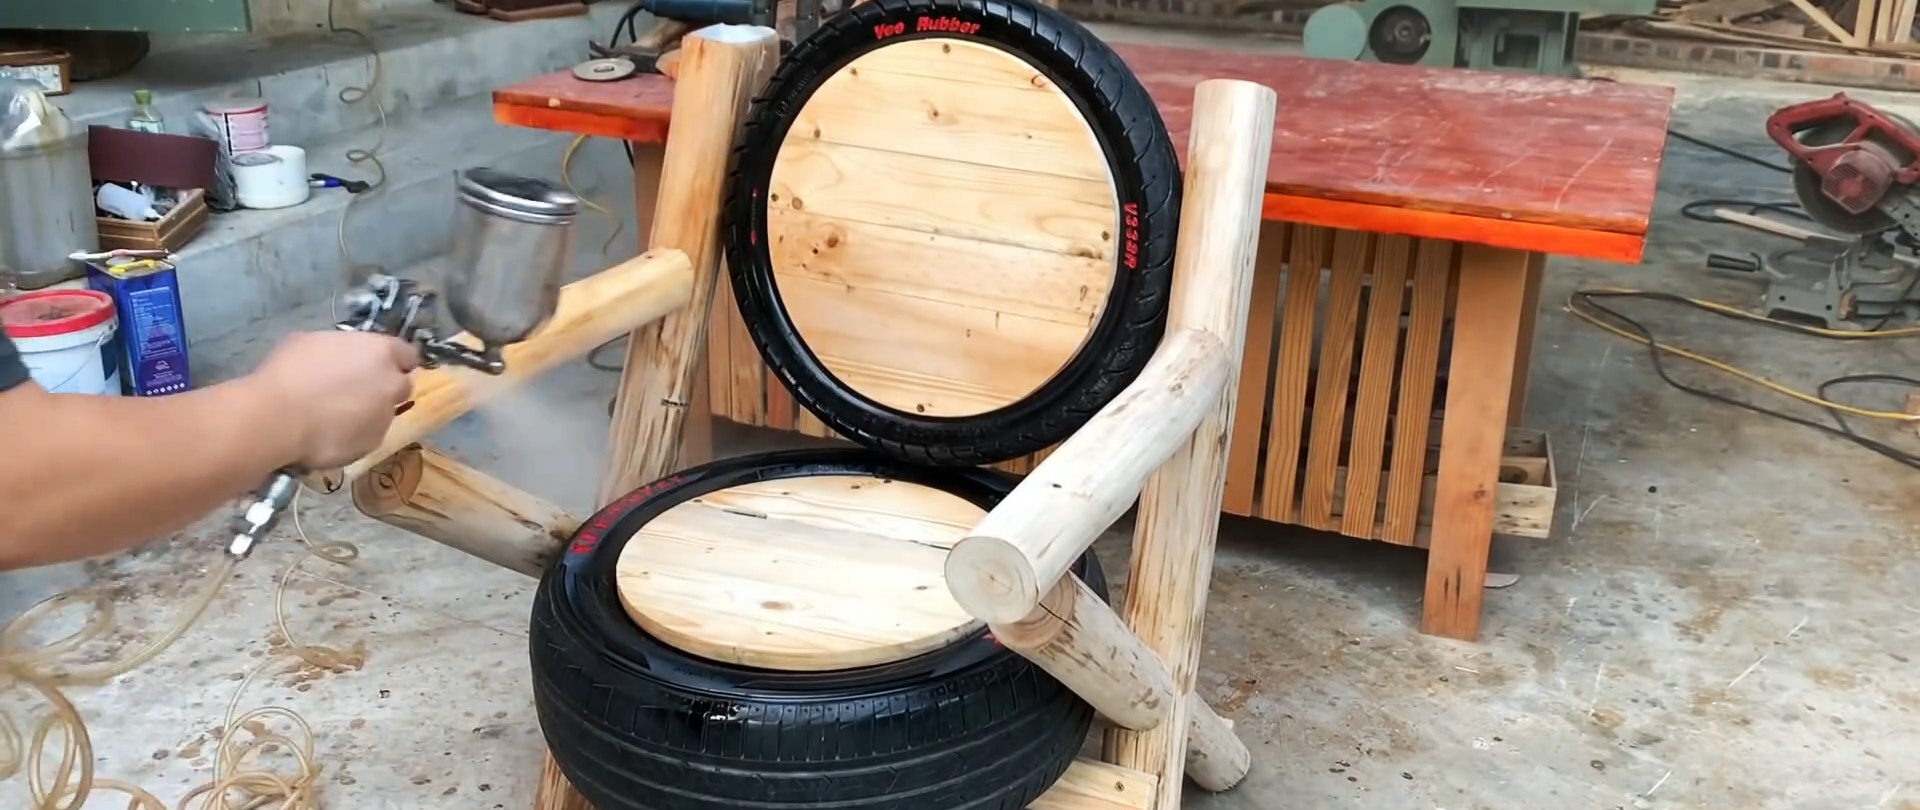
The backrest is easier to install - it is attached with self-tapping screws between the two protruding ends of long logs.
Round wooden blanks are attached to both sides of the backrest with self-tapping screws.


Installing handles and finalizing the chair
The remaining two logs are fastened with nails using a hammer.

Now the protruding letters on the tires are outlined with bright red paint using a brush. When the paint has dried, the chair is covered with stain using a compressor and a spray gun.


You can put a magazine or other things in the drawer under the seat to make your vacation as comfortable as possible.