For hardening and tempering small metal workpieces, you can use a mini gas forge made with a fire extinguisher. It is not at all difficult to assemble, and it takes up little useful space in the workshop. To assemble the forge you need a minimum of materials that are easy to obtain.

What you will need:
- Car fire extinguisher;
- pipe 25 mm;
- extended nuts M10 – 2 pcs.;
- M10 pin;
- roller chain;
- plywood;
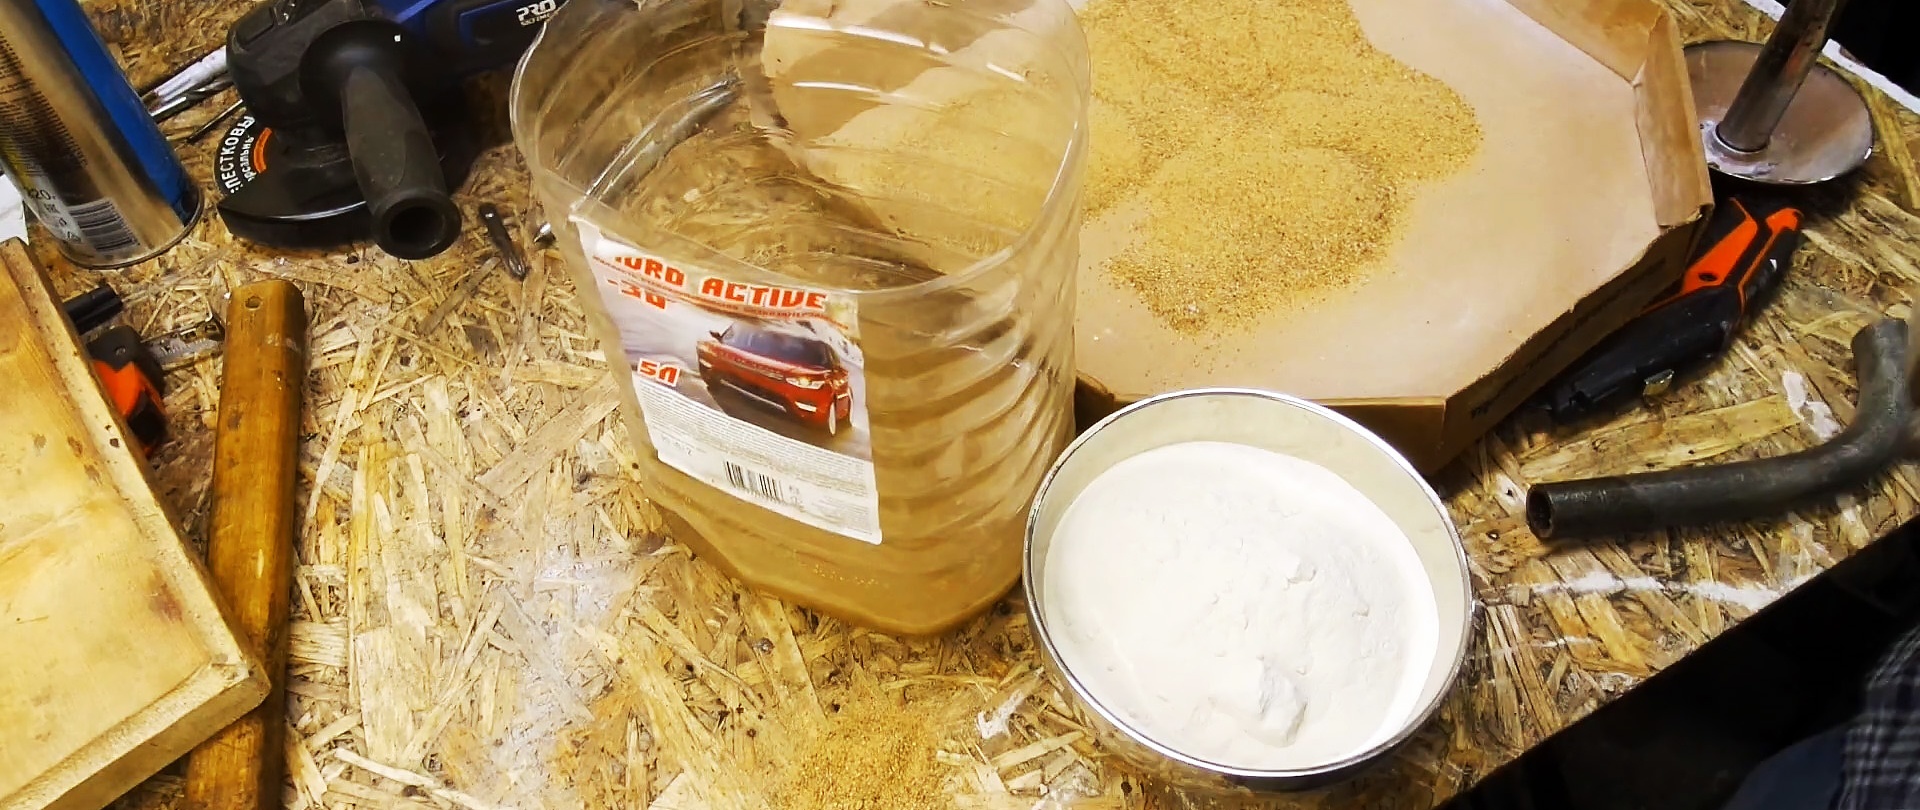
- sand;
- alabaster.
- gas burner on a cylinder - http://alii.pub/5lnp8a
Forge manufacturing process
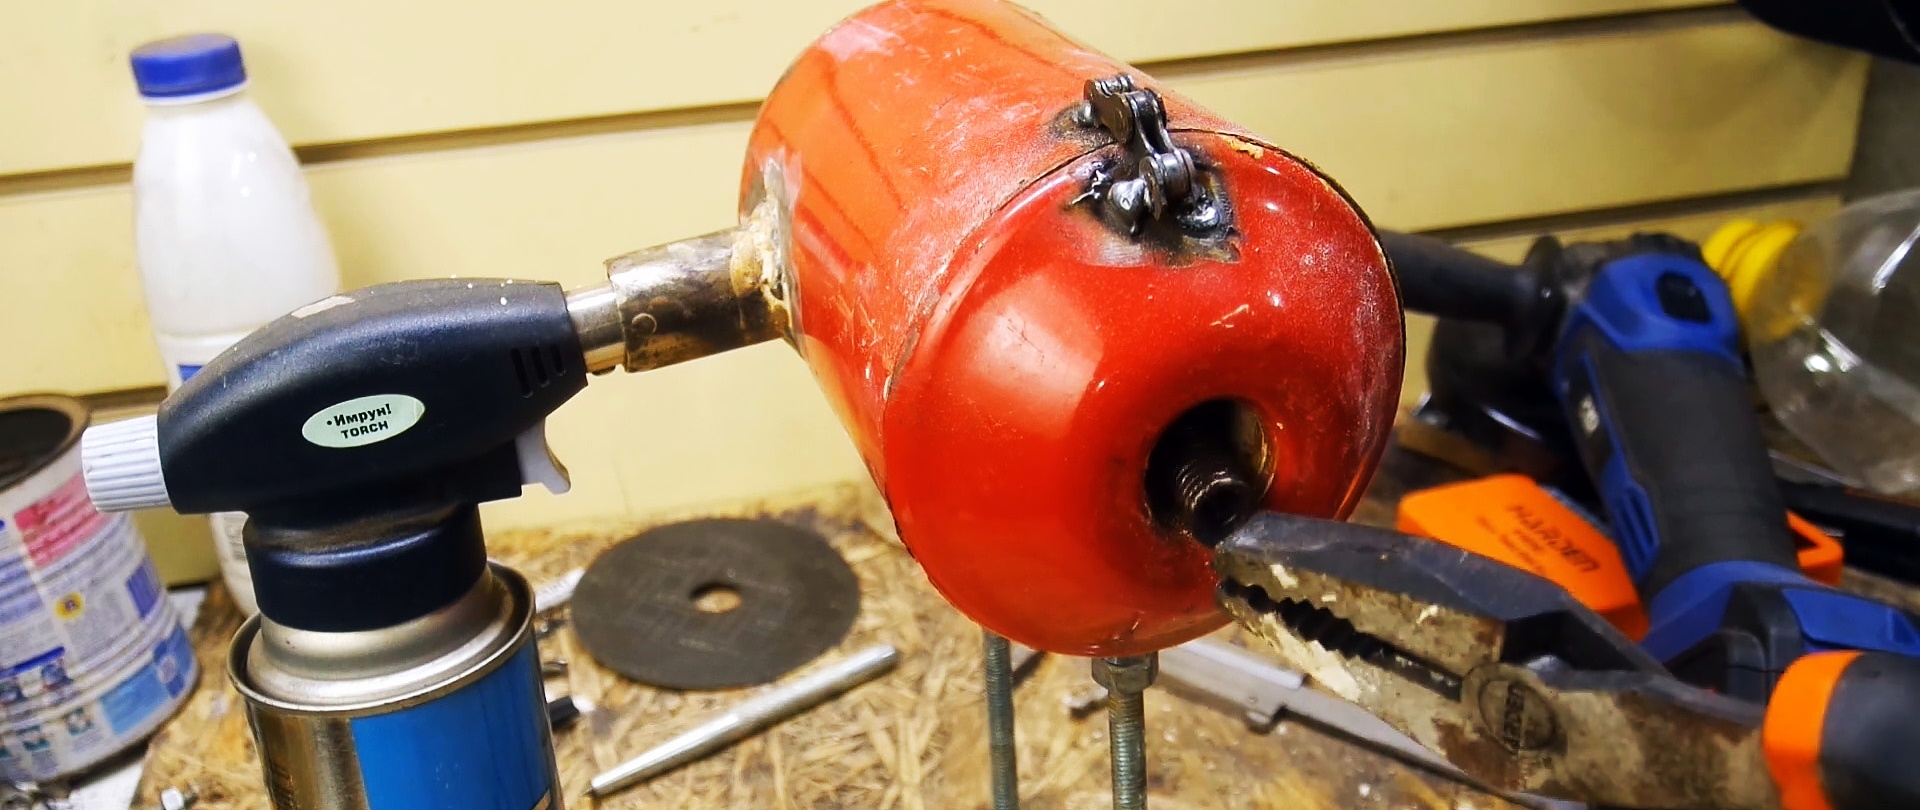
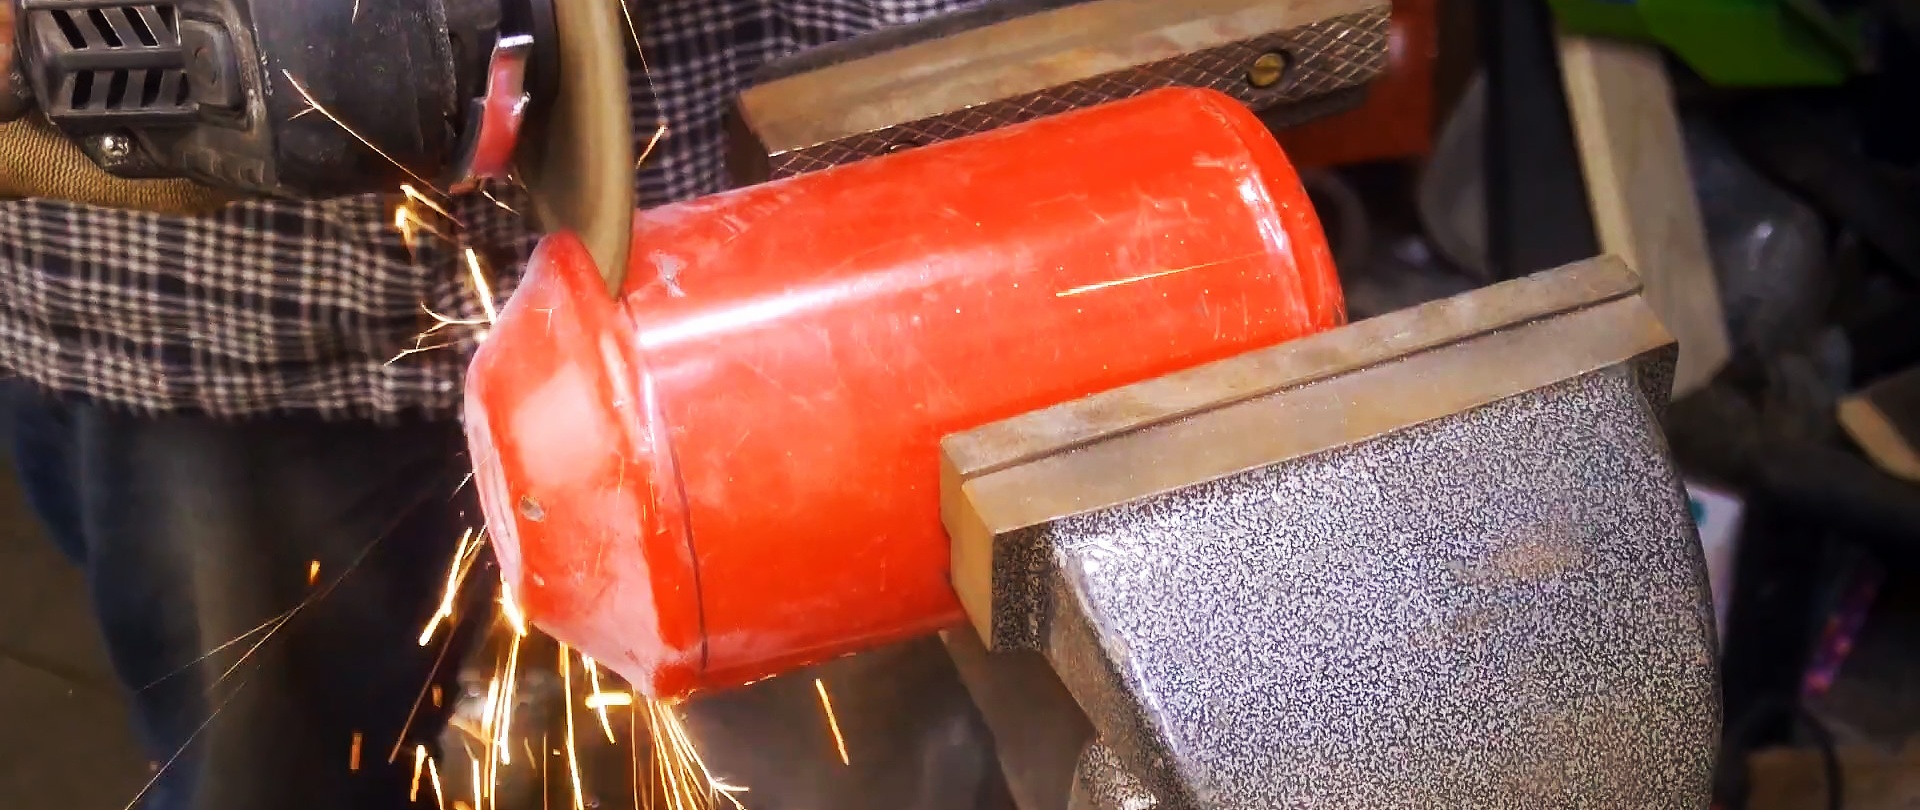
The first step is to disassemble the empty fire extinguisher. Its neck is cut off smoothly along the factory welding seam.
A hole is drilled slightly above the bottom of the fire extinguisher body for a 25 mm pipe, from which a 10 cm long piece is cut in advance.
High-quality and durable drills on AliExpress at a discount - http://alii.pub/5zwmxz

After this, you need to clean the metal around the hole, as well as on the side in two places for welding the posts.
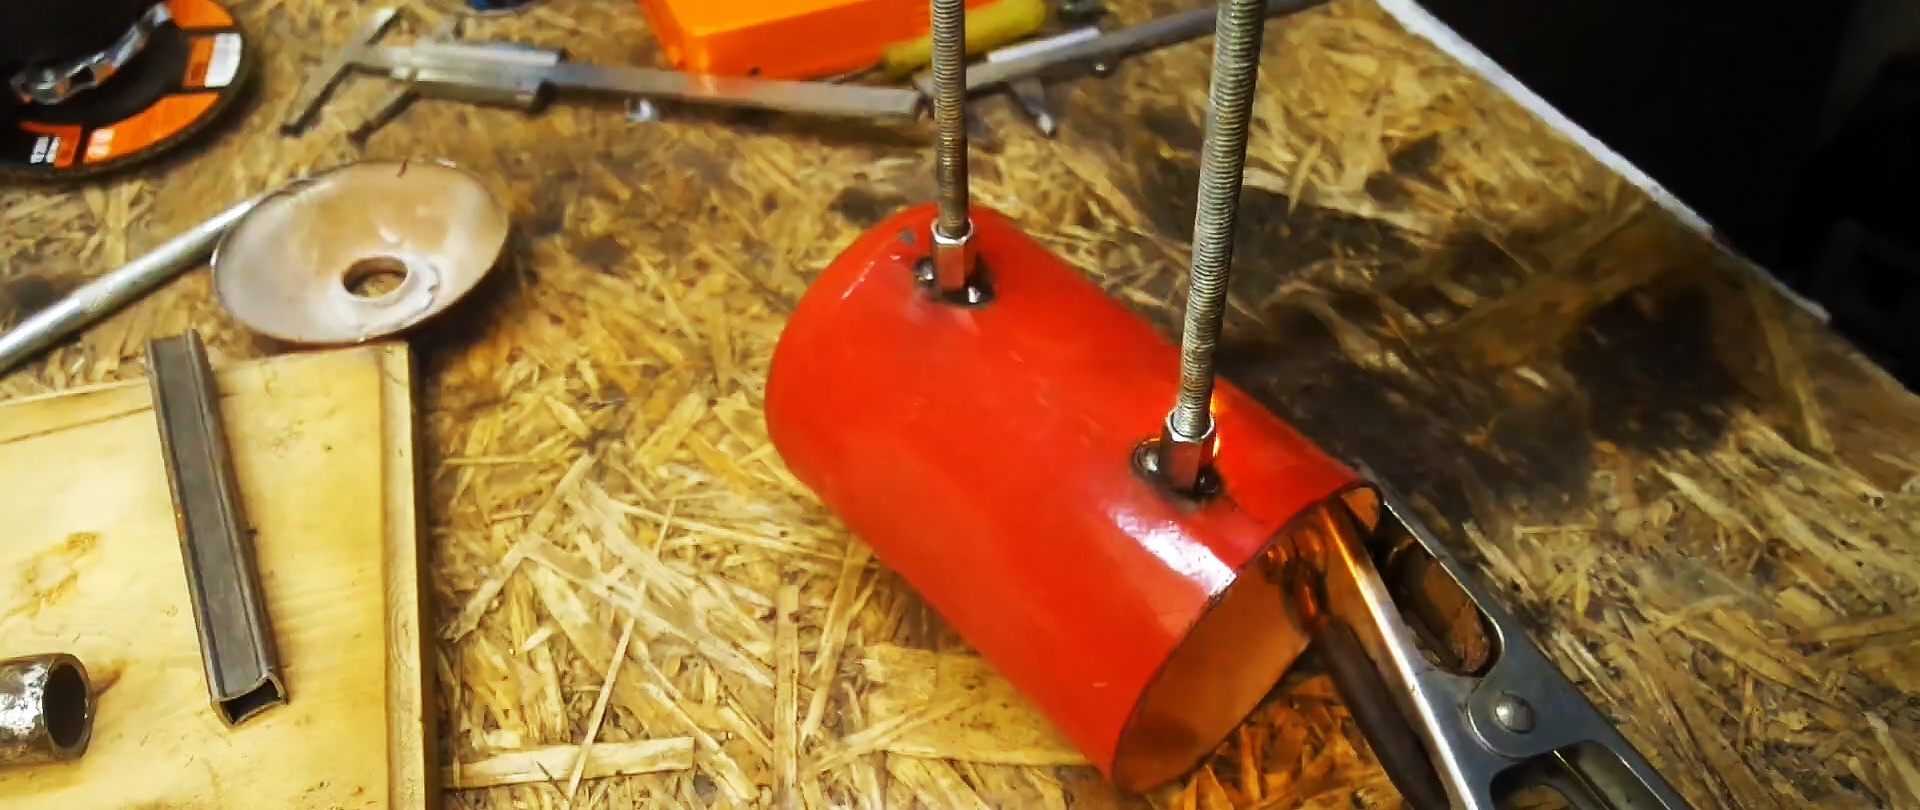
To attach the stands to the fire extinguisher body, 2 elongated nuts are welded. For ease of welding, you can immediately screw in the studs.A pipe is also welded, inserted half its length into the hole.
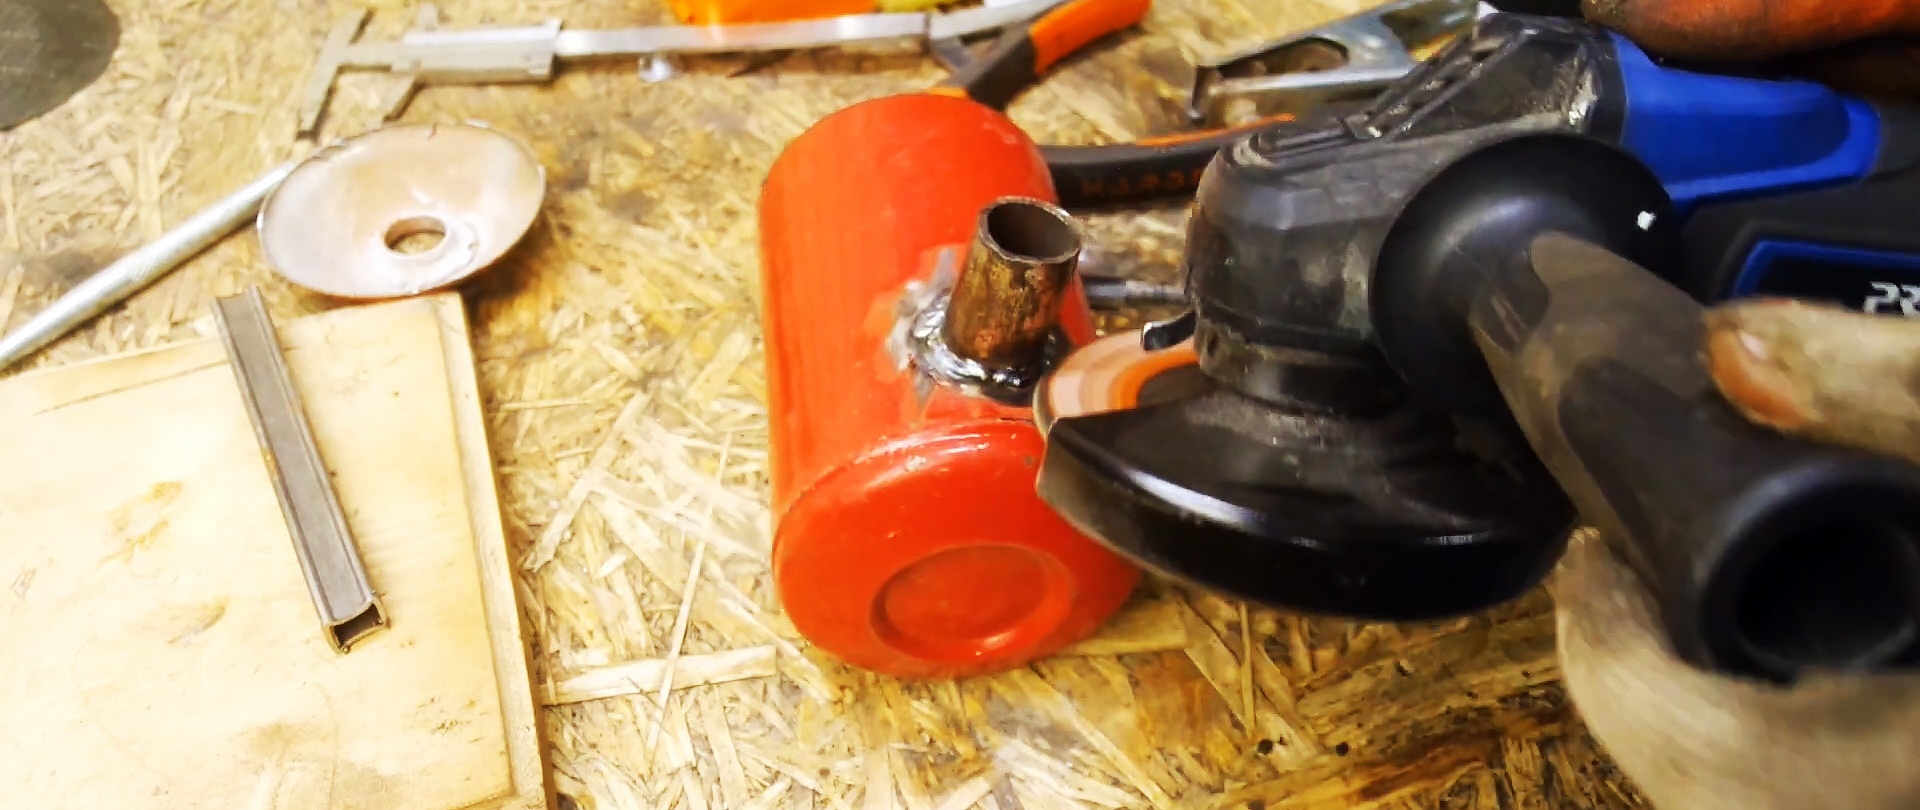
Now you need to clean the welds. After this, you should start forming the chamber from refractory material. To do this, prepare a solution of sand and alabaster mixed in a 1:1 ratio.
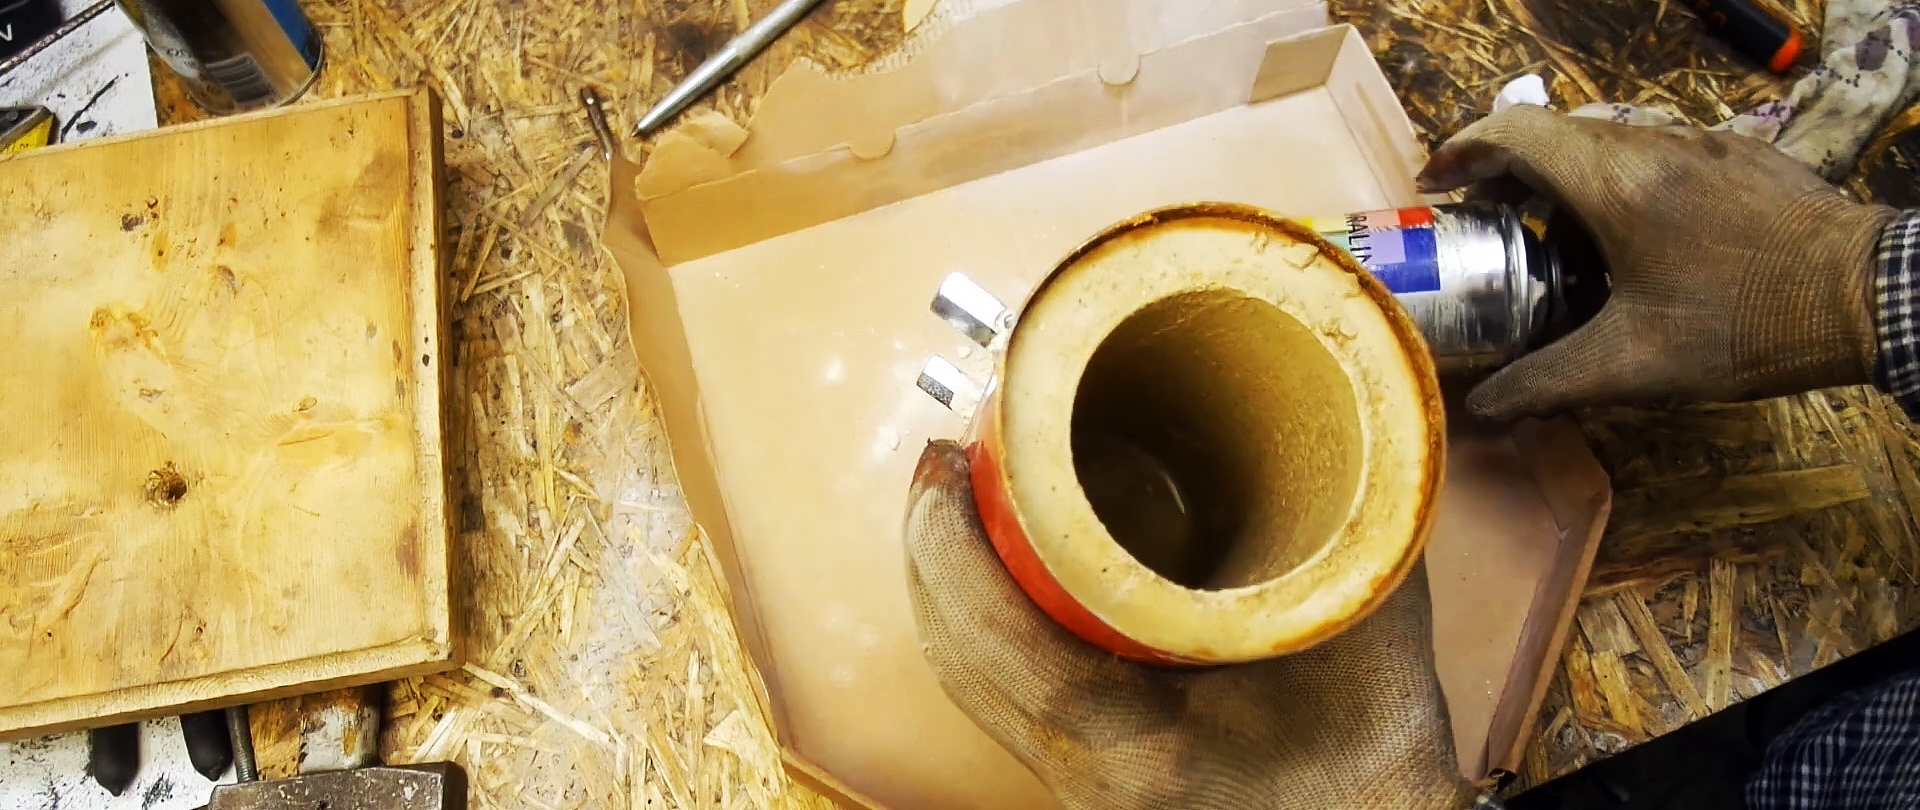
A spray can of paint is inserted into the fire extinguisher in the center. The welded tube must be temporarily plugged by pushing plastic bags into it. A liquid composition is poured between the can and the wall.
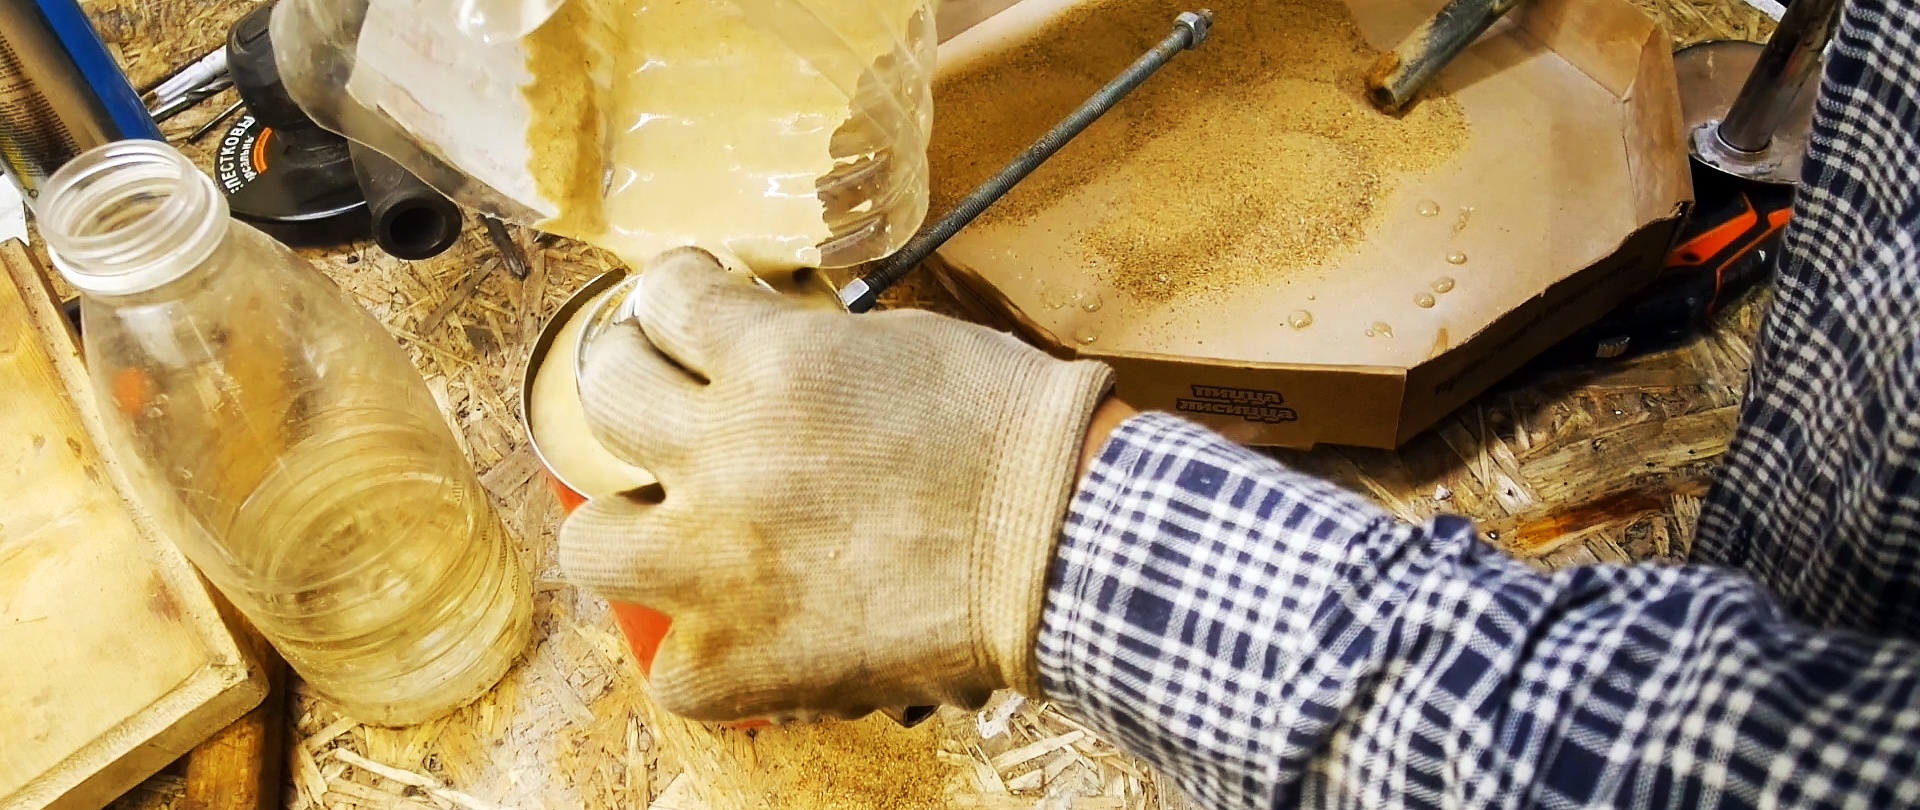
It also needs to be poured into the cut-off lid, temporarily inserting a tube into its hole.

After the mortar has set, the formwork is removed. Using a drill, you need to break through the mixture that could flow into the welded pipe.
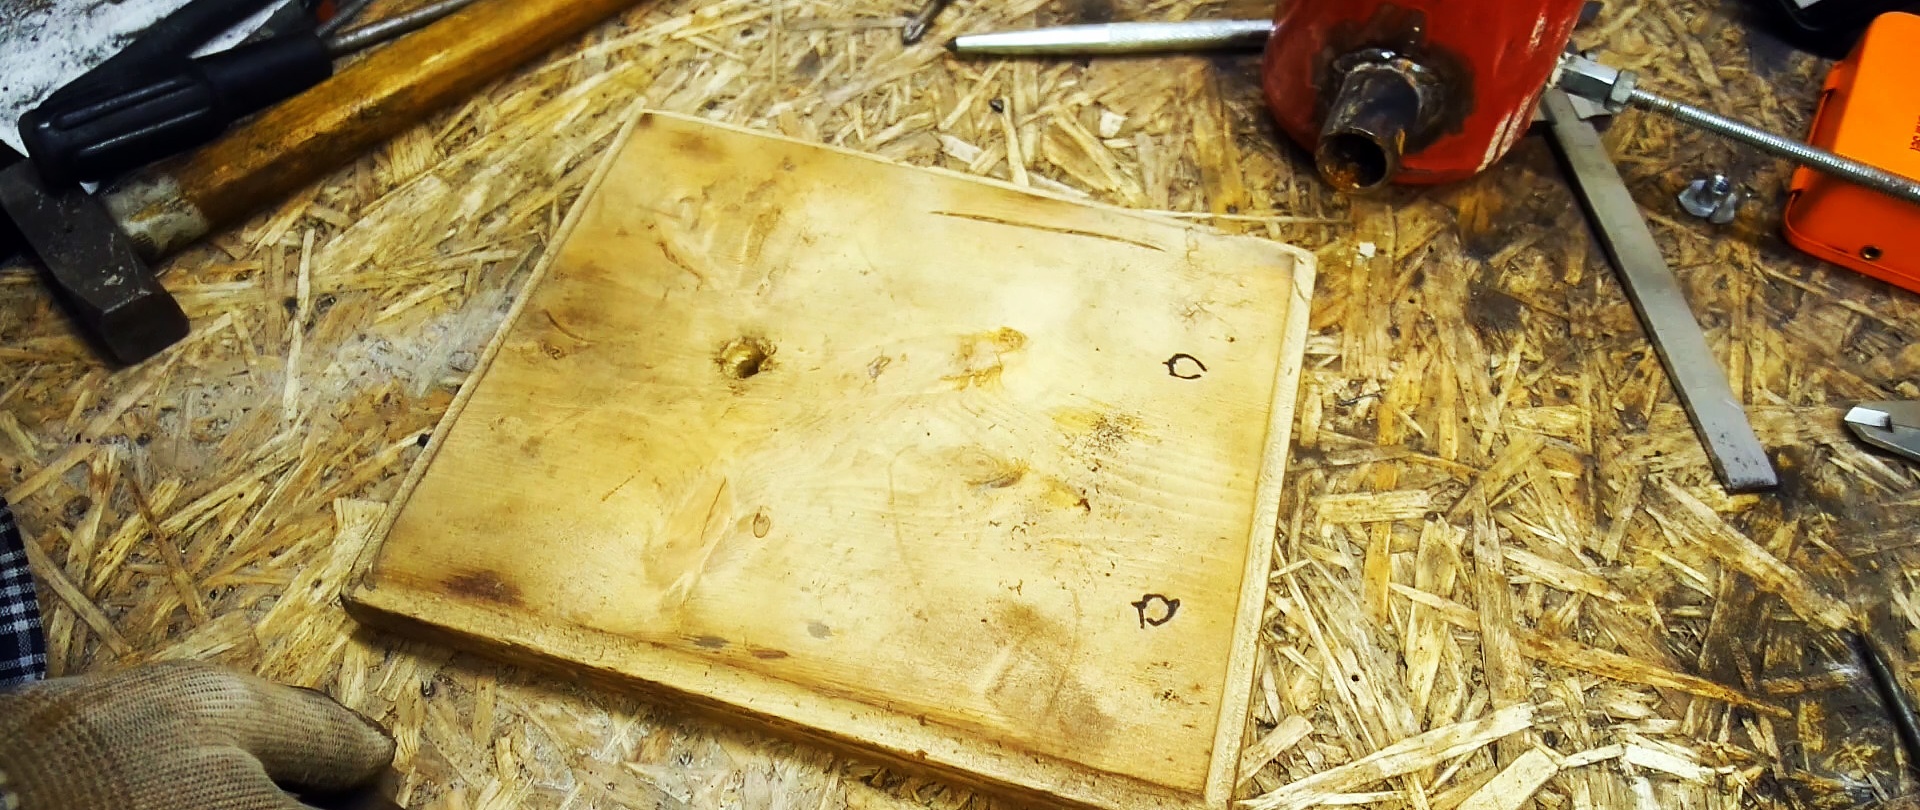
Studs are screwed into the elongated nuts on the body. Holes are then drilled into the piece of plywood. Studs are inserted into them and secured with nuts. This creates a base on which the forge can stand stably.
Now a piece of roller chain is taken and welded onto the body and cover. The result is something like a door hinge.

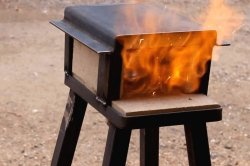
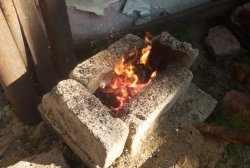
To use the forge, you need to insert a gas burner into the welded tube. The workpiece for heat treatment is placed in the chamber. If the size allows, then it is better to do this through a closed hole in the lid, so heating will happen faster.