Finding an equivalent replacement for a gear whose teeth have broken for some reason, if, moreover, it is still from a mechanism from previous years of production, is quite difficult, since the following must match: seat size, width, diameters (recesses, middle and outer), number and shape of teeth. Therefore, there is a reason to try to restore the unusable part by surfacing the broken teeth and corresponding machining using a cardboard template. This work is not at all easy and will require certain qualifications, steadiness of the hand and an accurate eye.
Will need
Materials and tools:
- steel gear with broken teeth;
- a piece of thick hard cardboard;
- plumber's hammer;
- measuring device beater;
- lathe;
- welding equipment;
- Bulgarian with cutting disc and etc.
The process of restoring a gear with broken teeth by surfacing followed by machining
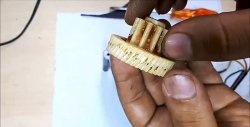
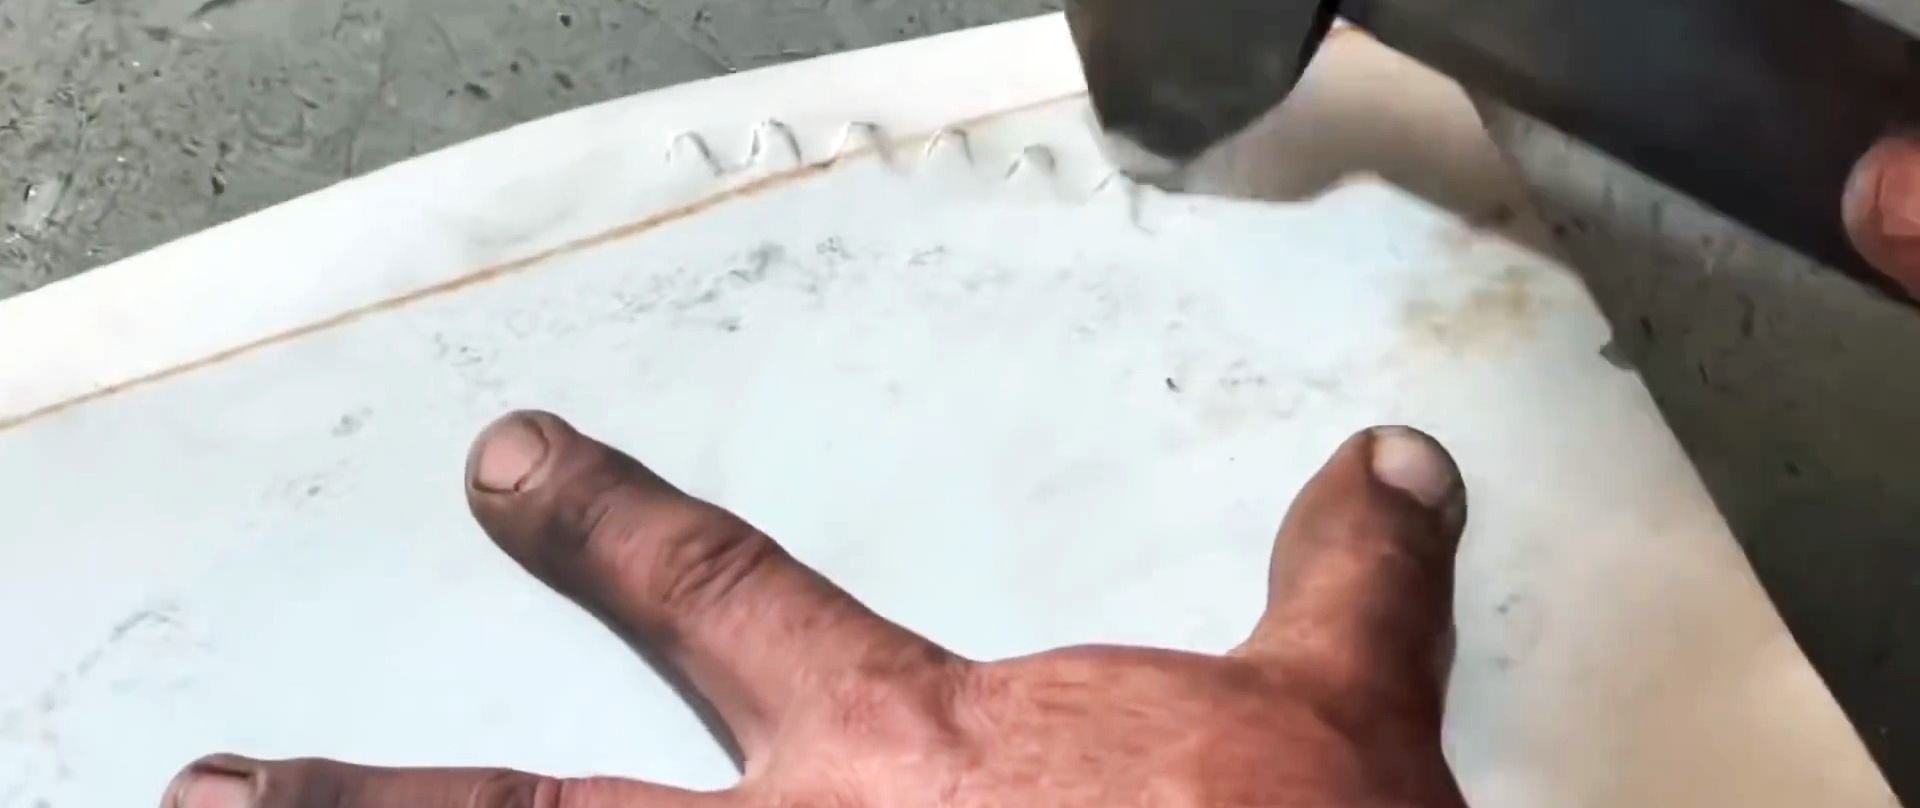
We cover the gear with a thick, thin piece of cardboard and, by striking with a hammer consistently around the entire circumference on top of the cardboard, we obtain a template for the gear ring gear. We will still need it when turning and adjusting the shape and size of the deposited teeth to the similar characteristics of the others.
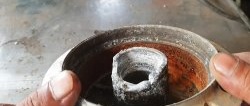
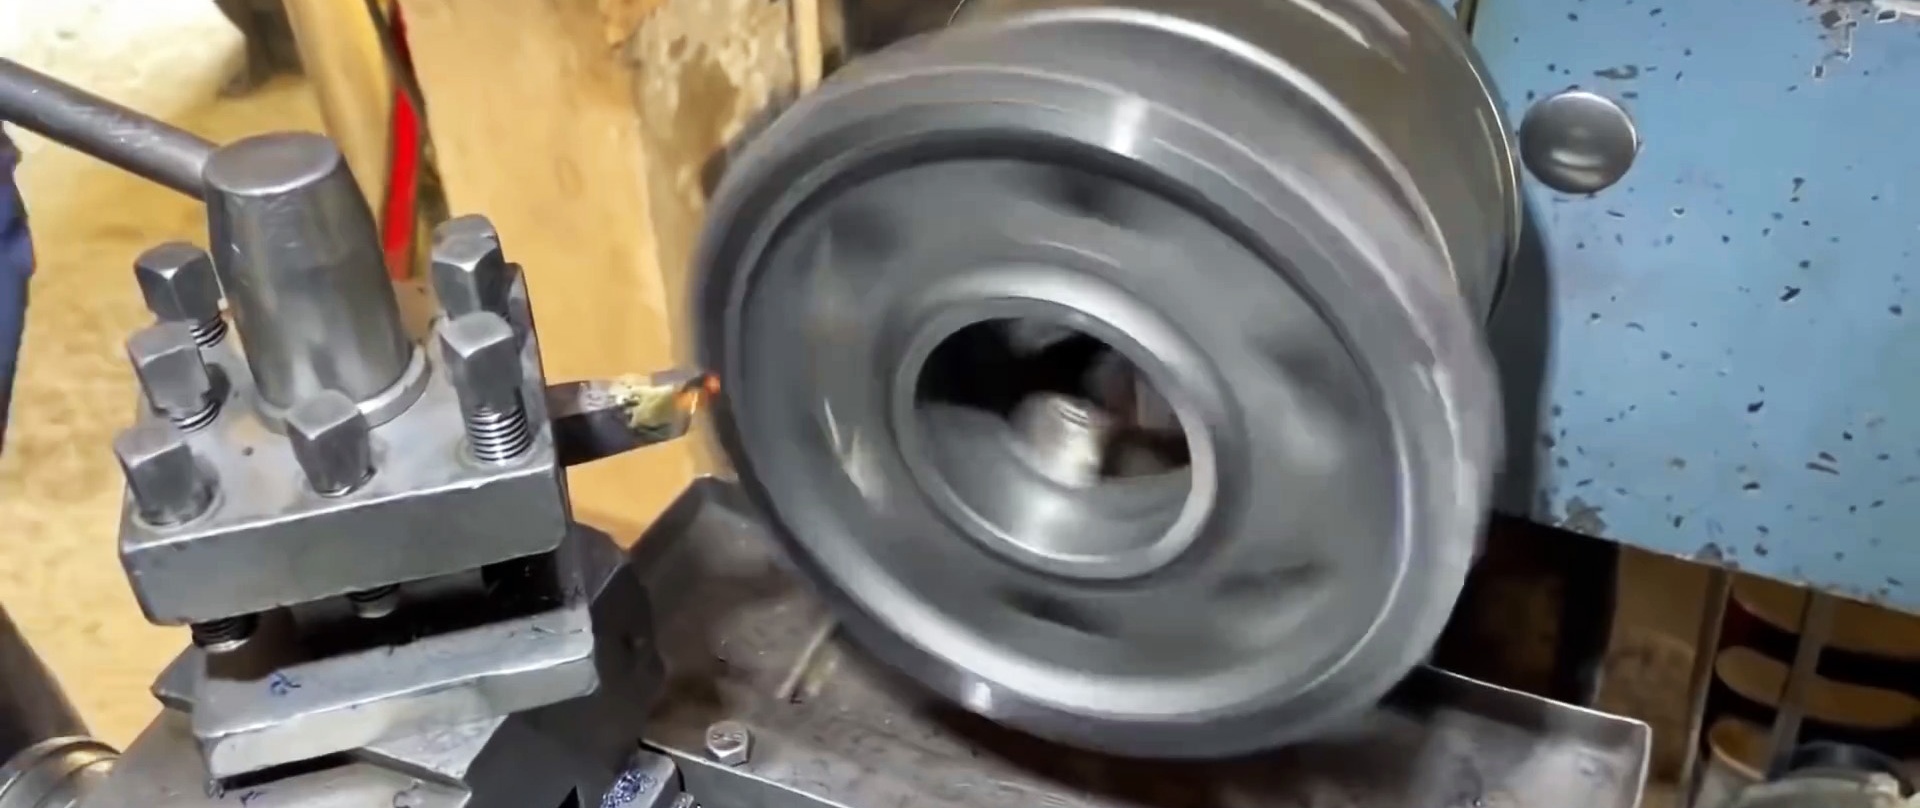
We fix the gear to be restored in the lathe chuck, reduce the runout of the side surfaces of the gear to a minimum value using a runout gauge and a hammer, and start using welding electrodes deposit layer by layer of metal onto the base of broken teeth, regularly and completely removing the slag formed during metal surfacing.

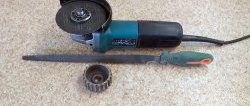
On a lathe we trim the sides of the deposited teeth on both sides to the specified width of the gear at the level of the teeth and grind their height to the outer diameter of the gear requiring restoration.

Using a grinder, we gradually give the deposited teeth thickness and shape, focusing on the configuration of the entire teeth, first on one side of the gear, then on the other.

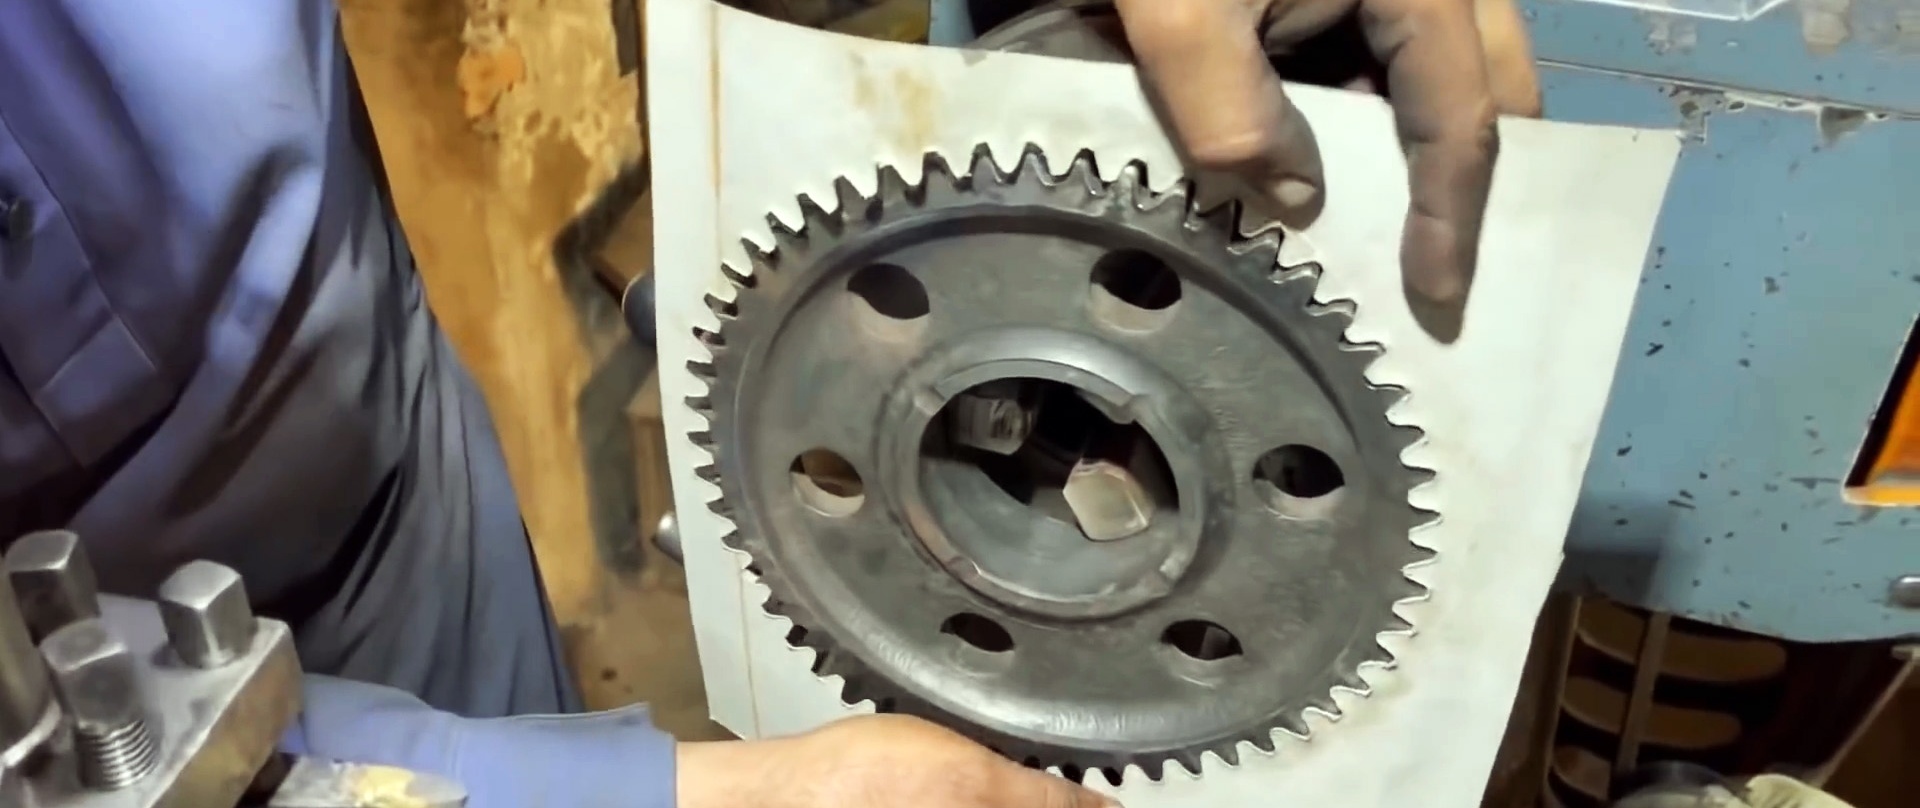
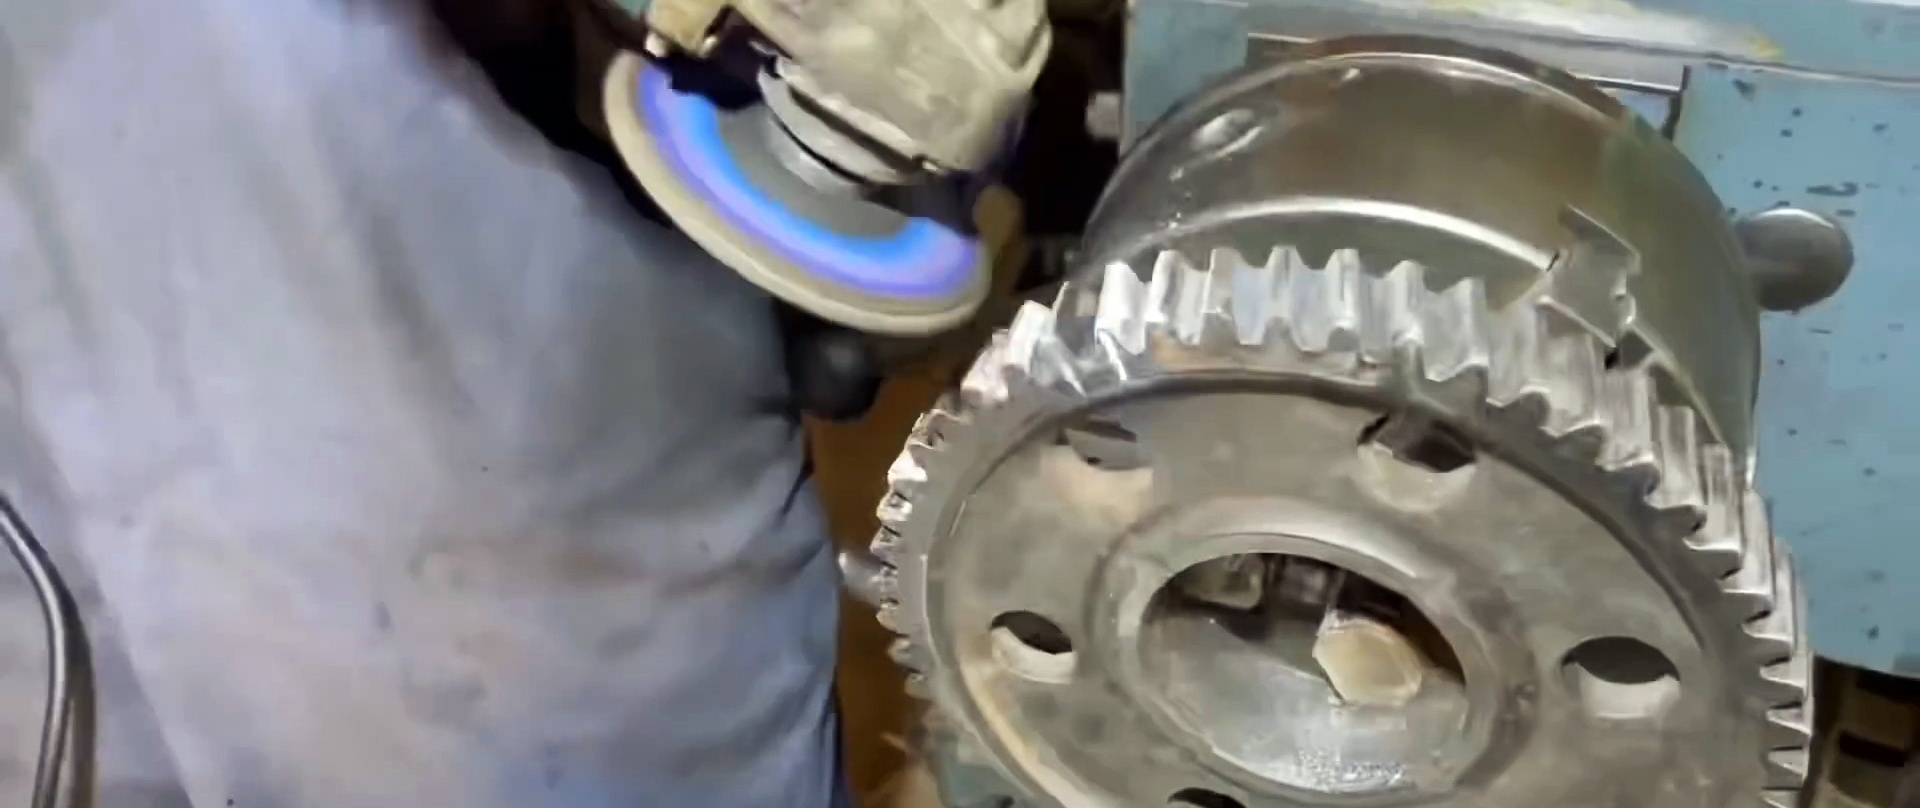

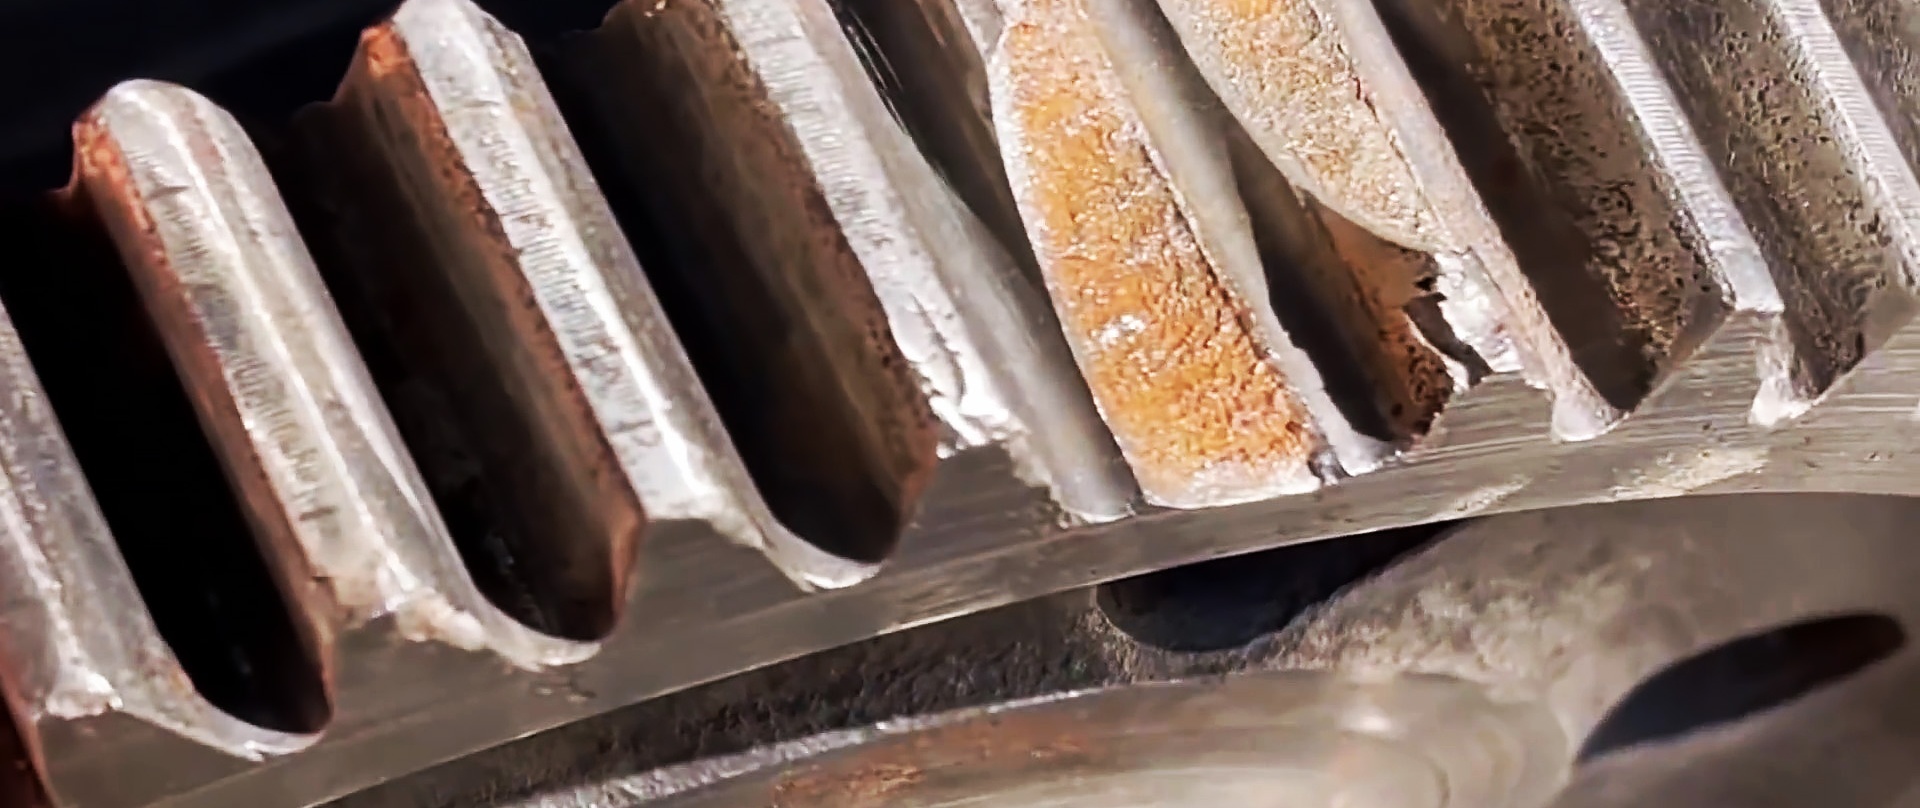
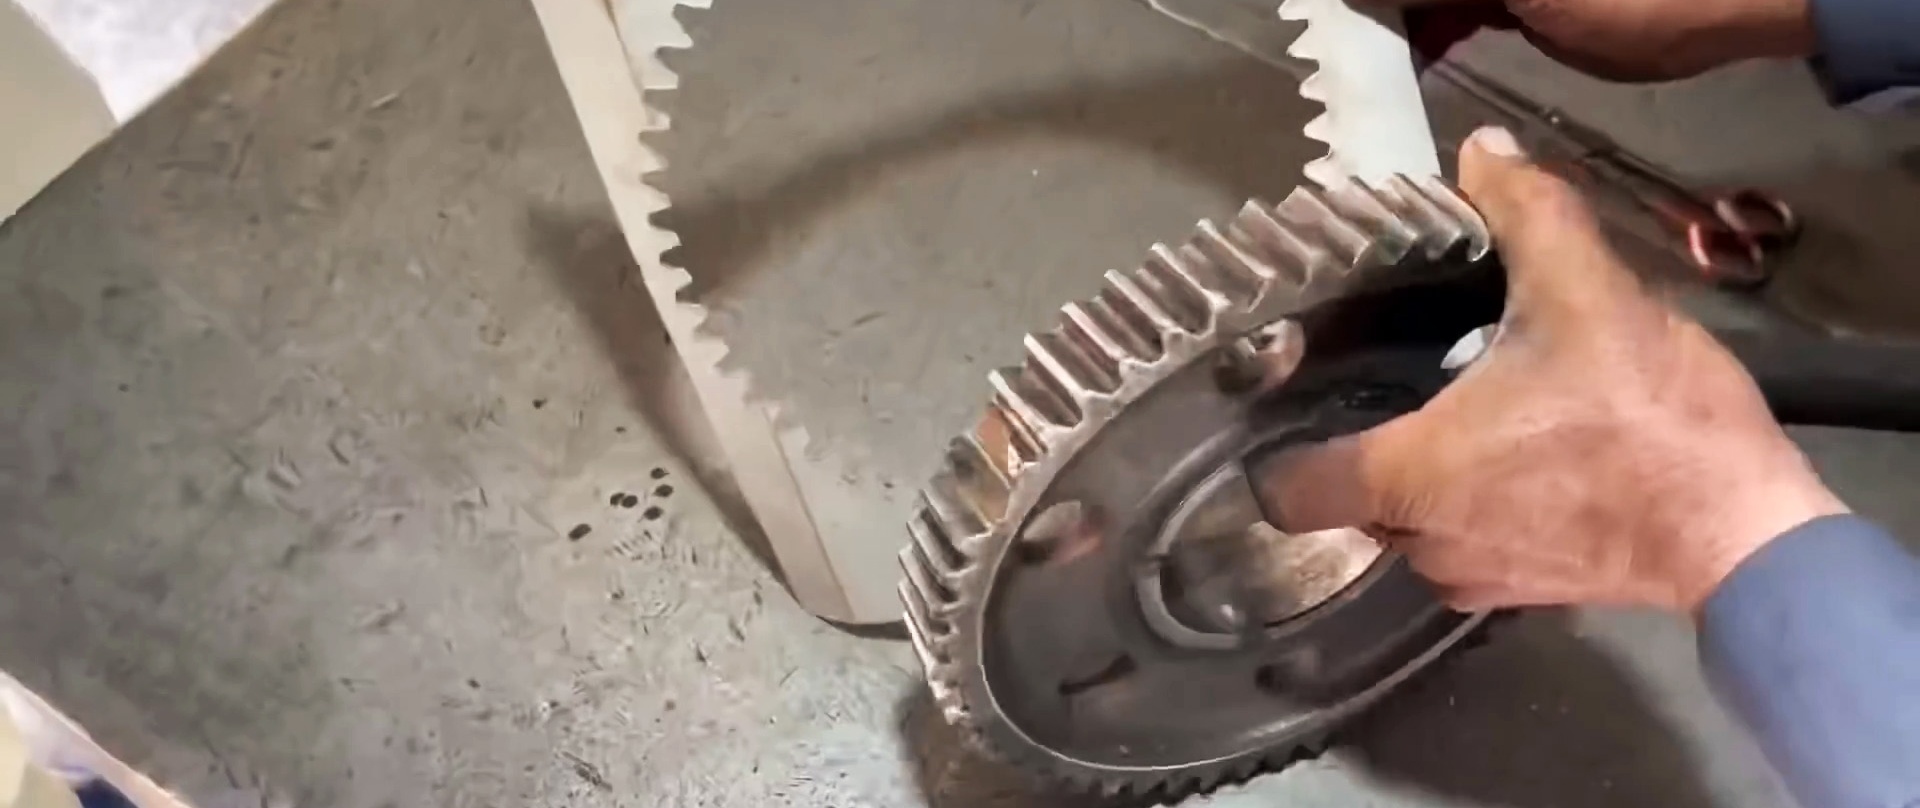
We try on a cardboard template and mark with chalk the places that need to be additionally ground off the deposited teeth. Final touches Bulgarian the shape of the deposited teeth and using the same templates we make sure that they are no different from the rest of the gear teeth. Now the restored part can be installed in its original place and continue to use the mechanism for its main purpose.