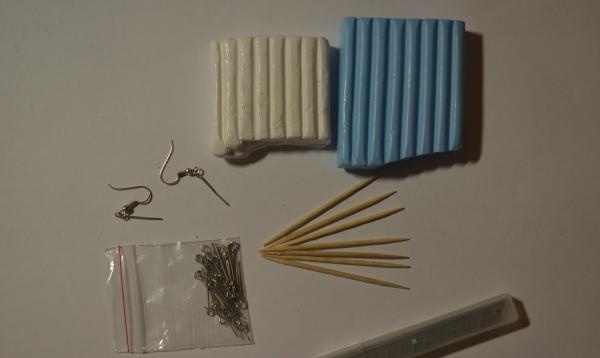
And so to create earrings from polymer clay we will need:
1. Baked polymer clay Cernit - blue and white;
2. Toothpicks;
3. A sharp knife (or like the blades I have for a stationery knife);
4. Accessories for earrings;
5. And a white sheet of paper (you can also use glass or another clean and smooth surface).
6. A pinch of salt;
7. And, of course, inspiration (after all, you can’t live without it!).
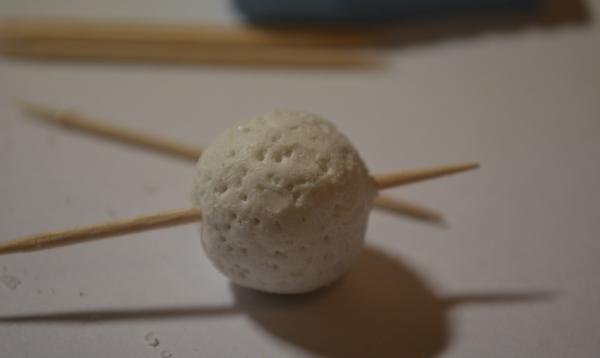
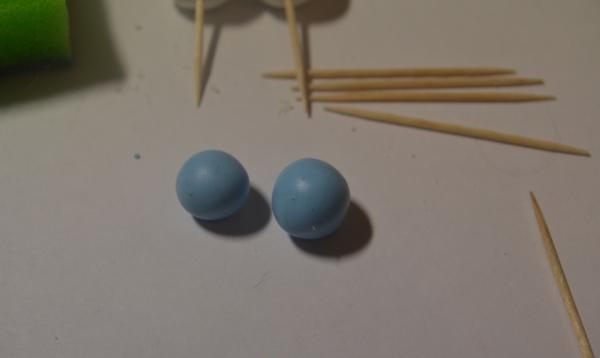
And so, having collected all the necessary materials, we begin to create! First of all, we need to heat the clay so that it becomes softer and more elastic. To do this, cut off a piece of white clay and begin to knead it with your hands.This process is quite tedious, so be patient (to speed up the process, you can use a special clay softener). Having warmed the clay in your hands, you can finally roll two small balls (a little less than a centimeter). Now these balls need to be rolled in coarse salt - this will give the beads an interesting effect. After which they need to be pierced with toothpicks and set aside; at this stage we no longer need them.
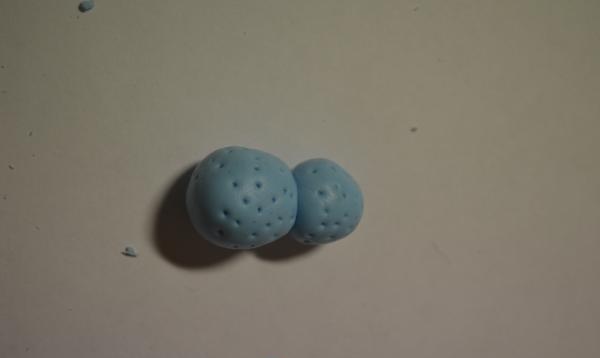
Now we begin to sculpt the bear cubs. Just like last time, soften the clay in your hands. First we make a ball (1 cm) - this is the future head. Take a slightly larger piece of clay (1.5 cm) and also roll it into a ball (if it’s not quite even, it’s okay) - this is the body of the bear.
We connect the head with the body.
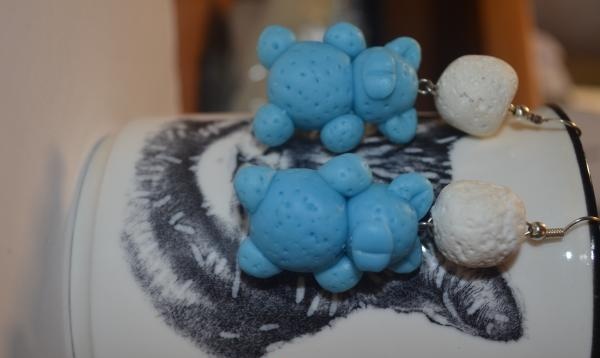
Agree, it doesn’t look much like a bear yet, so we attach four more identical balls (0.5 cm) to the body - and so the bear cub has paws. But he still lacks ears and a muzzle. Therefore, we take a piece of clay (0.5 cm), roll it into a ball and cut it in half, while using a toothpick to make a horizontal line. We attach the resulting ears to the head. Then cut off another piece of clay, knead it and flatten it between your fingers. We should get a small flat oval, we also need to make a vertical line in the middle using a toothpick. We attach the resulting muzzle to the head. The bear is ready!
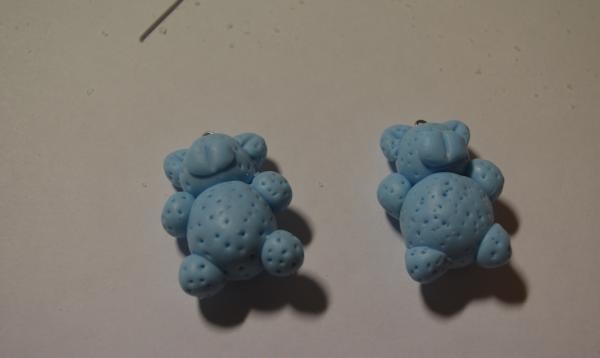
Now we attach the accessories (except for the earrings) and send our product to bake in the oven. The time and required temperature for baking clay is usually indicated on the packaging. I bake the product for 30 minutes at 130 degrees. After the product is baked, it still needs to cool for some time, since hot clay is very fragile.Don’t forget that our white beads are still in salt, so we put them in cold water (this will not affect the quality of the product), the salt dissolves, and we see interesting and original beads in front of us. Now the beads and bears are attached to each other. And the final stage is to secure the hooks. All our earrings are ready. Wear it for your health!