Do it yourself
Life hacks, master classes, useful tips, recipes.
home » Handicraft techniques » Embroidery » Cross-stitch » Cross stitch from photo
In these days of high technology and complete automation, manual work is valued very, very highly. Cross-stitched paintings convey warmth and sincerity. And if these paintings are modernized and some originality is introduced into them, then the creation is generally beyond all praise. We are talking about cross stitch from a photograph or from a picture. The basis is not taken from ready-made store diagrams, but, for example, a portrait in a photo, based on which an embroidered picture is made.

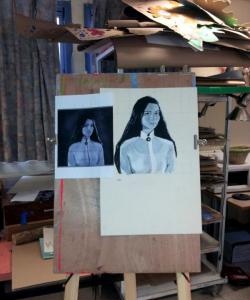
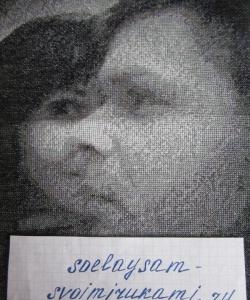
In order to receive a pattern, you just need to send a photo of the desired work on a specialized website and it will be converted into a pattern for embroidery and sent by email. You can, of course, make this diagram yourself in a special program, but it requires special knowledge and skills and quite a lot of time.
After receiving the diagram, you need to print it.

print out the diagrams


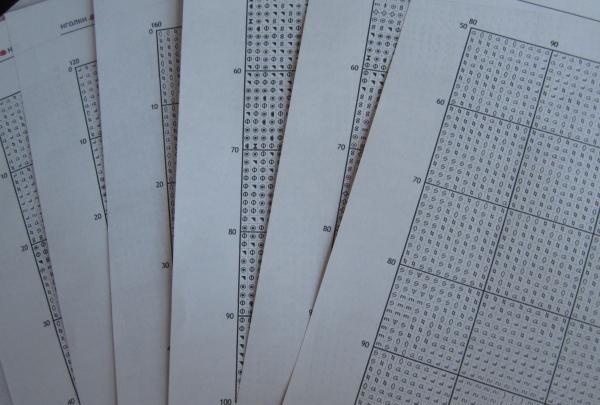
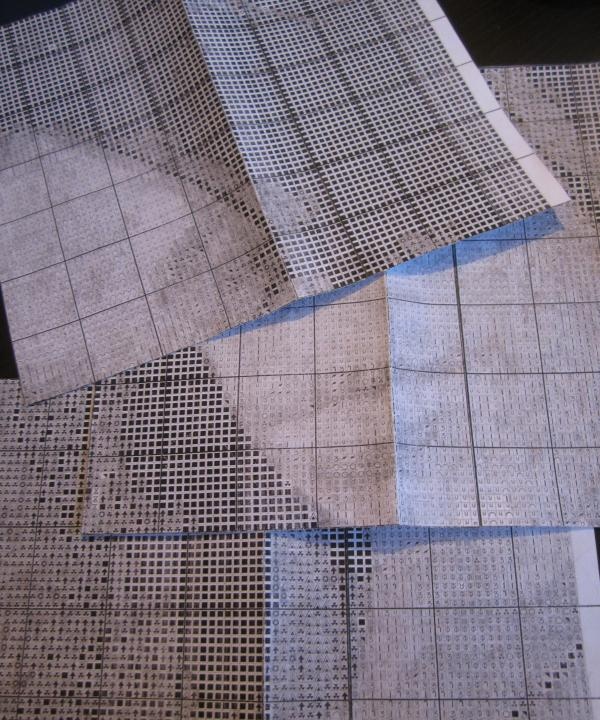
Next, cut the sheets and connect them together. I don’t make them into a large overall pattern, as they become frayed very quickly and become awkward to work with. I connect in fragments.

Connecting in fragments


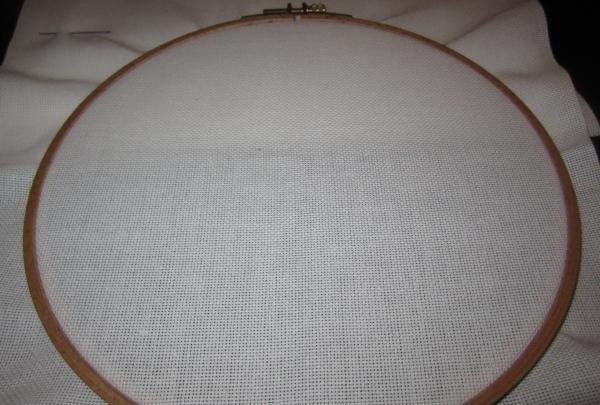
Next step. I'm choosing a canvas. To make the portrait more realistic and similar to the original, it is best to choose canvas from No. 18 and above. In this case embroidery will be on canvas number 18.
I stretch the canvas onto the hoop so that there is no sagging.

I'm choosing a canvas


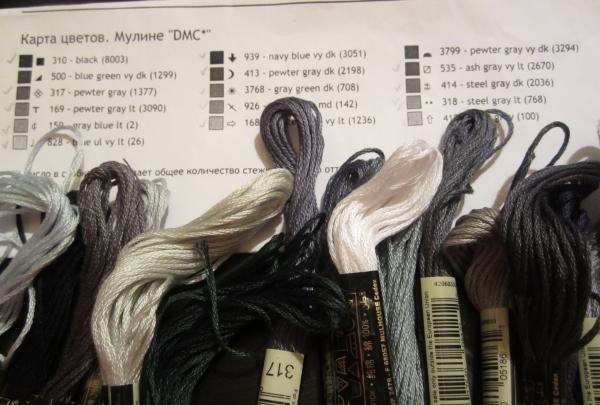
The next step is the selection of threads. I use DMC cotton floss. The pattern is accompanied by a color palette with numbers of skeins of thread. All that remains is to buy the necessary colors.

selection of threads


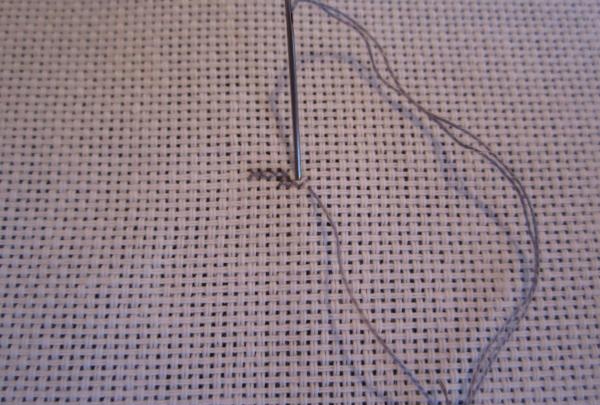
Next, I find the approximate middle on the outline and on the diagram. I determine what color I need to start embroidering with. I thread the needle. The needle should have a rounded end so as not to tear the canvas. And I make the first stitch, securing the thread from the wrong side. The knot is not made, the thread is fastened to itself.

I make the first stitch


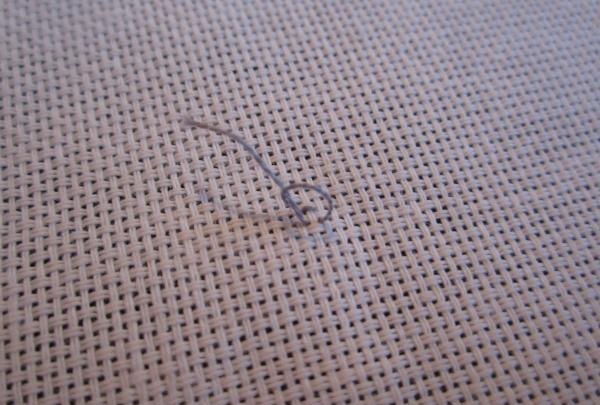
I tighten it well so that the thread does not unravel later.

I'm tightening it well


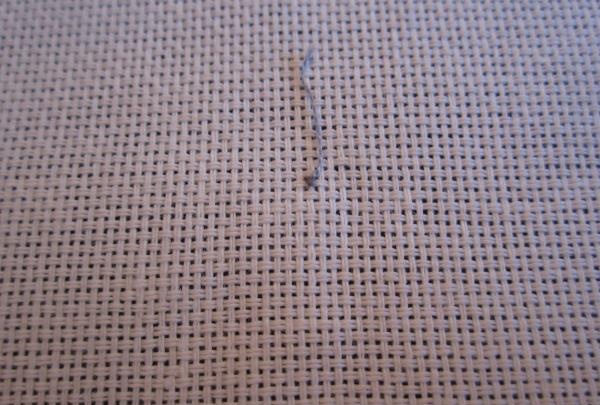
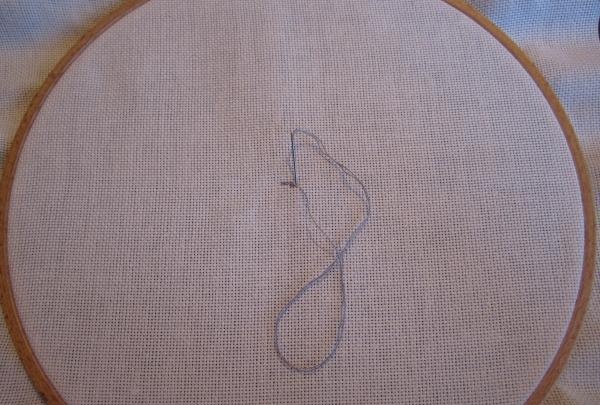
I'm starting to sew crosses. I make stitches from the lower left corner to the upper right. The needle goes inside out. From the inside it comes out in the lower right corner and enters the upper left.

I'm starting to sew crosses


And so I embroider each cell, according to the pattern.

I embroider every cell

according to the diagram


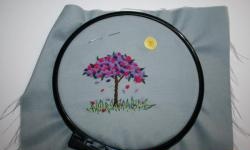
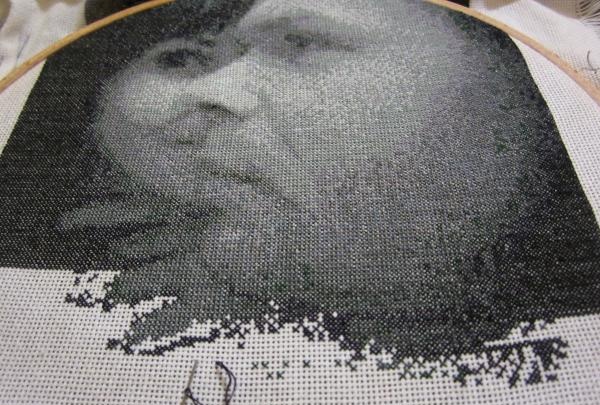
After a certain amount of time, the drawing will be visible.

the drawing will be visible


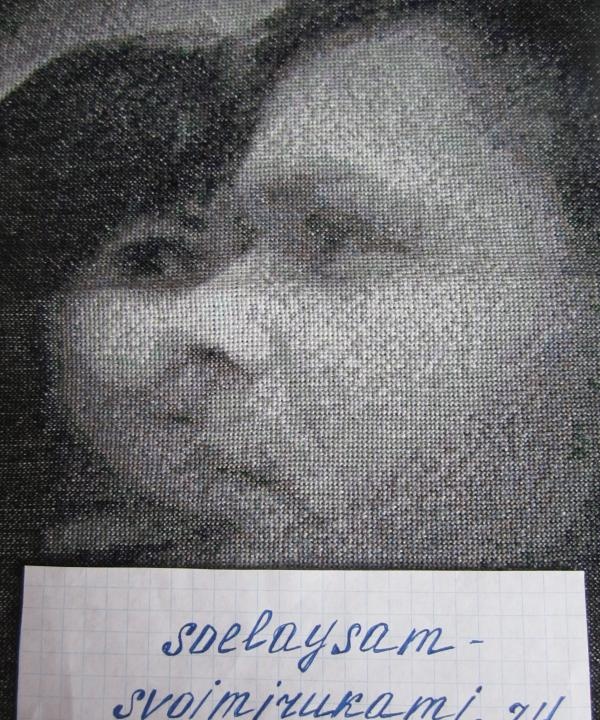
When the embroidery is finished, you need to wash the finished work in warm soapy water and steam it from the wrong side.
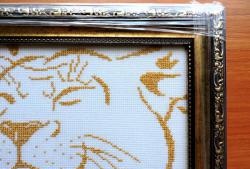
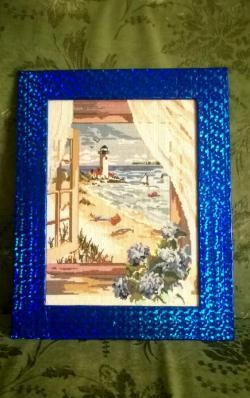
The portrait is ready!

Cross stitch from photo


This kind of portraits or any thematic embroidered pictures from photos can serve both as decoration for your own apartment and as a wonderful gift that everyone without exception will be happy with.
come back
Comment
  • bowtiesmilelaughingblushsmileyrelaxed relaxedsmirk
    heart_eyeskissing_heartkissing_closed_eyesflushedrelievedsatisfiedgrin
    winkstuck_out_tongue_winking_eyestuck_out_tongue_closed_eyesgrinningkissingstuck_out_tonguesleeping
    worriedfrowninganguishedopen_mouthgrimacingconfusedhushed
    expressionlessunamusedsweat_smilesweatdisappointed_relievedwearypassive
    disappointedconfoundedfearfulcold_sweatperseverecrysob
    joyastonishedscreamtired_faceangryragetriumph
    sleepyyummasksunglassesdizzy_faceimpsmiling_imp
    neutral_faceno_mouthinnocent
3+three=
Comments (2)
  1. Natalia
    #1 Natalia Guests November 5, 2014 10:35
    3
    The picture turned out amazing, but I would embroider with double thread so that the outline would not be visible. But this is at my discretion))
  2. Julia
    #2 Julia Guests 9 April 2017 16:28
    0
    Please tell me where or to whom I can send a photo and receive a diagram and thread color numbers?) Thank you

Very simple homemade DVB-T2 antenna with amplifier

How to make a simple mini drill stand with your own hands

Do it yourself - crafts and master classes | Page 225

How to make a power regulator for household appliances

«Do it yourself - with your own hands» - a site of interesting homemade products made from scrap materials and items at home. Step-by-step master classes with photos and descriptions, technologies, life hacks - everything a real master or just a craftsman needs for needlework. Crafts of any complexity, a large selection of directions and ideas for creativity.

We recommend reading

Washing machine error codes