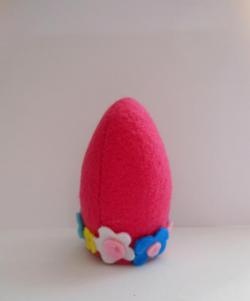
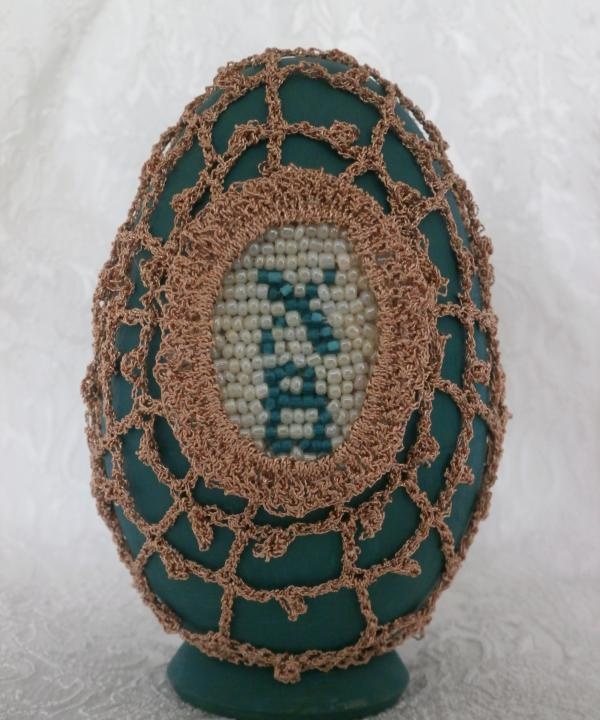
Nowadays, a painted or decorated egg is not only a symbol of the bright holiday of Easter, but also a wonderful souvenir in which you can embody creative ideas and show your artistic taste, not limited to just color. Here is an example of such a souvenir.
To complete the work you will need:
1. wooden egg;
2. hook 1.3 mm;
3. gold yarn (GAMMA, Iris M-09);
4. acrylic paints (Ladoga, shade 2204507 “Turquoise”, shade 2204704 “Chrome Oxide”);
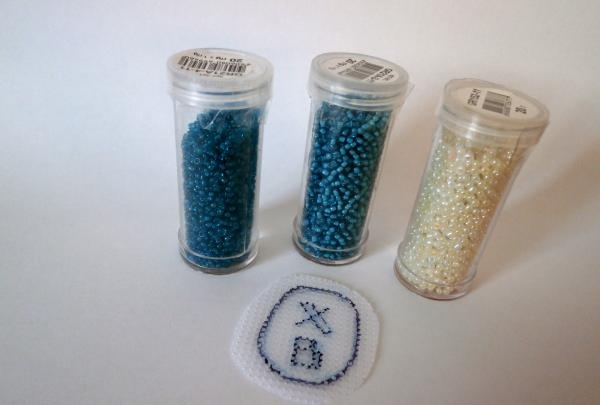
5.beads (Zlatka GR152-11 (light, cream), GR21A-3-11 (light turquoise), GR21A-4-11 (deep turquoise).
6. Canvas for embroidery (GAMMA, 100% polyethylene, 10 cm - 55 cells).
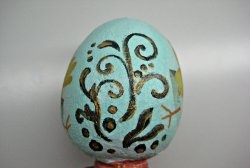
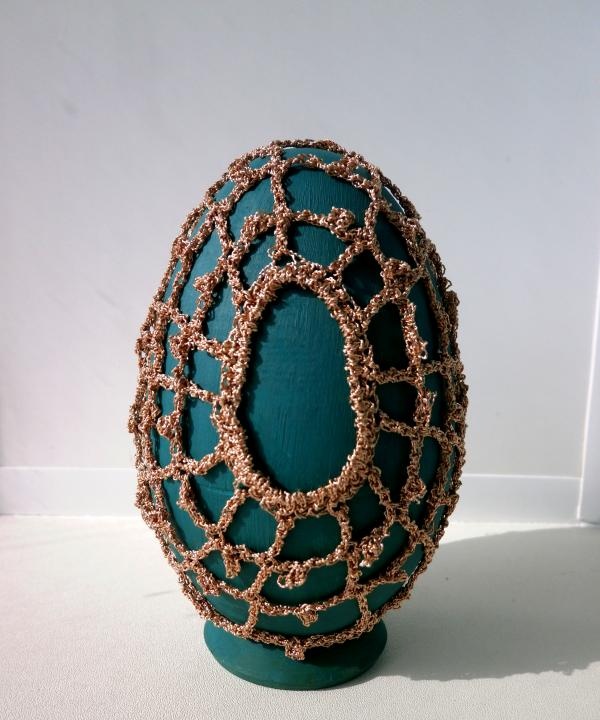
When starting work, you should prepare the base: cover a wooden egg (or any other workpiece that fits the shape) with a layer of paint and let it dry. If necessary, you can mix several shades, obtaining a unique or simply more suitable shade for the interior color scheme. So, to obtain a rich turquoise shade, you can mix shade 2204507 “Turquoise” and shade 2204704 “Chrome Oxide”. The proportional ratio is 2:1. The drying time of acrylic paint is quite short, about 1-2 hours. If you want acrylic paint to gain shine, you can use a special varnish applied to the already dried color layer. The varnish coating, in addition to its shine, prolongs the durability of the color layer, protecting it from damage.
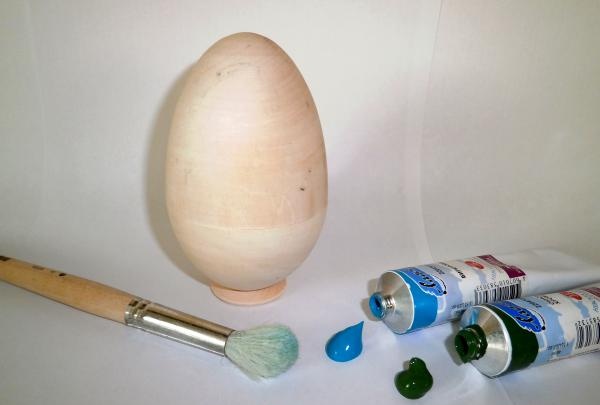
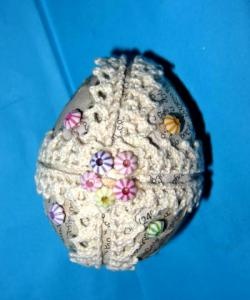
It is worth noting that the wooden base used is slightly larger than a regular egg (about 2 times its size).
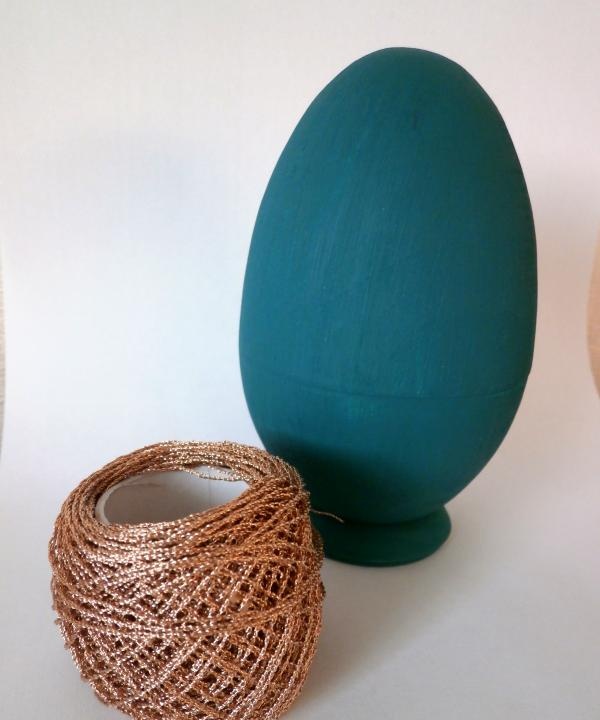
The next step is to make half of the knitted cover. The complete product will consist of 2 identical parts, which at the end of the work will need to be sewn together.
Description of knitting pattern:
Cast on 30 vp, combine them into a ring sp. Each knitted row must also be knitted with a sp., closing the circle.
Round 1: ch 2, 39 sts. without n. to the center of the circle.
Round 2: 4 vp, *1 vp, 1 picot, 1 vp, st/2 n. in the 3rd loop of the previous row, 2 ch, 1 picot, 2 ch, st / 2 n. in every 3rd loop of the previous row*, sp.
Round 3: ch 4, * ch 2, pic 1, ch 2, st/ 2 n, ch 3, pic 1, ch 3, st/ 2 n .*, s.p.
Round 4: ch 5, *ch 3, pic 1, ch 3, st/ 3 n, ch 4, pic 1, ch 4, st/ 3 n. *, s.p.
Round 5: ch 3, ch 5, st.b/n. to the top point of the picot of the previous row, * 10 vp, st. without n. to the top of the picot of the previous row*, 5 ch, sp.
The pattern in each row from * to * is repeated the required number of times.
Half of the product is ready.
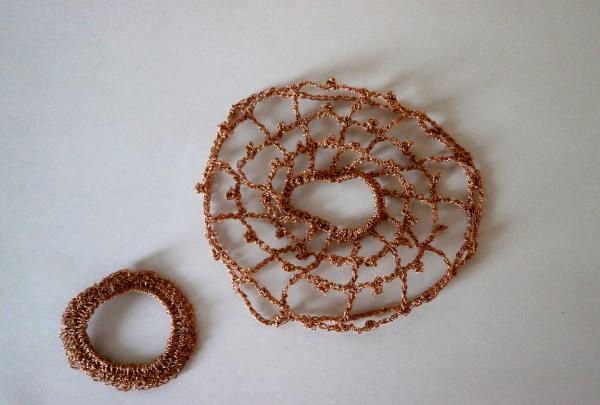
The second half of the cover is done in the same way. The two separate halves can be set aside.
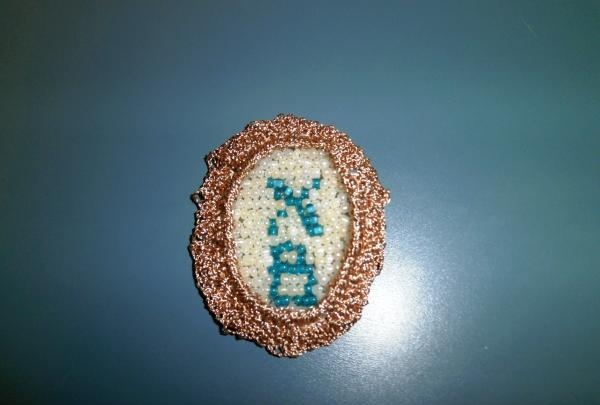
Next we make a frame for bead embroidery.
Description of knitting pattern:
Cast on 35 vp, combine them into a ring sp.
We knit the initial row like this: 2 ch. rise, 42 st.s. to the center of the circle.
Having put aside the knitted parts, you can begin to perform bead embroidery. To do this, you need to cut an oval from a single piece of canvas that matches the diameter of the embroidery frame + 0.5 cm, which is necessary to be able to sew the frame onto the embroidery. The light shade of the beads will serve as the background for the pattern (indicated “C” in the diagram), dark turquoise will serve as the main color of the design (indicated “TM”), light turquoise is needed to create a shadow (in the diagram – “SVB”). You can apply an embroidery design to the stencil, best done with a special marker, then during the work you don’t have to worry that it will be erased or smeared.
Description of the embroidery pattern:
1st row: C, C, C, C, C, C.
Row 2: C, C, C, C, C, C, C, C.
3rd row: C, C, C, C, C, C, C, C, C, C, C, C.
4th row: S, S, S, TM, SvB, S, S, S, TM, S, S, S, S, S.
5th row: S, S, S, S, TM, SvB, S, TM, S, S, S, S, S, S, S, S.
6th row: S, S, S, S, S, S, TM, TM, S, S, S, S, S, S, S, S, S, S.
7th row: S, S, S, S, S, TM, S, TM, SvB, S, S, S, S, S, S, S, S, S, S, S.
8th row: S, S, S, S, TM, S, S, S, TM, SvB, S, S, S, S, S, S, S, S, S, S, S, S.
Row 9: repeat the pattern of the previous row
10 row: S, S, S, S, TM, TM, TM, TM, SvB, S, S, S, S, S, S, S, S, S, S, S.
11th row: S, S, S, S, TM, S, S, TM, SvB, S, S, S, S, S, S, S, S, S.
Row 12: S, S, S, TM, TM, TM, TM, TM, SvB, S, S, S, S, S, S, S.
Row 13: S, S, S, TM, S, S, S, TM, SvB, S, S, S, S, S.
Row 14: S, S, S, TM, S, S, S, TM, SvB, S, S, S.
Row 15: S, TM, TM, TM, TM, TM, SvB, S.
Row 16: C, C, C, C, C, C.
Row 17: C, C, C, C.
After completing the embroidery, you can sew a frame onto it.
It is best to sew on the beaded decoration after the 2 halves of the knitted cover are connected on the egg. The halves of the cover are sewn together with the threads used to work along the edge of the loops of the last row.
To complete the work, the frame with bead embroidery is sewn onto the finished product.
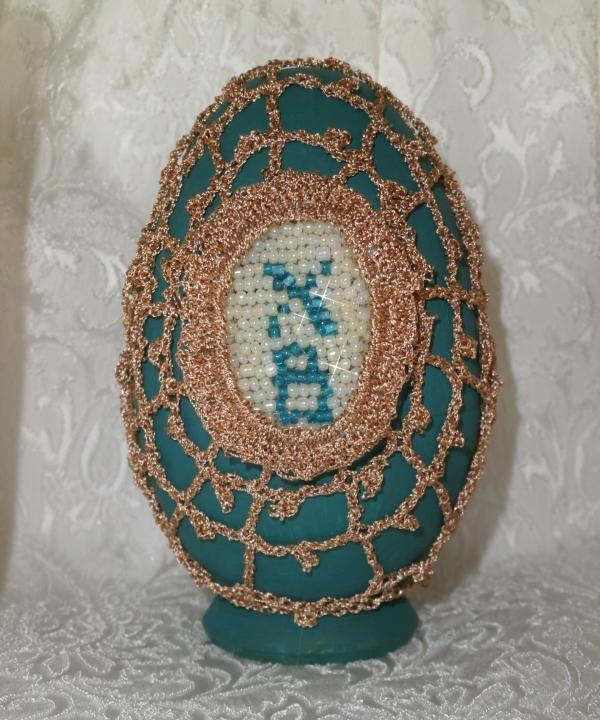
The souvenir Easter egg is ready!