So, first you will need to prepare the soil for laying the site. To do this, decide on the place where the site will be located, dig a pit of a small depth of about 20 cm in this place. Next, fill it with granulation. If you come across tree roots, they need to be cut down. The granulation must be compacted. If this is not done, then over time some areas of the site may sag, and as a result, pits will form.
After you have filled the hole with granulation and compacted it, you can begin installing the curb. To do this, select sandstone that has at least one straight side. Melon sandstone must be dug along the edges of the site. That is, with this you indicate the boundaries of the site.

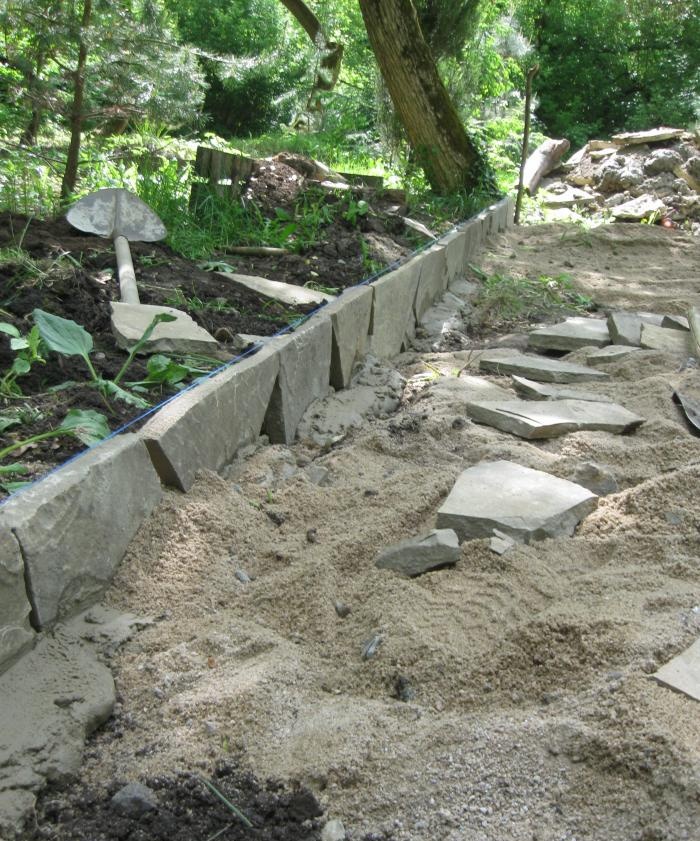
After you dig in the stone, making a curb, it needs to be secured.To do this, mix the solution with one share of cement, two shares of granulation, and two shares of sand. Use this solution to secure the curbs at the bottom. To ensure that the curb is level, you can pull the thread level from one edge of the platform to the other.
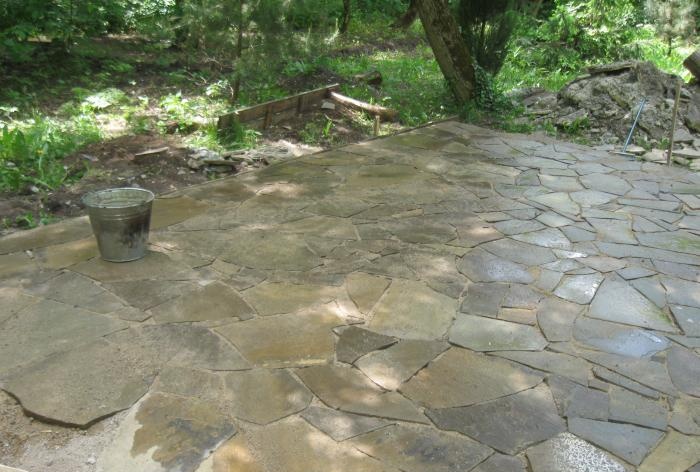
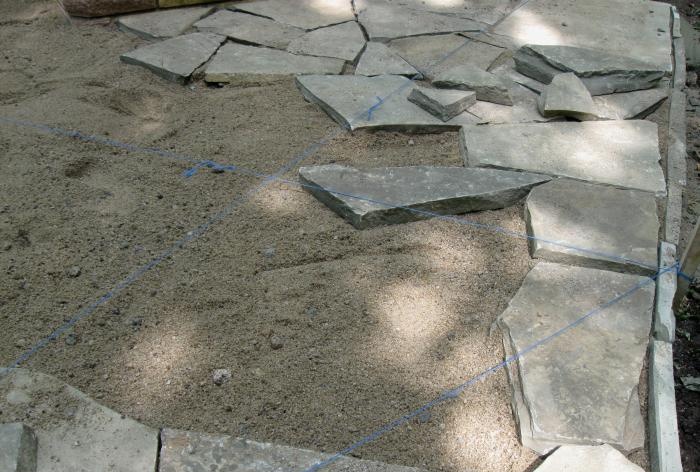
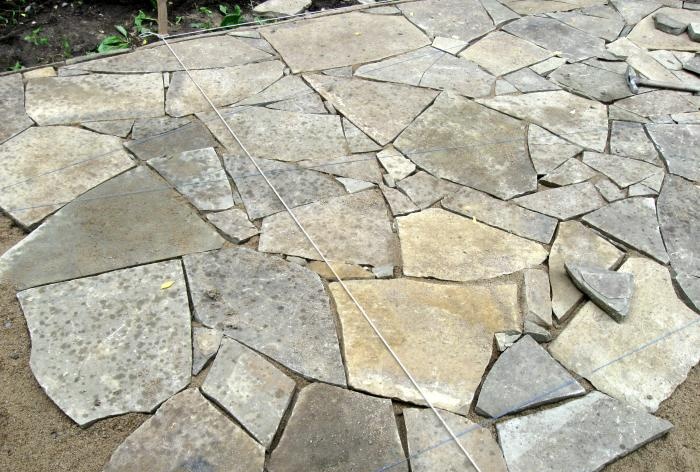
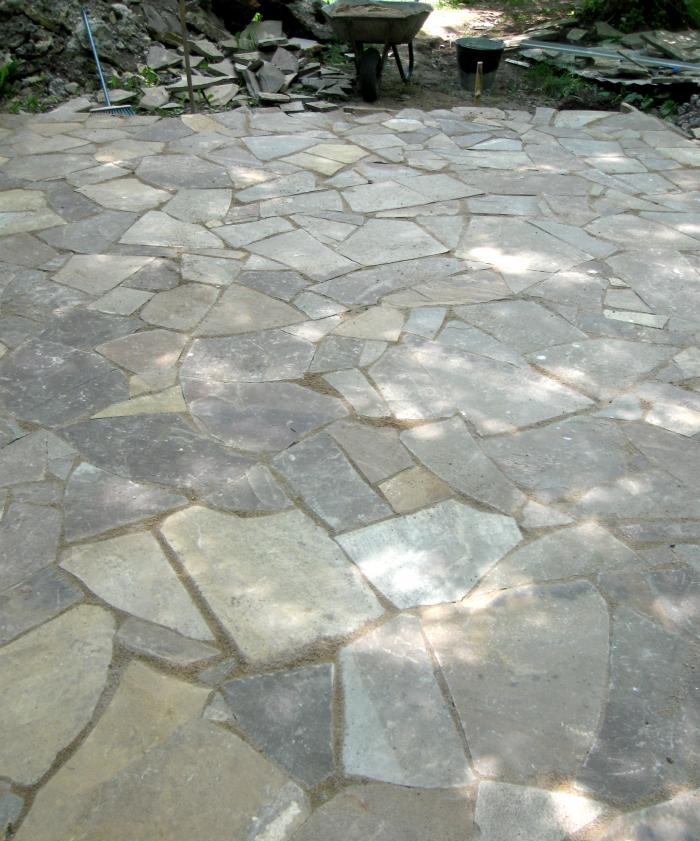
Now you can begin laying the sandstone of the site itself. Here you especially need to hammer pegs or reinforcement in the four corners in order to stretch the fishing line along them. If the site is large, then approximately every two meters you can hammer in additional pegs along the edges of the site. From them you need to pull the fishing line, marking the level across and along the diagonals of the site. For this you will also need a building level. The longer the level, the smoother the platform will be.
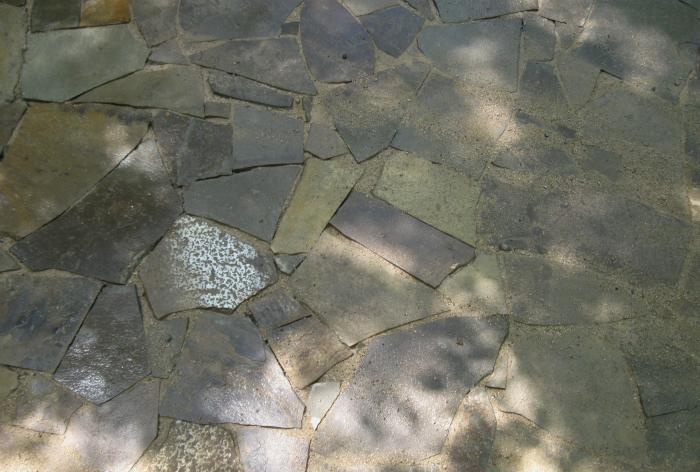
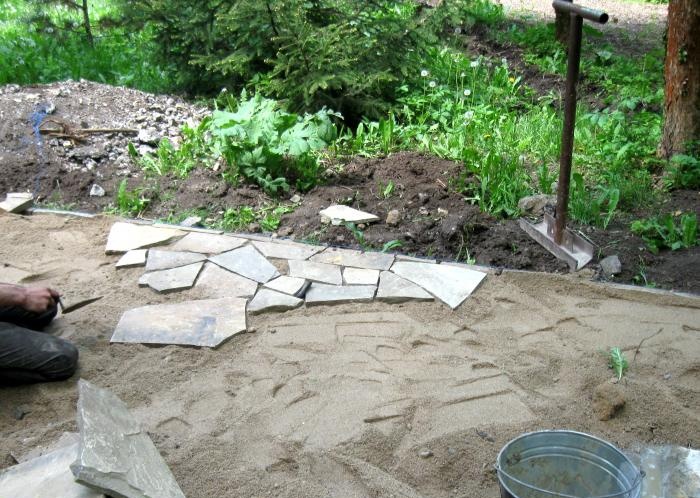
Next, you need to select sandstone, laying it on granulation. It is advisable to buy sandstone of a certain thickness. If the stones are different, this will complicate the installation process. The most suitable sandstone for the site will be 3 cm thick. If the site is being made for parking cars, then you will need a stone at least 5 cm thick. When laying the stone, you can navigate along the stretched lines.
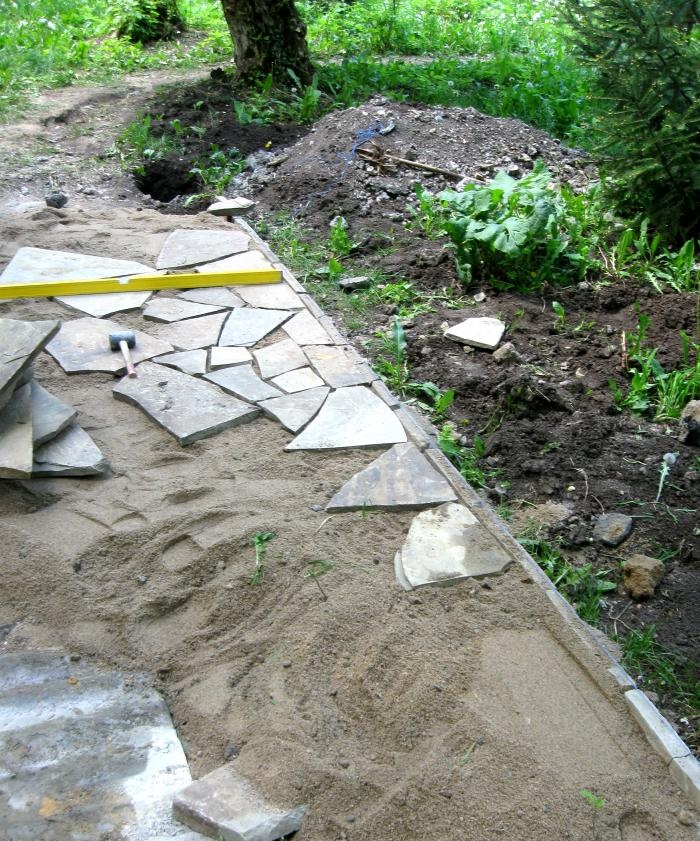
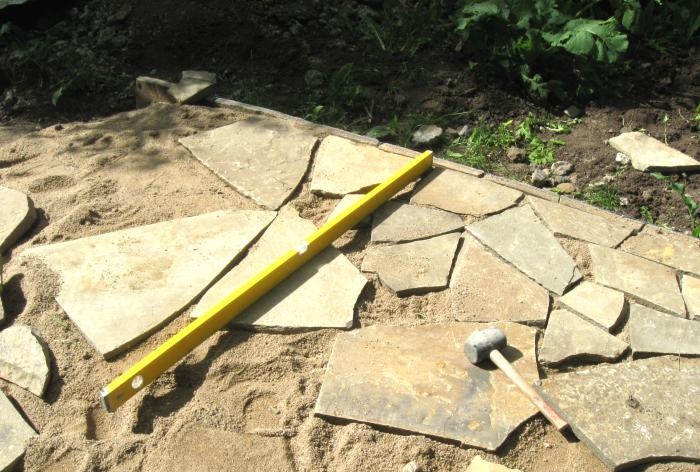
If the stone is higher, then it must be tapped with a rubber mallet. If the stone, on the contrary, is below the level, then add more granulation under it. It is advisable to pour in such an amount of granulation that you have to tap the stone all the time. This way, it will settle down better, and there will be no voids underneath. Otherwise, when walking on it, it will stagger.
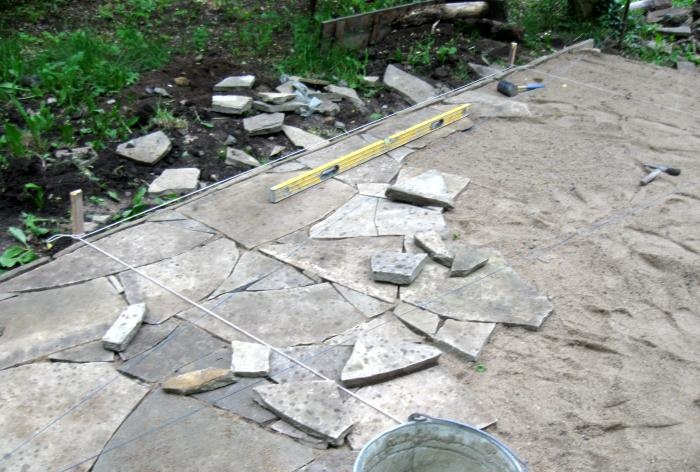
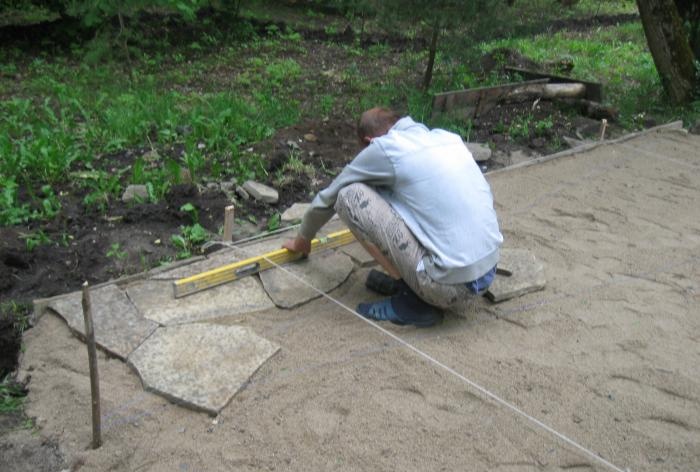
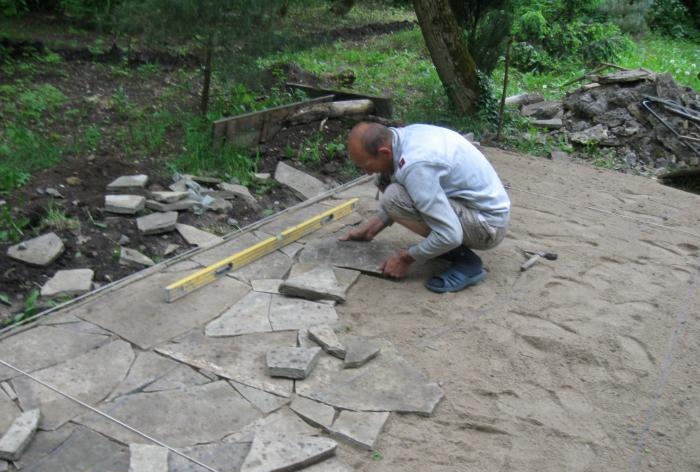
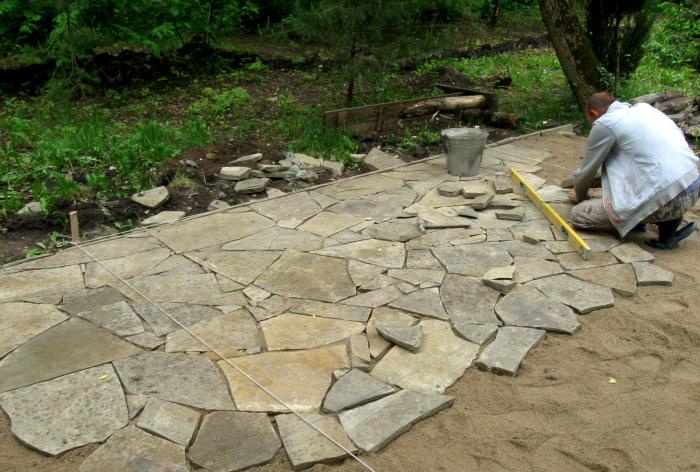
During the installation process, you must also have a small pick or hammer. Sometimes it is difficult to choose the required size of sandstone, or a shape that would suit you.Therefore, with a pick or hammer, you can give the sandstone the required shape, breaking off unnecessary parts from them.
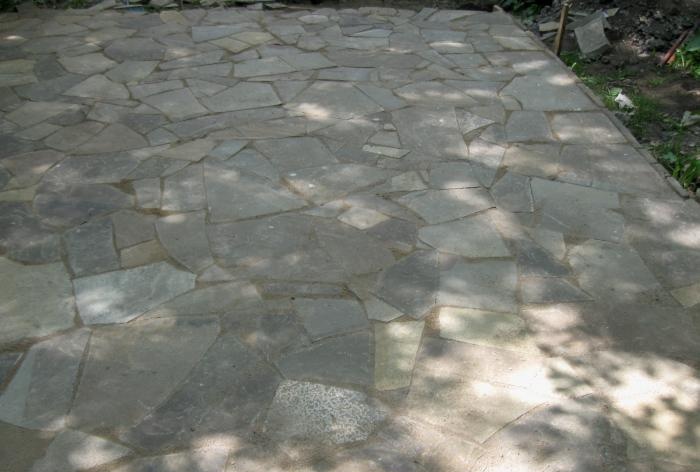
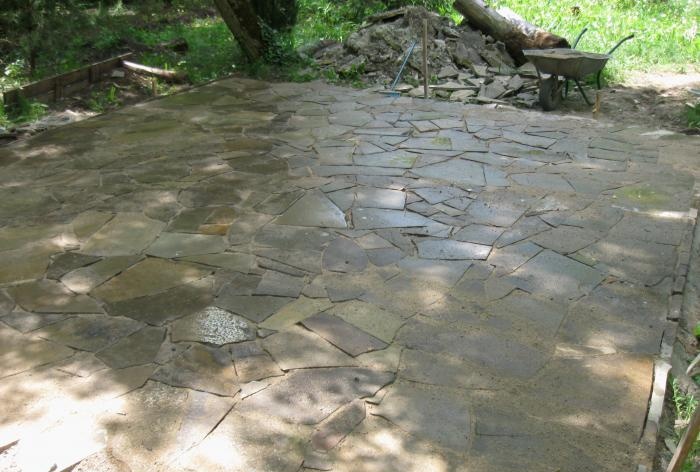
After you finish laying the sandstone, you need to fill the seams between them. This can be done with the same granulation or sand. To do this, sprinkle granulation or sand onto the area, and then use a broom to distribute it over the area. This way you will fill all the seams. Remove excess sand or granulation. Next, use a hose and water to rinse the area.
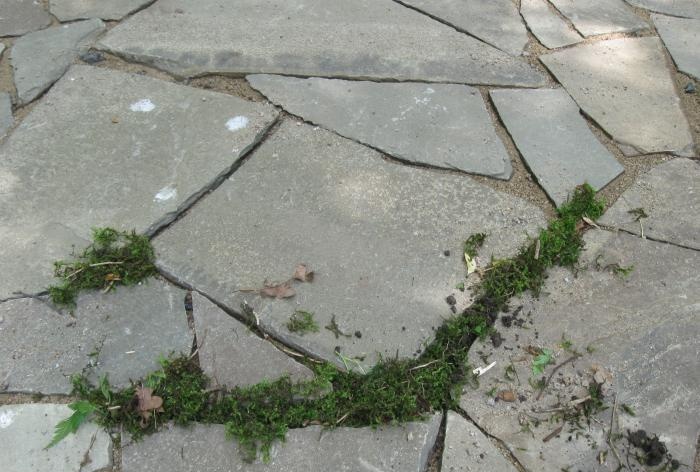
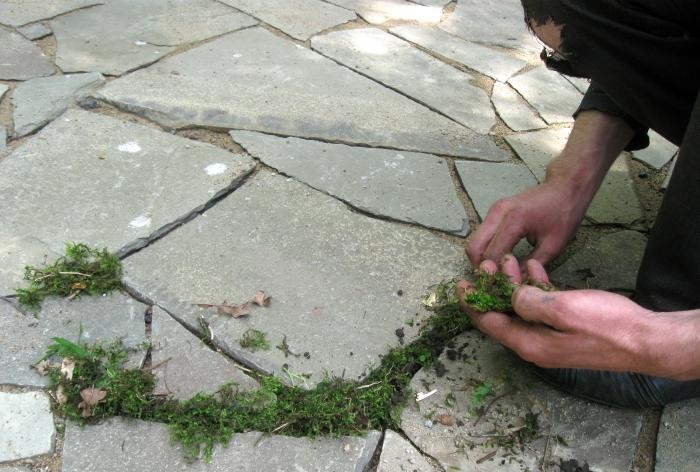
Another option for filling the joints is to plant moss. This process is complex and takes time. If you order such work from someone, it will be expensive. But if you manage to fill all the seams with moss, it will look gorgeous. If you decide to do this work yourself, then you need to go to the forest or planting where moss grows. Using a knife, cut it off along with the roots. Then soak it in a bucket of water. After this, you can fill the seams with soil and moss roots. After a few weeks, all seams will be covered with moss. Typically, greenery goes well with natural stone.