Making an even cut with a hand-held circular saw is not so easy. Due to the heterogeneity of the wood and for other reasons, the saw always tends to move to the side. Of course, you can buy a guide bar in a store, but a factory branded product is comparable in price to the saw itself. With basic carpentry and plumbing skills, you can make this useful addition to your tool yourself.
Will need
Materials:- Hand-held circular saw;
- laminate;
- aluminum channel;
- screws, bolts, nuts and washers;
- aluminum plate;
- Double-sided tape;
- roll of sandpaper.
The process of manufacturing a guide bar for a manual circular saw
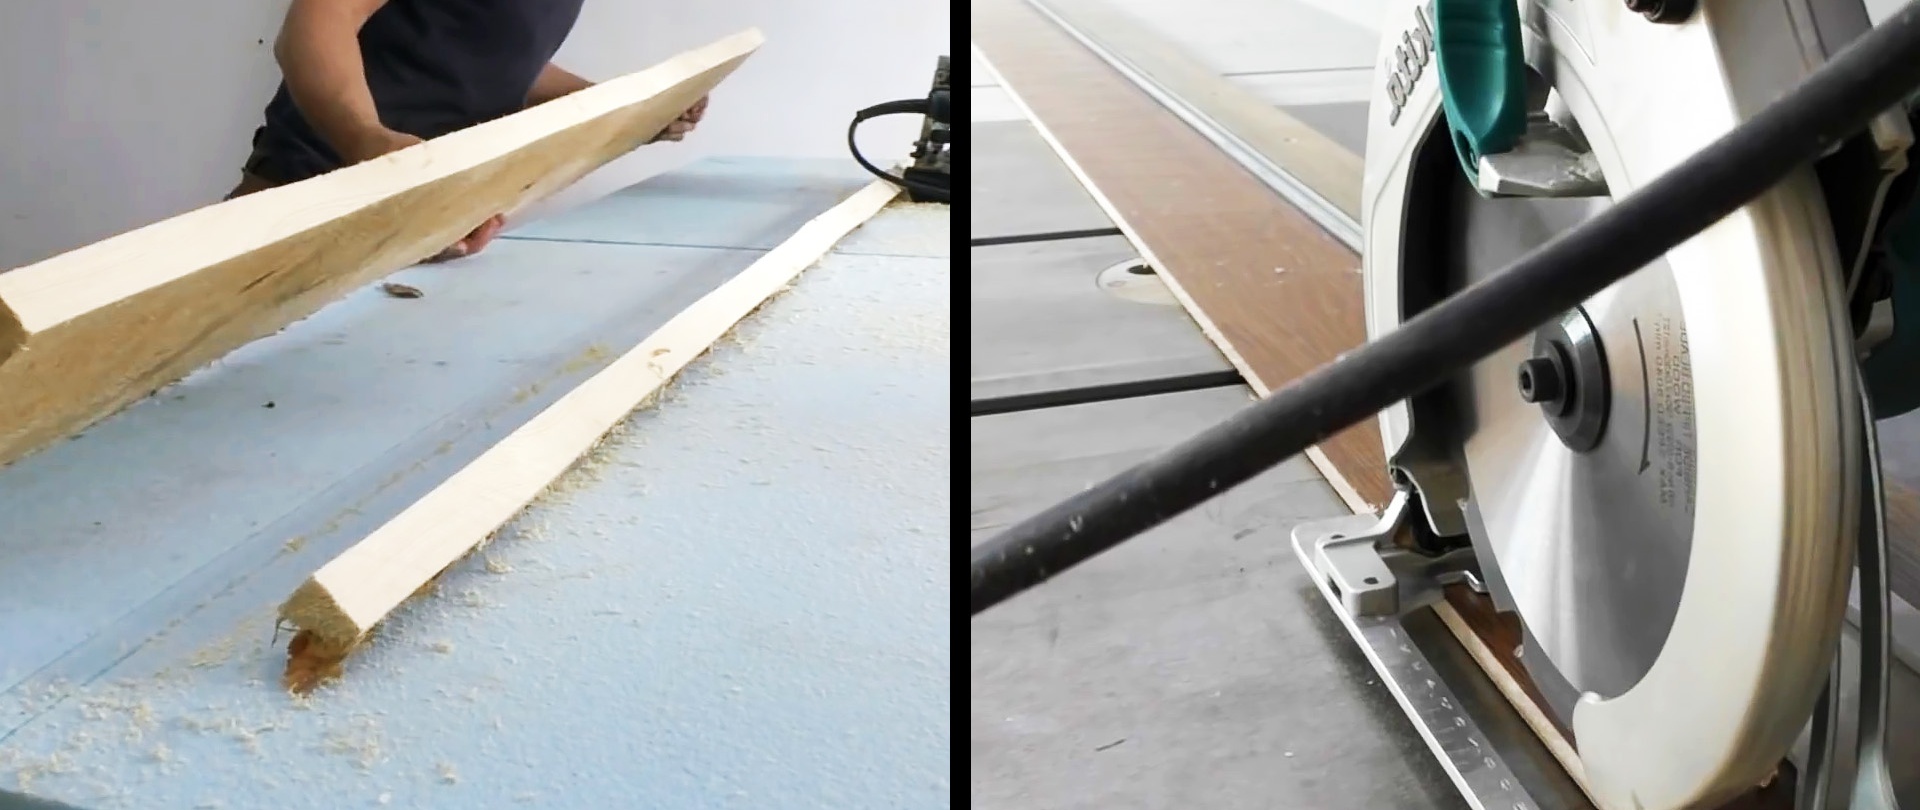
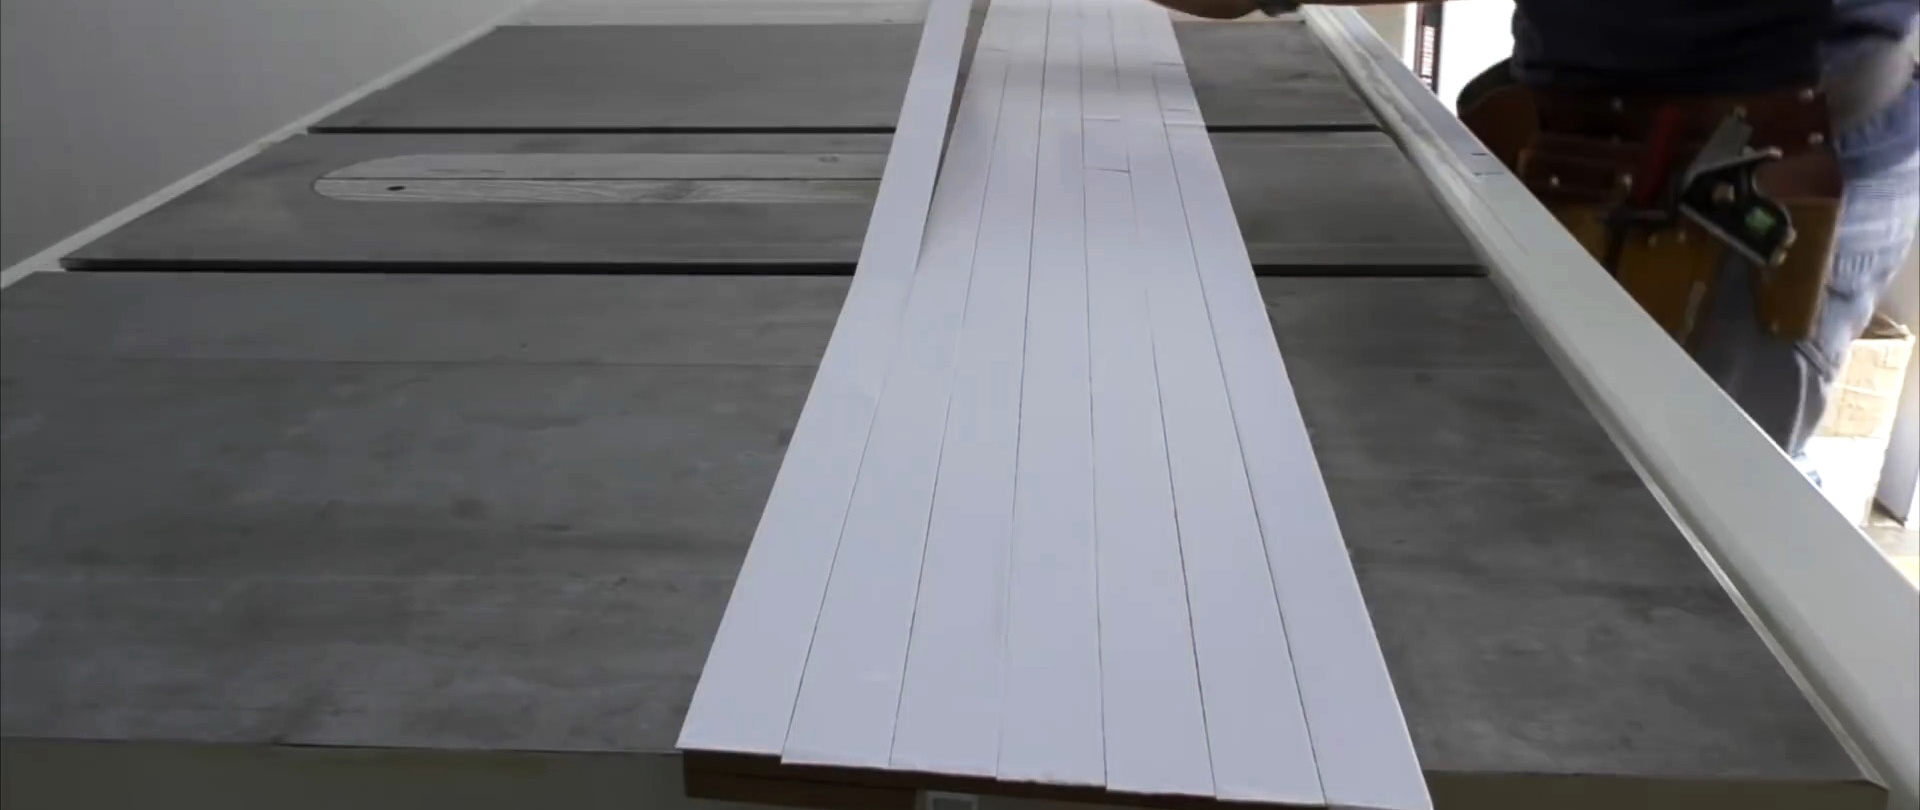
Using a stationary circular saw, we make longitudinal and transverse cuts of the laminate to obtain blanks for the base of the guide rail.

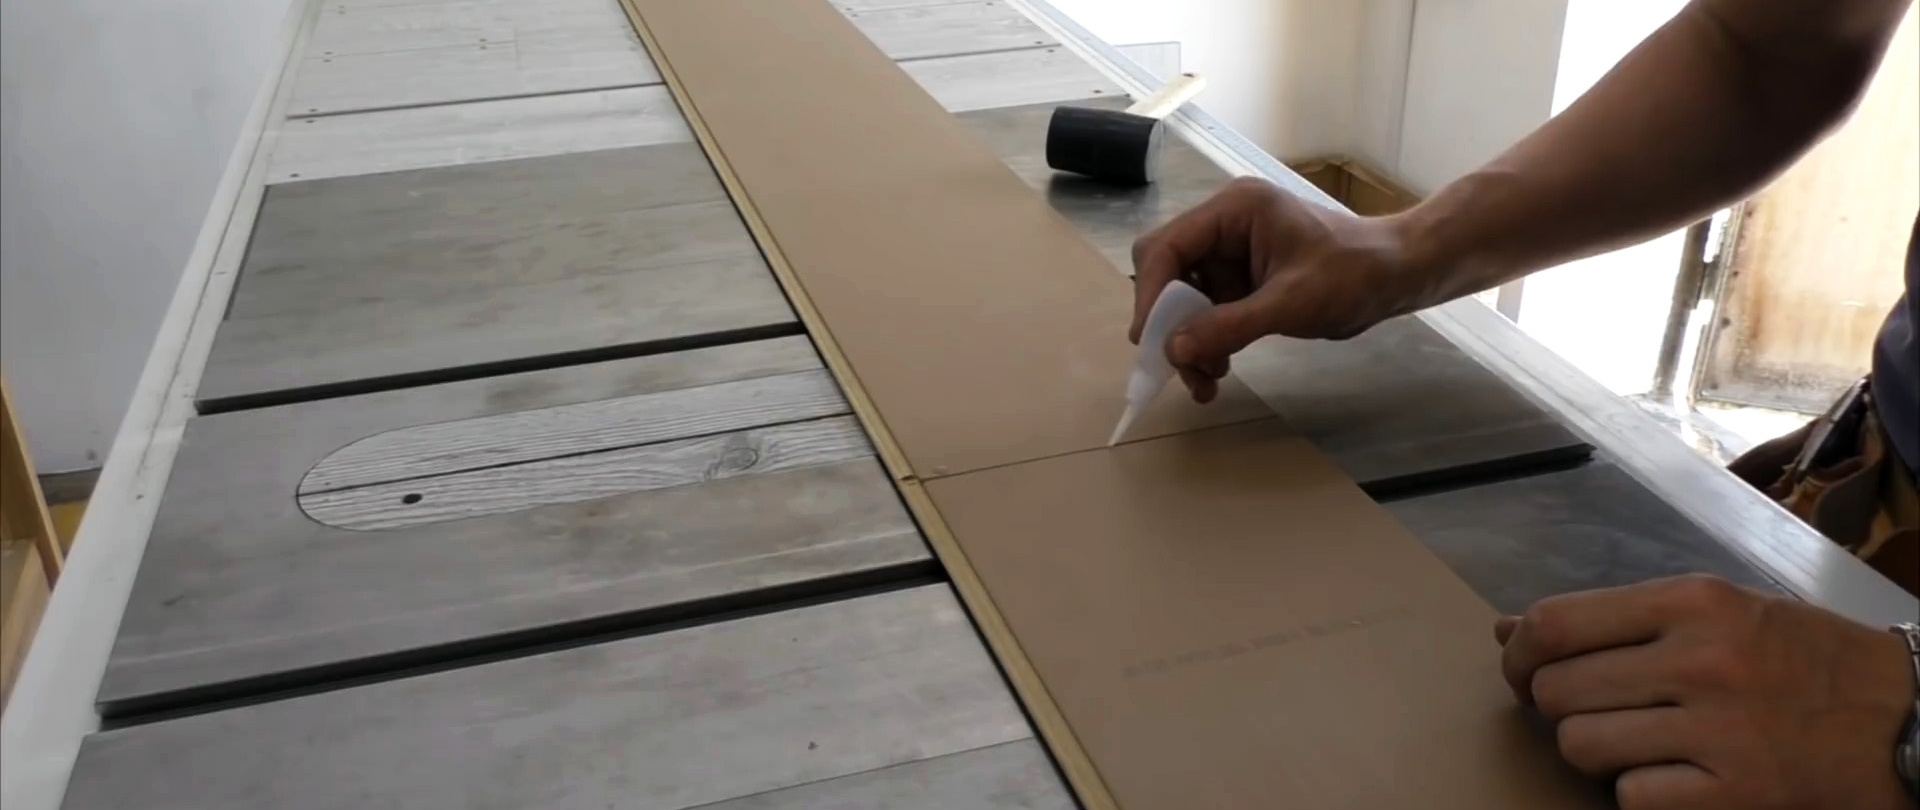
We connect two laminate boards lengthwise, tapping the seam with a mallet, and fill the reverse side with quick-drying glue.
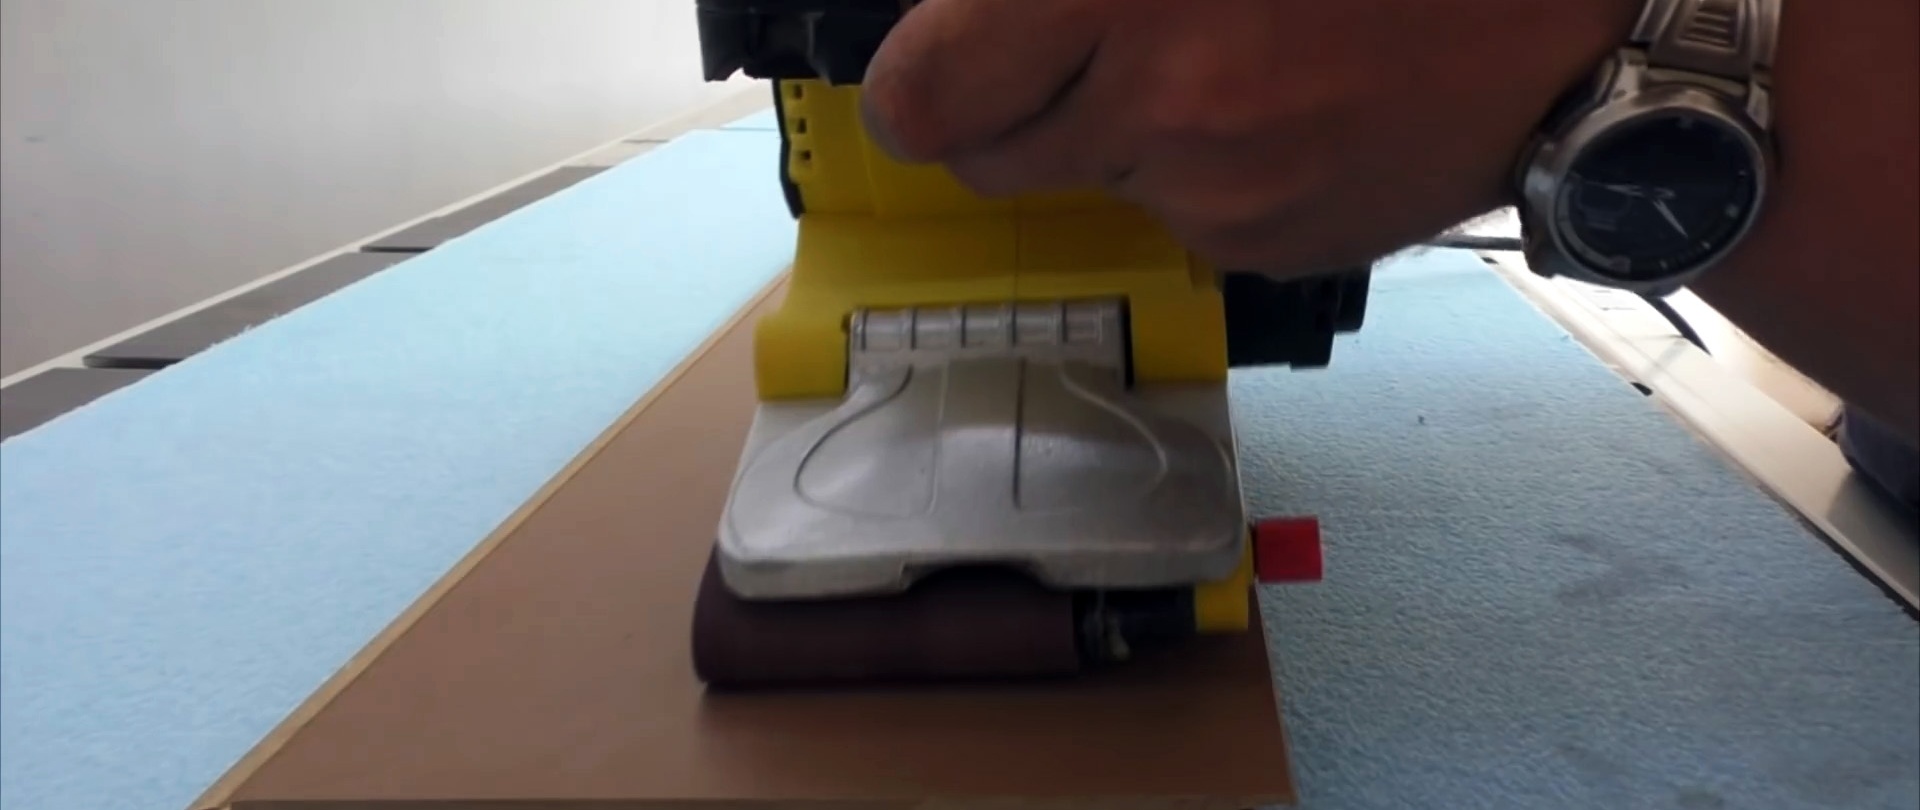
We clean the surfaces of the workpieces with sandpaper on a round holder and wipe with a cloth.
We apply glue to the back surface of the narrow laminate workpiece, press the aluminum channel along the length of it to the base as a limiter, and glue the narrow workpiece to the base along the aluminum channel.

In the back of the aluminum channel, we drill holes of the same type at equal distances, drilling them out from the inside for the screw heads, and removing burrs from the outside with sandpaper.

We lay the aluminum channel along a narrow strip glued to the base with a guaranteed gap, using two pieces of aluminum channel of a suitable size for this.
Cover the contact point between the aluminum channel and the laminate base with glue and press the channel so that the stops slide freely along the guide rail.

We strengthen the guide rail with screws, screwing them through the holes in the back of the channel to the base.

We grind off the ends of the screws on the back side of the base using a hand grinder.
We strengthen the narrow strip with screws along the length, screwing them into the laminate base. We also grind down the ends of the screws on the reverse side using a hand grinder.


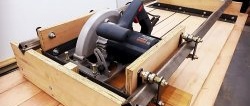
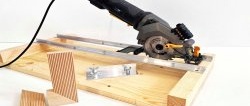
We cut an aluminum channel, similar to a guide rail, to size. Based on its dimensions, we make two parts from an aluminum strip, bent closer to one end twice at a right angle. We straighten the bends with a hand file.


We mark the large sides of the curved plates and cut off along the edges along the entire length of the strip. We remove burrs and round the edges.
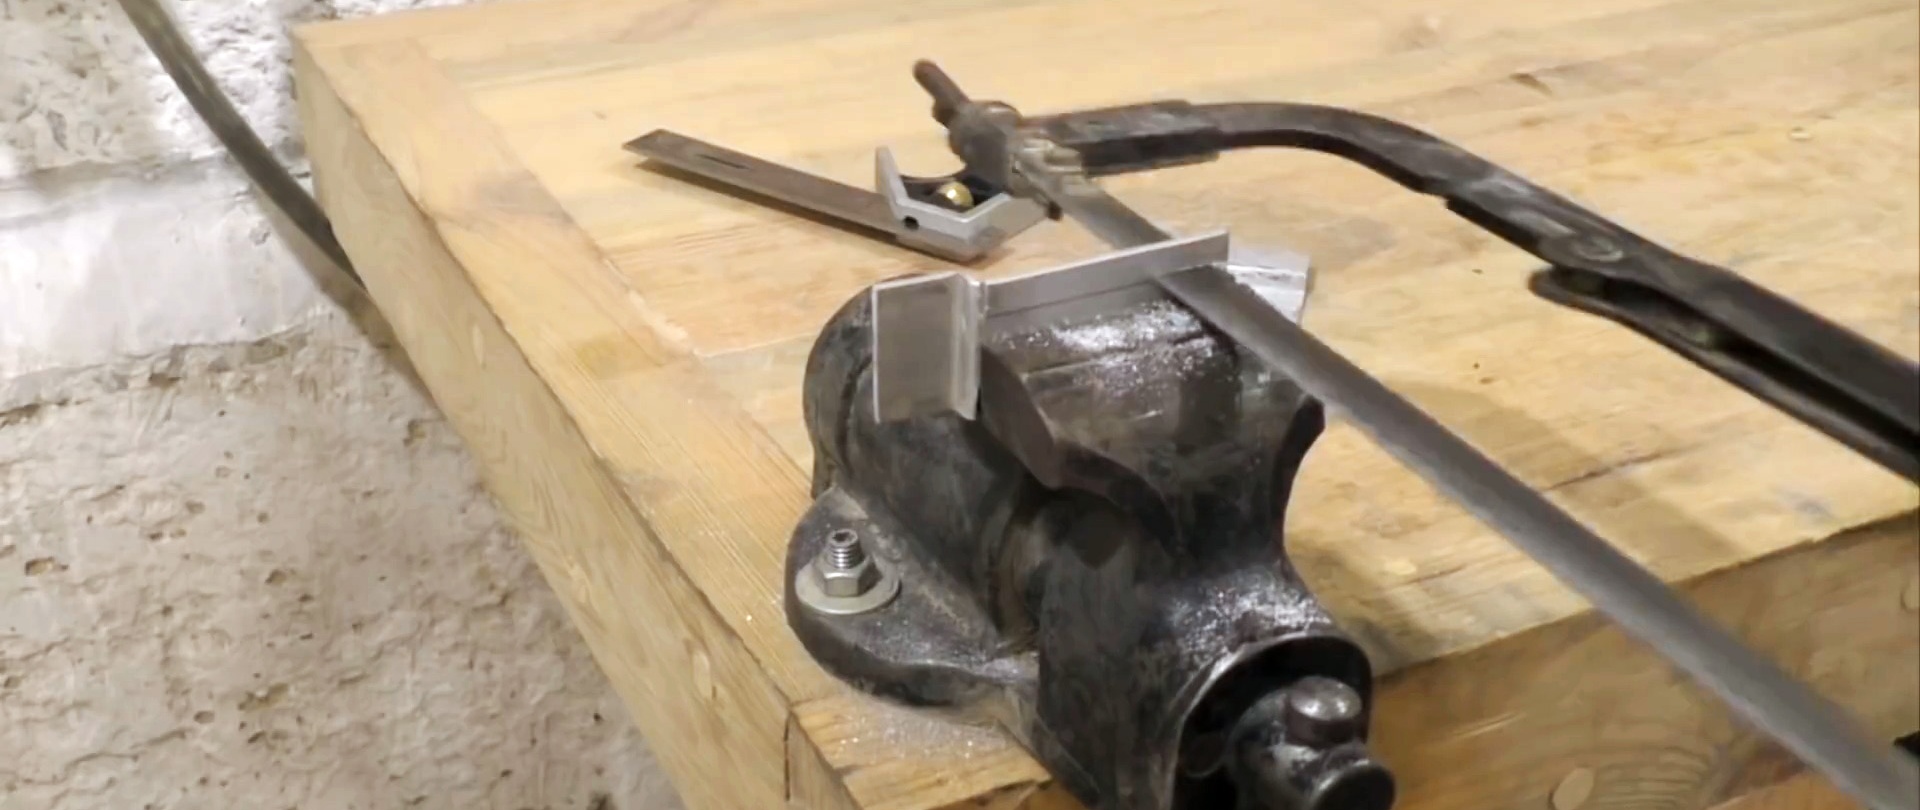
We make two holes at the base of the plates.

We round the corners of a piece of aluminum channel. We glue the curved aluminum strips to the aluminum channel, focusing on the fastening points on the hand-held circular saw.
We drill holes in the aluminum channel that coincide with the holes in the curved strips. We fasten them with bolts, nuts and washers, placing the bolt heads inside the channel.
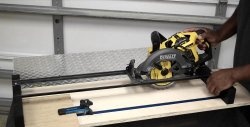
We insert the long ends of the curved strips into the fastening points on the circular and tighten the wing nuts. The channel should fit snugly against the side of the working base of the circular saw.

We insert the end of the channel on the circular into the groove of the guide bar and cut off a strip from the base so that its width is equal to the width of the working base of the saw. We are also adjusting other aspects of our device.

We clean it again with sandpaper, remove particles of material with a brush, and wipe the base of the device with a damp cloth.
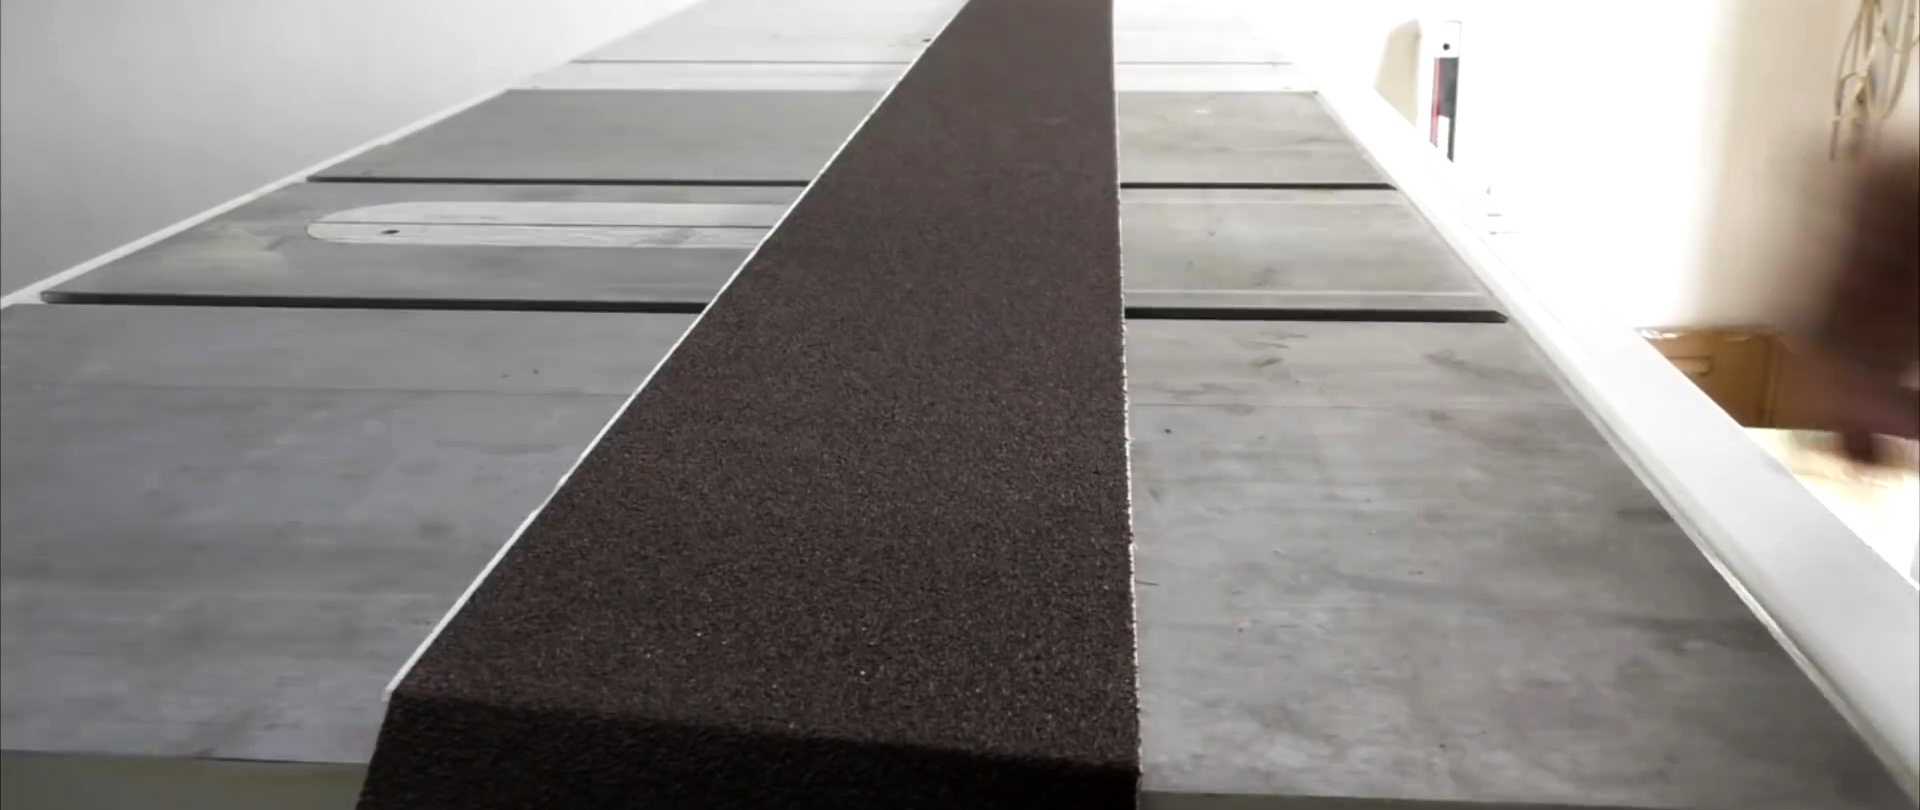
Place strips of double-sided tape along the length of the clean surface of the base. We measure a roll of coarse sandpaper along the width of the base and tear off the excess along the width.
Remove the protective film from the tape and glue a strip of sandpaper with the grain facing outward. Cut the ends to fit the length of the base.
We rub the contact surface of the guide bar and the laminate base of the paraffin candles and our device is completely ready for use.

A smooth cut is guaranteed 100%.