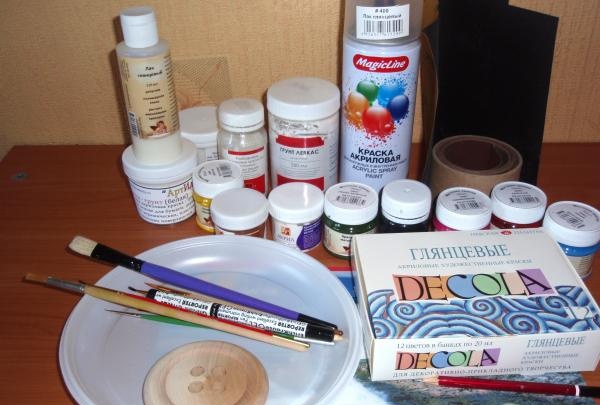
To create a bright decorative button you will need:
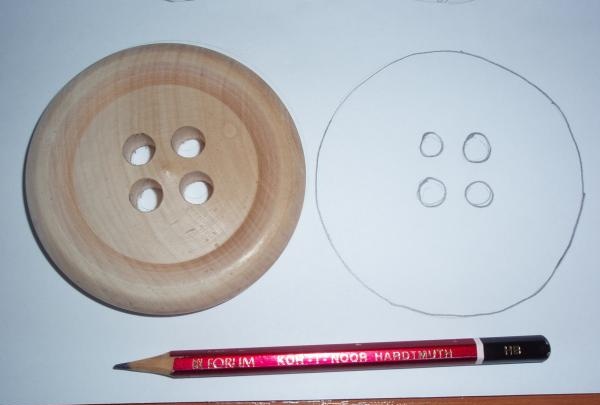
- wooden button blank,
- drawing paper, pencil, eraser, black gel pen,
- a saucer or other container for paint and primer,
- acrylic primer and paints,
- fine sandpaper,
- acrylic varnish in aerosol or regular construction varnish of good quality, suitable for interior work,
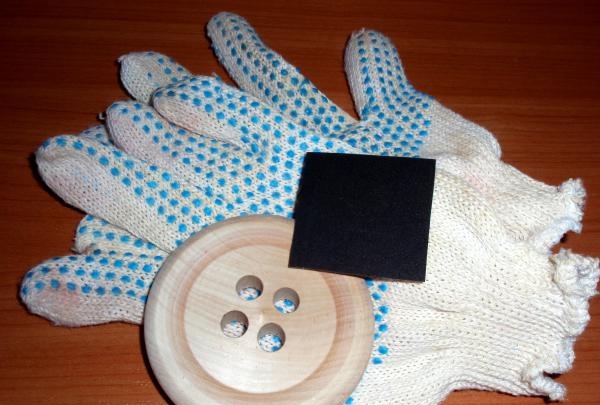
- You may also need cloth gloves and colored pencils, but they are not required.
Manufacturing stages.
1. Take the button and sand it with fine sandpaper.To prevent the button from slipping out of your hands and the sandpaper from damaging them, you can wear cloth gloves.
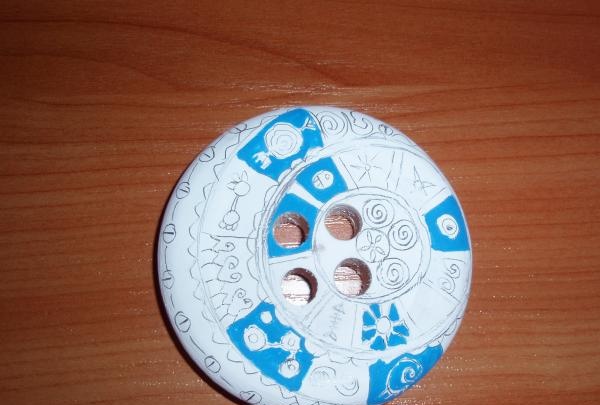
2. Then, on drawing paper, trace the outline of the button with a simple pencil. We do this twice, since we will paint both sides.
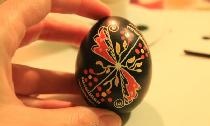
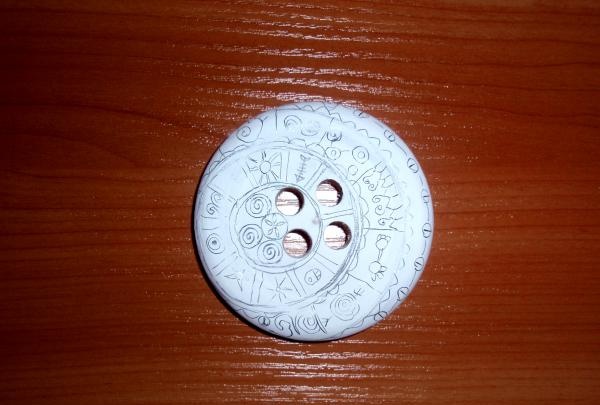
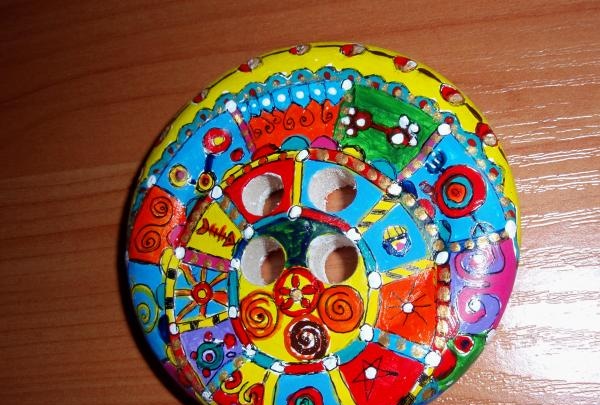
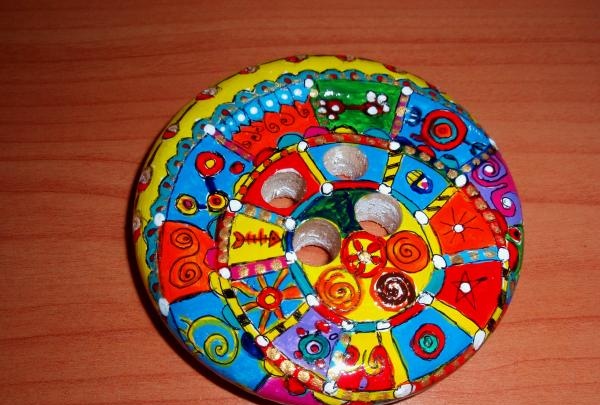
3. We make a sketch of the design, trying to fit it into the natural texture of the button.

You can use colored pencils to add color to the drawing or keep the color scheme in mind. The drawing can be anything, your imagination will suggest it. If you stick to the Indian theme, the colors should be bright and the design should contain many small elements.
4. We prime the surface of the button on both sides with acrylic primer at least 2 times, after each time we wait for it to dry and sand it with fine sandpaper.
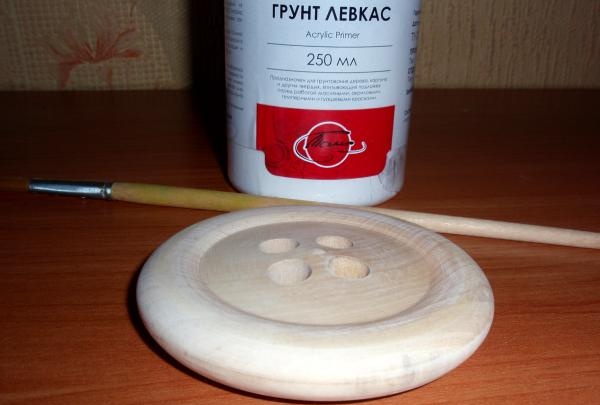

It is better to take a synthetic brush or a high-quality one made from natural bristles for primer.
5. Using a simple pencil, apply the prepared sketch to the button on both sides.
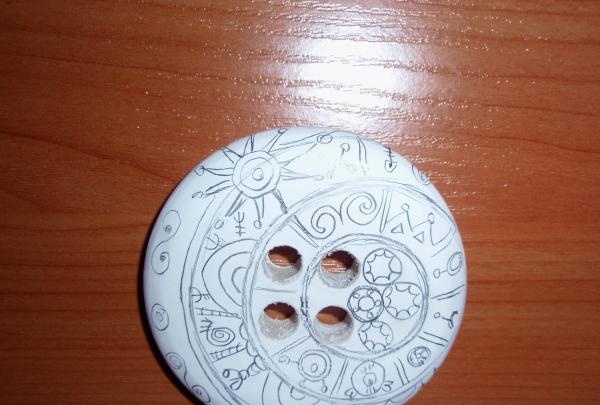
If you need to correct something, carefully erase the pencil drawing with an eraser.
6. We begin to paint large fragments of the drawing with acrylic paints, starting with the largest sectors, color by color.
It is better to use synthetic brushes for acrylic paints. When using natural bristle brushes, you should not allow the paint to dry on them, as it will be very difficult to remove the paint.
7. Let's start highlighting small details with paints.
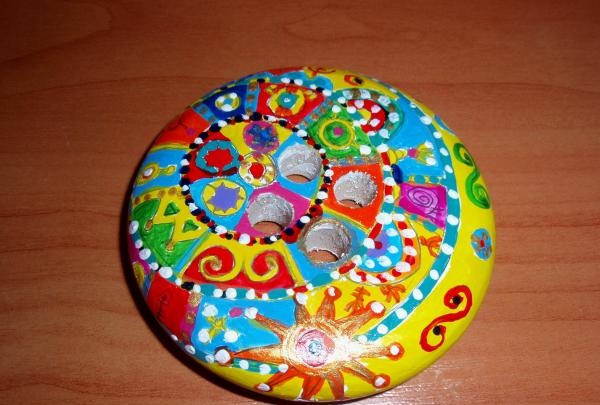
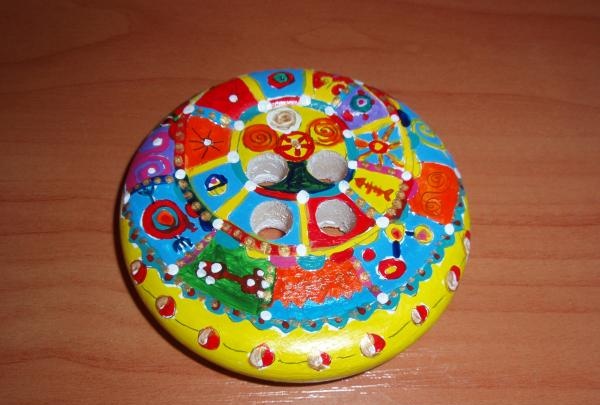
8. After complete drying, apply the smallest details with a black or dark blue gel pen.
For further manipulations, you need to wait until the handle dries so that you can pick up the button.
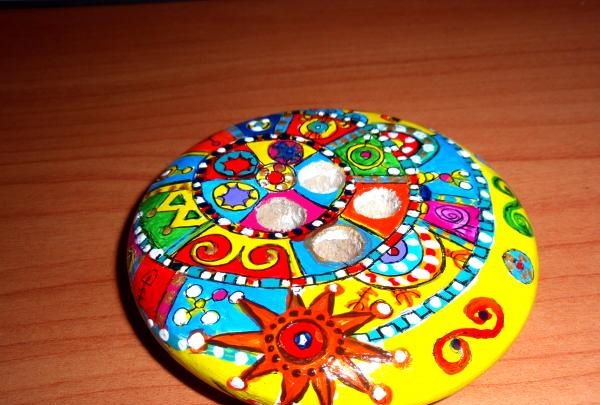
9. Apply aerosol varnish. You can use construction varnish or special acrylic varnish for artwork and decoupage.The varnish is applied in 2-3 layers; before applying the next layer, you must wait until the previous one has completely dried. If there is no varnish for artistic works in an aerosol, and ordinary construction varnish sticks after application, then it is necessary to apply acrylic varnish for artistic works in the form of a solution over it with a synthetic brush. It is necessary to keep in mind that the gel pen spreads when applying varnish to it with a brush. Therefore, the first layer of varnish must be aerosol. The button is ready.
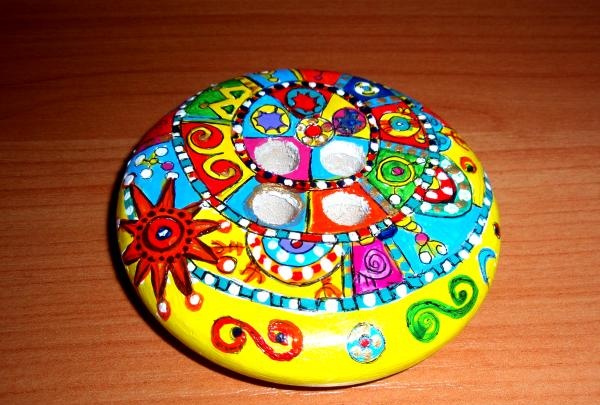
A decorative button in the Indian style will help decorate your own home or serve as a pleasant and unexpected gift for friends.