Do it yourself
Life hacks, master classes, useful tips, recipes.
home » Handicraft techniques » Sewing » Sewing clothes » Changing a zipper without spacers
Zippers often fail: either the “pawl” will fall out, or the lock will “corrode”, or the “teeth” will break... To replace the fastener, as a rule, it is necessary to space the parts of the clothing into which the zipper is sewn. But flogging the fastener is not enough, you need to insert a new one, adjust both sides of the stitching of the zipper and the fabric, and even on two pieces of clothing. The main problem is to sew a new seam so that the edges of the item do not stick out in different directions, and the zipper stays in the fabric, and not next to it. However, all of the above troubles can be easily avoided by working a little on the appearance of the old fastener.

Materials for work:
• Detachable zipper greater than the length of the item (or old zipper) – 1 pc.;
• Pliers, large needle, matches, sewing machine, scissors.

Stages of work:

First stage: disassemble the broken clasp.
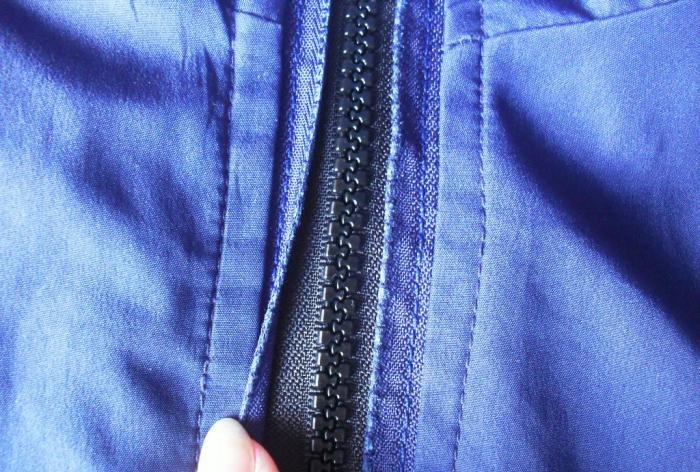
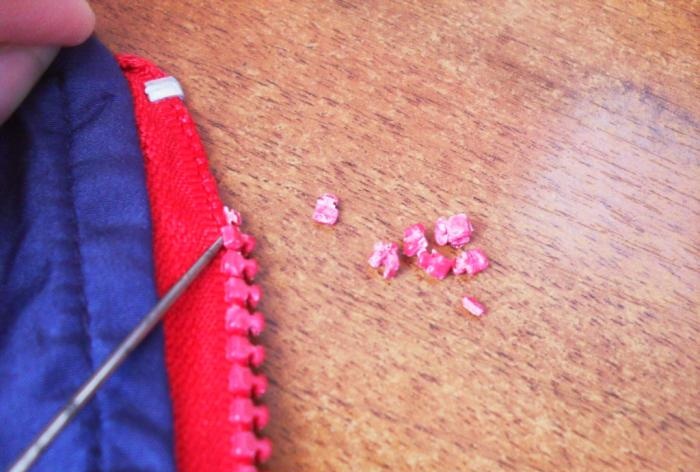
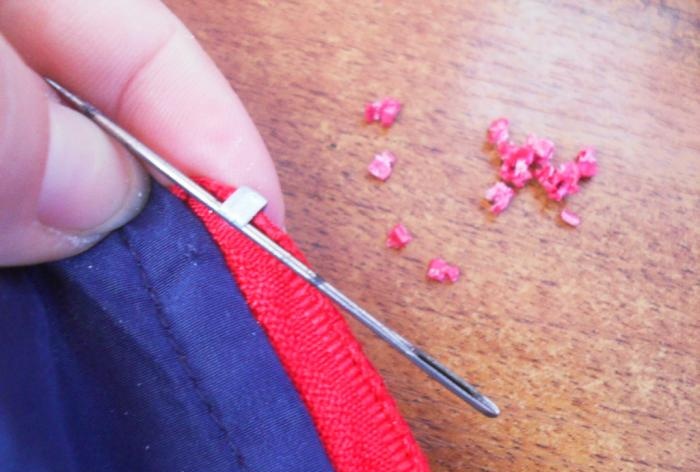
Using a large needle, pry up the “teeth” of the broken zipper and move them to the side. The “teeth” are easily removed from the fabric base of the fastener. If you can’t get rid of them with a needle, you can use pliers and pull off the “teeth.”When using pliers, it is necessary to grab only the upper part of the “tooth” with them, so as not to tear or damage the fabric base on which they are held.
Changing a zipper without spacers

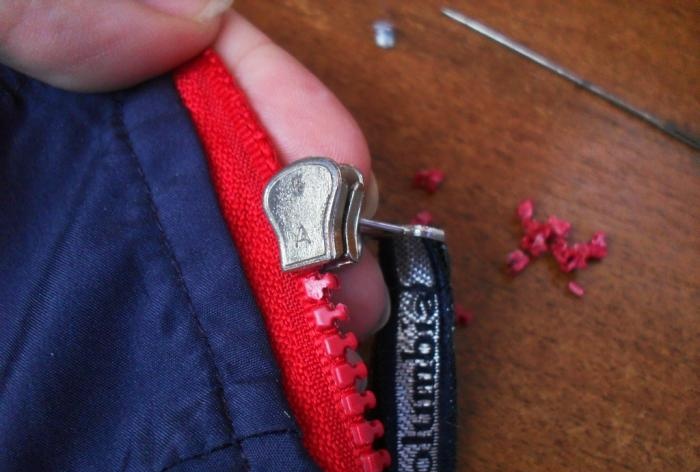
Carefully unbend the metal zipper fastener located at the top of the fastener. This fastener will still be needed for the new fastener.
Changing a zipper without spacers

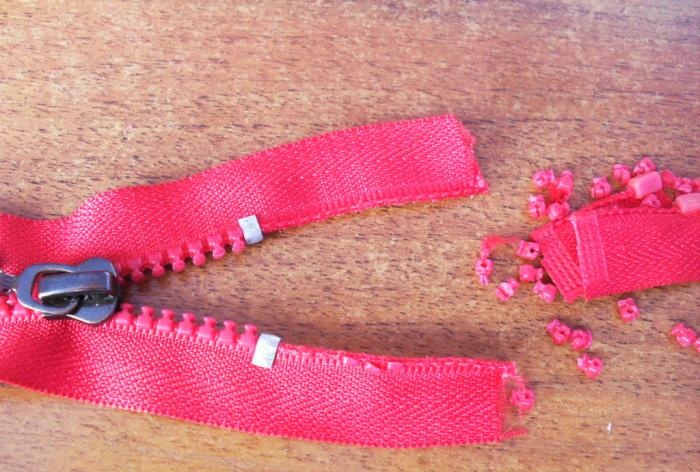
After dismantling the “teeth” and metal fastening, remove the “pawl” by sliding it up until it stops.
Changing a zipper without spacers

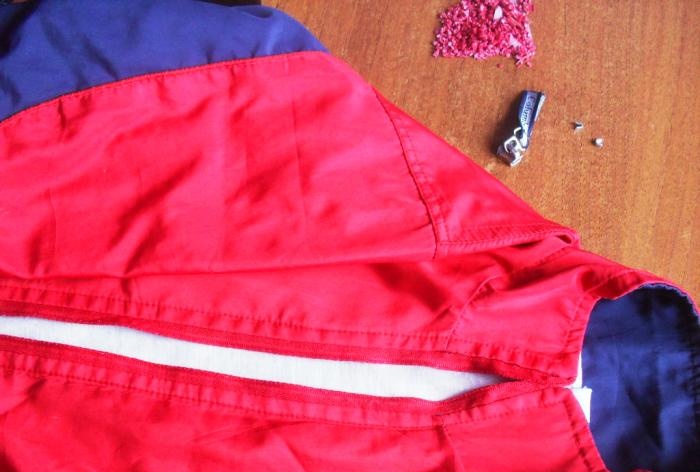
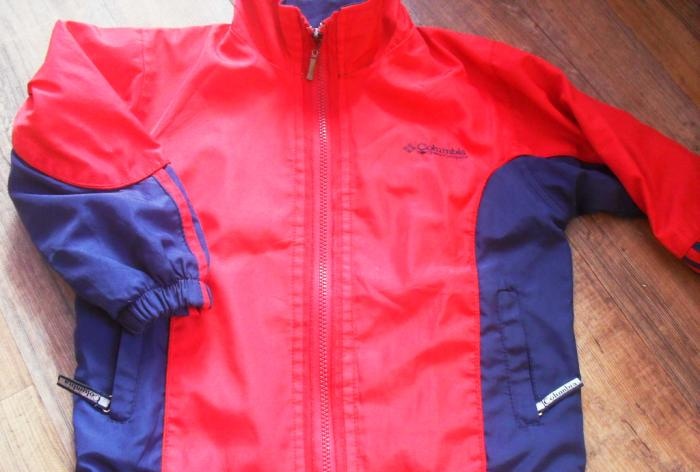
This is what the item looks like after disassembling the broken zipper: everything has been removed, but the fabric base remains in the details of the clothing.
Changing a zipper without spacers


Second stage: adjust the new fastener to length.
Place the zipper next to the item and measure the required length. We cut off the excess so that the length of the new fastener is a couple of centimeters longer than the length of the old one.
Changing a zipper without spacers

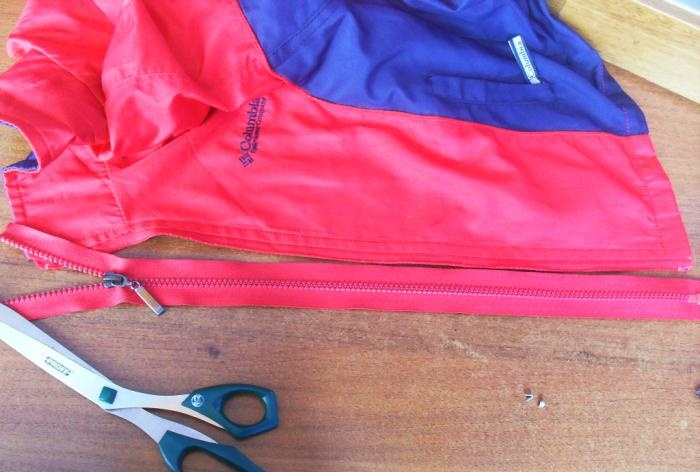
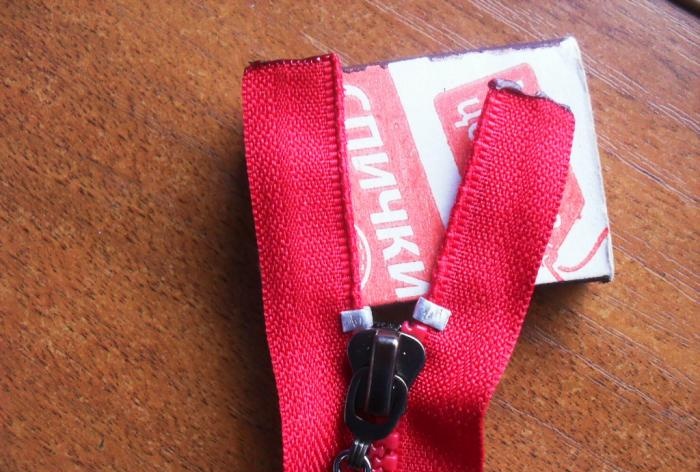
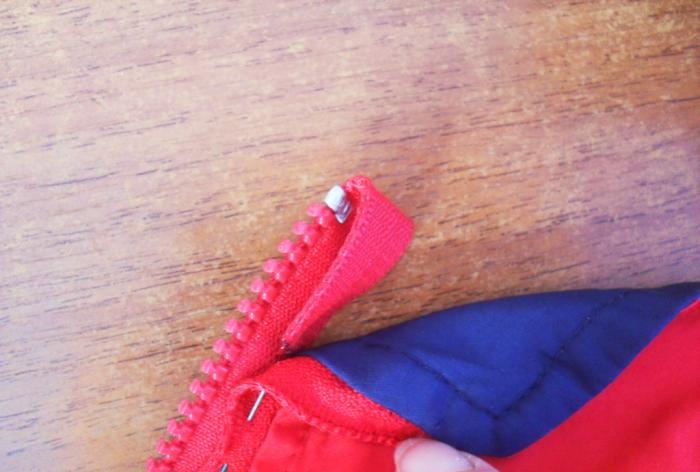
Since the fastener should not touch the body in the neck area, in the upper part of the zipper it is necessary to pull out the “teeth” on both sides of the zipper in the right place (at the end of the old zipper).
Changing a zipper without spacers

We insert the metal parts removed from the old zipper into the empty spaces and, using pliers, secure them to the new fastener.
Changing a zipper without spacers

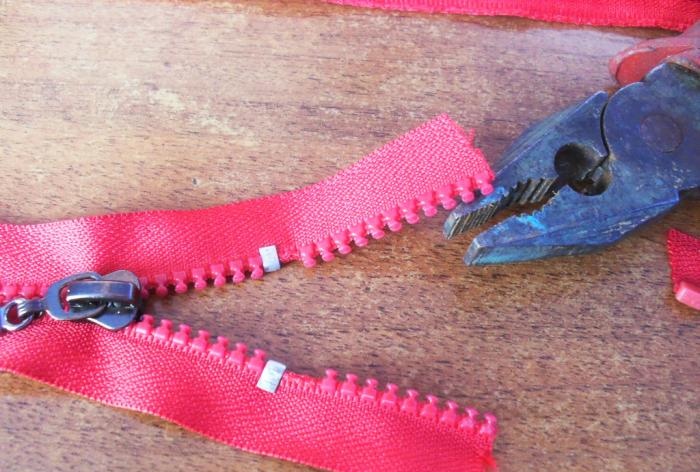
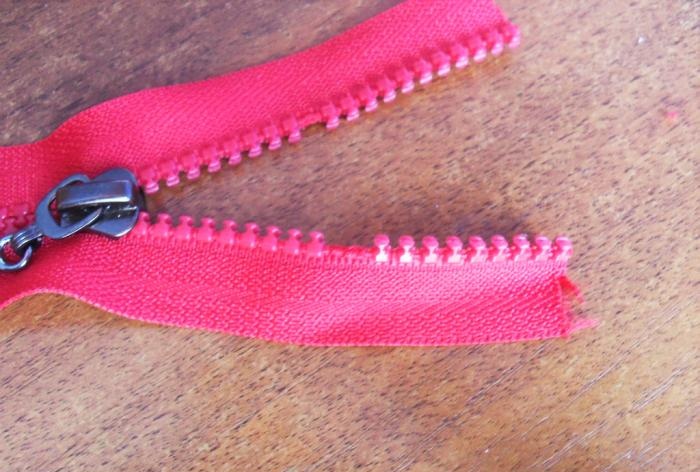
We carefully remove excess “teeth” with pliers or a large needle.
Changing a zipper without spacers

To prevent the fabric from fraying, burn the cut edges of the fastener with a match or candle flame.
Changing a zipper without spacers


Stage three: attach the new fastener to the item.
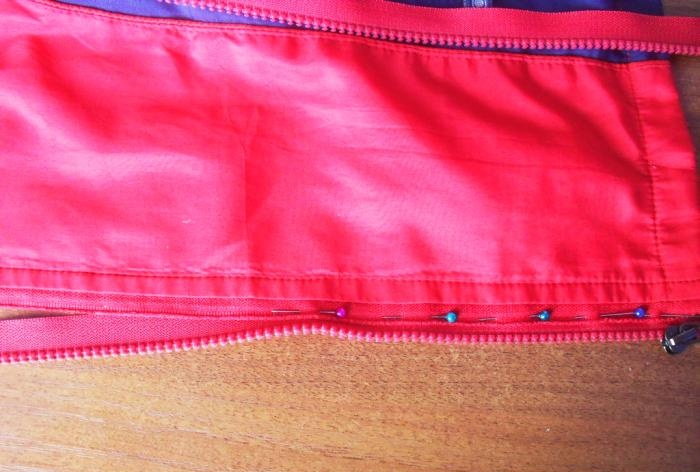
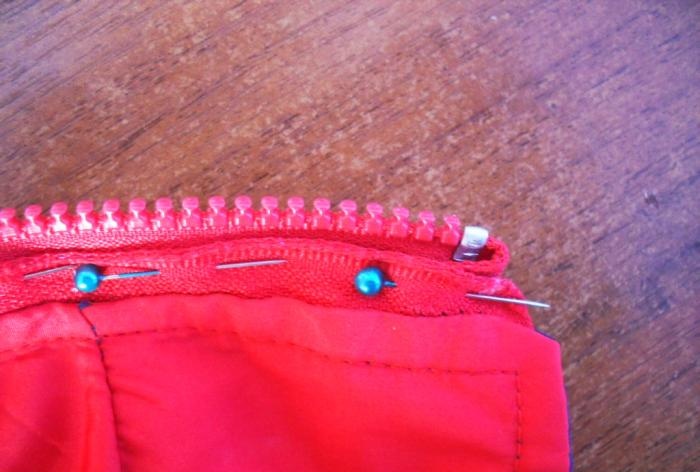
We attach a new zipper to the fabric base remaining from the previous fastener (after disconnecting it). To avoid shifts and bevels, you can fasten the fastener and fabric not with pins, but with a basting seam.
Changing a zipper without spacers

We bend the upper edge of the fastener inward (on one side of the bend there is a new zipper, and on the other - the fabric base of the old one). After stitching, the burnt edge of the zipper will not be visible.
Changing a zipper without spacers

We similarly attach the second part of the disconnected zipper to the second side of the item.
Changing a zipper without spacers

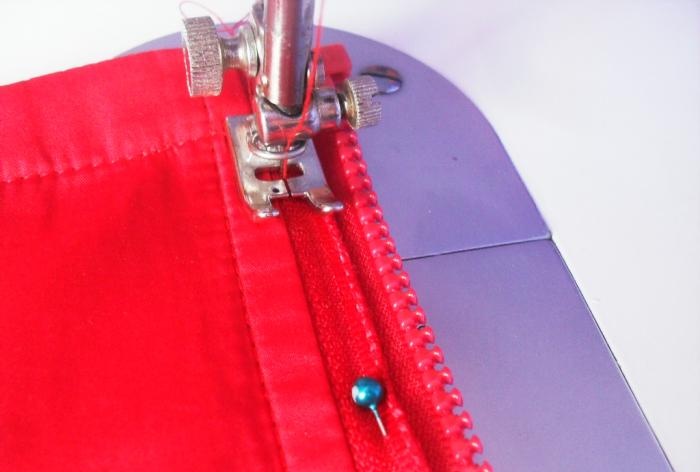
We sew the fastener at the points of attachment with the fabric base of the old zipper.
Changing a zipper without spacers

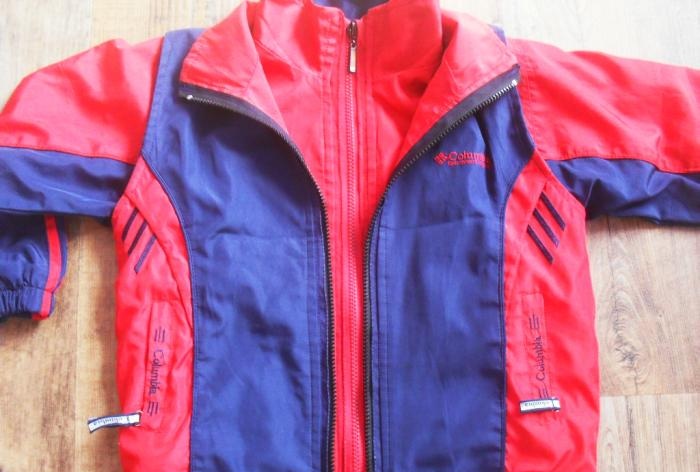
That's all! It took about ten minutes to replace the zipper.
Changing a zipper without spacers

Changing a zipper without spacers

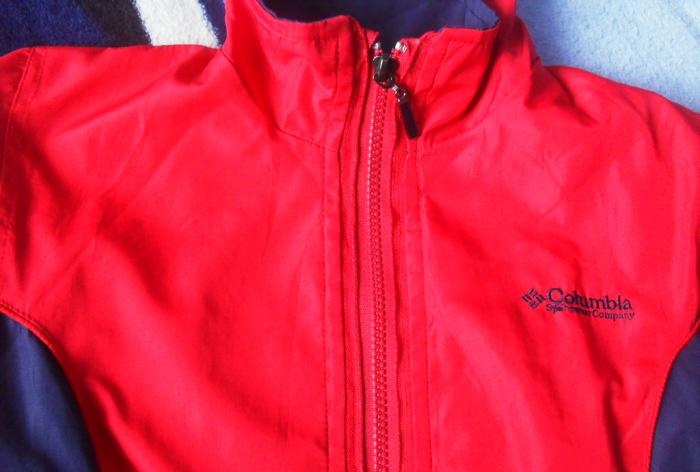
In twenty minutes the suit acquired two new zippers! The work looks neat, the manipulations performed are completely invisible. The most important thing is fast and simple!
Changing a zipper without spacers

Changing a zipper without spacers
come back
Comment
  • bowtiesmilelaughingblushsmileyrelaxed relaxedsmirk
    heart_eyeskissing_heartkissing_closed_eyesflushedrelievedsatisfiedgrin
    winkstuck_out_tongue_winking_eyestuck_out_tongue_closed_eyesgrinningkissingstuck_out_tonguesleeping
    worriedfrowninganguishedopen_mouthgrimacingconfusedhushed
    expressionlessunamusedsweat_smilesweatdisappointed_relievedwearypassive
    disappointedconfoundedfearfulcold_sweatperseverecrysob
    joyastonishedscreamtired_faceangryragetriumph
    sleepyyummasksunglassesdizzy_faceimpsmiling_imp
    neutral_faceno_mouthinnocent
5+two=
Comments (1)
  1. Guest Andrey
    #1 Guest Andrey Guests June 13, 2018 11:33
    1
    Normal solution. if the teeth are plastic.

How to make your own herb grinder

Album for a girl for the first year of life | Do it yourself

We make knurling for a lathe from disposable lighters with our own hands

How to make a compact tile for a gas canister

«Do it yourself - with your own hands» - a site of interesting homemade products made from scrap materials and items at home. Step-by-step master classes with photos and descriptions, technologies, life hacks - everything a real master or just a craftsman needs for needlework. Crafts of any complexity, a large selection of directions and ideas for creativity.

We recommend reading

Washing machine error codes