To make a candy bowl we need to take:
• colored office paper;
• sharp knife;
• knitting needle;
• PVA glue;
• cardboard.
Stages of work:
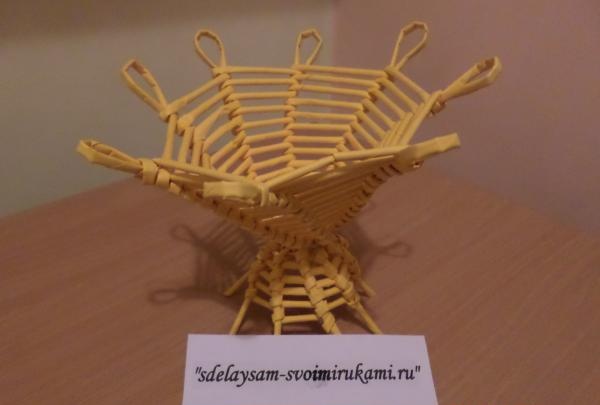
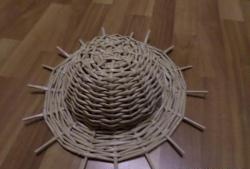
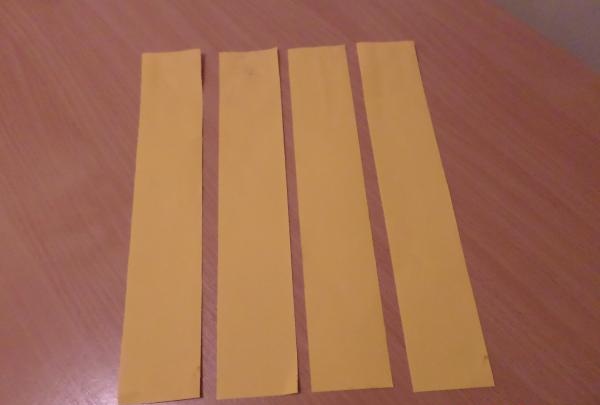
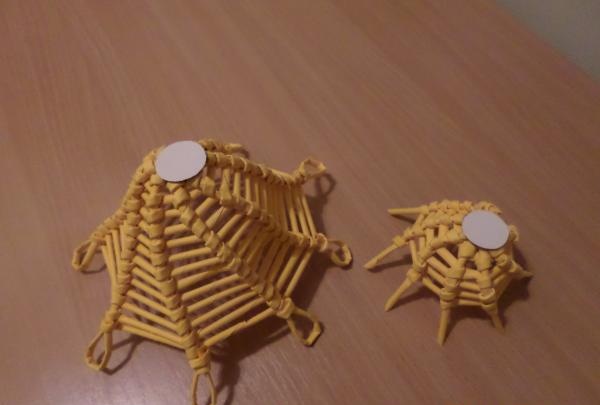
1. The vase consists of two parts: the stand and the base itself. Let's start with the stand. It is significantly smaller in size. To make them we need paper tubes, we will twist them from office paper. Take a sheet, fold it in half and cut it into strips with a sharp knife. We cut each of the resulting strips again. We get 4 colored stripes. Next we make the required number of stripes.
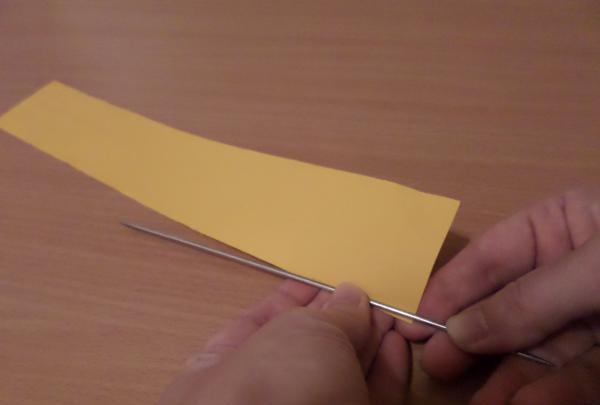
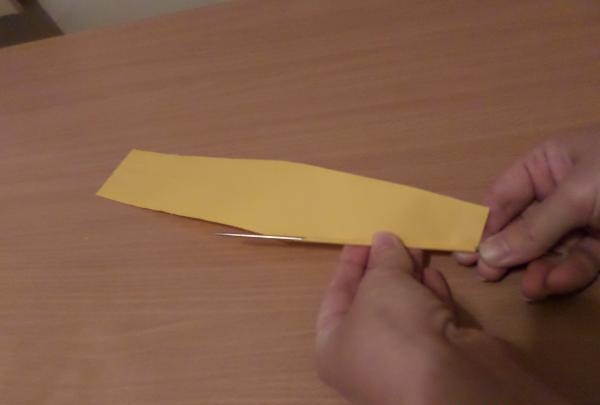
2. From each blank strip we twist a tube using a knitting needle. We carefully monitor the angle between the strip and the knitting needle.

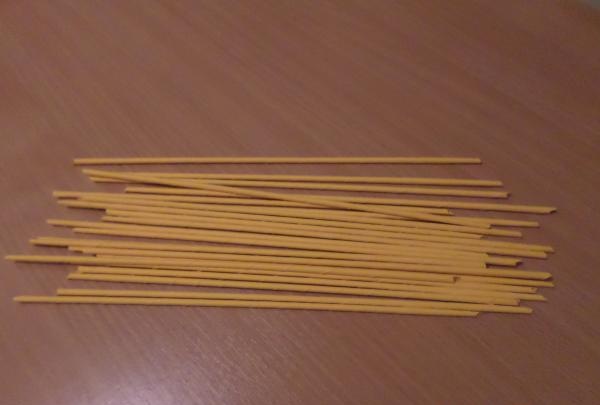
3. The tubes are ready.
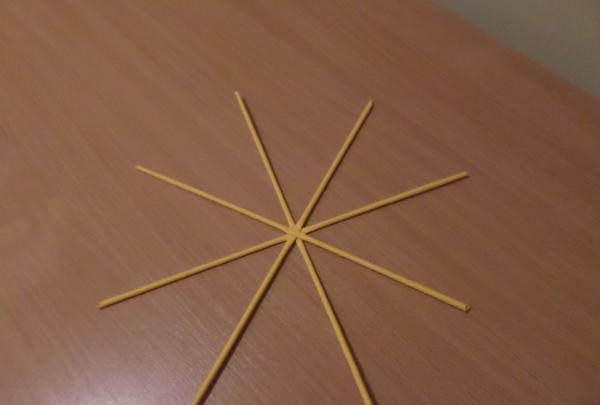
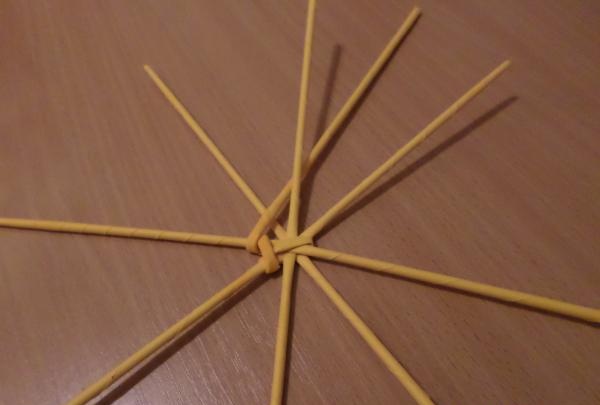
4. We begin to weave the stand. First, glue 4 tubes crosswise.
5. Next, glue the working tube to the middle. It needs to be slightly moistened to make it easier to twist.
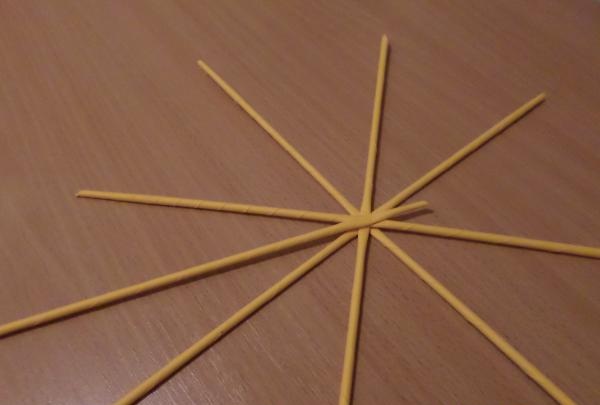
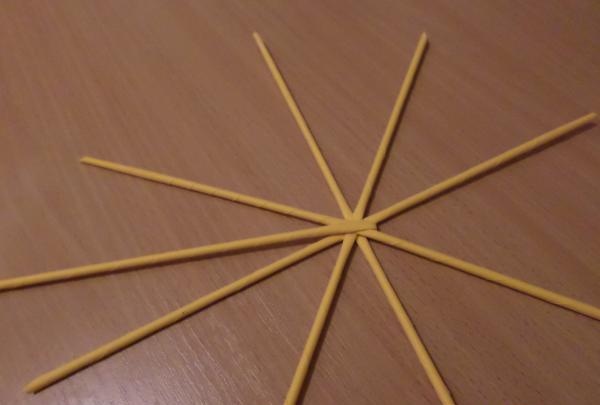
6. Make a loop and fix it with glue.
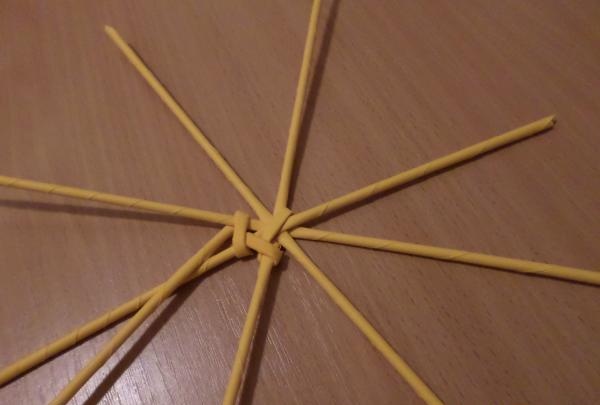
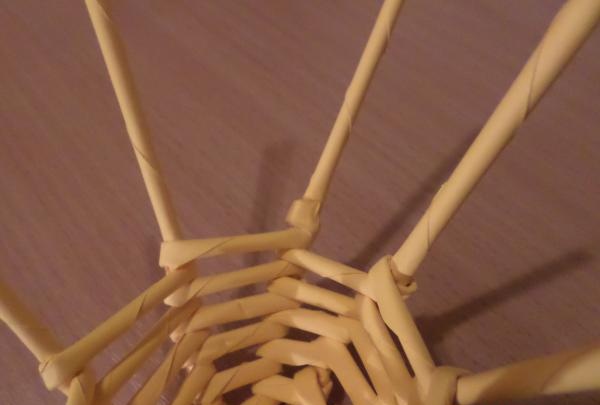
7. We begin to weave.We place the working tube under one of the tubes of the base of the stand.
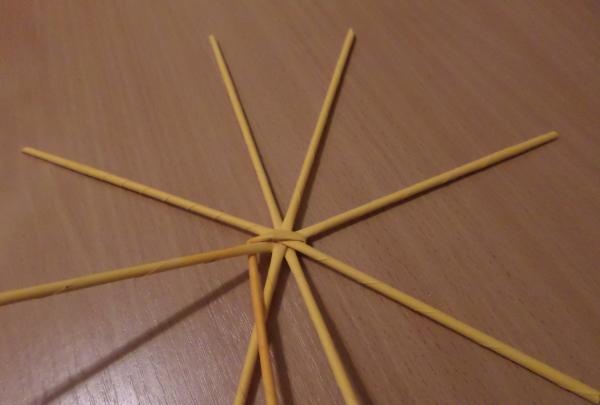
8. We braid it from above and put it on the second adjacent tube.

9. Now we place the working tube under the second tube of the base of the stand, braid it and bring it above the third.

10. So we continue to weave in a circle.

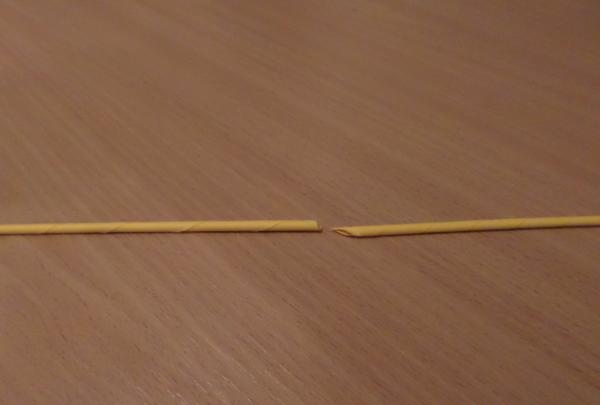
11. Don’t forget to extend the working tube when it runs out. To do this, insert the thin end, coated with glue, into the thick one.
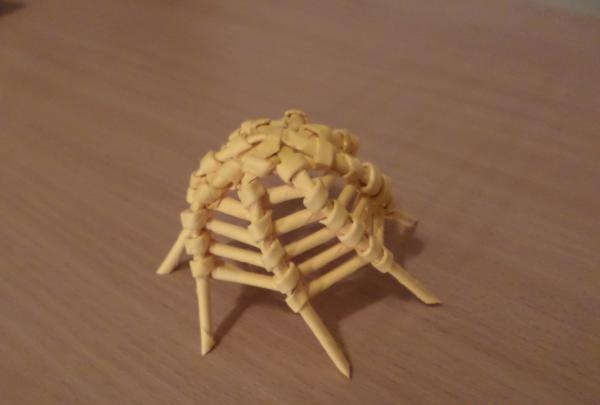
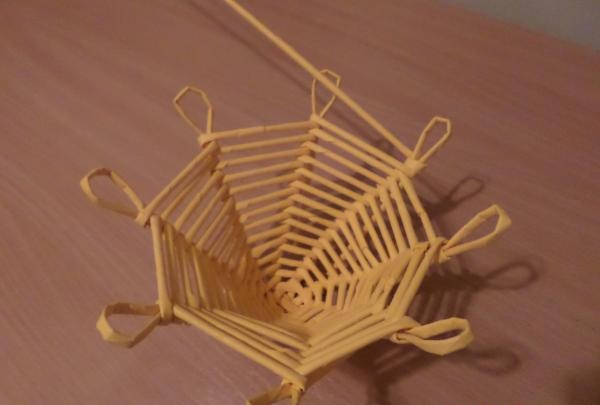
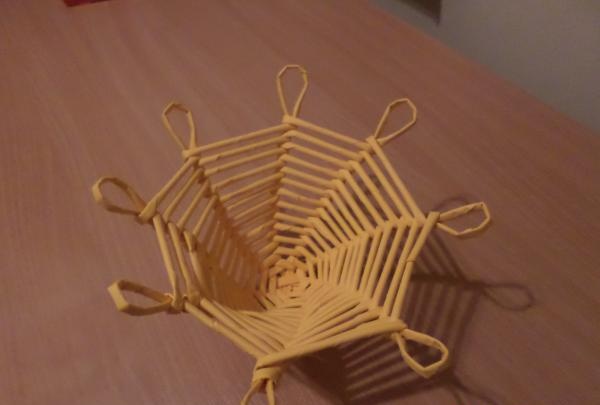
12. We weave almost to the top, at the same time forming a pyramid. In the process of weaving the tubes, we raise them all the time. If we do not do this, then instead of a pyramid we will get a flat part.
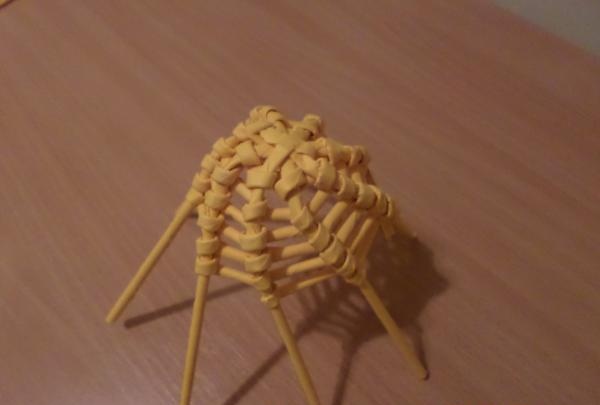
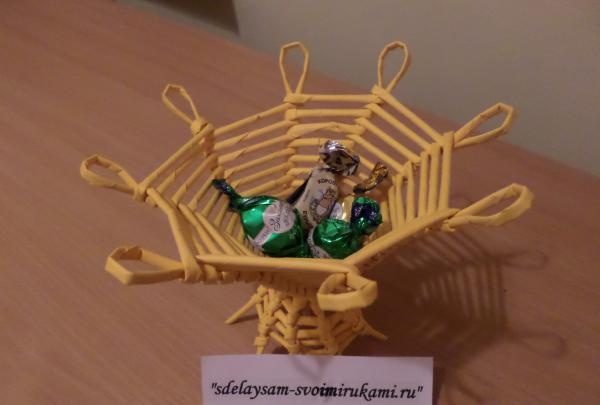
13. Before reaching 3 centimeters, we stop. Secure the end of the tube with glue.
14. Cut off the protruding ends of the tubes of the base of the stand diagonally with scissors. The stand must be stable.
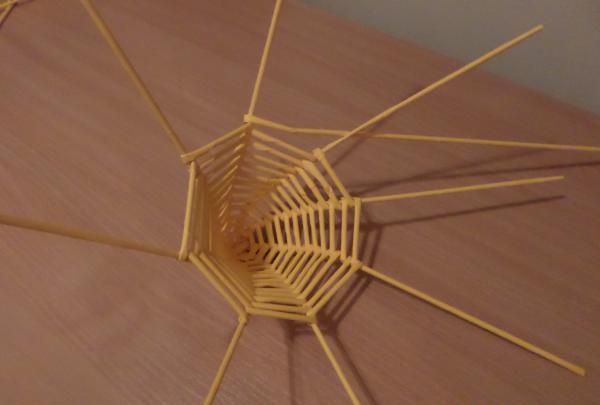
15. Now we begin to weave the base of the candy bowl. It should be larger in size. To do this, we splice two tubes together to make one large one. Prepare 4 long tubes. We glue these tubes crosswise, as we did for the stand. Next, we repeat all the steps, starting from the fifth point and up to the twelfth.
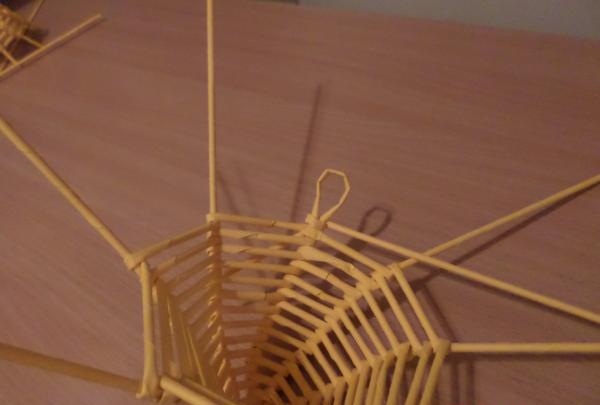
16. The ends of the tubes of the base of the vase must be carefully tucked inside, forming a small loop, and secured with glue.
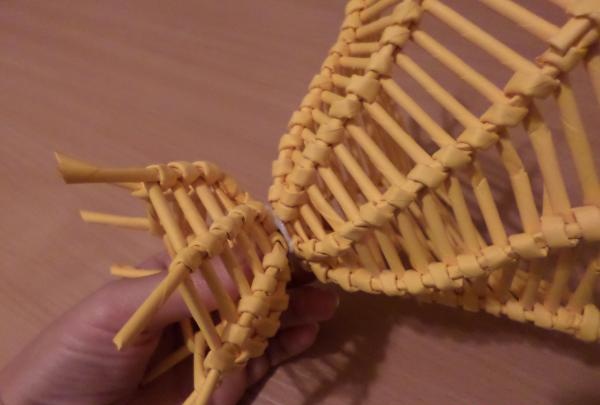
17. To make the vase stable, glue cardboard circles to the bottom of both parts.
18. Glue the stand and base together.
19. The candy bowl is ready. We will not use any paints or varnishes, since direct contact with food is intended. That is why we made tubes from colored paper. We used sheets of the same color. You can try combining two or more shades. The main thing is not to be afraid to experiment.