Do it yourself
Life hacks, master classes, useful tips, recipes.
home » Computer homemade products » Modding » Name of the track being played on the body
Hello dear readers. Surely you have repeatedly seen all kinds of LCD panels on the front of the system unit, or maybe you have already managed to get hold of your own. But real modders prefer a slightly more complex and interesting process - creating an LCD screen with their own hands. Today we will tell you how, with the help of direct hands, knowledge of the basics of circuit design, patience and a little imagination, you can create an external display that displays information about the musical composition being played by Winamp.


To bring the project to life we ​​will need:

The display itself. This article used a copy from Ericsson 2618 on the PCF8548 controller; LPT connector; 6 1N4148 diodes; Non-polar capacitor 1 µF; Program ;Driver to access ports;Script for working with the display will be described below.

Iron

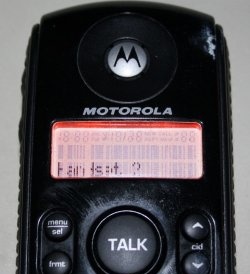
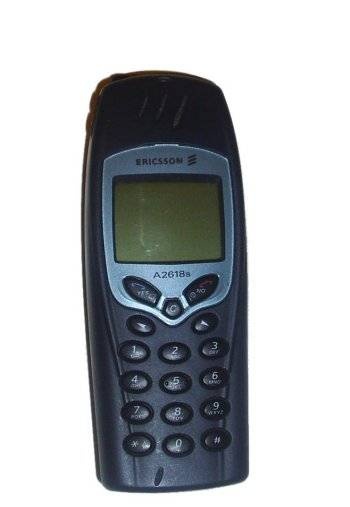
We go to the closet and look for a self-defense item there with the inscription Ericsson A2618, which has been lying around there since the time of the 45th. (it is advisable that it turns on in order to check the display for functionality).


Let's take it apart carefully. From the internals, we only need the board itself, the display module and the substrate (backlit keyboard).


Next, using metal scissors, we barbarically “cut off” everything unnecessary from the board, plastic module and substrate.


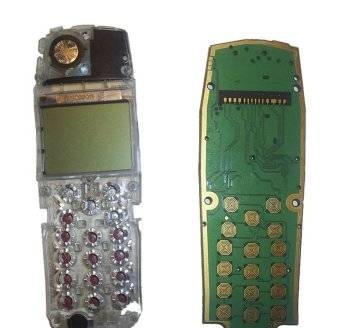
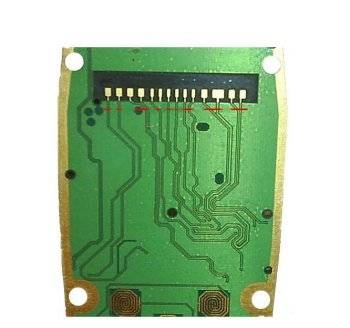
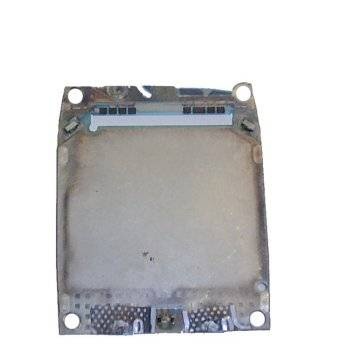
It is advisable to cut all the paths that the red line crosses and ring each contact on the housing. Only the sixth contact must call, the rest should not. We emphasize that only cut the paths. These are thin strips of foil.

We disassemble the connector of the LPT cable going to the printer and solder it as follows:

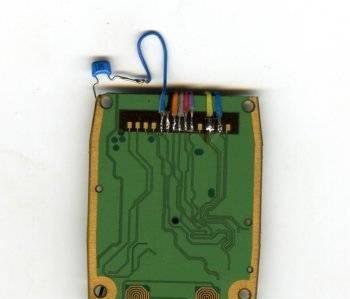
Where (from left to right):
1. n/a;
2. n/a;
3. n/a;
4. n/a;
5. Blue with a white stripe - Vlcd;
6. Black - Gnd;
7. Orange - Sclk;
8. Gray - Sda;
9. Red - U+;
10. Purple - Reset;
11. n/a;
12. Yellow - U+ (backlight);
13. Blue - Gnd (backlight);
14. n/a.

Solder the second end of the cable to the LPT connector according to the diagram

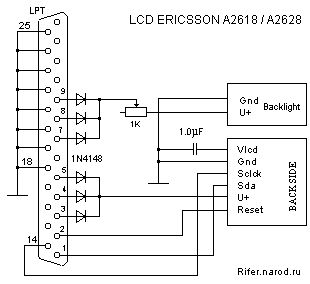
If you use the standard backlight, then a 1 kOhm resistor can be excluded from this circuit, because A resistor is already installed on the standard backlight. Even two.

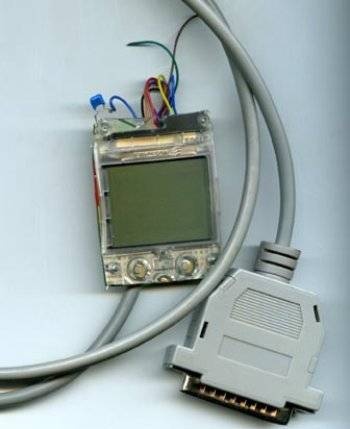
We install the display on the board.

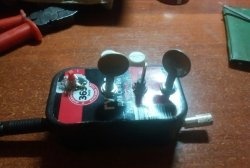
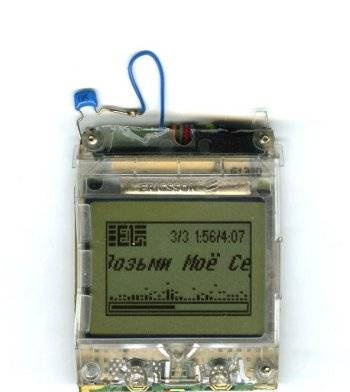
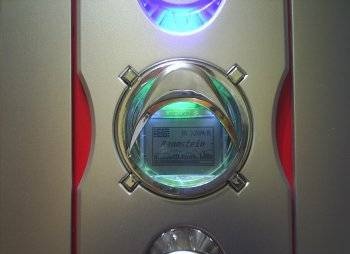
What happened after the work was done can be seen below:

Software

Download and install the LCDHype program. Open and configure as in the picture.

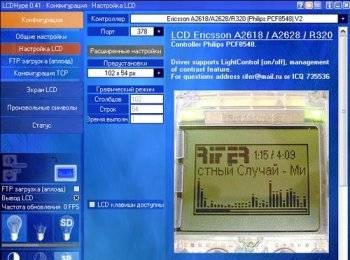
And copy the text from the Script.txt file into the field.

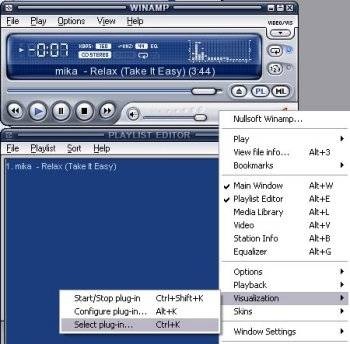
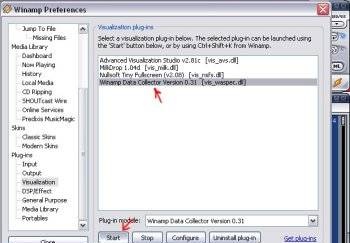
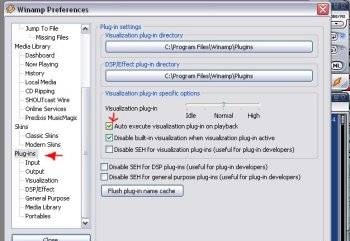
It's time to configure Winamp.

From the folder C:\Program Files\LCDHype\stuff\winamp, copy the files to C:\Program Files\Winamp\Plugins, launch the player and follow the illustrated instructions.

We close the settings, do not forget to connect our device to the computer and in LCDHype click “Start”. If the circuit is assembled correctly, the following should appear on the display:

We integrate the device into the case

Only your imagination can help you here.

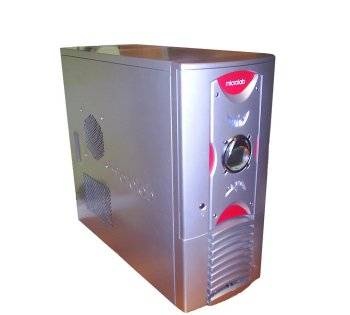
I installed the display in a case from Microlab. I simply installed the module with the display behind the transparent door window. I won’t describe what and how, I think this process will be individual for everyone.

Interested in the article?! Then check out the links:

A site for determining the screen pins of a large number of phones. That is, you can make your device not only from Ericsson, but also from other models!


come back
Comment
  • bowtiesmilelaughingblushsmileyrelaxed relaxedsmirk
    heart_eyeskissing_heartkissing_closed_eyesflushedrelievedsatisfiedgrin
    winkstuck_out_tongue_winking_eyestuck_out_tongue_closed_eyesgrinningkissingstuck_out_tonguesleeping
    worriedfrowninganguishedopen_mouthgrimacingconfusedhushed
    expressionlessunamusedsweat_smilesweatdisappointed_relievedwearypassive
    disappointedconfoundedfearfulcold_sweatperseverecrysob
    joyastonishedscreamtired_faceangryragetriumph
    sleepyyummasksunglassesdizzy_faceimpsmiling_imp
    neutral_faceno_mouthinnocent
5+two=
Comments (4)
  1. Veent
    #1 Veent Guests 24 June 2011 22:00
    0
    And the LPT port is probably next to the charging?
  2. NOTFRONT
    #2 NOTFRONT Guests June 25, 2011 21:37
    1
    What the hell is this?! LPT port on your computer!
  3. NOTFRONT
    #3 NOTFRONT Guests 26 June 2011 13:19
    0
    Ah, I got it! well you're funny biggrin
  4. Nick
    #4 Nick Guests 26 June 2013 19:59
    0
    What about settings for other players?

Monkey from children's tights | Do it yourself

DIY gift box | Do it yourself

How to make a miniature compressor from a syringe and a machine gearbox

Driveway to the house made of paving slabs

«Do it yourself - with your own hands» - a site of interesting homemade products made from scrap materials and items at home. Step-by-step master classes with photos and descriptions, technologies, life hacks - everything a real master or just a craftsman needs for needlework. Crafts of any complexity, a large selection of directions and ideas for creativity.

We recommend reading

Washing machine error codes