Sharpening dull knives is not easy without the skills, mainly due to the difficulty of keeping the sharpening angle constant along the entire length of the blade. But if you make a simple sharpener from available materials, then the knives in the house will always be sharp. To make it, it is enough to be able to hold a hammer and a hacksaw in your hands.

Will need
Materials:- rectangular and square timber made of hard wood;
- wooden dowels;
- metal rod;
- screws and nuts;
- brass clamping screws;
- steel strip;
- wood glue and universal;
- sandpaper of different grits, etc.
The process of making a knife sharpener with your own hands
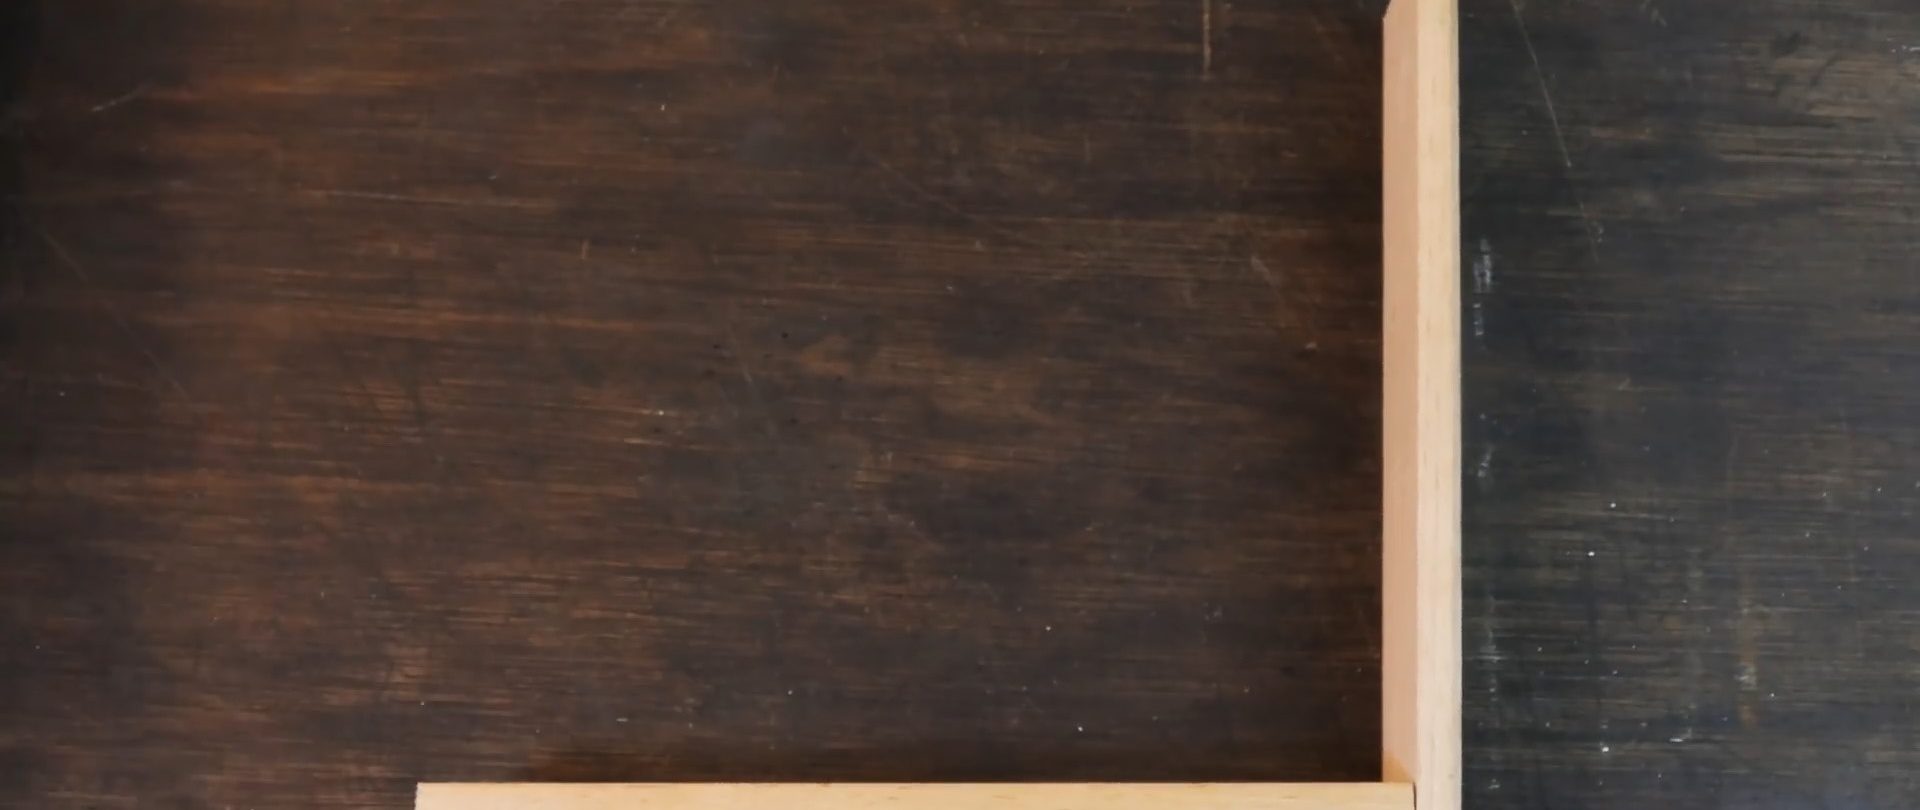
We cut a piece 20 cm long from a rectangular beam of hard wood. Using a hacksaw and a chisel, we divide it into two halves. Square timber is also preferably made of hardwood.
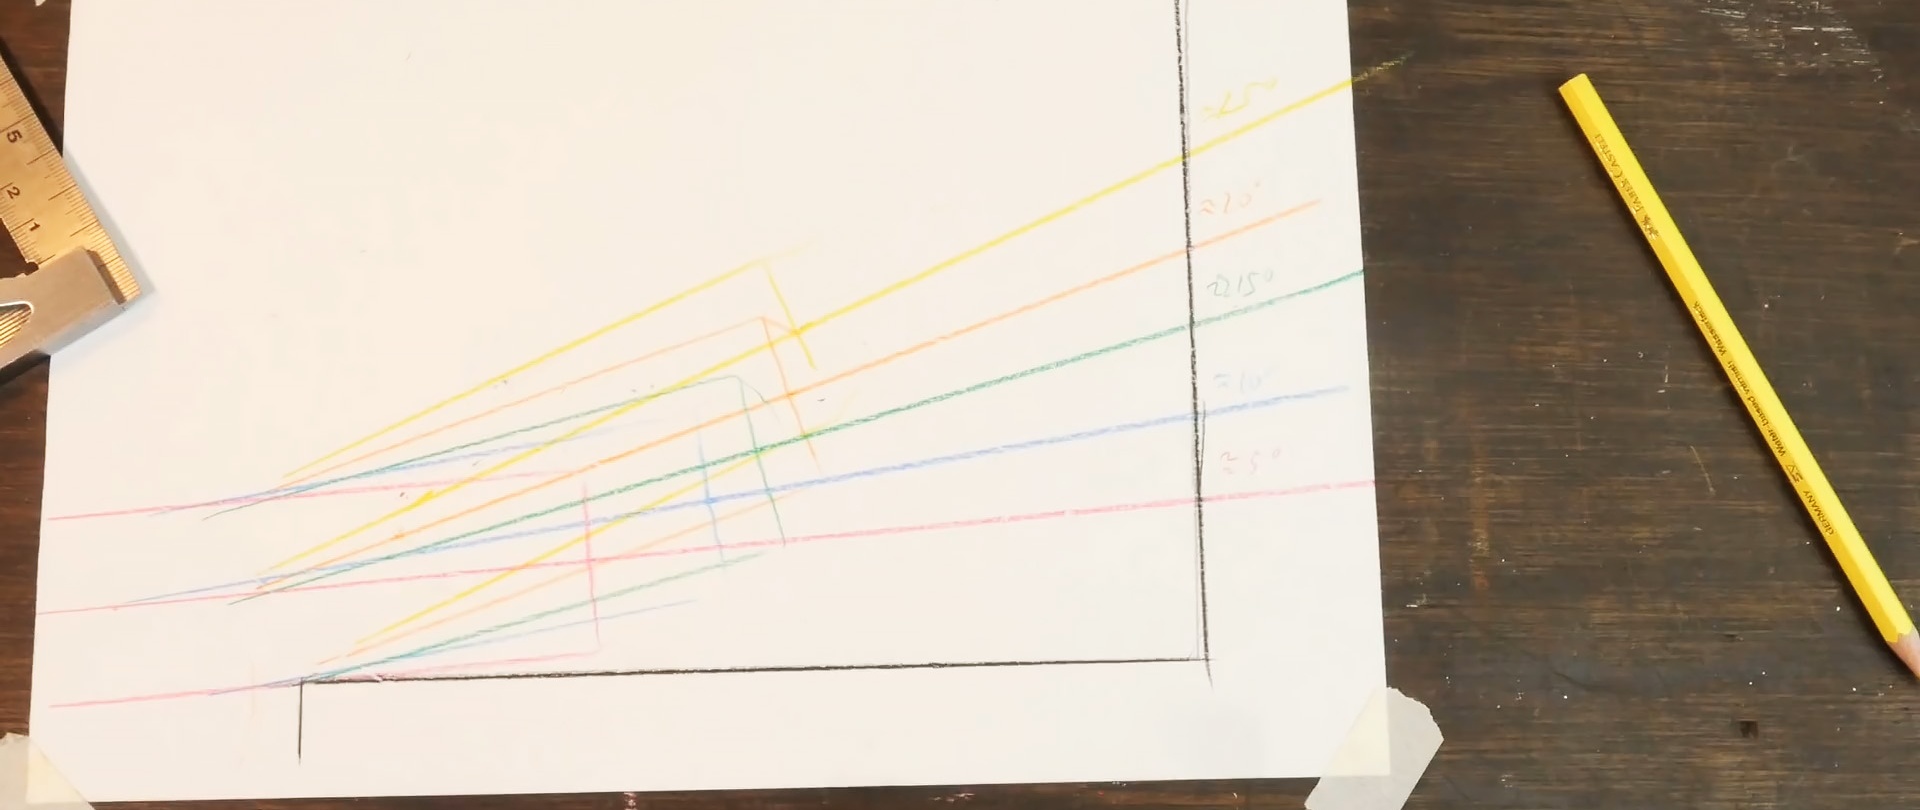
We place one half of the beam on a sheet of paper strictly along its lower edge.Then we apply the second half vertically to it so that its end also coincides with the bottom edge of the sheet. We draw a line 20 cm long along the top of the horizontal half and a vertical line along the inside of the second half. We get a right angle. At the end of the horizontal side of the corner, we place a square beam in the center at an angle of 5 degrees and outline the outline, then, alternately turning by 10, 15, 20 and 25 degrees, we also outline its outline.
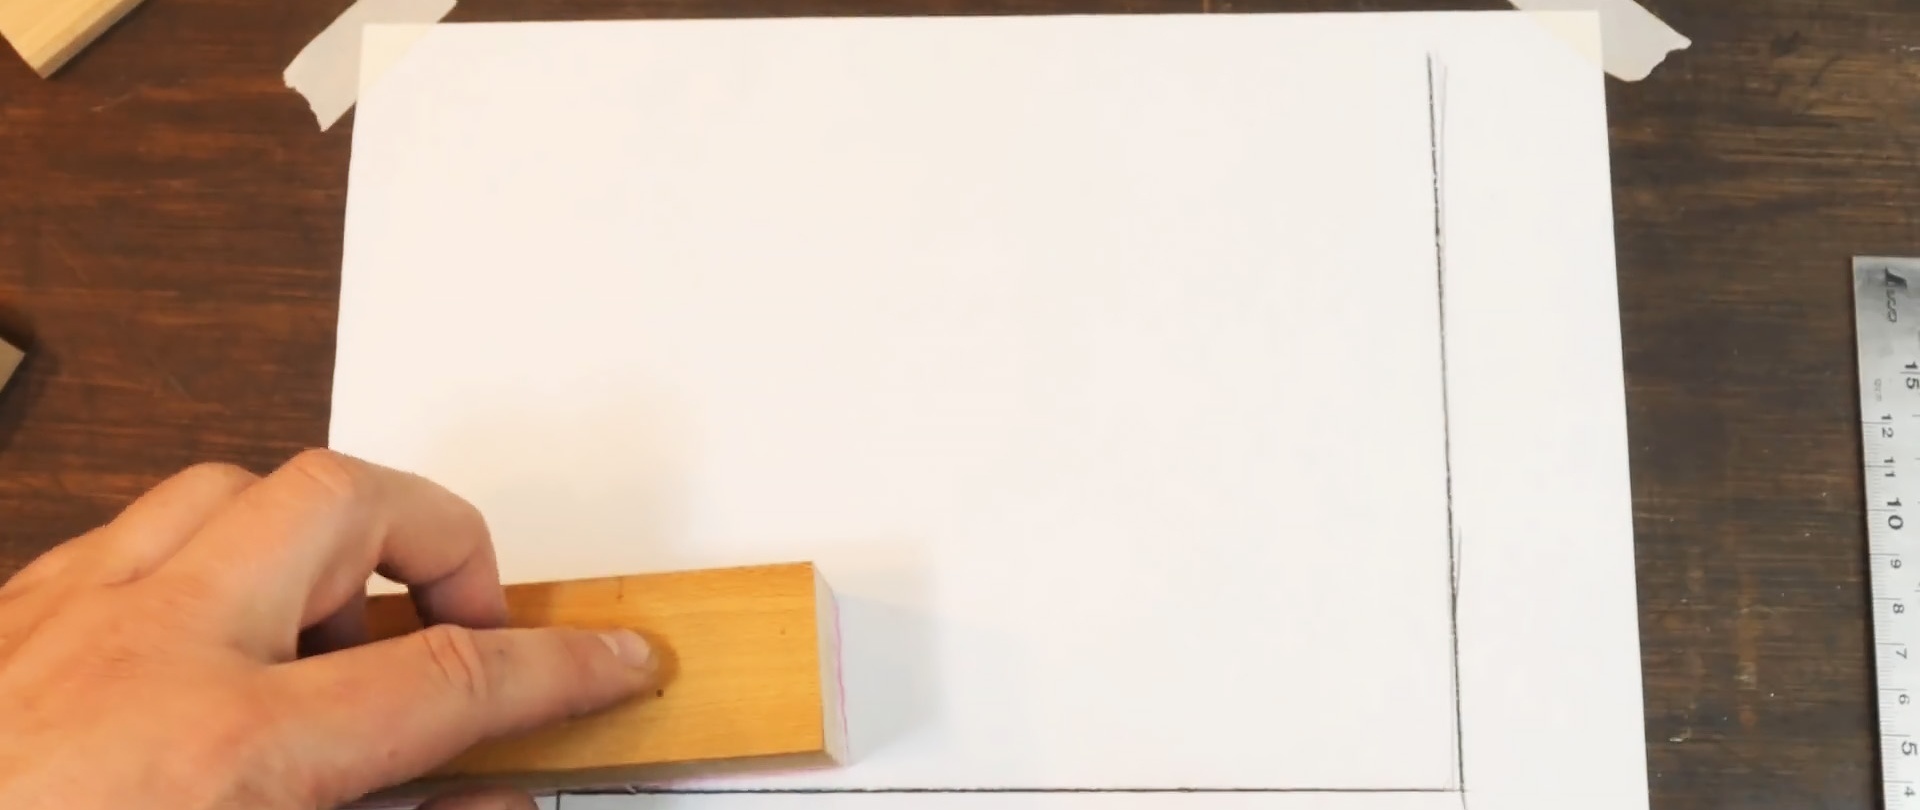
For each beam position, draw a center line until it intersects with the vertical corner. The intersection points from bottom to top correspond to 5, 10, 15, 20 and 25 degrees.
We lay one of the halves of the rectangular beam along the vertical side of the corner so that its lower edge coincides with the bottom of the sheet and transfer the marks corresponding to the five corners to it. We draw 5 horizontal lines along the marks and a vertical line intersecting them in the center.
At the intersection points of the lines, drill 5 holes with a countersink.
High-quality drills on AliExpress at a discount - http://alii.pub/5zwmxz
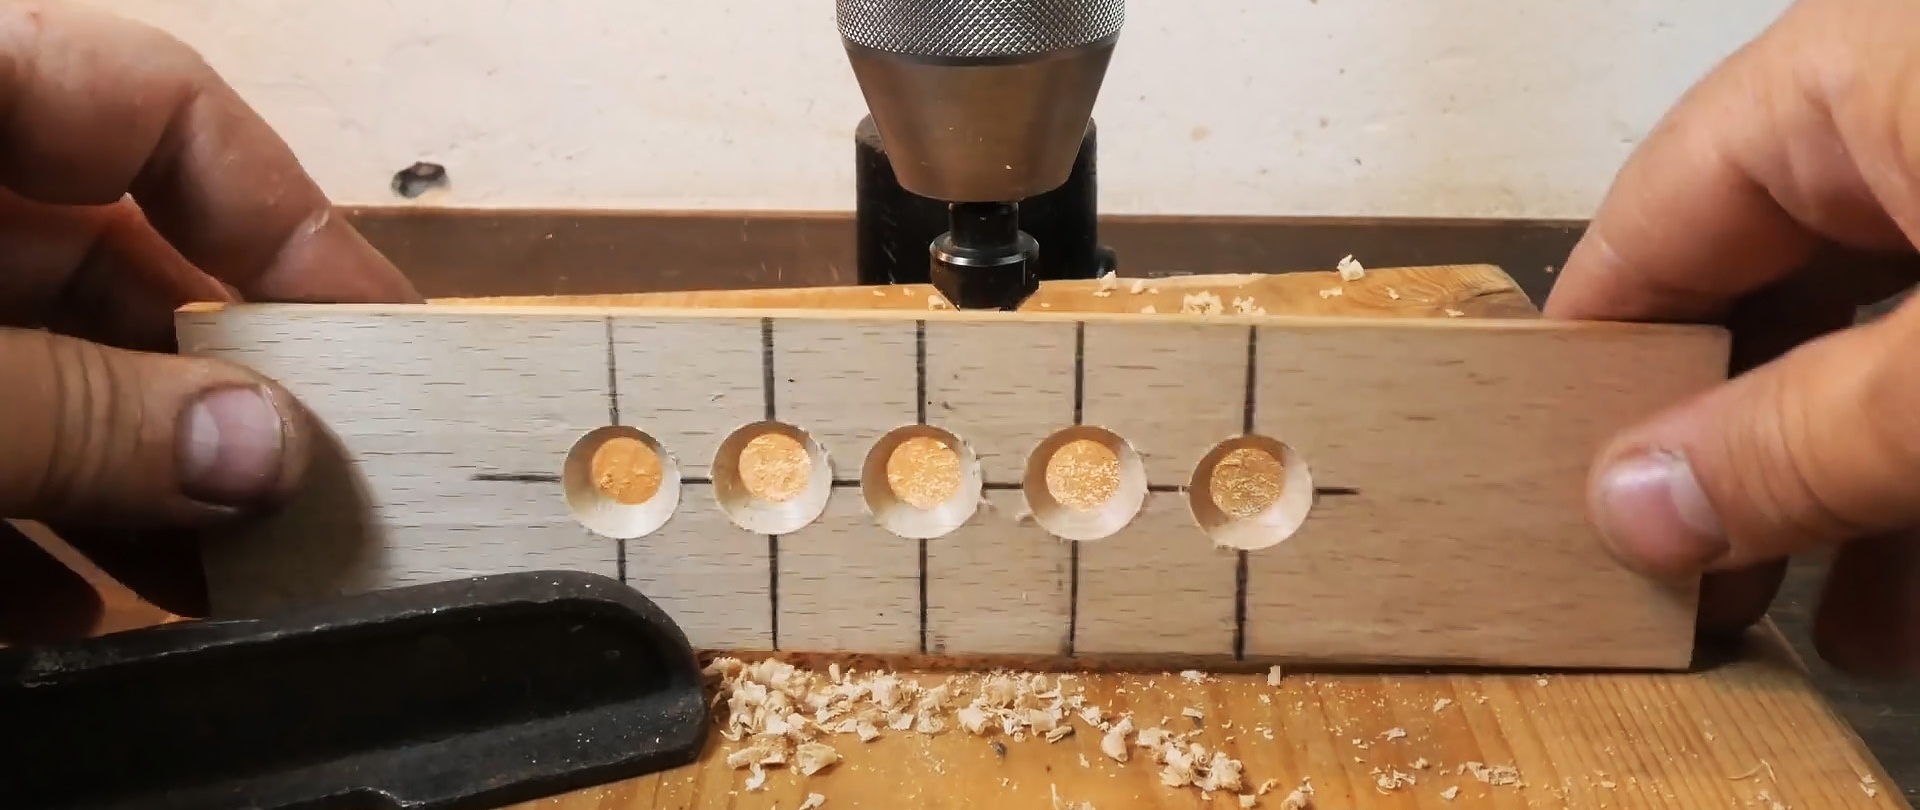
We process half of the timber with holes with a plane and next to the holes we indicate the angles of future sharpening from 5 to 25 degrees.
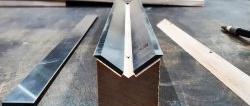
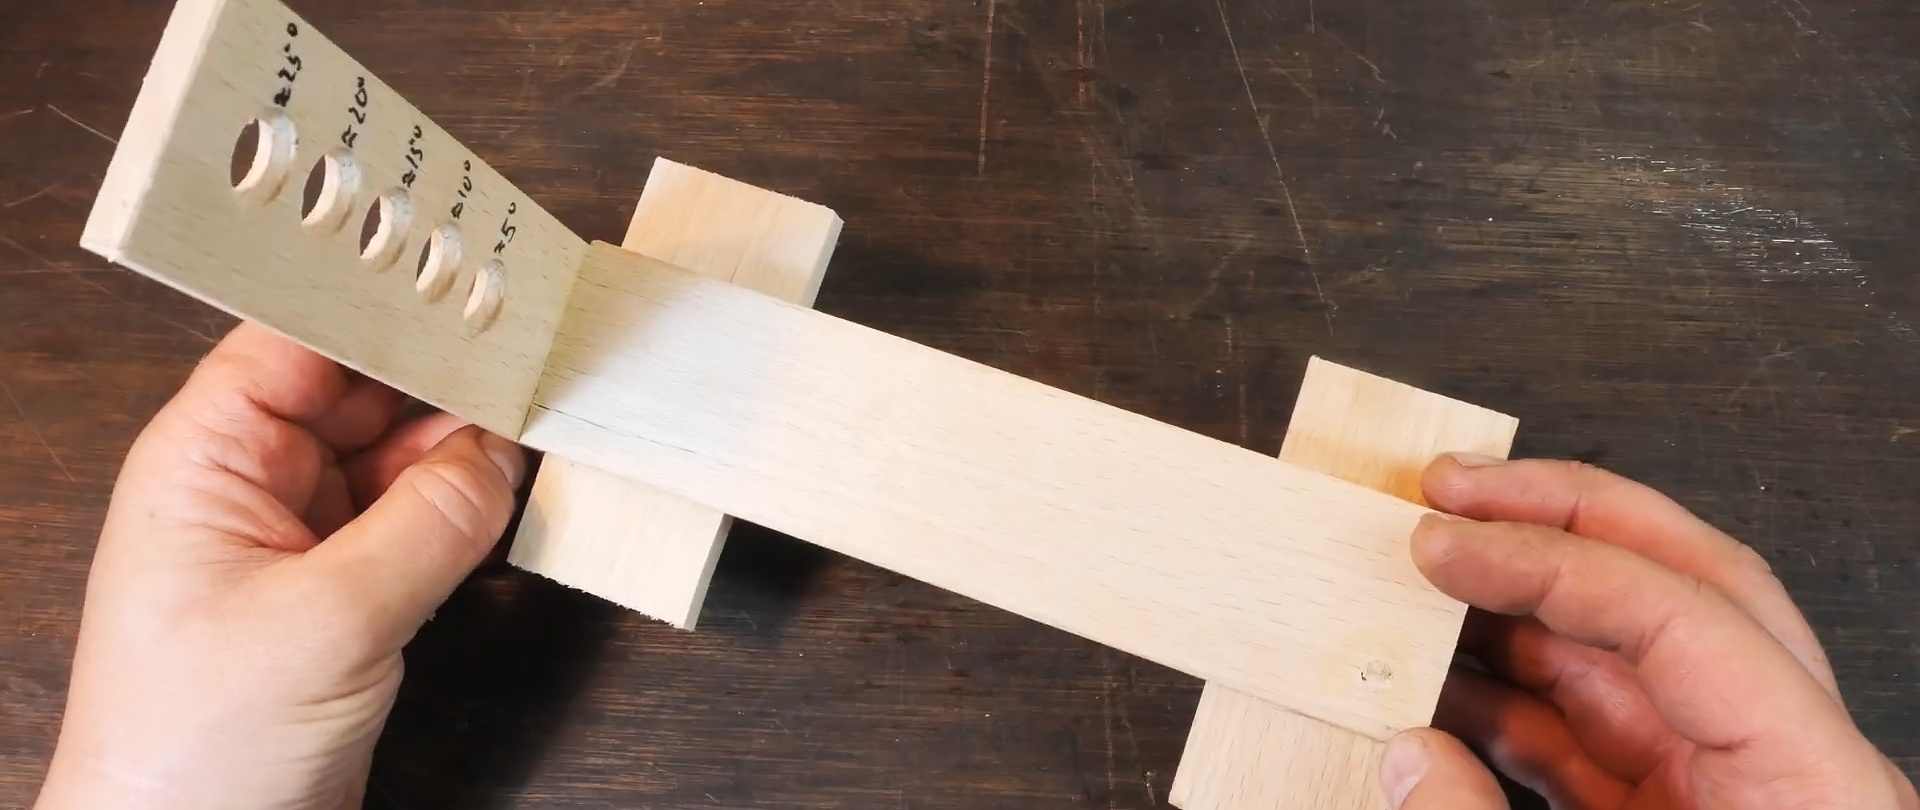
We shorten half of the beam with holes to the estimated length, and cut the second half into two equal parts and glue it transversely to the third rectangular beam at the ends, compress it with clamps and fasten it with dowels, cutting off the protruding parts.
To one end of the horizontal beam and the crossbar vertically in the center we glue a part of the beam with holes and also strengthen it with dowels using glue.

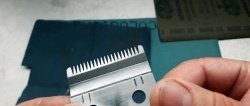
We divide a steel strip 2 cm wide into two parts of 6 cm each.

We mark and drill two holes with a countersink in the longitudinal direction in the center.
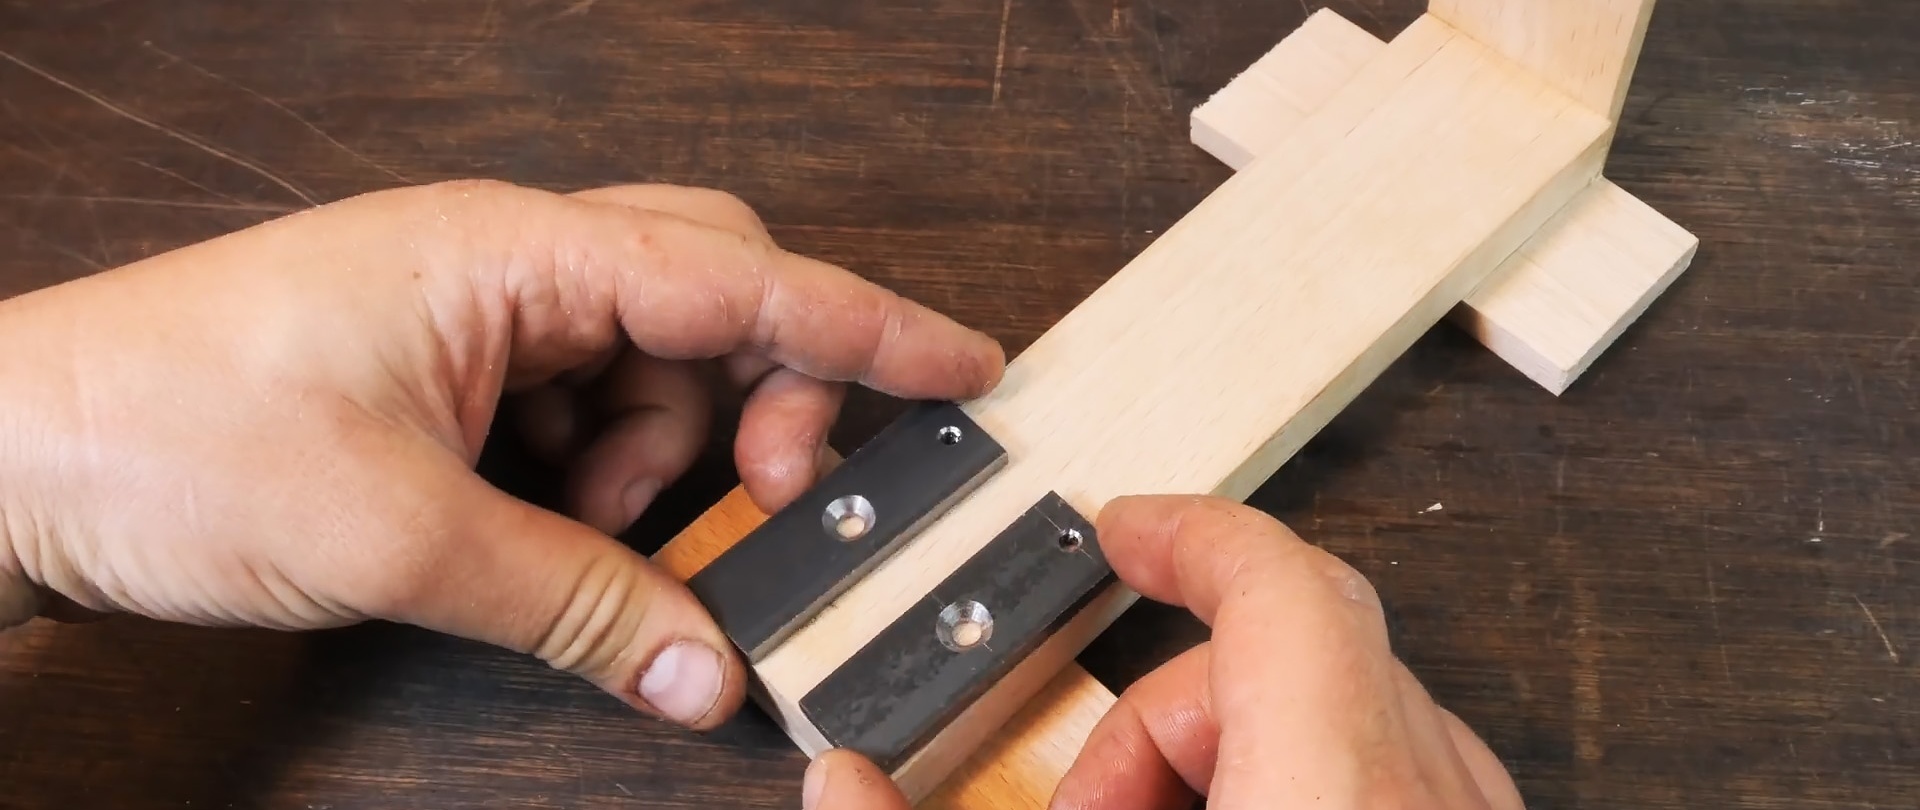
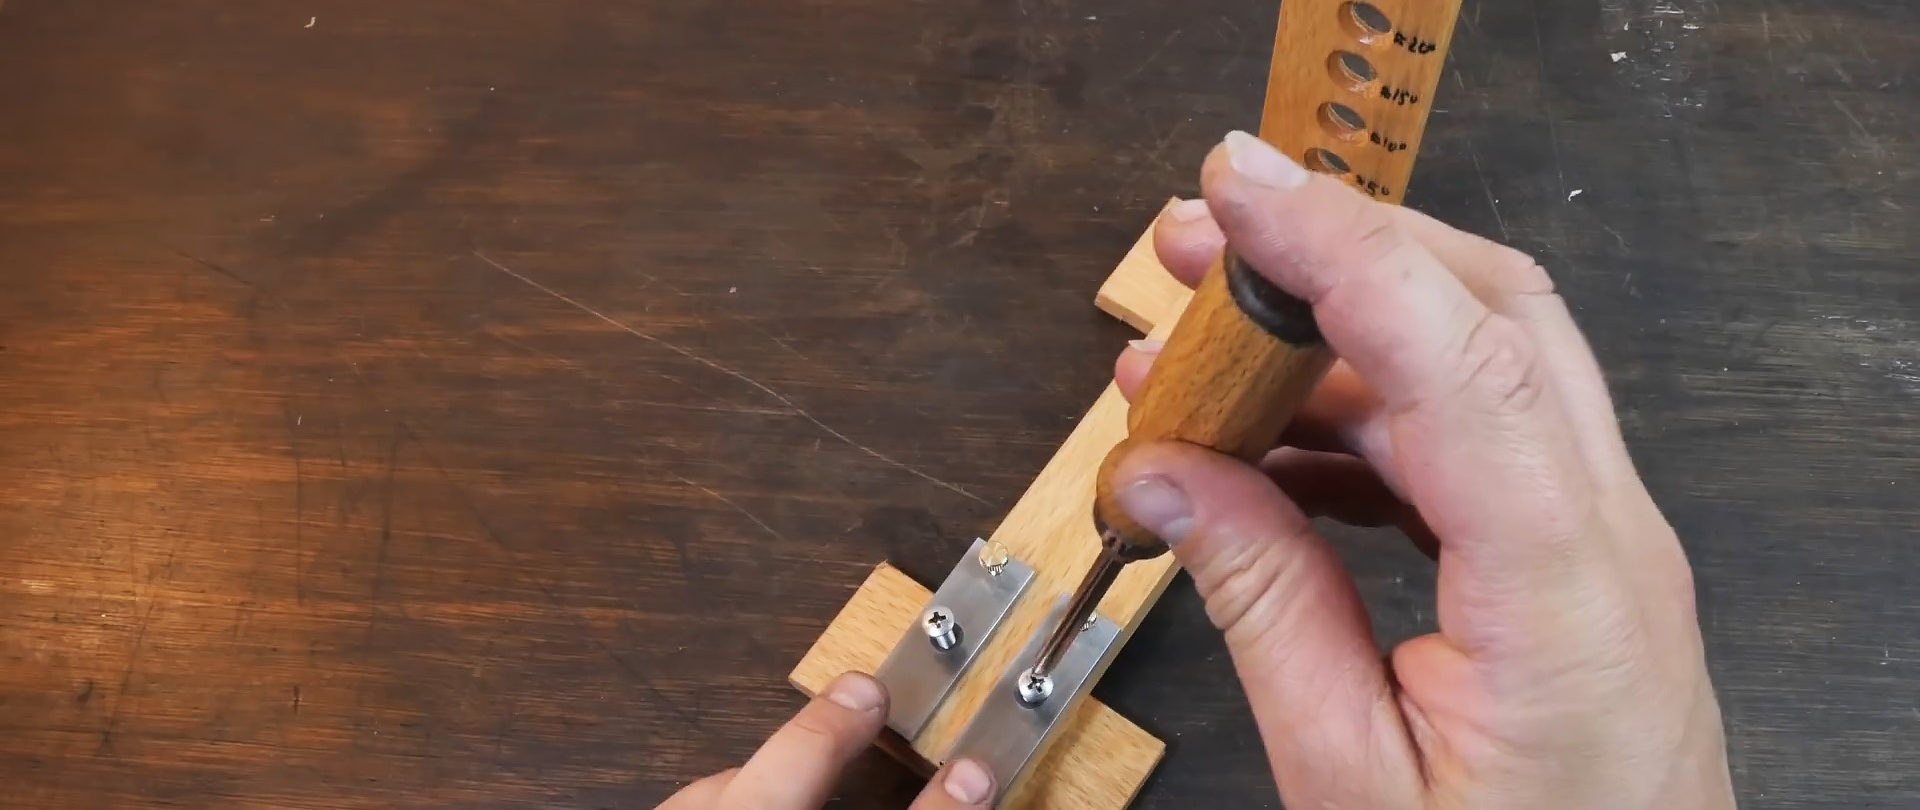
Sand with sandpaper. In the holes closer to the edge we cut threads for brass clamping screws.

We lay the plates with holes longitudinally on a horizontal beam, aligning the sides and ends. We mark the centers of the holes with a countersink on the beam and drill them all the way through, including the cross member.
We insert the nuts into the holes, tap them with a hammer, screw in the screws and, hitting the heads of the screws, move the nuts deeper into the holes, after which we remove the screws.
Lubricate the wooden parts with linseed or similar oil.
We lay the steel plates on a horizontal wooden beam and fasten them with screws to the recessed nuts.
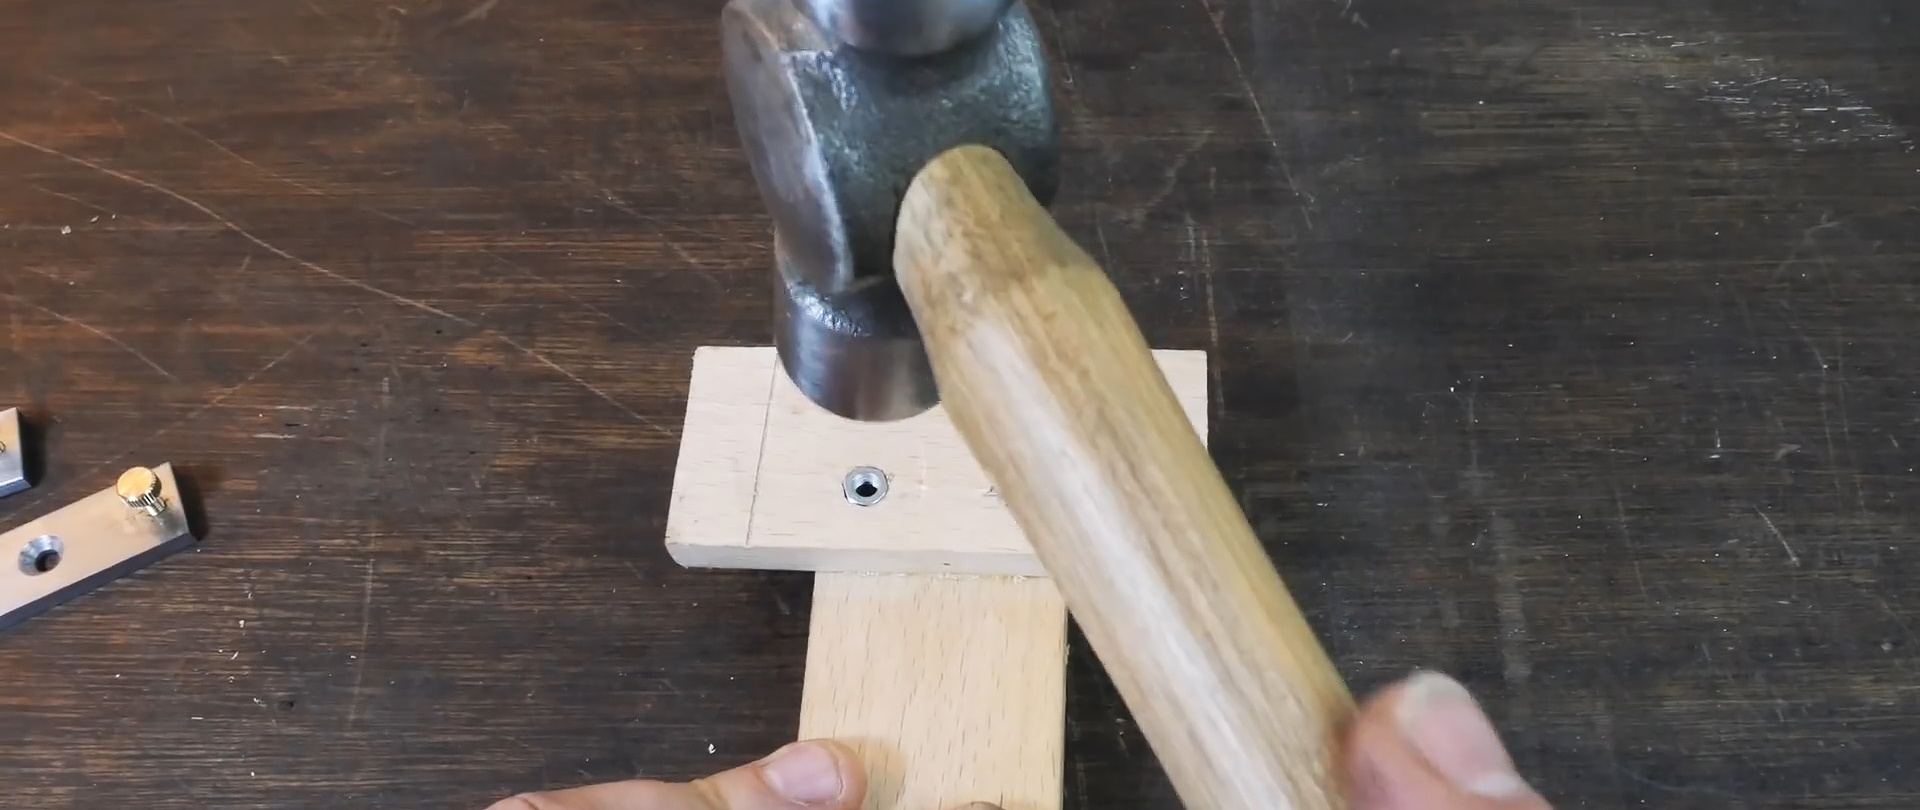
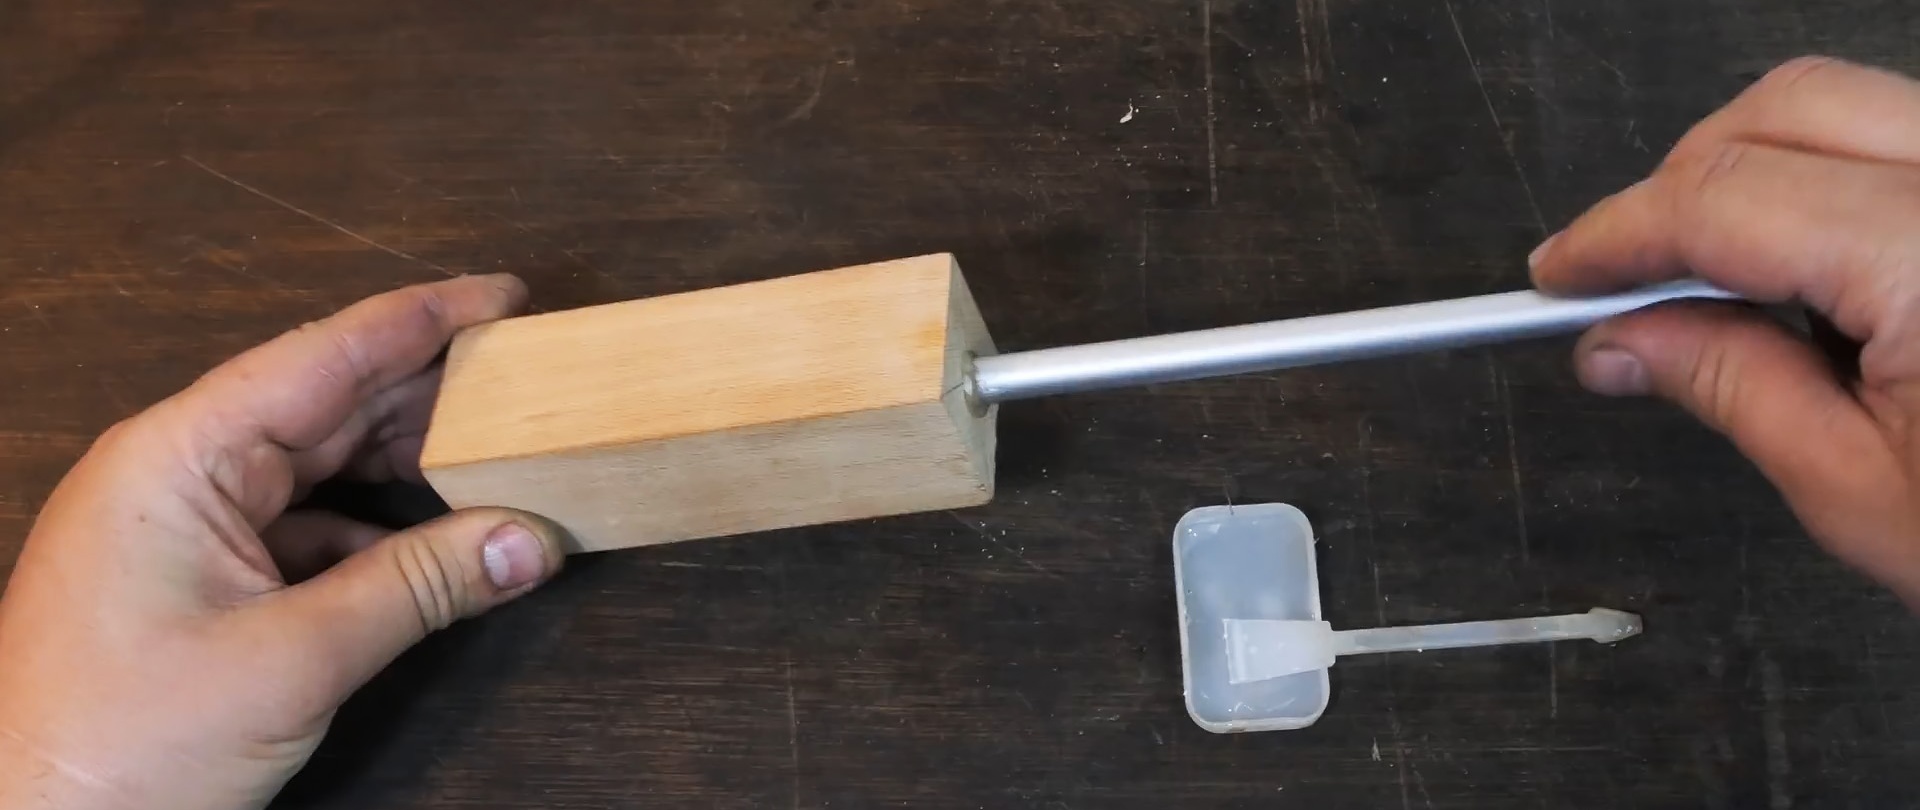
At the end of the square beam we draw diagonals and at the intersection point we drill a blind hole for a metal rod with glue.

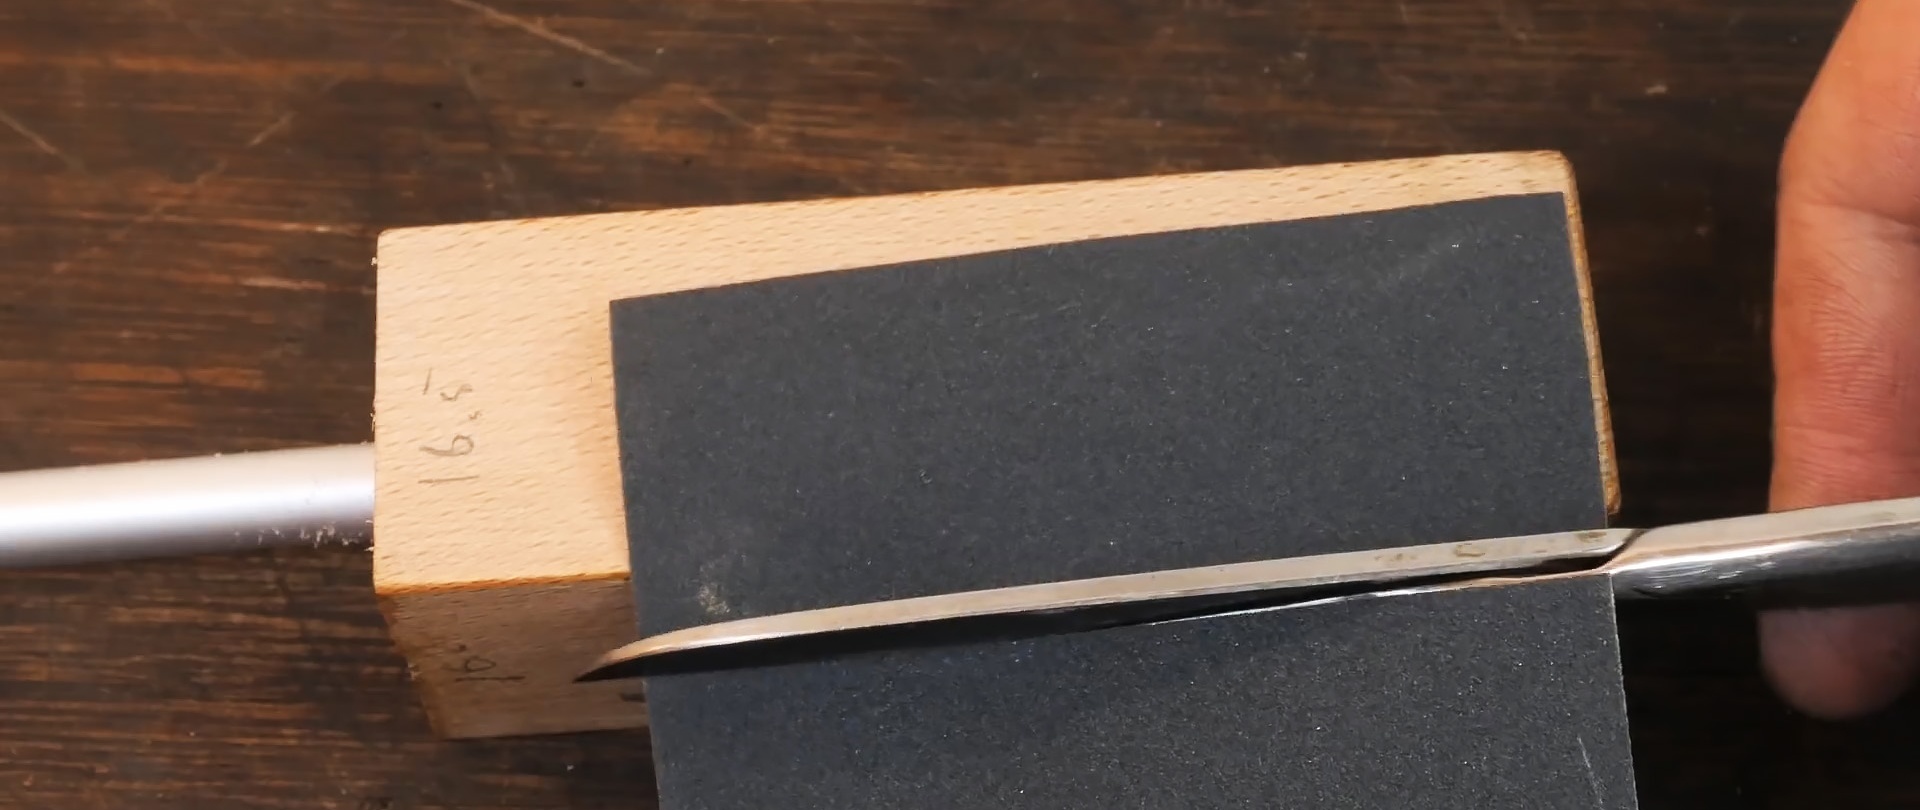
Since the hole is drilled with a slight deviation from the center, this may affect the sharpening angle. Therefore, taking into account the design of the sharpener, we glue the coarsest P240 sandpaper to the side with the smallest deviation and, conversely, P1000 paper to the side with the largest deviation. Leave one side of the timber clean for polishing.
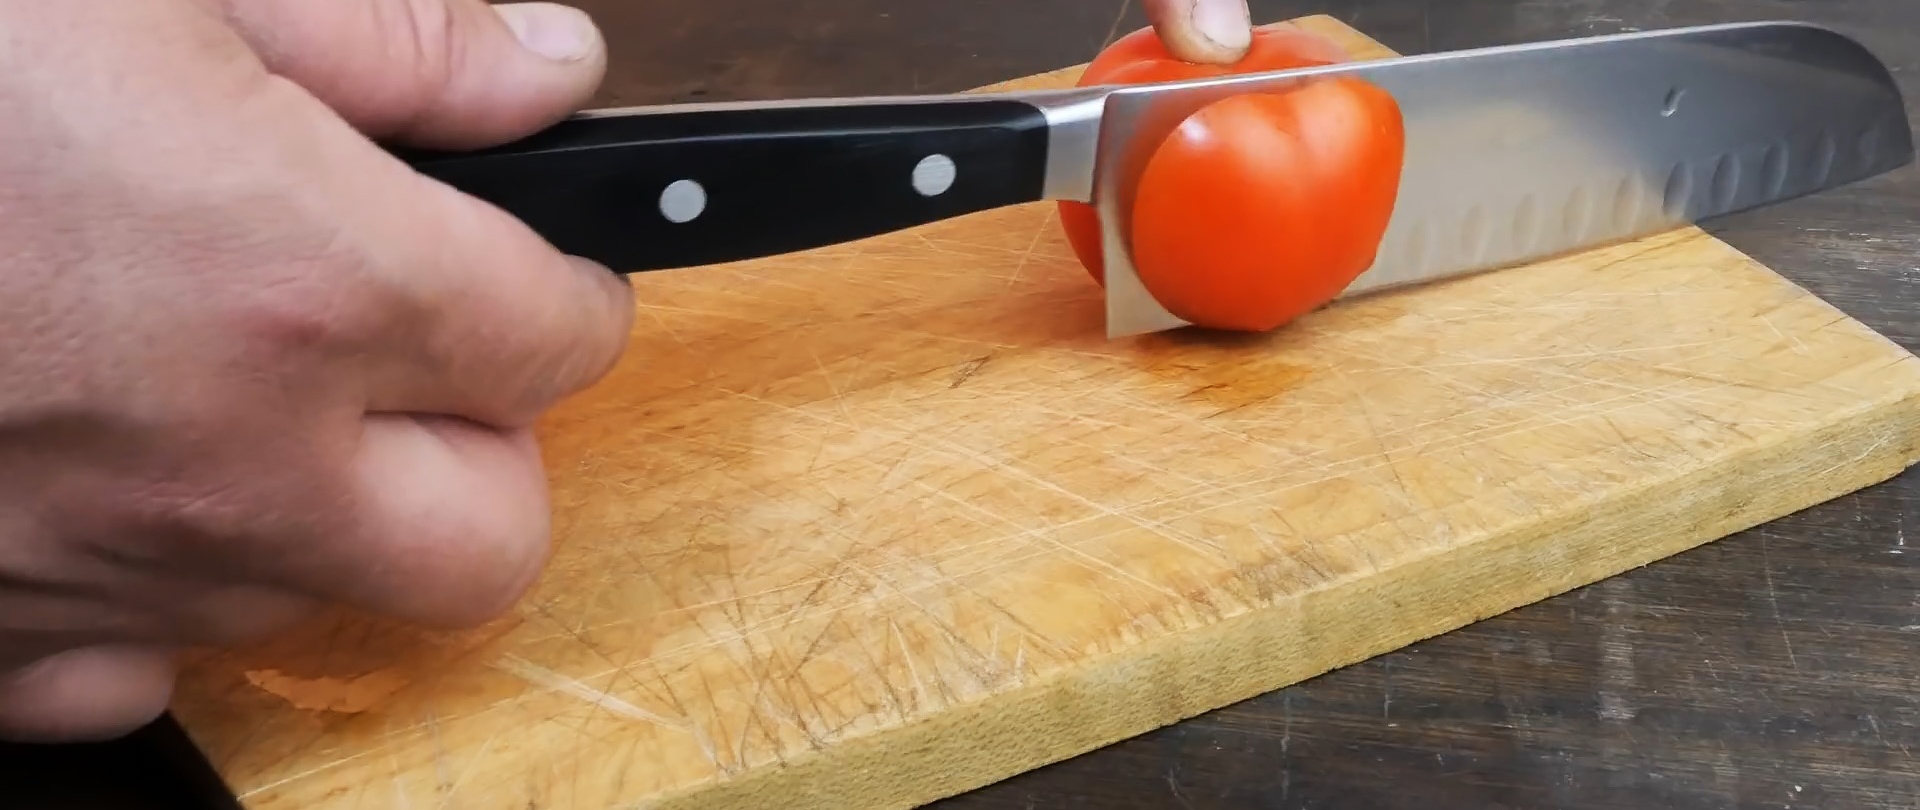
We take a kitchen knife, which cannot be used to cut a tomato, it is so dull. We place the butt of the blade under the plates and clamp it with brass screws.
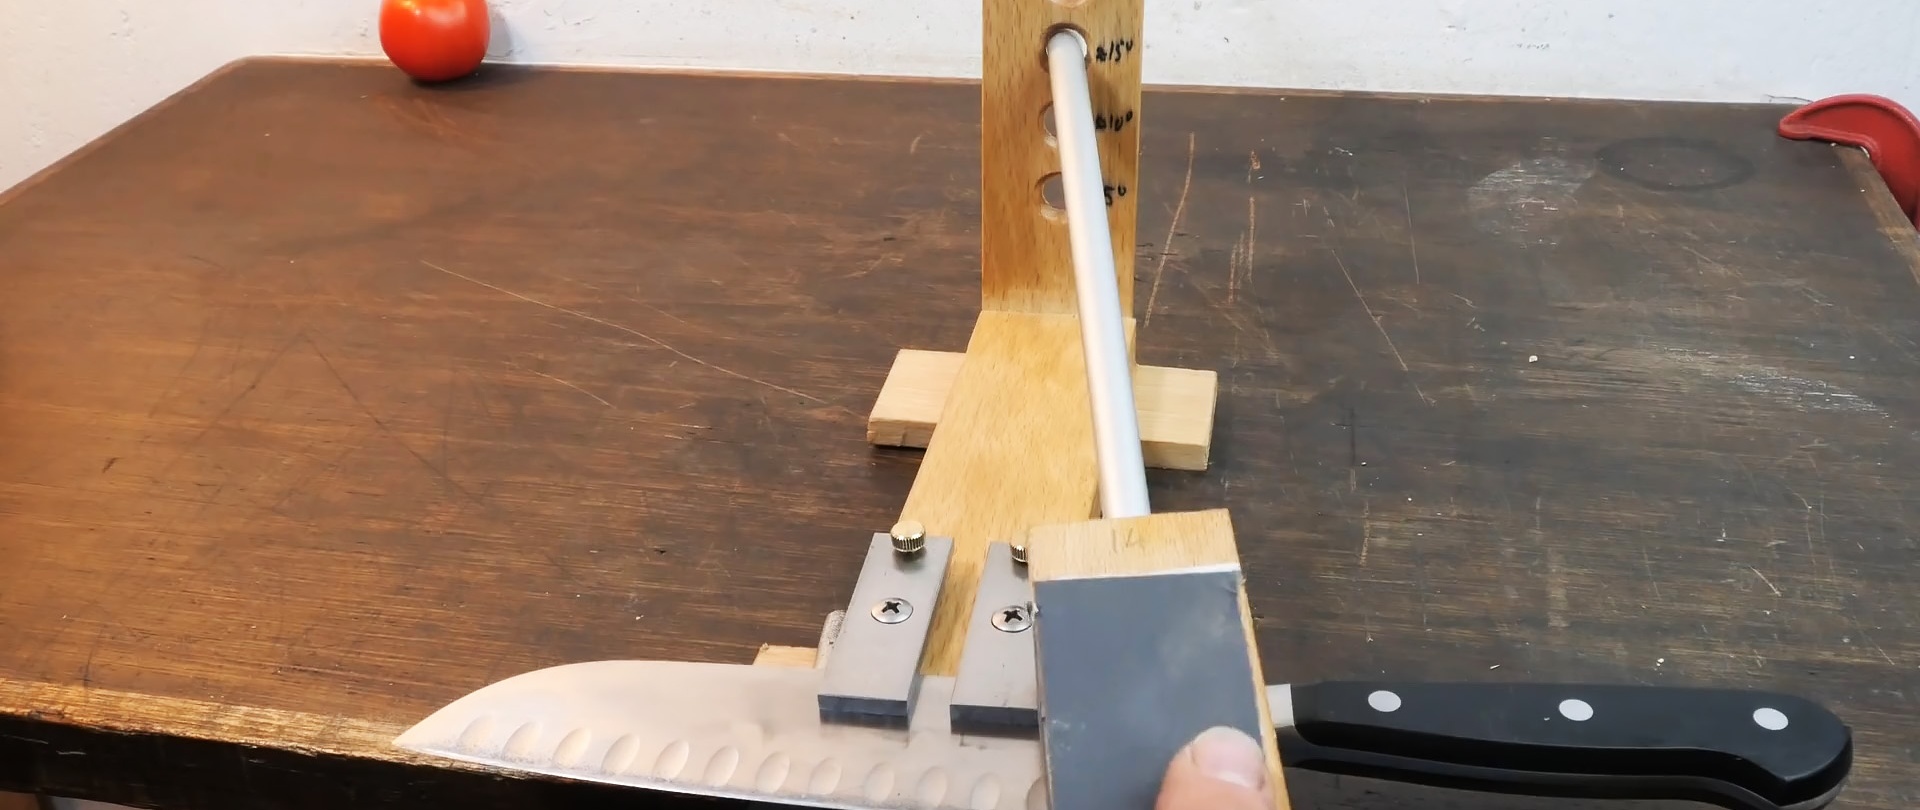
We place the rod in the hole with the desired sharpening angle and begin to process the blade along the entire length on both sides, starting with sandpaper P240, then P400, P1000, and ending with polishing. After such sharpening, the knife easily cuts the tomato under its own weight.